|
Author
|
Topic: The Coupe!
|
bwkelley76
¯
Member # 8792
|
 posted


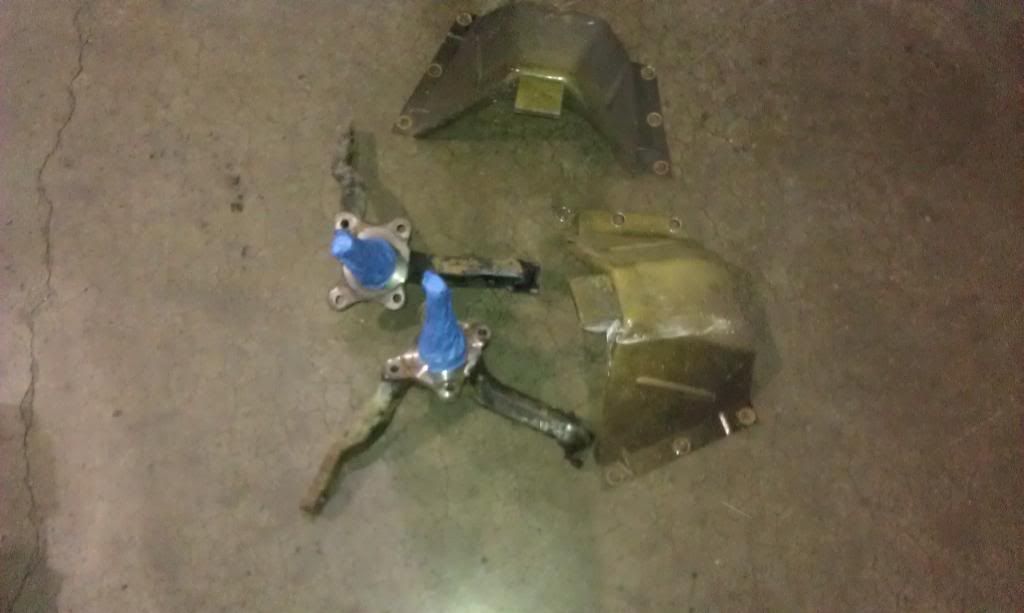
Removing spindles an throwing them in the parts washer
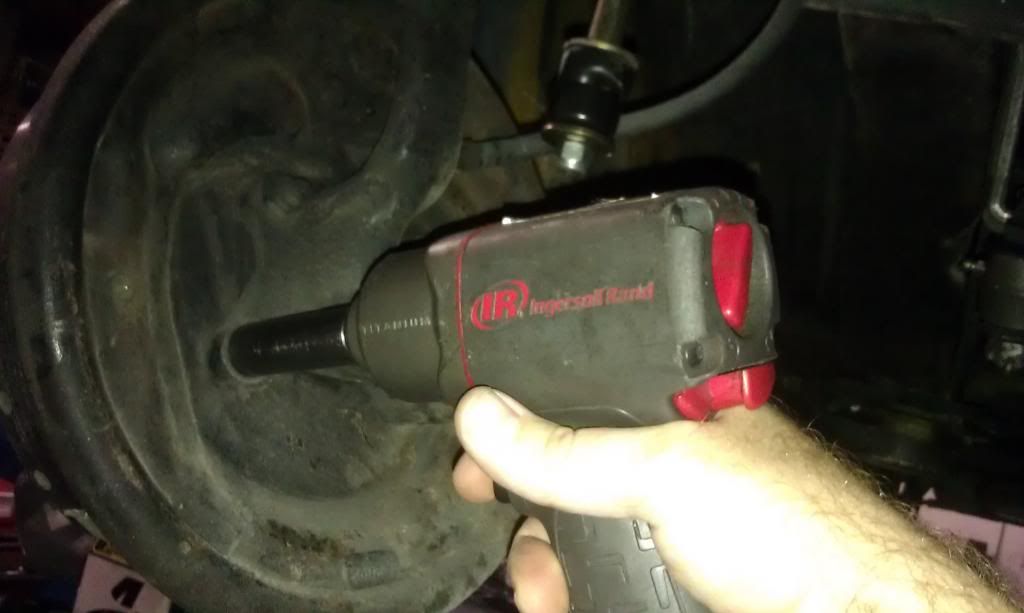
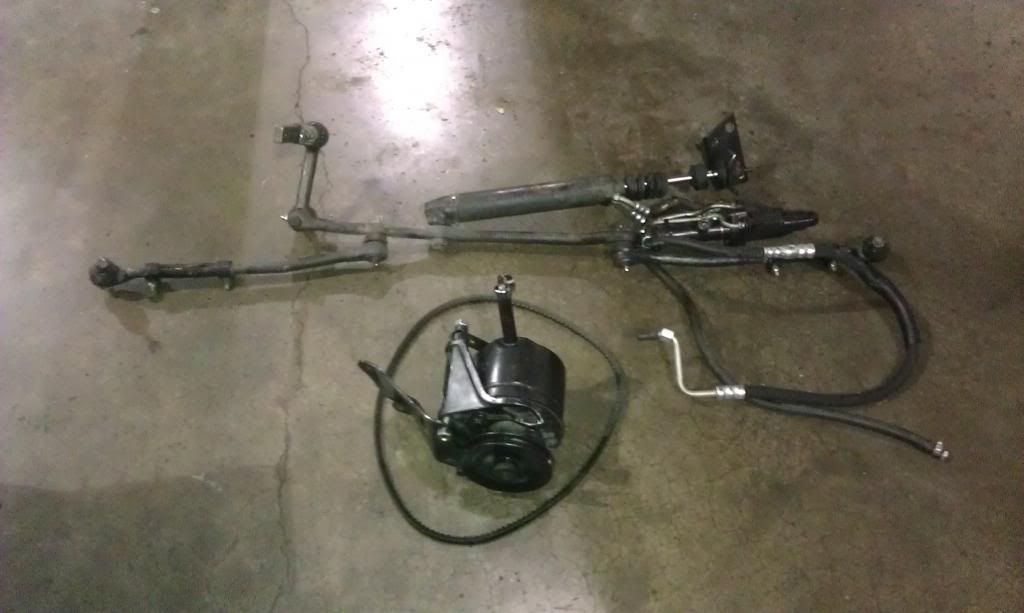
Removed lower half of the steering components plus the pump and bracketry
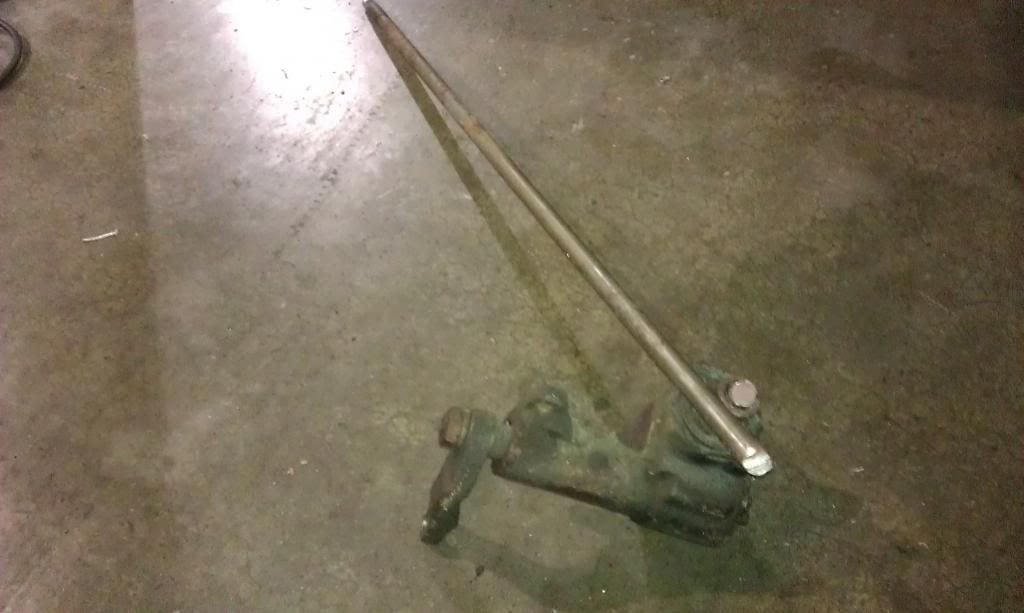
Removing the steering box
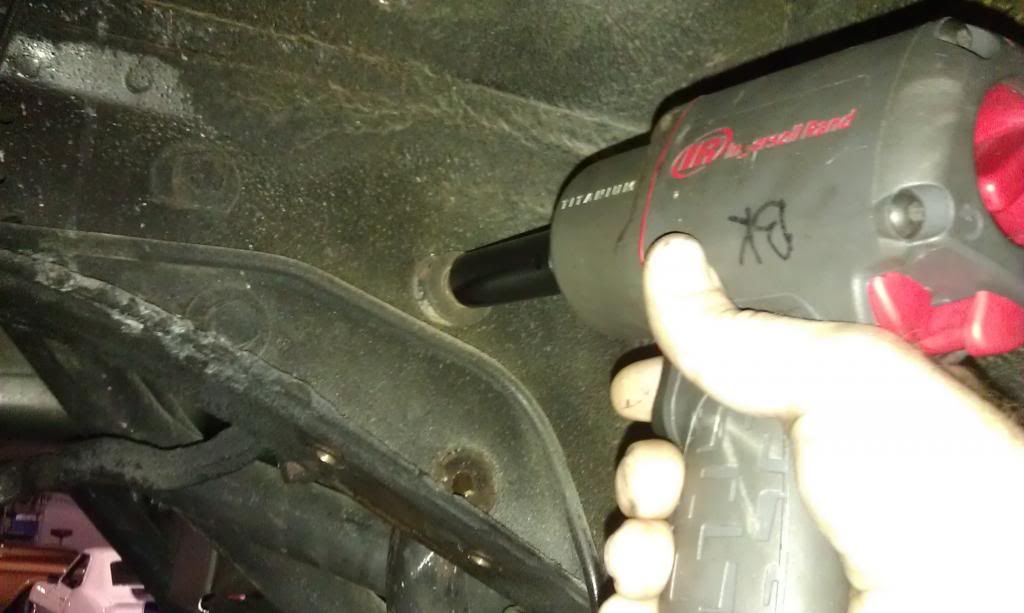
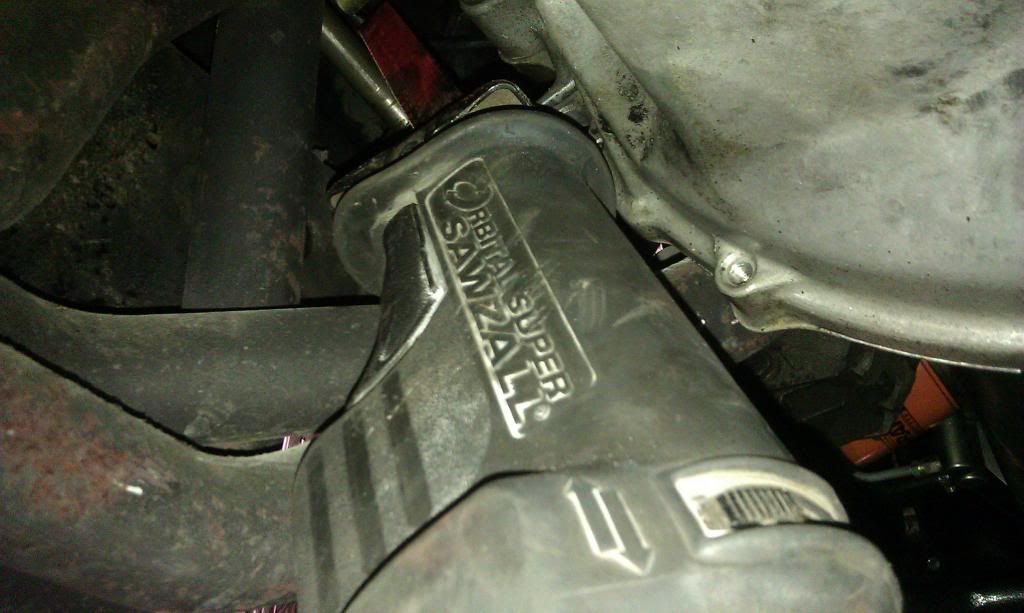
Removed all of the upper suspension as a whole
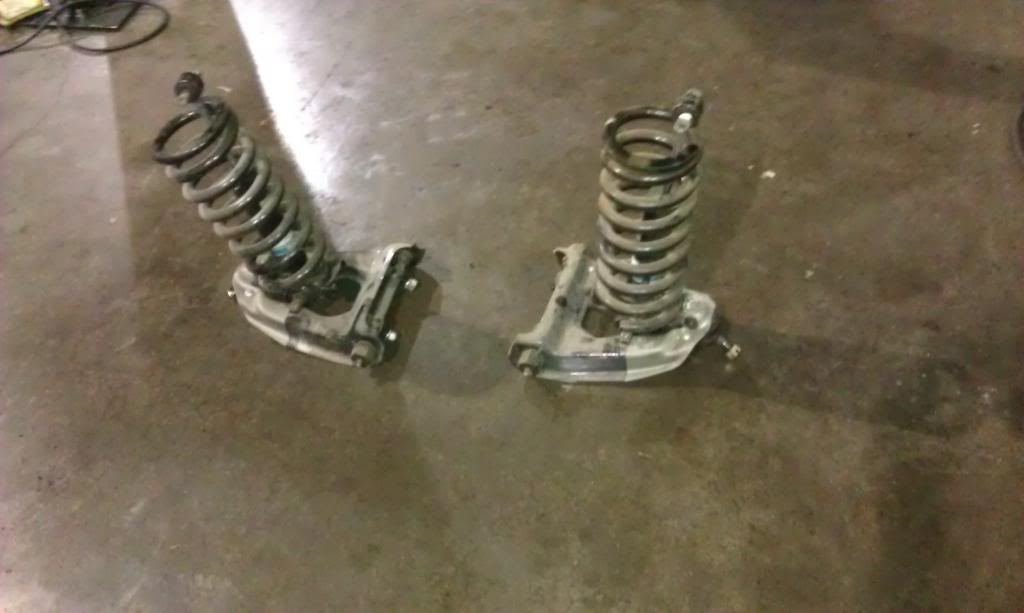
THE HEAP IS GROWING!
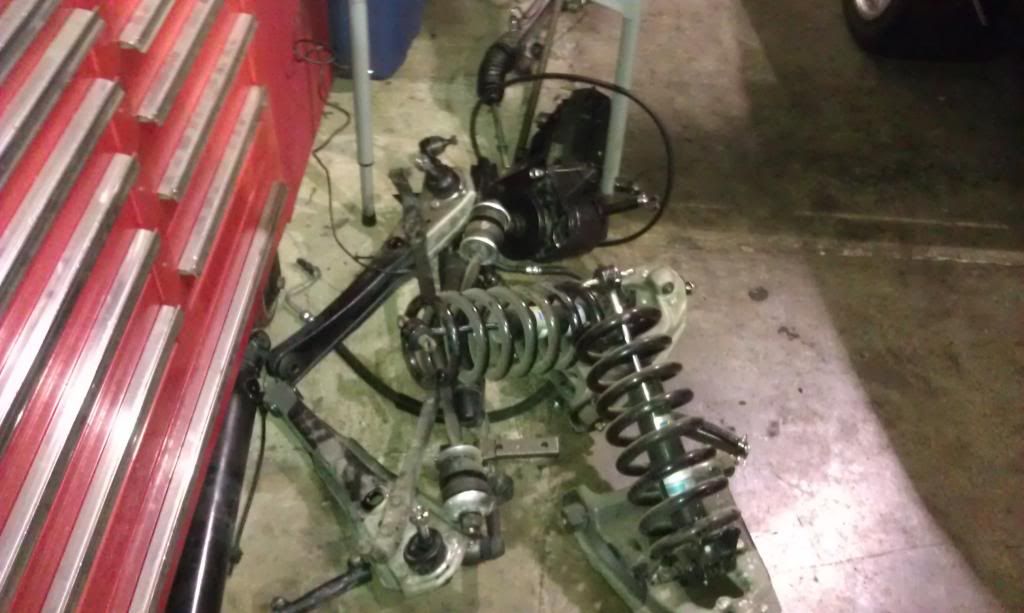
Cleaning time!

--------------------
Dont sweat the petty things and dont pet the sweaty things. "RIP George Carlin"
Posts: 886 | From: Sacramento | Registered: Dec 2008
| :
|
|
bwkelley76
¯
Member # 8792
|
posted
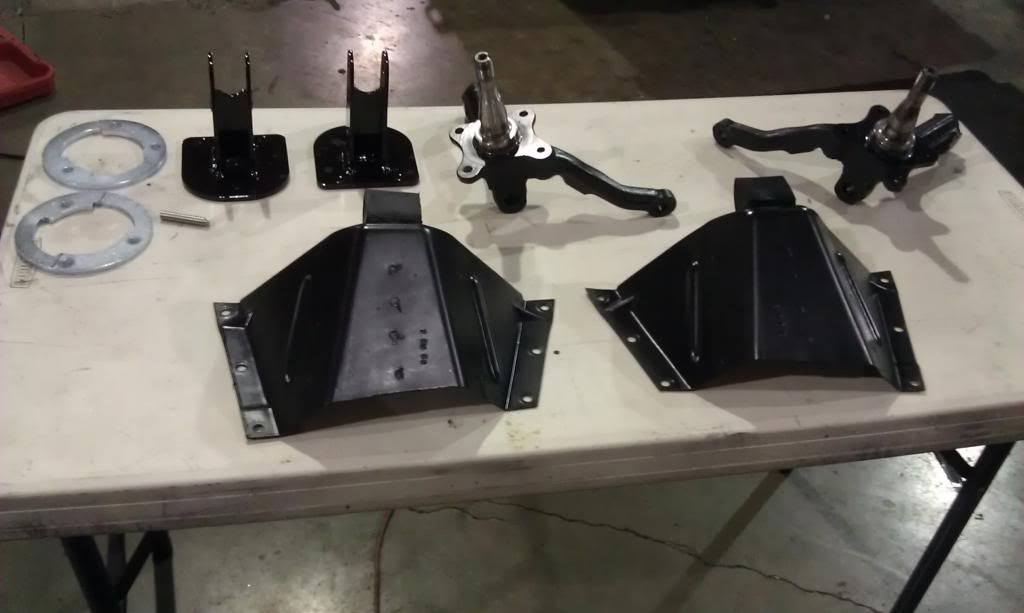
Much Better!
...Really good stuff!
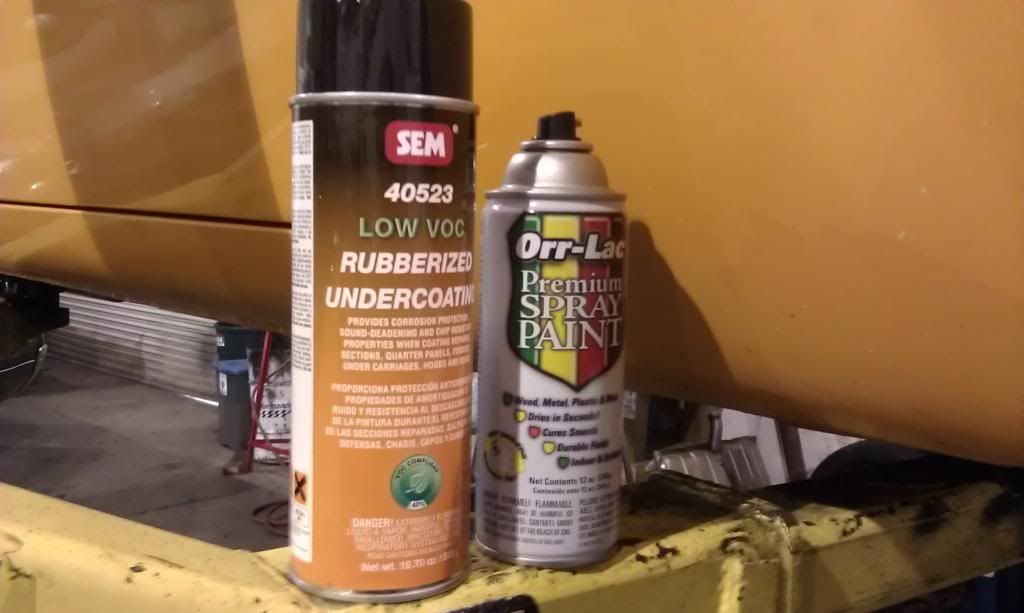
Sand blast time
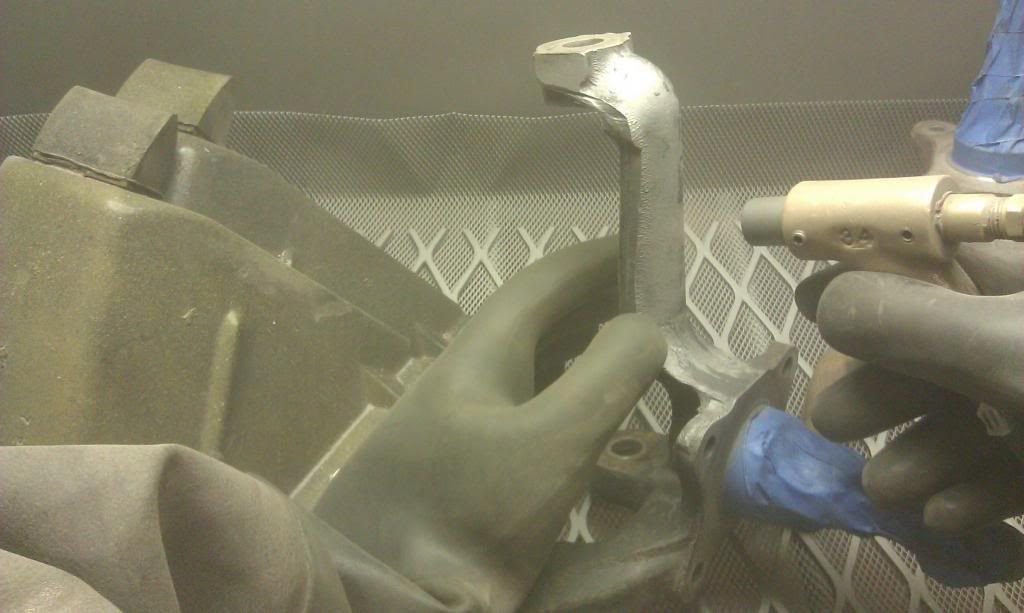
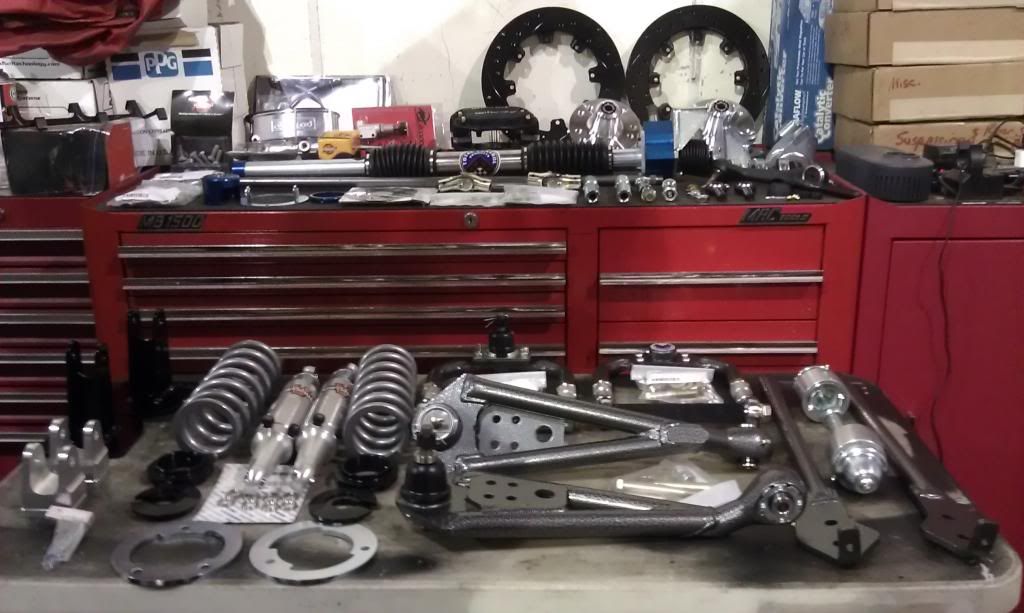
A little blasting and paint goes a long way! (also a little random sneak peak of a few of the new parts that you weren't supposed to see until later) ![[Wink]](wink.gif)
HERE WE GO!!!!!
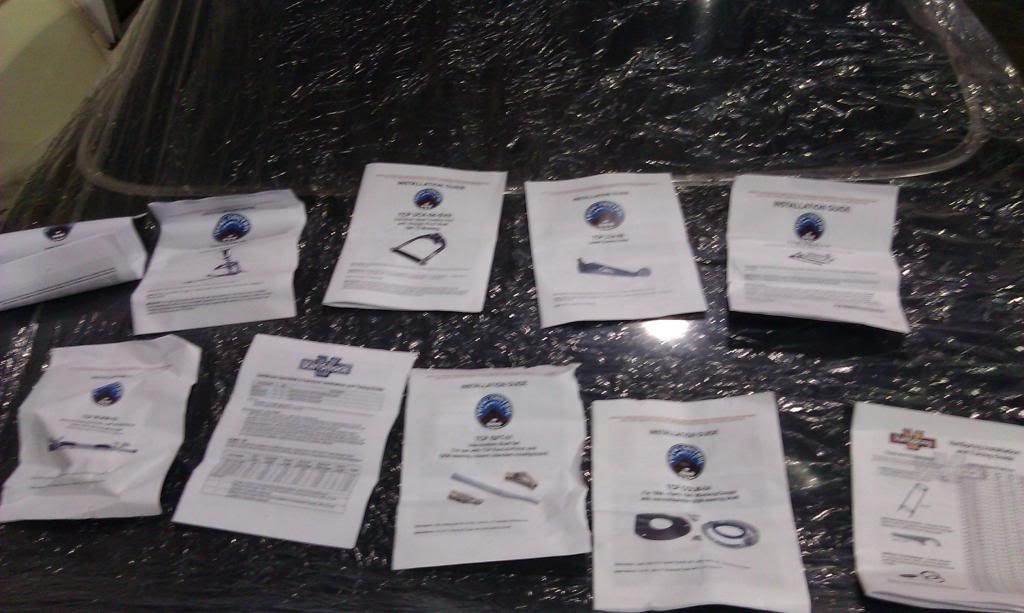
...Wait, don't forget the instructions. Where's my beer?
TO BE CONTINUED.....
-
-
-
--------------------
Dont sweat the petty things and dont pet the sweaty things. "RIP George Carlin"
Posts: 886 | From: Sacramento | Registered: Dec 2008
| :
|
|
kingdavid
¯
Member # 11179
|
posted
![[worship]](graemlins/worship.gif)
--------------------
1967 mustang 410W
2014 Oxford White 5.0
Posts: 305 | From: Sacramento | Registered: Aug 2011
| :
|
|
bwkelley76
¯
Member # 8792
|
posted
<<<Thanks kingdavid!
OK HERE WE GO...
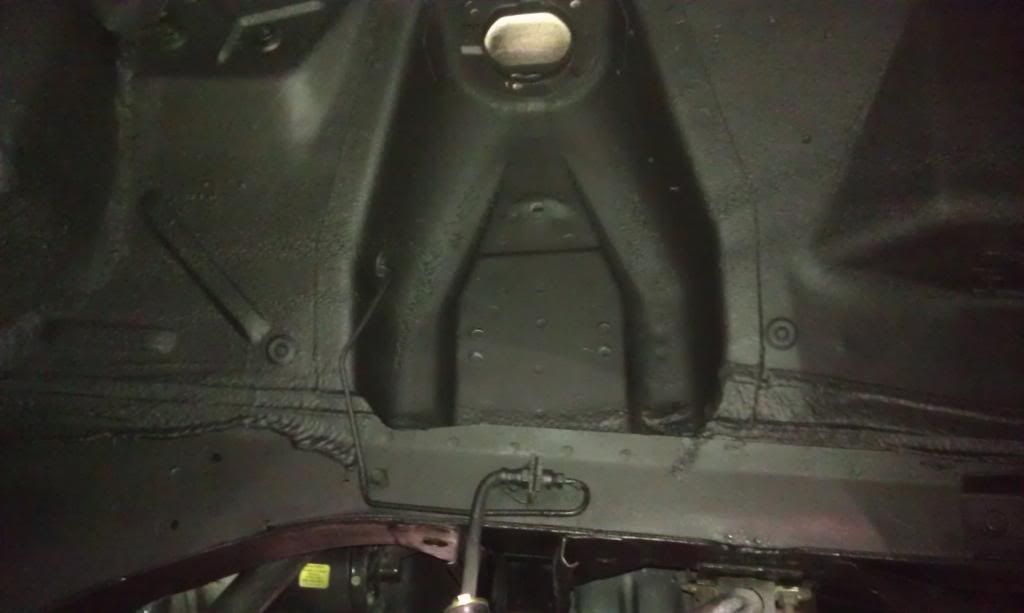
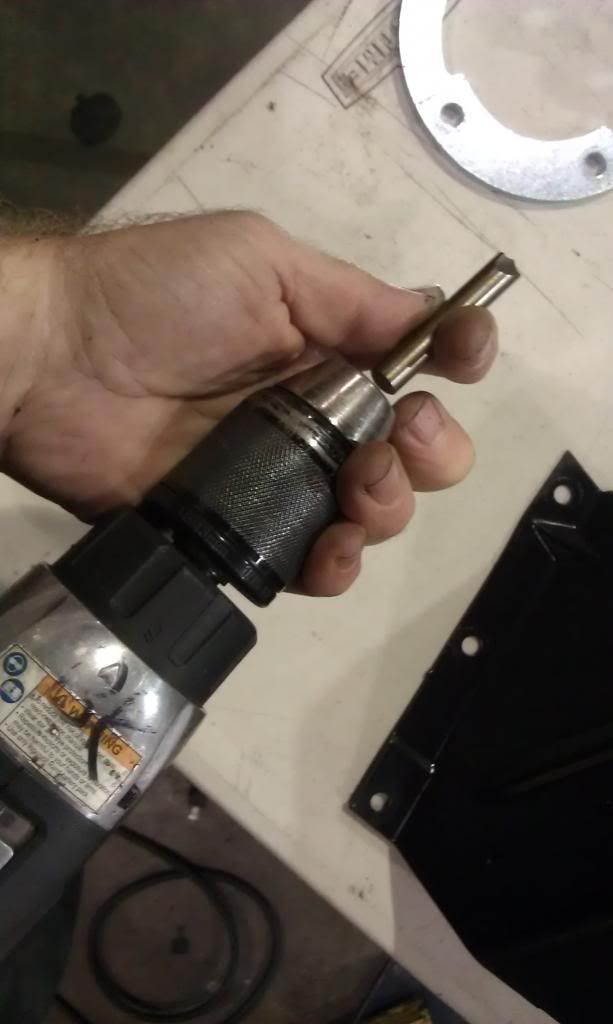
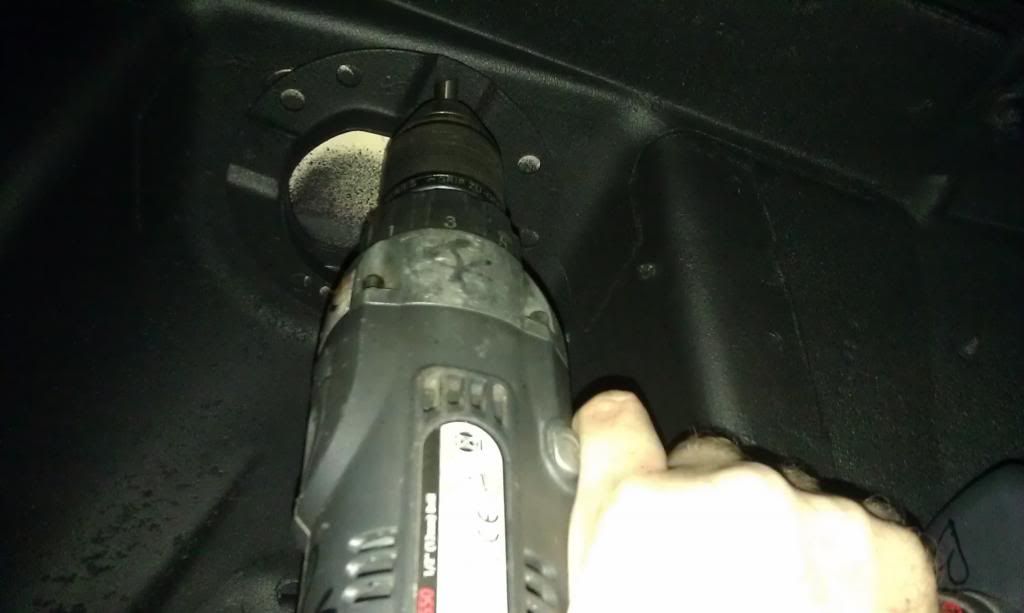
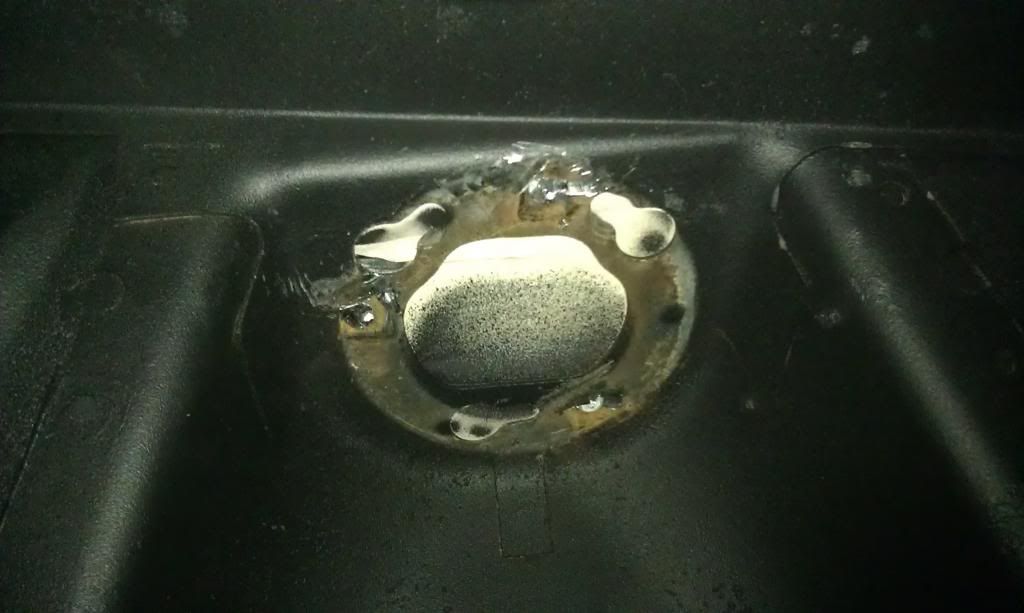
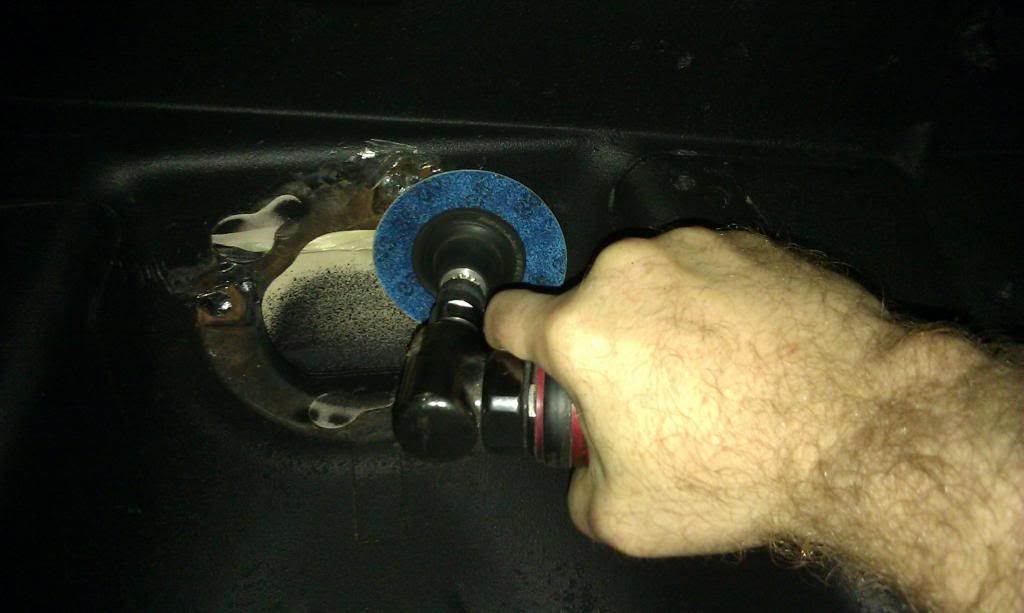
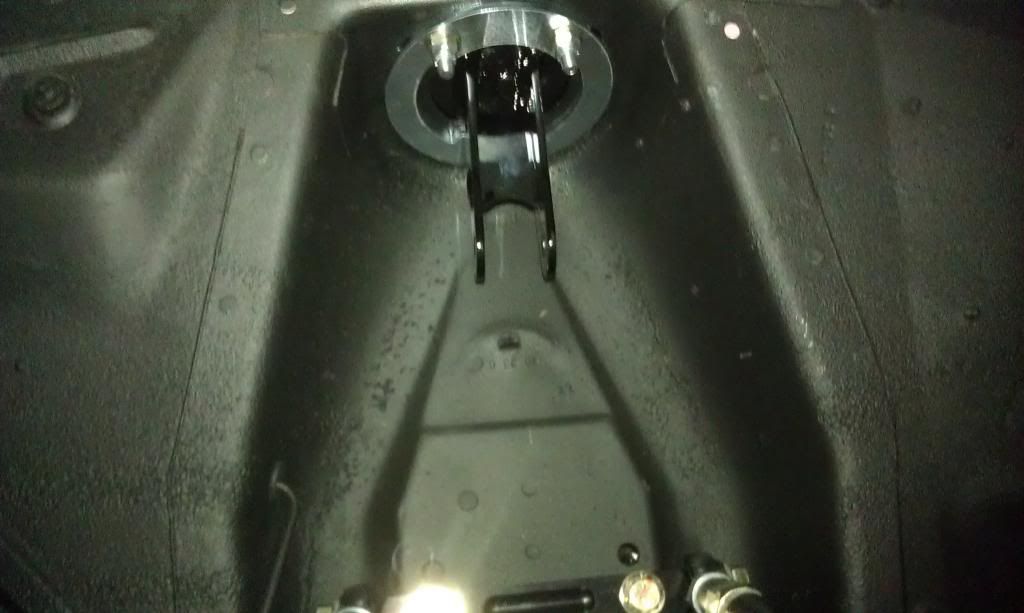
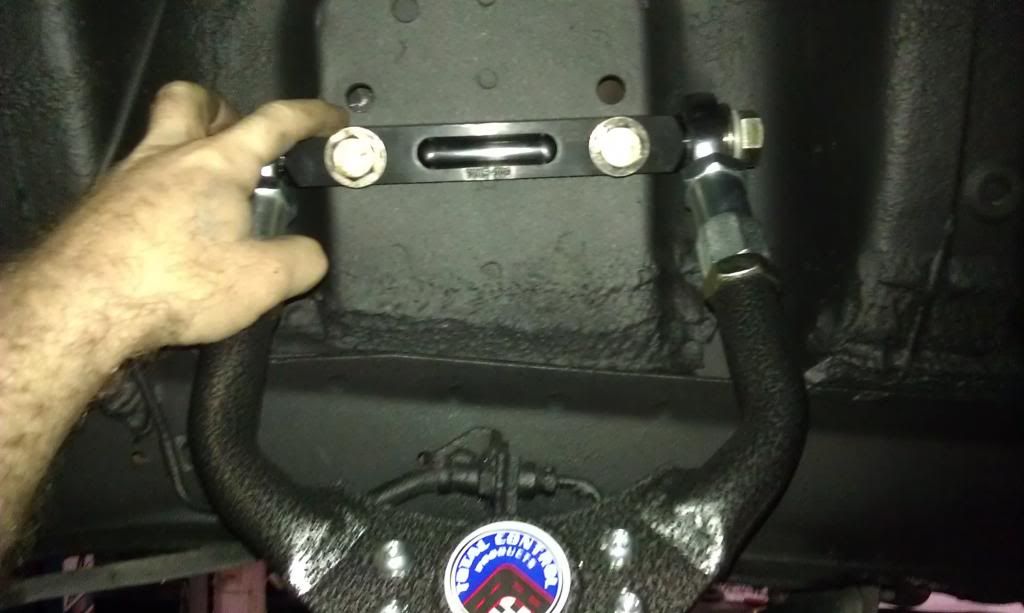
First step is to remove the factory spring locator plate from inside the shock tower. You can use the spot-weld drill/bit provided with the kit or whatever method works for you. When you are done removing the plates be sure to clean up the area and paint it so it doesn't rust.

Installing the upper coil-over mounting plates is super easy, just mock them up and hog/drill out any of the car's factory holes that need it. THERE IS A PASSENGER AND DRIVER'S SIDE PLATE and they are marked "D" and "P" The markings are hard to see since they are laser-etched and then powder-coated.
In my case all but one of the holes on each plate lined right up to the shock tower. Do the same with the holes on your factory or aftermarket strut tower brace to make installation easier. Your brace will bolt right on top of the coil-over mounting plate. ...In order from top to bottom you will have a shock tower brace, TCP coil-over mounting plate, factory shock tower, and finally underneath will be the TCP lower retainer plate followed by lock-nuts and washers.

--------------------
Dont sweat the petty things and dont pet the sweaty things. "RIP George Carlin"
Posts: 886 | From: Sacramento | Registered: Dec 2008
| :
|
|
bwkelley76
¯
Member # 8792
|
posted
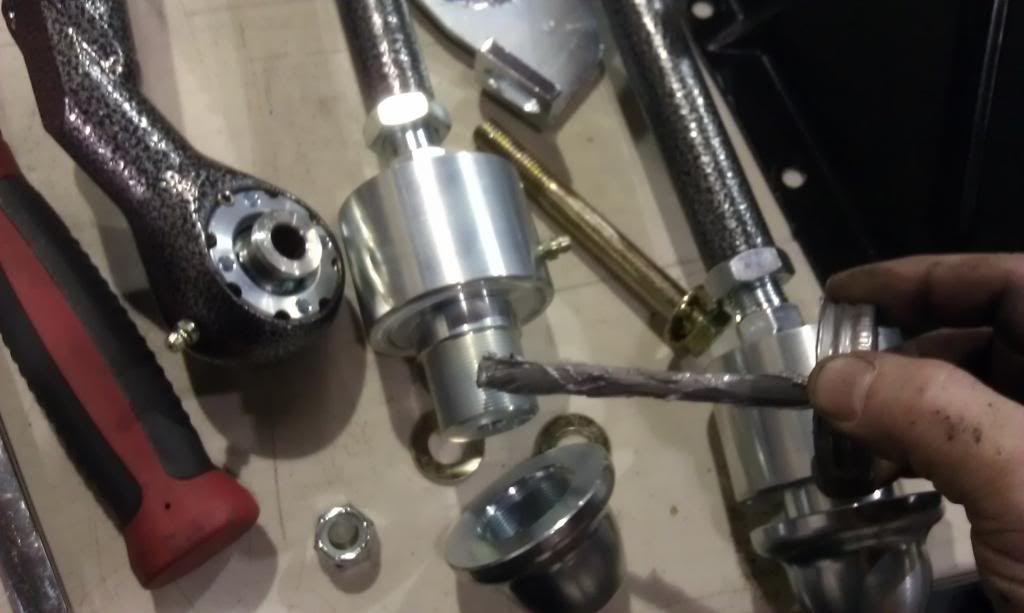
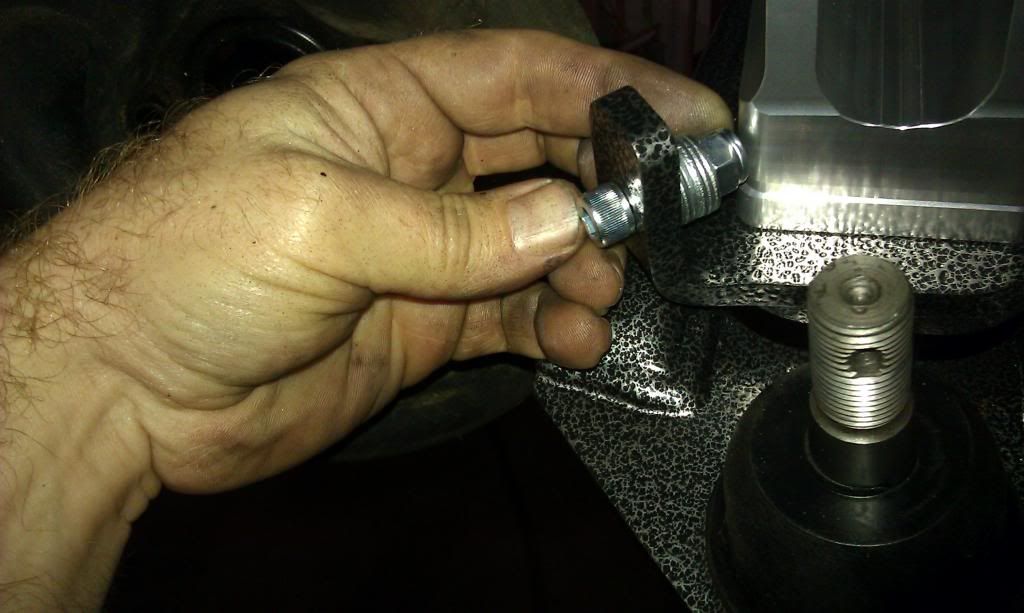
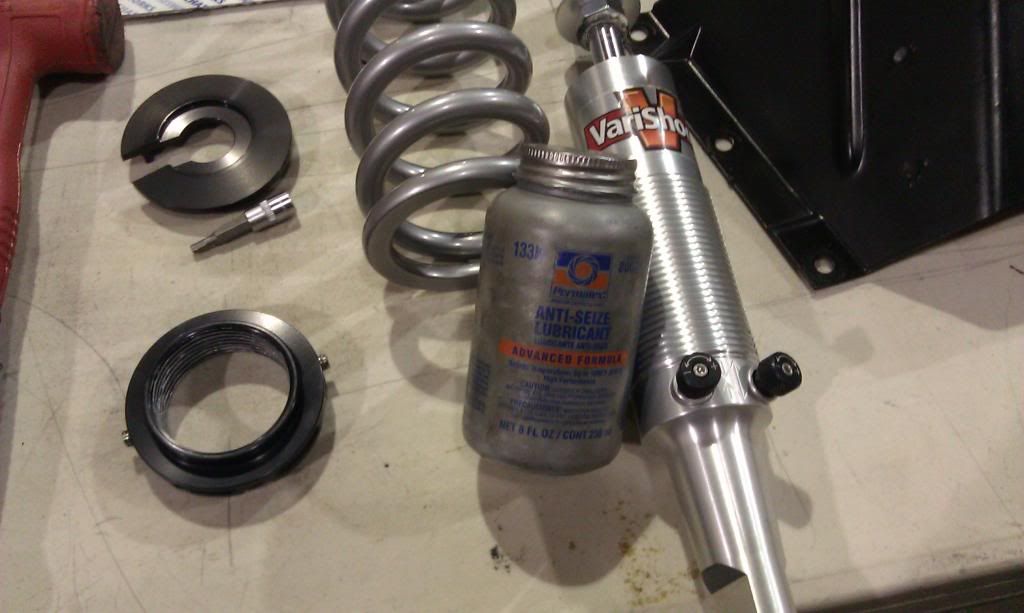
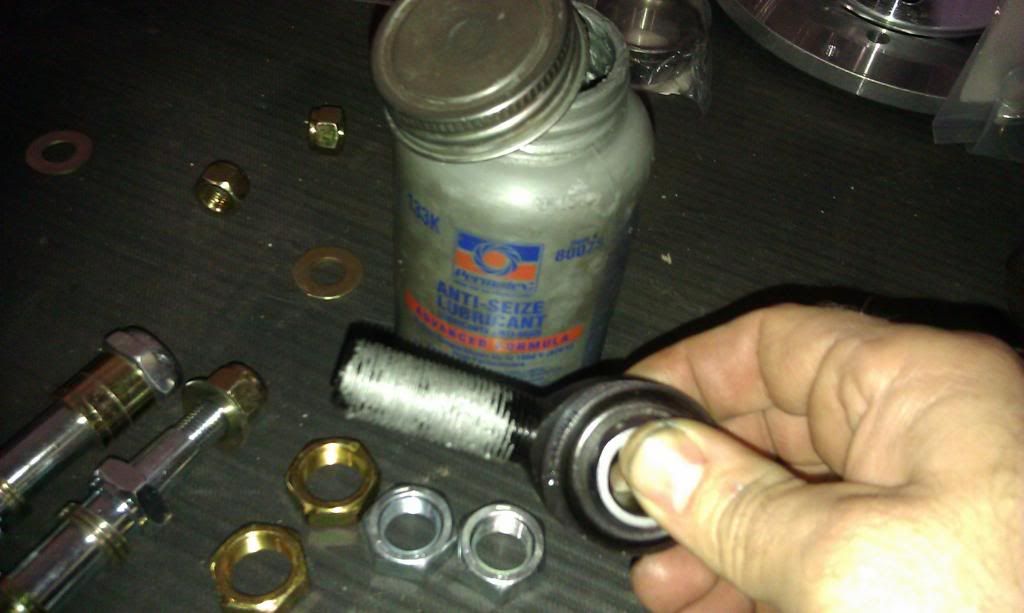
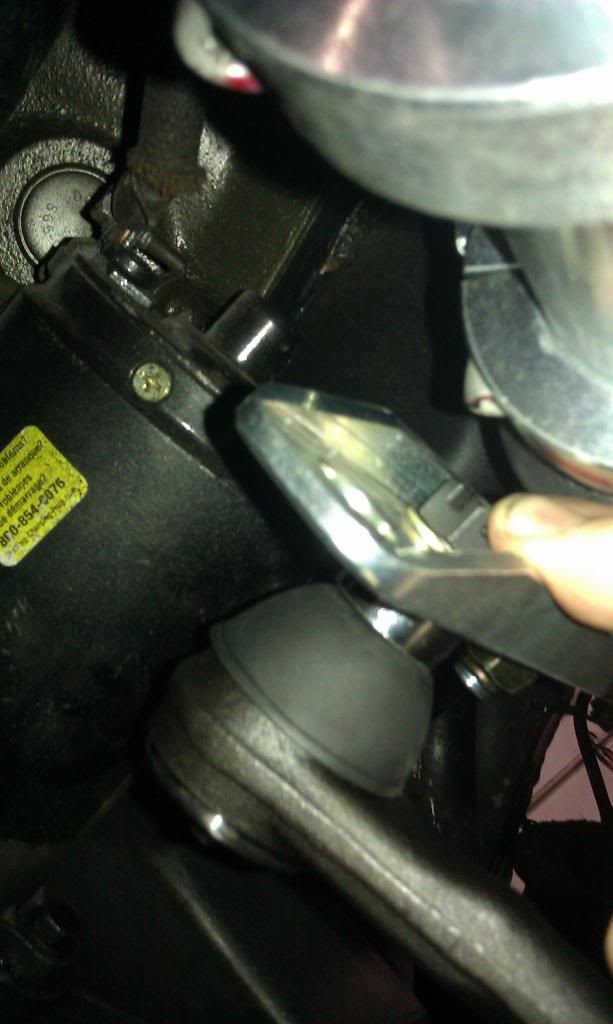
Now on to the lower control arms, eccentric eliminators, and strut rods. Make sure to use anti-seize on strut rod adjusters and also if you're running a TCP rack & pinion make sure the LCA bolts you use are long enough to incorporate mounting of the rack. My kit came with 2 sets, one was included with the rack and one with the LCA's. Both sets ended up being the same length in my case but it's still a great idea to check.
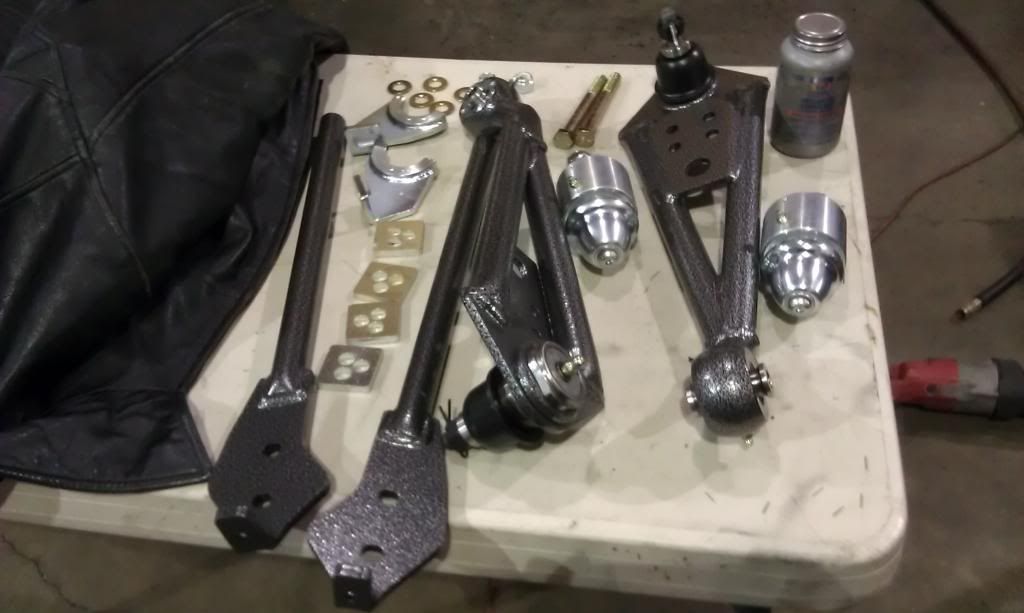
Be careful not to damage the Zerk fitting on the LCA when installing the arm.
Remove collar/sleeve from factory strut rod mount
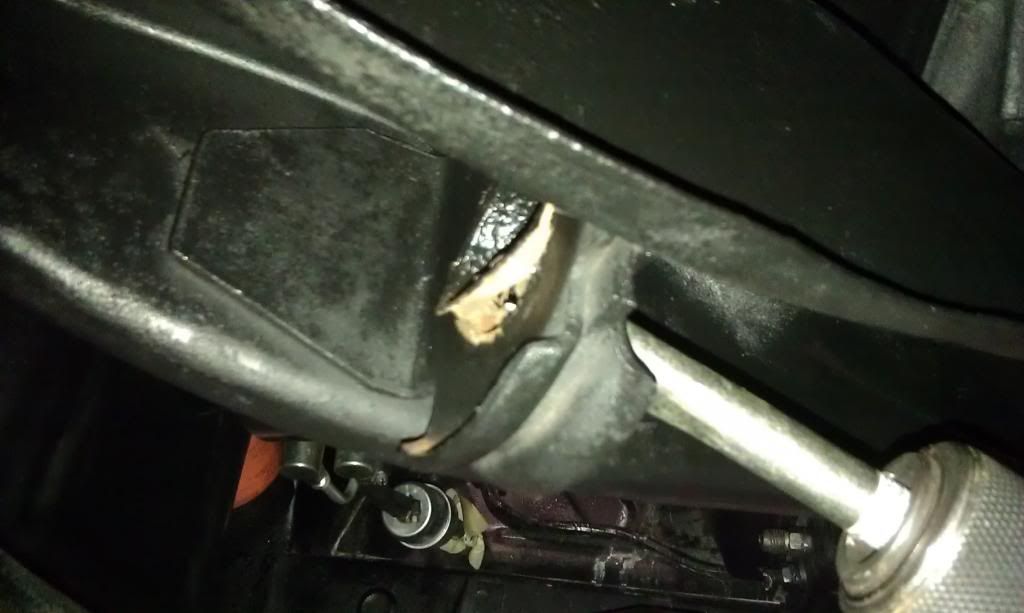
When installing the strut rod bushing to the car you need to read the instructions carefully, you will need anti-seize for the big threads and loc-tite for the small retainer bolt. TORQUE SPECS ARE MANDATORY. ...Very clever engineering was put into this part, I LIKEY.
--------------------
Dont sweat the petty things and dont pet the sweaty things. "RIP George Carlin"
Posts: 886 | From: Sacramento | Registered: Dec 2008
| :
|
|
bwkelley76
¯
Member # 8792
|
posted
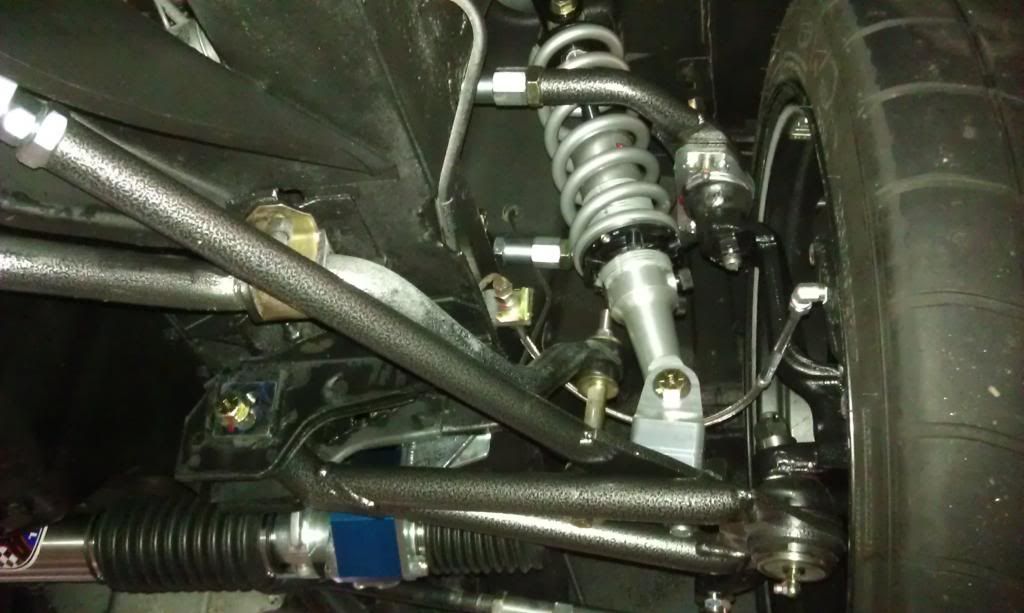
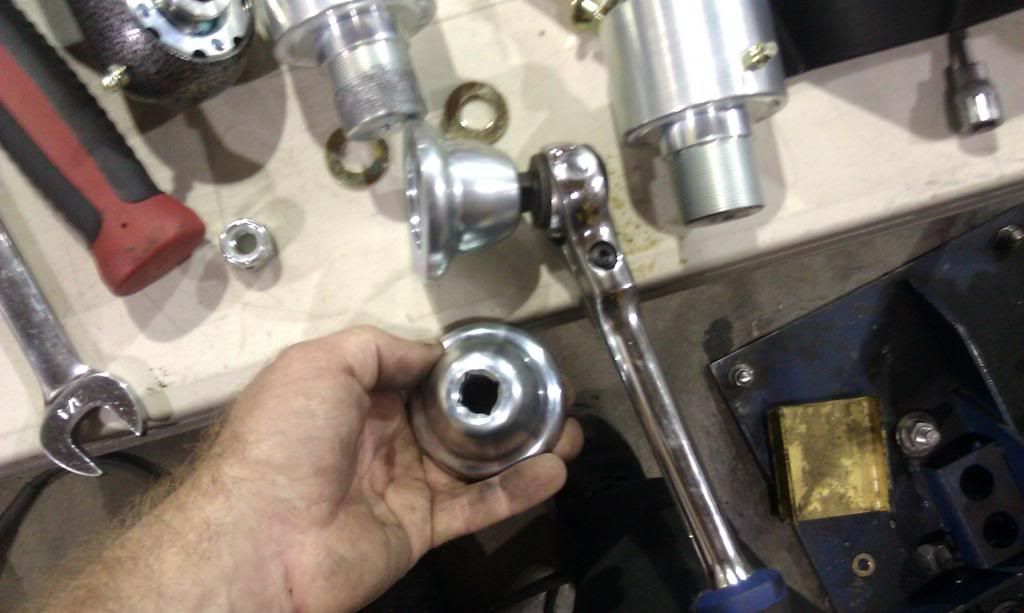
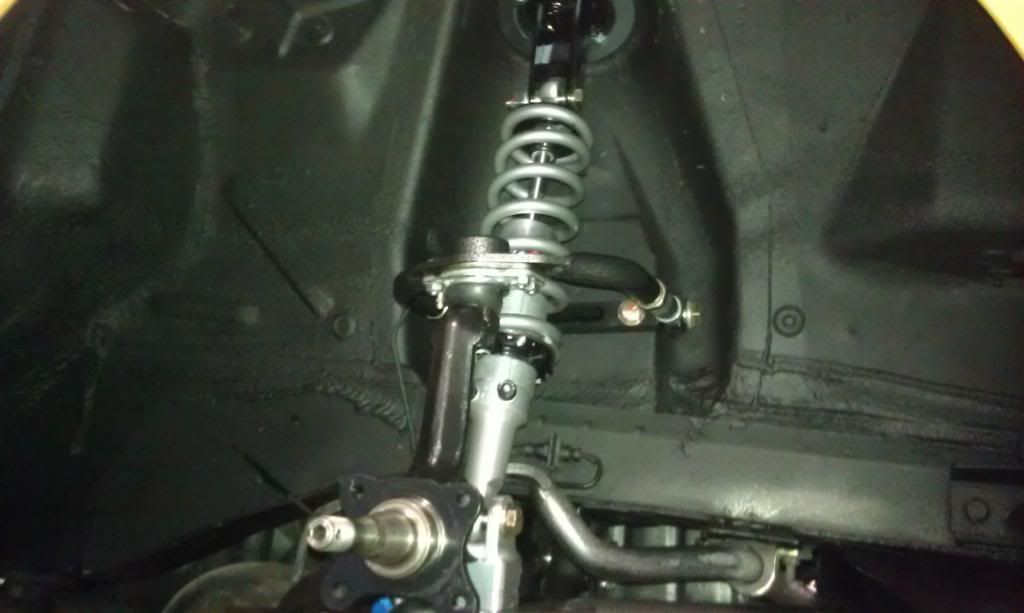
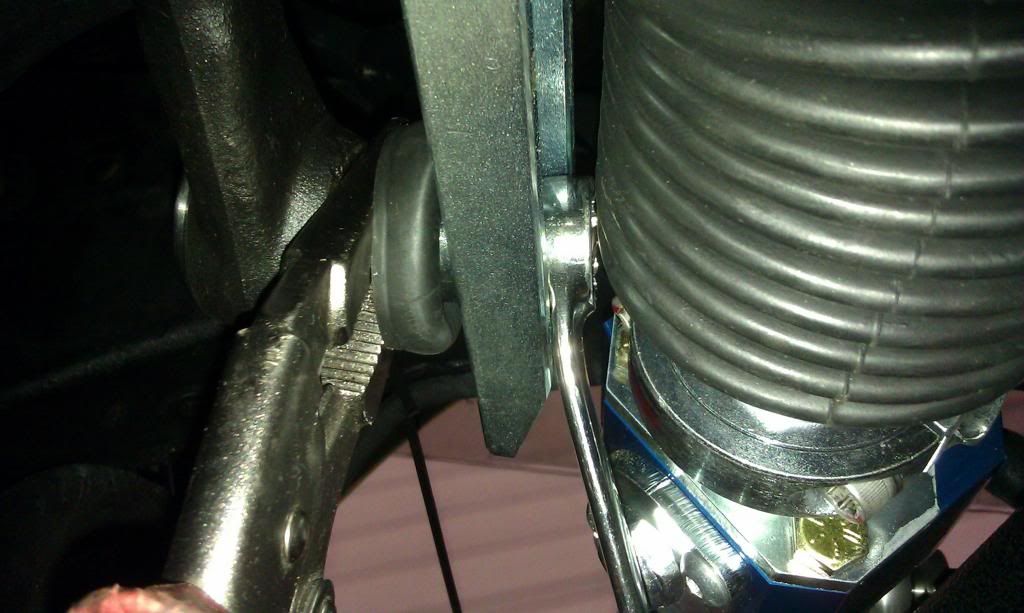
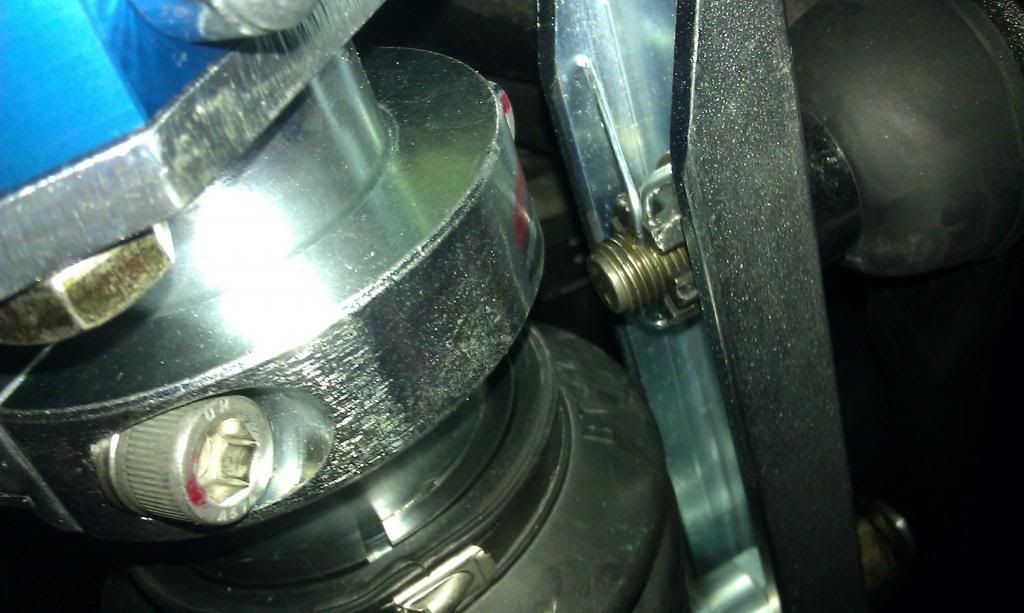
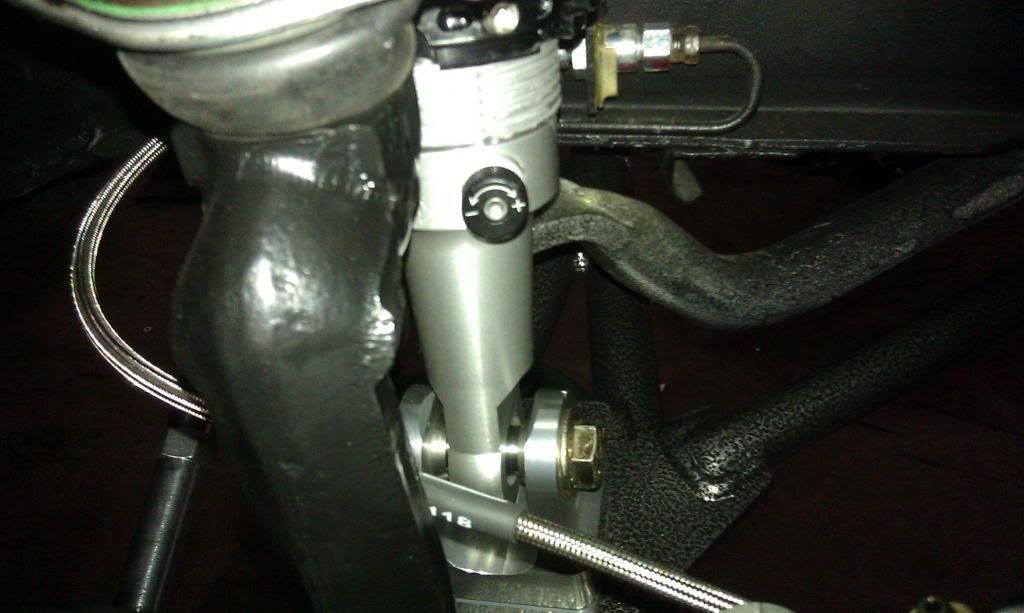
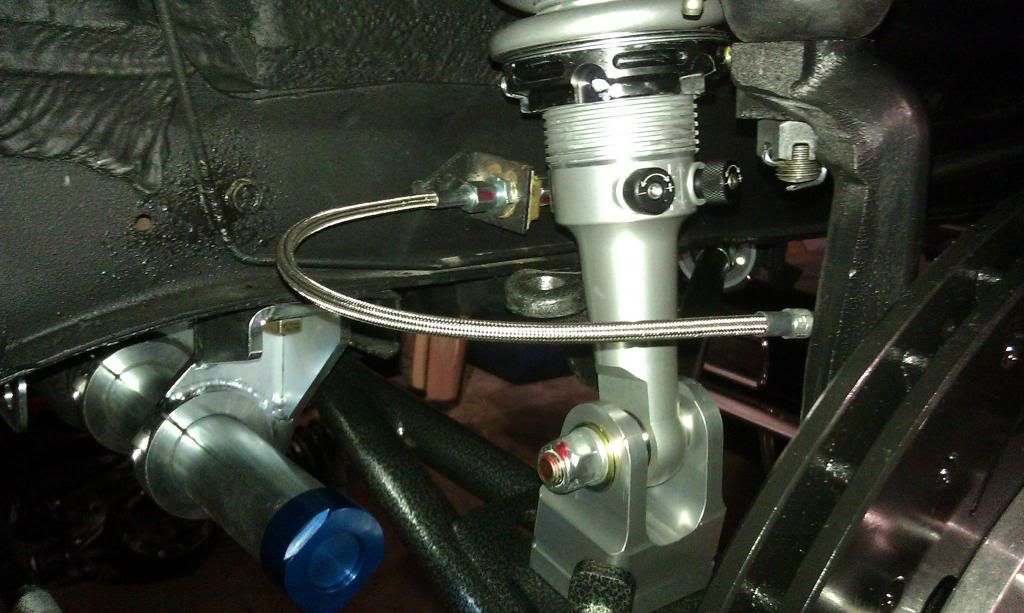
Zerk fitting aligned accordingly for service.
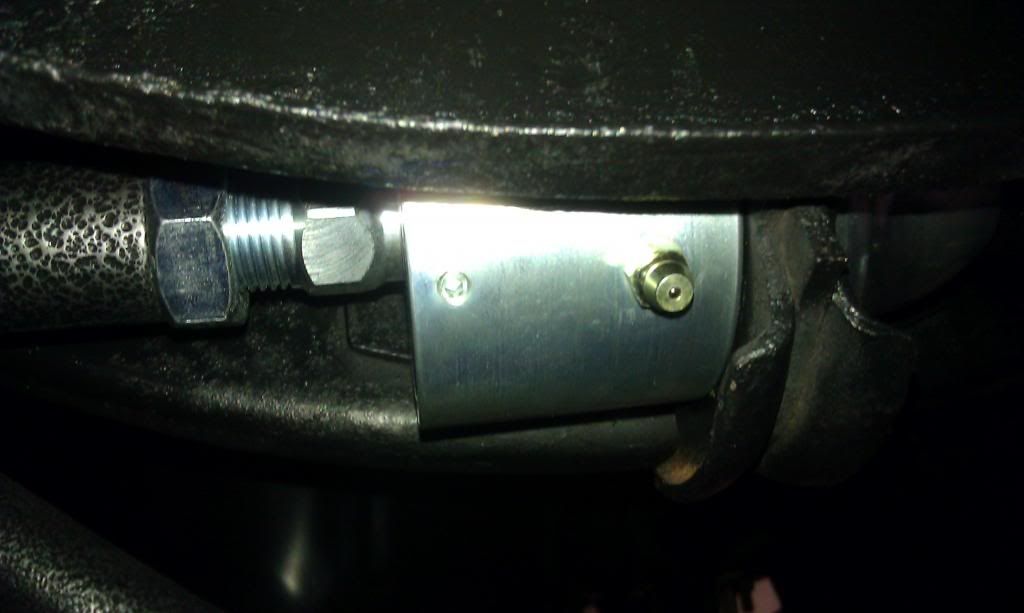
Lower coil-over perch is directional and doubles as the nut to mount the strut rod to the LCA.

Steering stop will be adjusted later
TO BE CONTINUED...
--------------------
Dont sweat the petty things and dont pet the sweaty things. "RIP George Carlin"
Posts: 886 | From: Sacramento | Registered: Dec 2008
| :
|
|
kingdavid
¯
Member # 11179
|
posted
Looking good.
--------------------
1967 mustang 410W
2014 Oxford White 5.0
Posts: 305 | From: Sacramento | Registered: Aug 2011
| :
|
|
68dustin
CAFords OG
Member # 5388
|
posted
DAMN that is the only update i havent done to my car.. I have all new a-arms, bushings & borgenson steering. Does the coil-over system with tublar a-arms make a huge difference on the road?
--------------------
"As I lay rubber down the street, I pray for traction that I can keep, and if I do begin to slide, please dear God protect me and my ride!"
Posts: 3986 | From: neverland | Registered: Feb 2005
| :
|
|
bwkelley76
¯
Member # 8792
|
posted
quote:
Originally posted by 68dustin:
DAMN that is the only update i havent done to my car.. I have all new a-arms, bushings & borgenson steering. Does the coil-over system with tublar a-arms make a huge difference on the road?
The short answer is YES! Not only is it way stronger than your current setup, the adjustability allows for all kinds of different ride and handling characteristics and the ability to change everything without much labor.
[ December 08, 2012, 01:14 AM: Message edited by: bwkelley76 ]
--------------------
Dont sweat the petty things and dont pet the sweaty things. "RIP George Carlin"
Posts: 886 | From: Sacramento | Registered: Dec 2008
| :
|
|
bwkelley76
¯
Member # 8792
|
posted
quote:
Originally posted by kingdavid:
Looking good.
Thanks!
...Continued
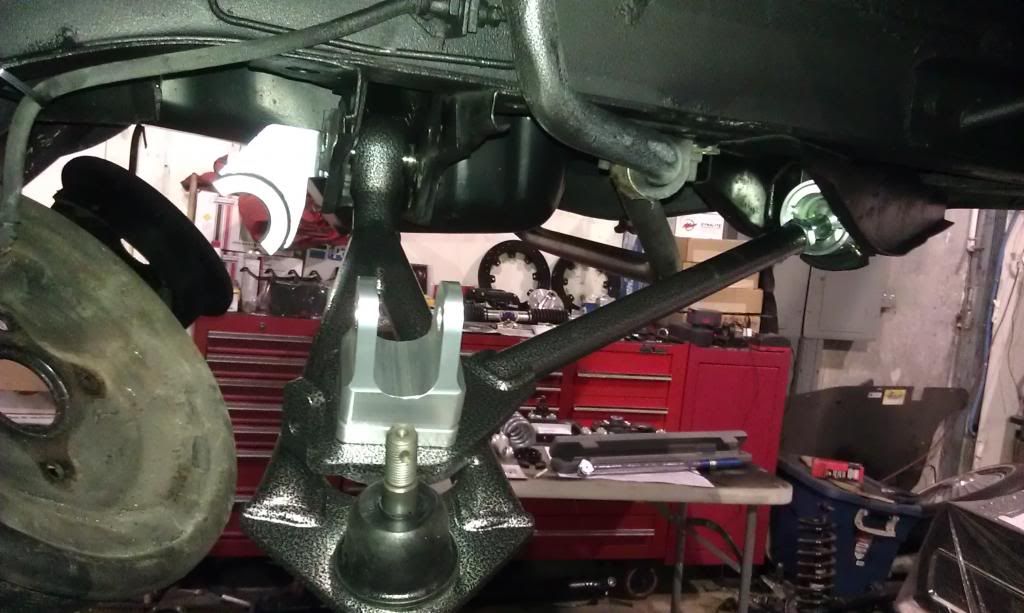
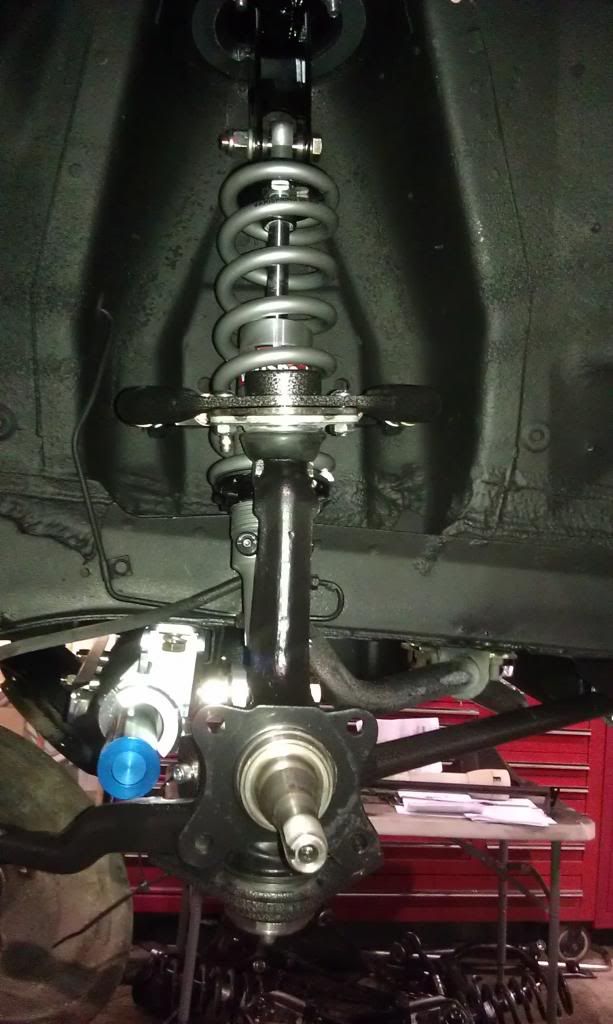
Upper control arms go on super easy. Mine are the straight shaft instead of the drop-down ones since my car already has the 1" UCA (Shelby) drop holes drilled.
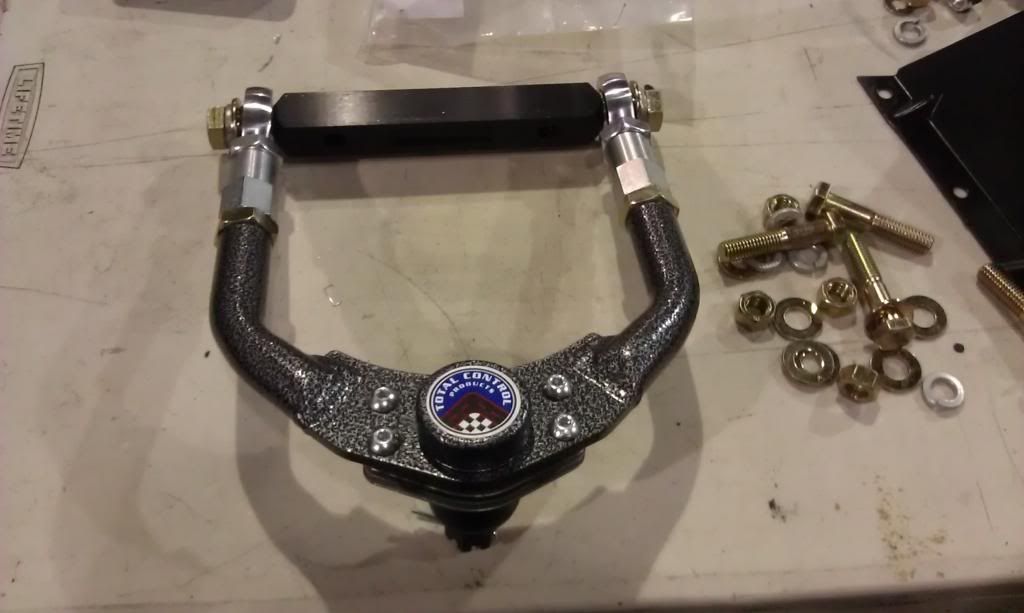
Aligning/clocking the cotter pin holes so they line up with desired position (not pointing right at the spindle which makes it impossible to install and remove them later.

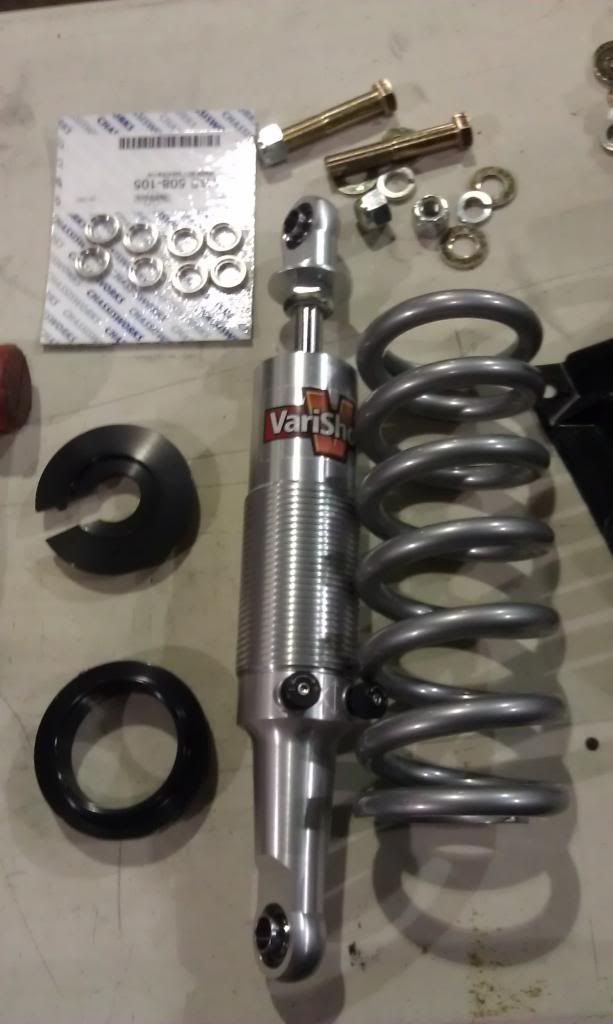
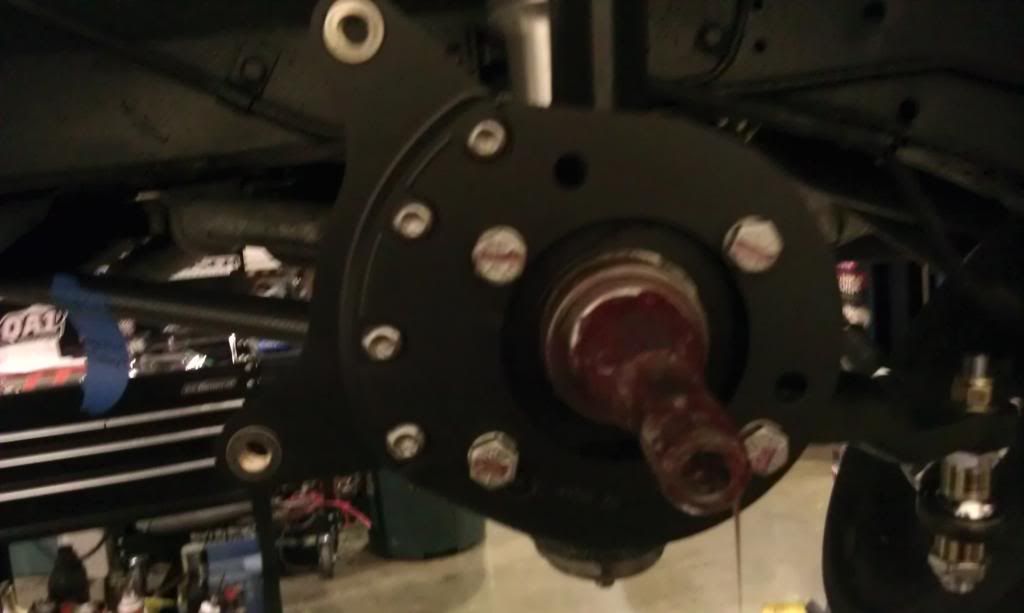
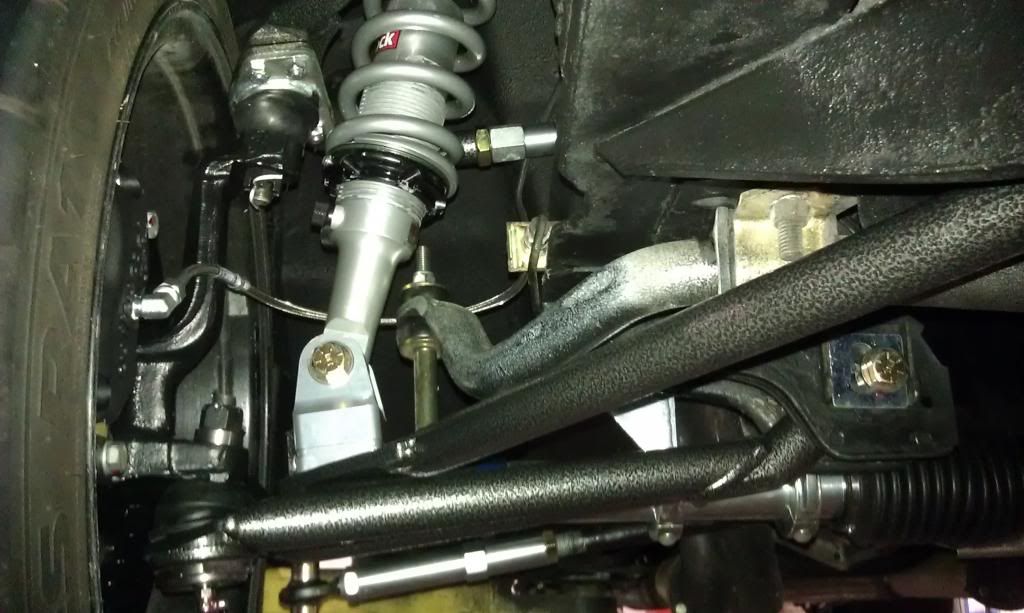
Spindles go on next
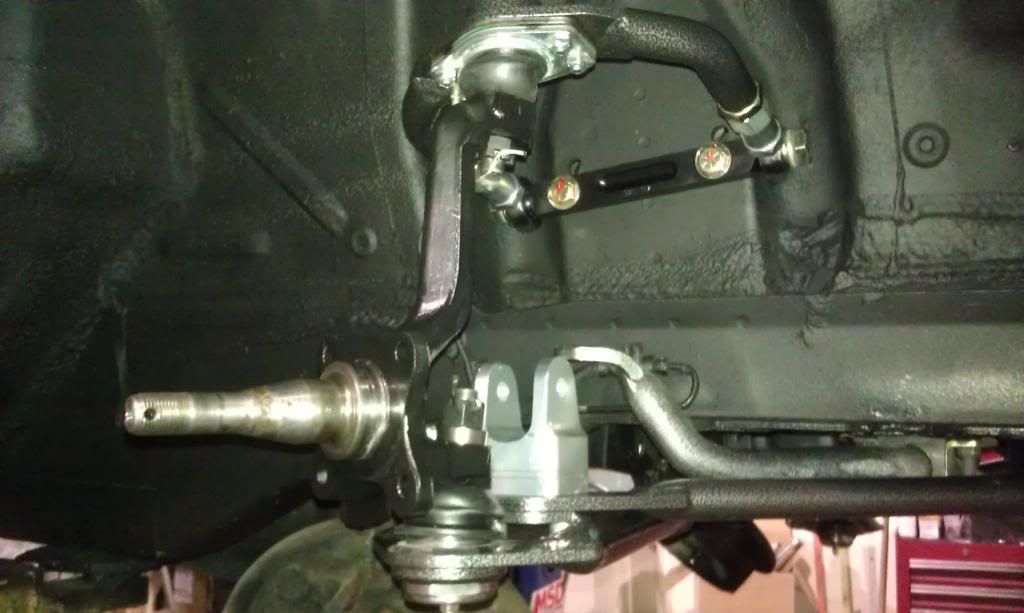
Now it's time for the coil-overs. Setting them on the lowest setting really helps make the job easier. USE LOTS OF ANT-SEIZE ON THE SPANNER THREADS AND DONT FORGET TO LOOSEN ALLEN LOCKS. I also opted for a set of spanner bearings which make the adjusting job easier and protect your spanners from wear.
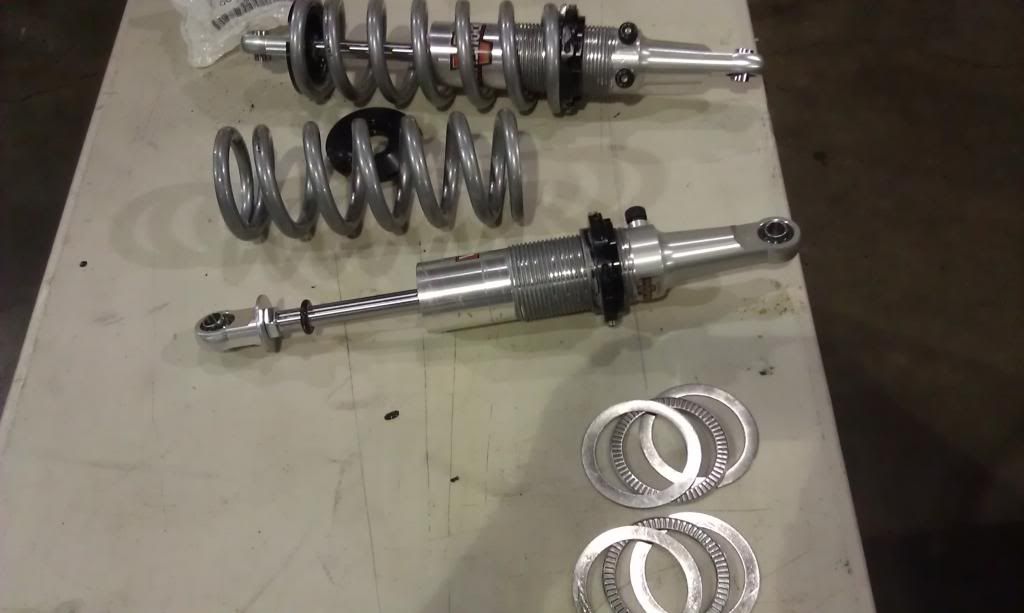
(Note the sneak-peak of the rack & pinion mocked up in this pic)
--------------------
Dont sweat the petty things and dont pet the sweaty things. "RIP George Carlin"
Posts: 886 | From: Sacramento | Registered: Dec 2008
| :
|
|
bwkelley76
¯
Member # 8792
|
posted
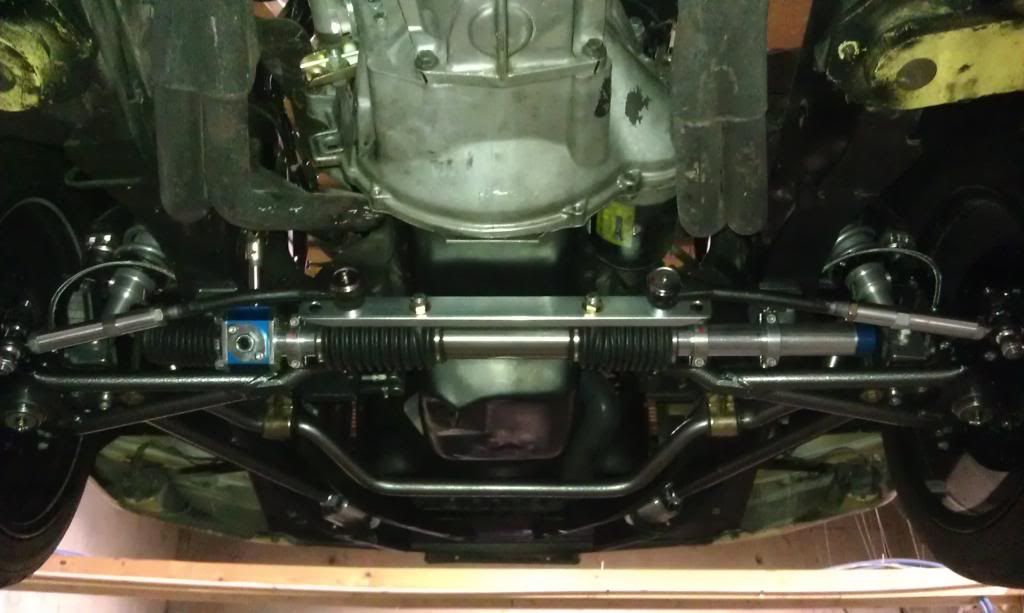
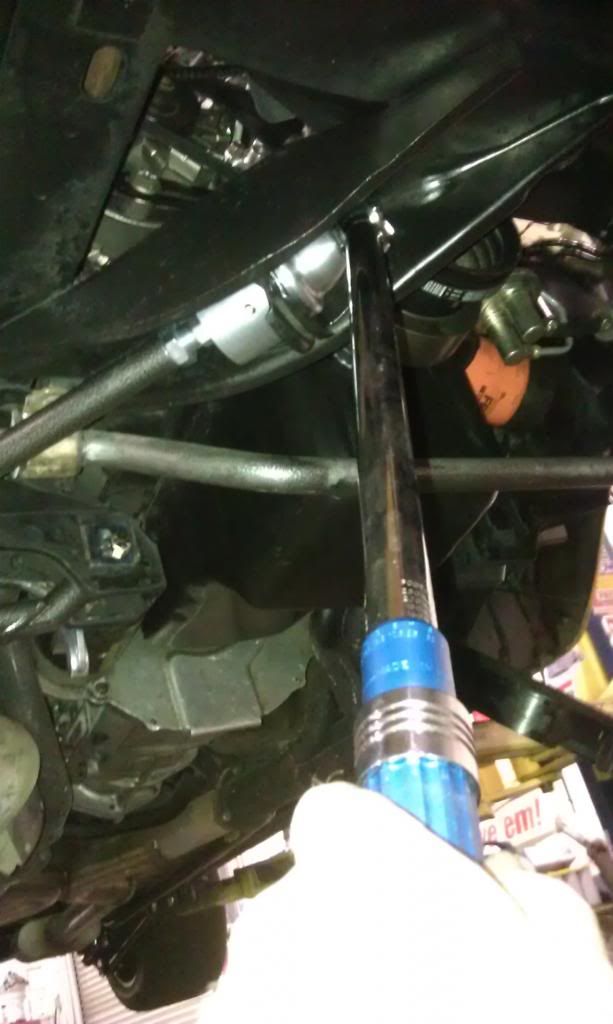
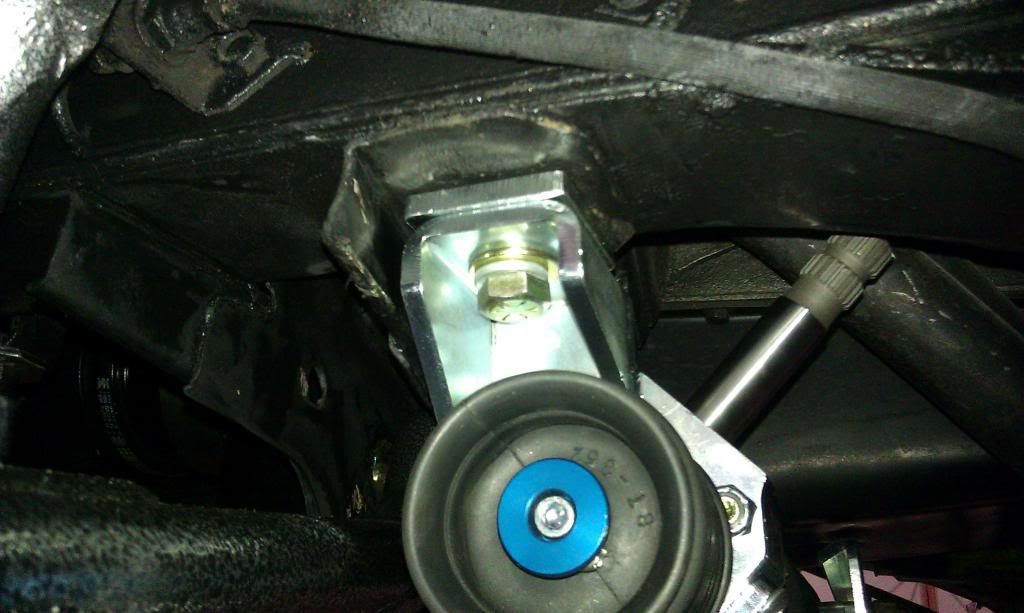
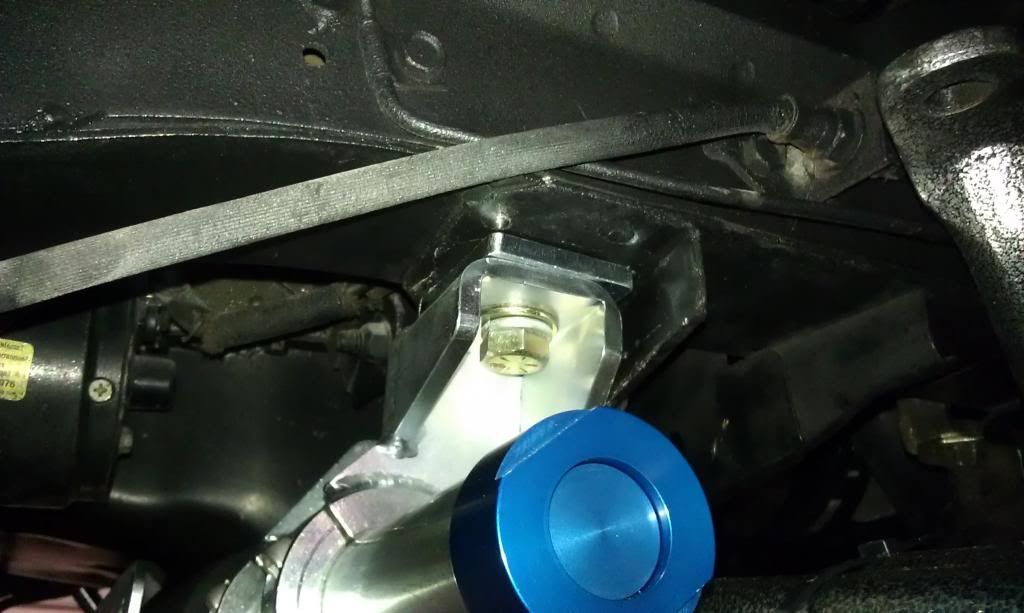
Manual Rack & Pinion Install. Friendly advice; READ INSTRUCTIONS AND DO NOT DEVIATE WHATSOEVER or you could ruin your rack.
Clamps install in a certain order and will require shims to the frame. A drive-on lift is the best option so the chassis isn't in a bind or slightly tweaked. The instructions go over a few troubleshooting scenarios if for some reason you install it wrong and put the rack in a bind with the frame.
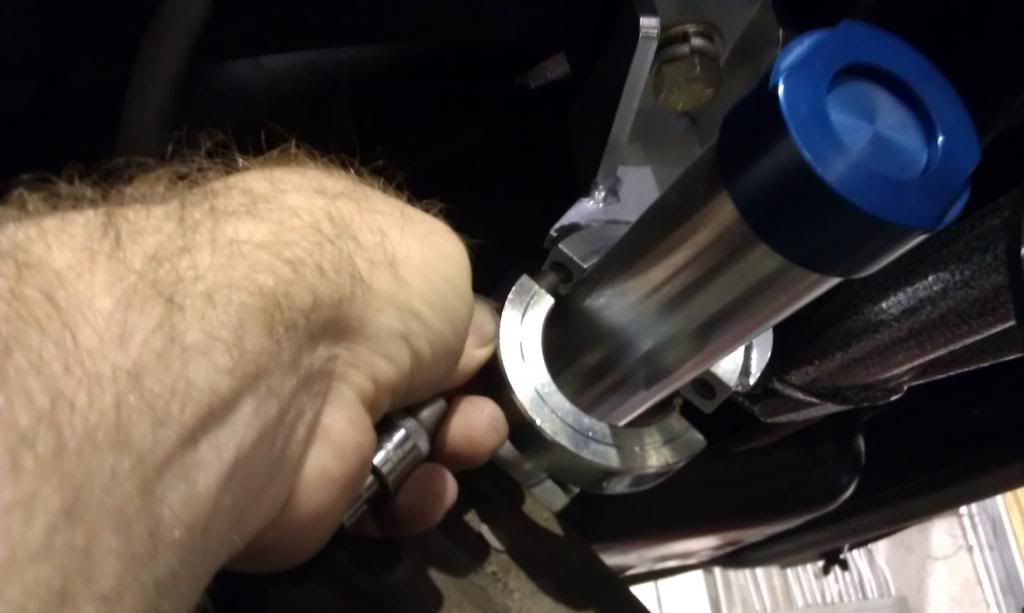
If your column isn't installed yet you can move the rack by hand to see if it is binding or making noise, etc. The instruction manual will help you do the job correctly, hopefully the first time.
TO BE CONTINUED....
-
-
-
-
-
--------------------
Dont sweat the petty things and dont pet the sweaty things. "RIP George Carlin"
Posts: 886 | From: Sacramento | Registered: Dec 2008
| :
|
|
v-town coupe
fordologist
Member # 2771
|
posted
looking good!
Posts: 4597 | From: the V-town | Registered: May 2003
| :
|
|
bwkelley76
¯
Member # 8792
|
posted
quote:
Originally posted by v-town coupe:
looking good!
Thanks V-Town! ..Hey your PM inbox is full so I can't reply to your PM.
--------------------
Dont sweat the petty things and dont pet the sweaty things. "RIP George Carlin"
Posts: 886 | From: Sacramento | Registered: Dec 2008
| :
|
|
bwkelley76
¯
Member # 8792
|
posted
Continued...
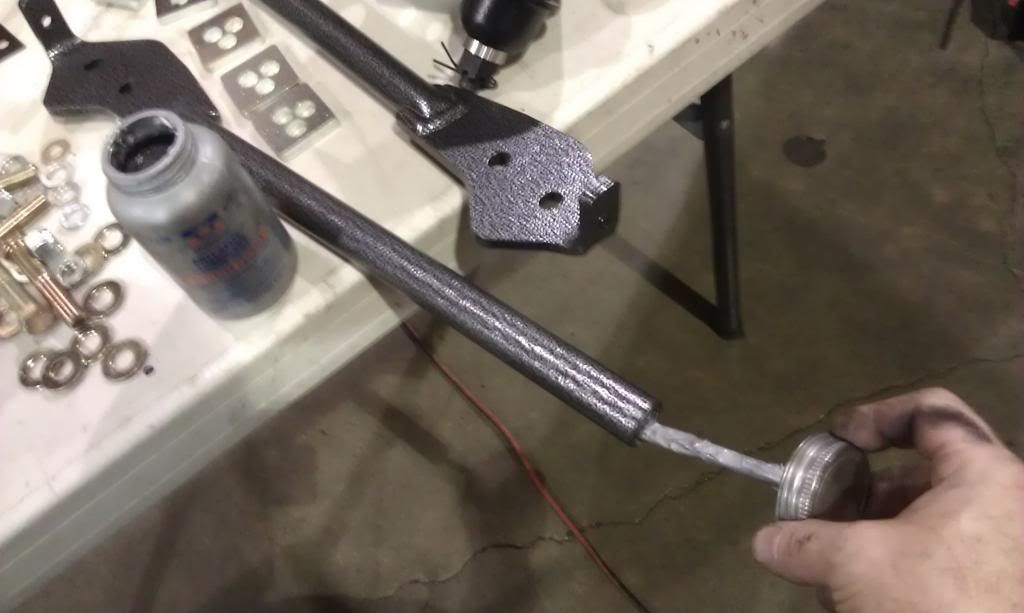
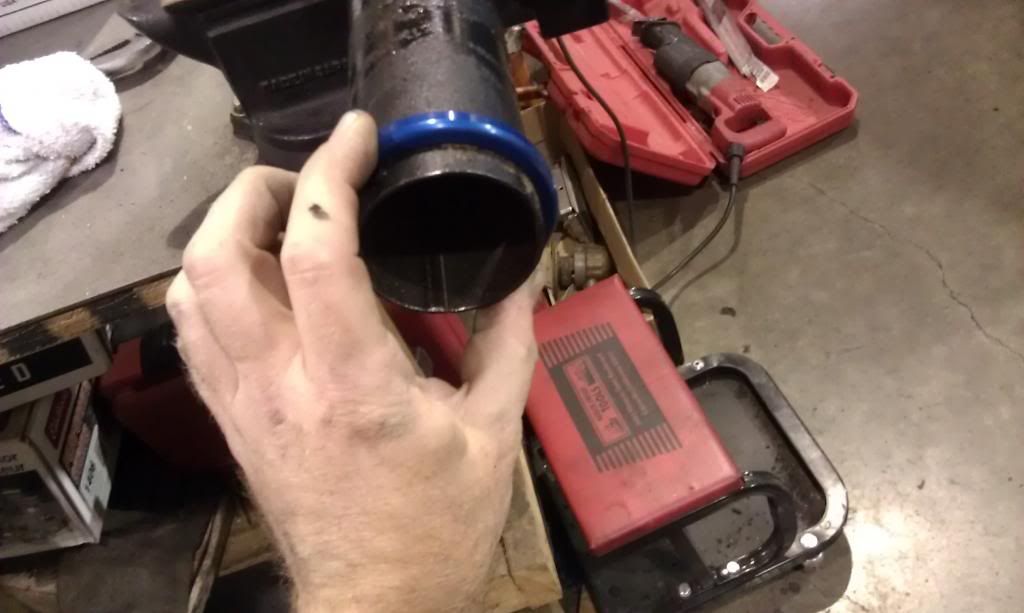
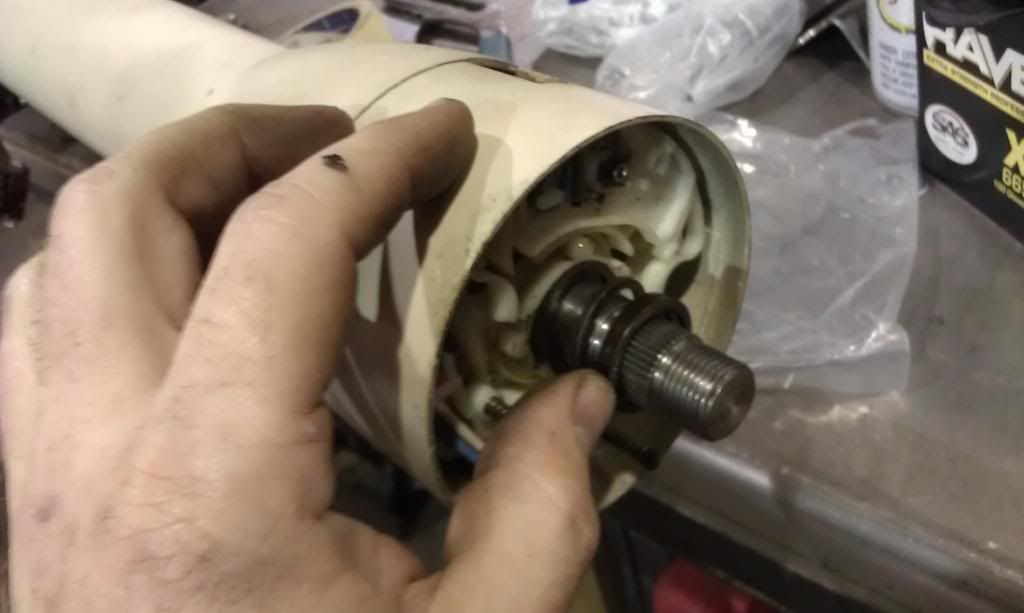
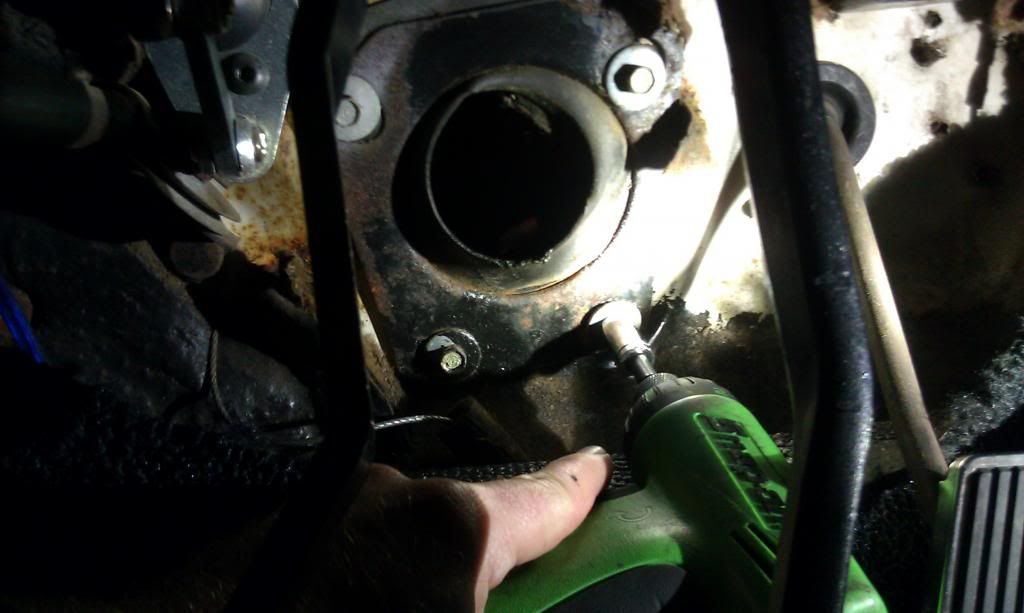
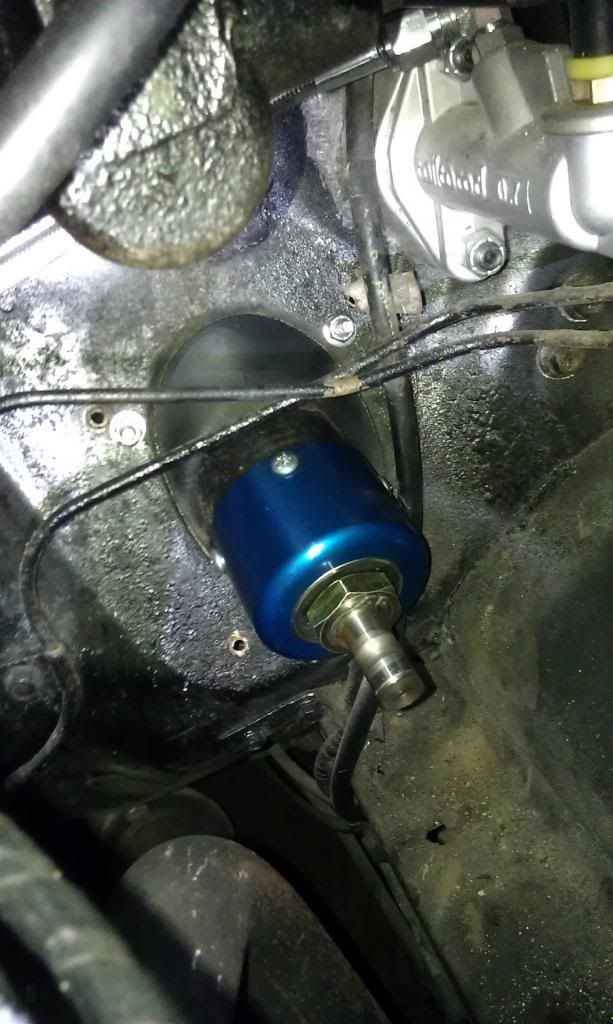
Time to modify the factory steering column to work with the TCP manual rack. The parts come with the kit so all you are out is your time/labor on this. The other option is to buy their tilt column which is made by "Ididit". To keep cost down I decided to go this route although the Ididit column is really nice.
Once again the instructions are really helpful. There are a few things you will need to know like how to adjust/shim or cut to obtain the right end-play on the shaft.
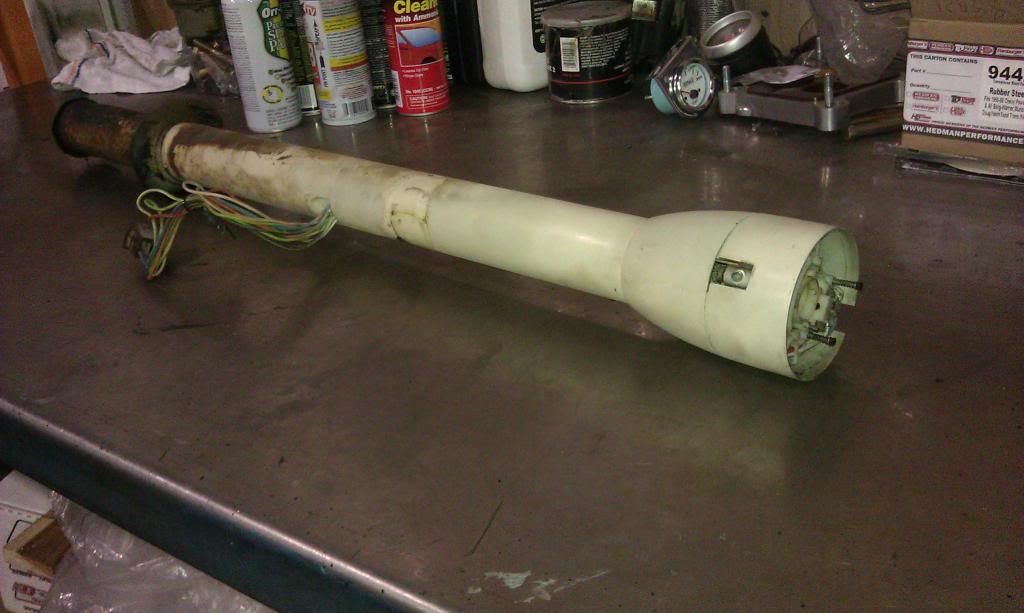
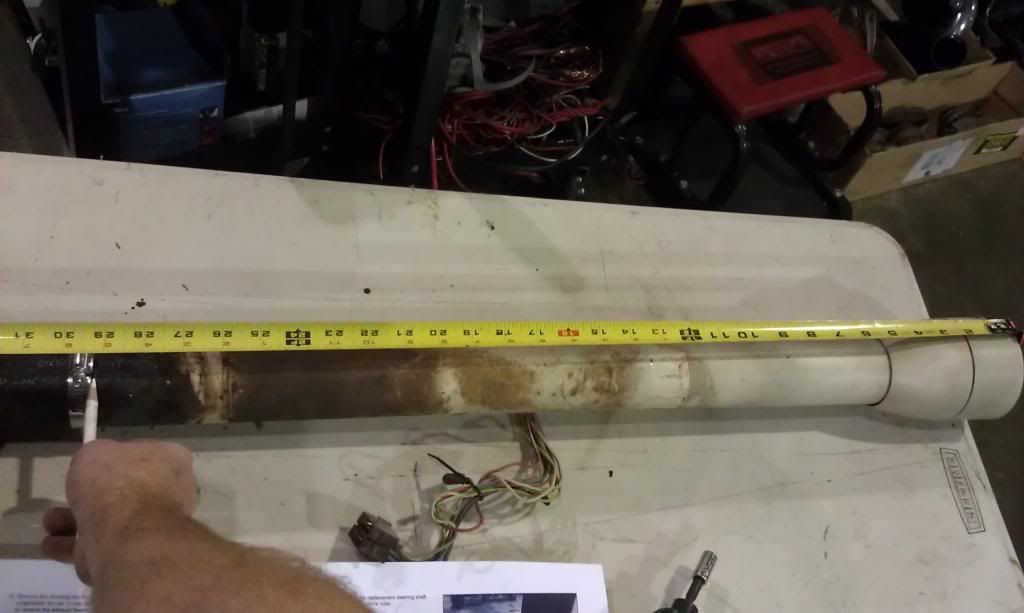
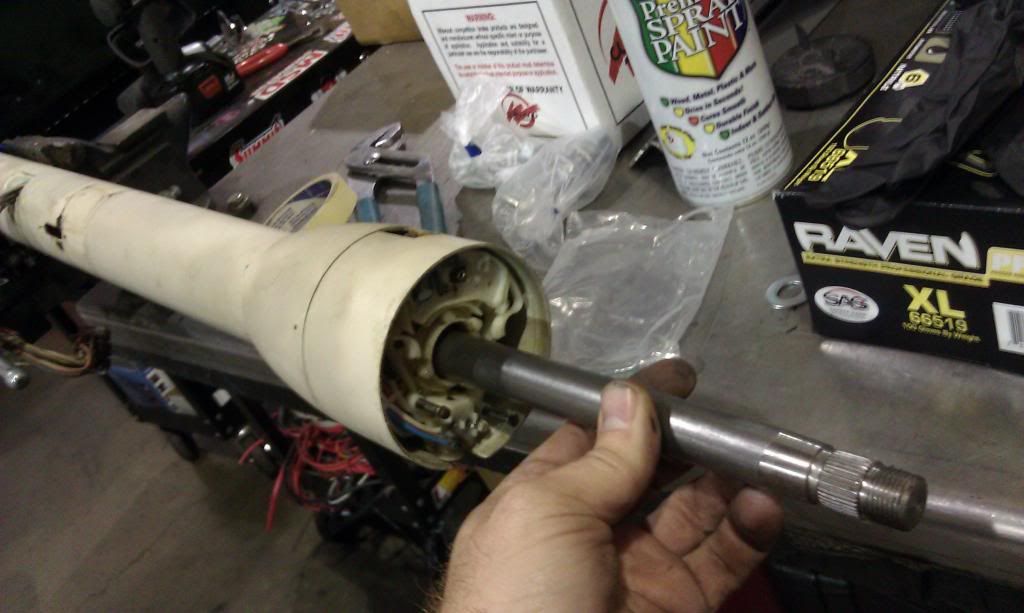
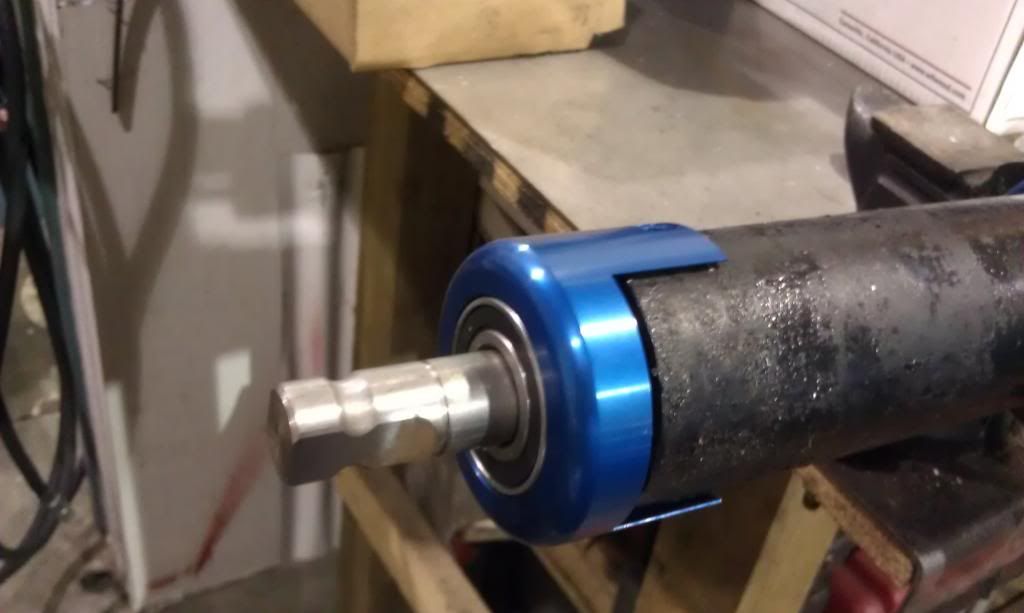
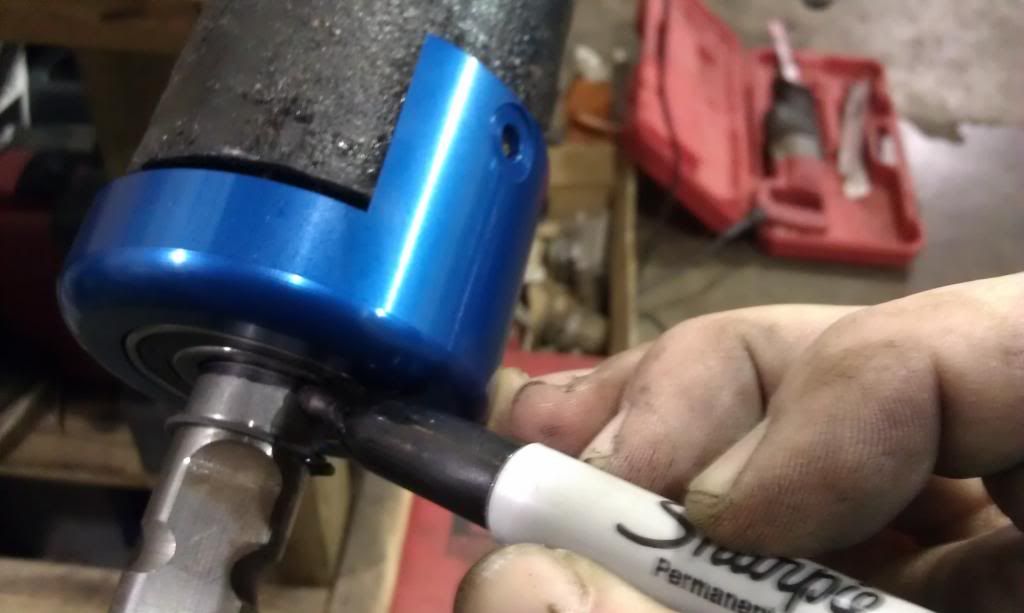
Measure and cut the old column to the length specified in the instructions. I used a hose clamp to make a straight cut. After cleaning up the cut end of the column I used a file to clean it up and then I painted the lower portion to avoid rust. Then I installed the supplied retaining collar onto the column.

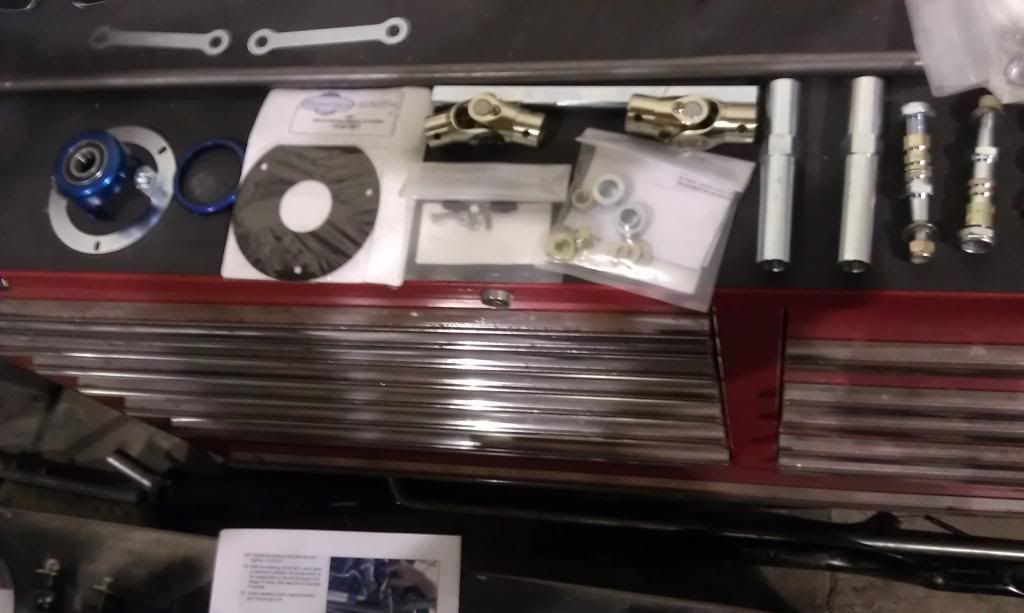
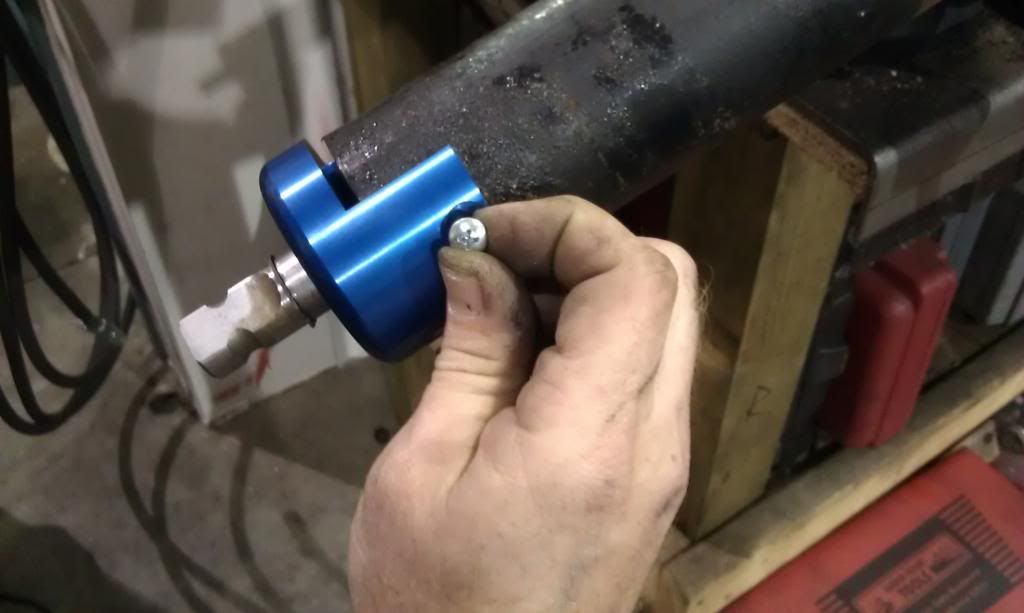
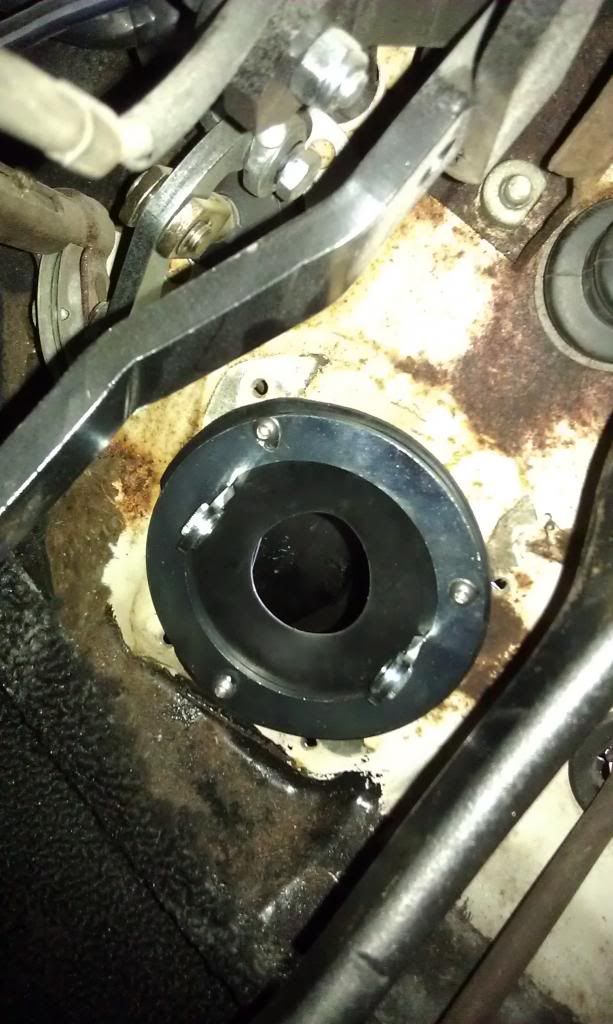
End cap/shaft support bearing assembly slides right onto the end and then it's attached with 3 sheet-metal screws (good idea to mock up shaft and steering wheel before screwing this to the column)
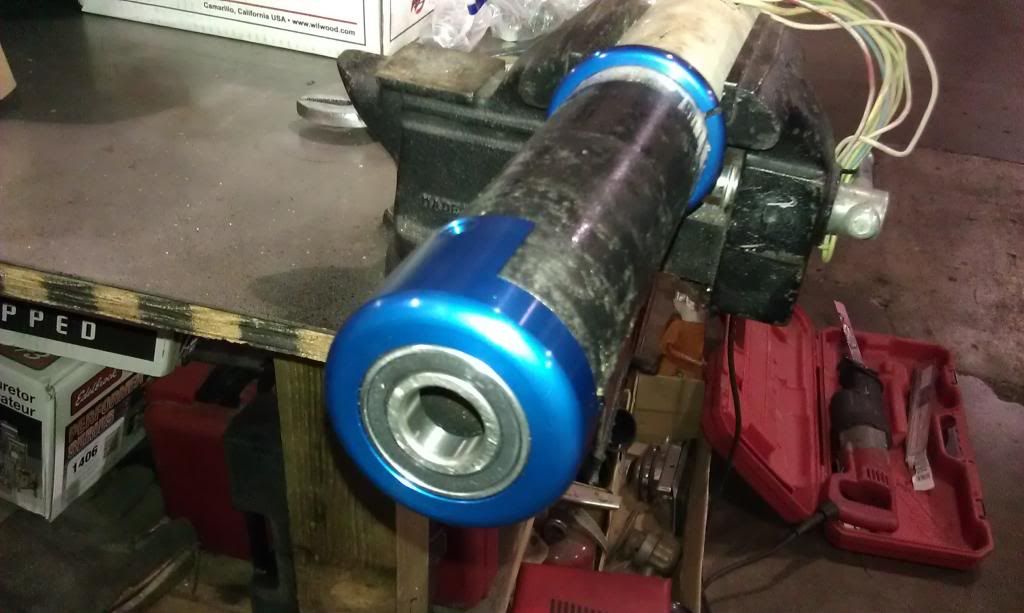
Now insert the supplied steering shaft and attach the steering wheel. The top half of this shaft is identical to factory and will reuse the original nut, spring and collar/bushing. I installed the wheel and set up the turn-signal cancel geometry and column to bell clearance, etc.
--------------------
Dont sweat the petty things and dont pet the sweaty things. "RIP George Carlin"
Posts: 886 | From: Sacramento | Registered: Dec 2008
| :
|
|
bwkelley76
¯
Member # 8792
|
posted

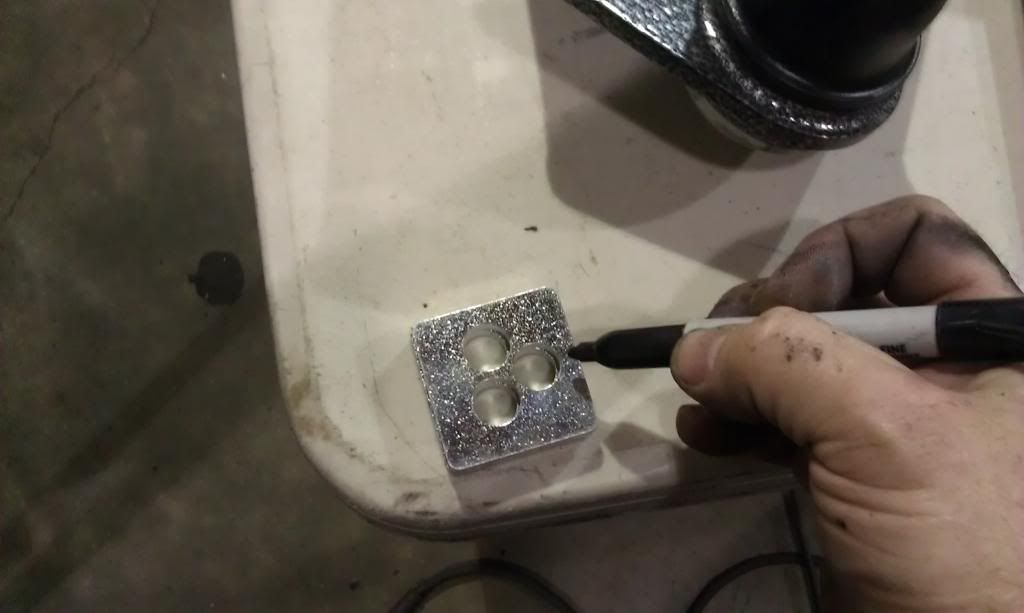
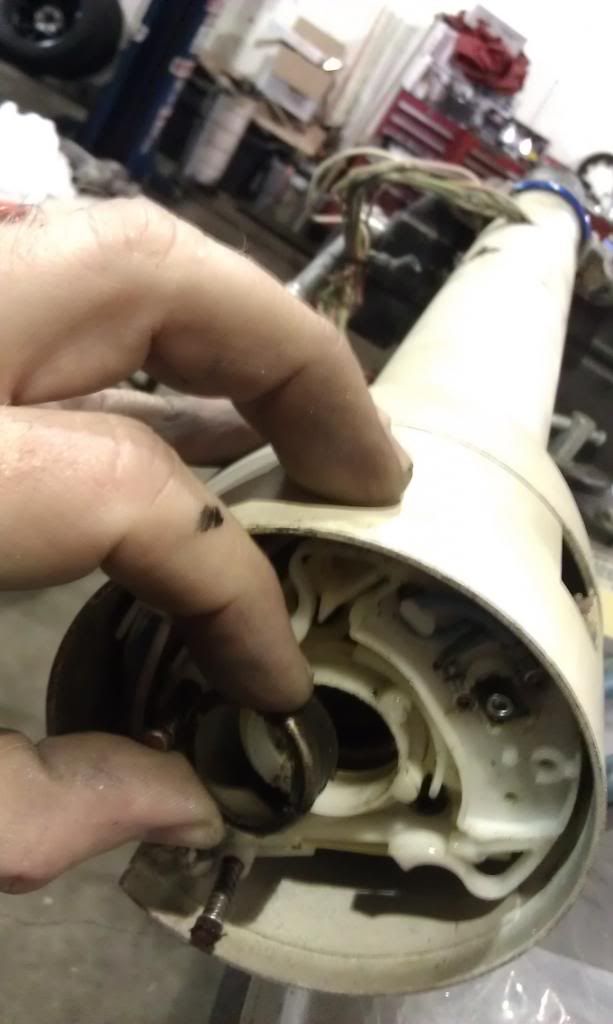
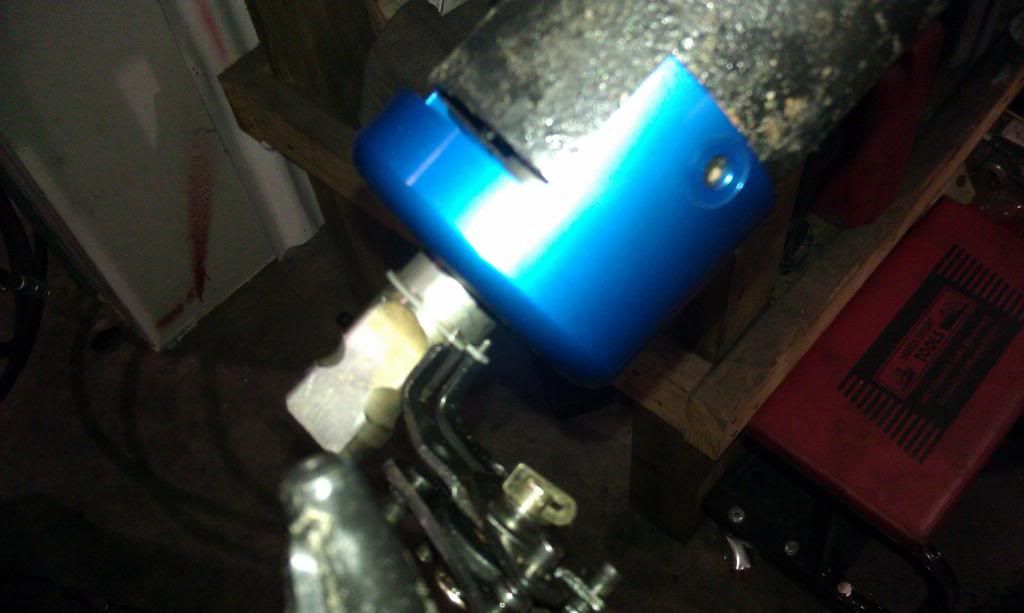
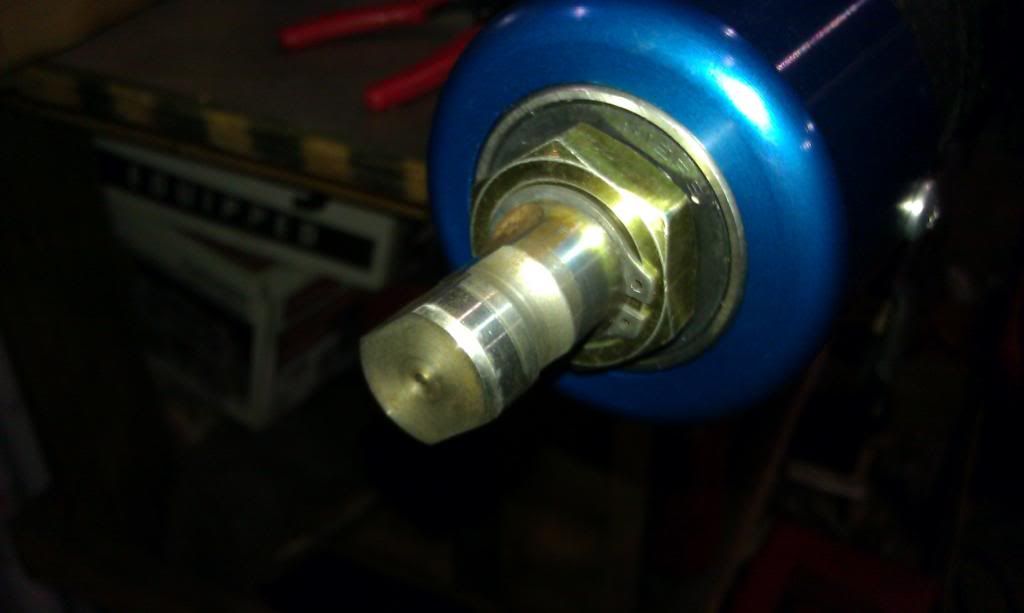
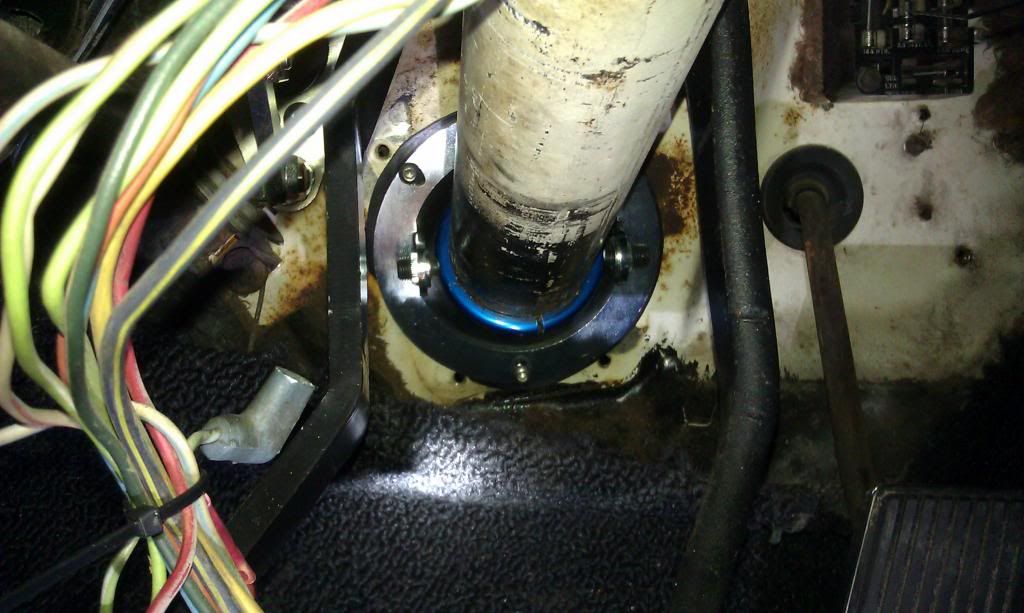
Now it's time to set the end-play (telescopic play) so that your steering wheel and its shaft do not slide up and down (in and out) in the column. I installed the retainer clip at the bottom and then checked my clearance at the steering wheel-to-column bell top. Because there is a spring trying to pull the shaft outward this can be a little tricky. Once the correct position is obtained check the clearance between the shaft support bearing and the clip. Make sure the column cap and support bearing are ALL THE WAY onto the column. Determine if you need to cut more off the column or add shims to make up for play. Once you get the column close to the right length you can screw the bearing support down. In my case I needed almost 1/4" of shim so I found a nut that fit perfectly. ...hey it was free and available. lol
--------------------
Dont sweat the petty things and dont pet the sweaty things. "RIP George Carlin"
Posts: 886 | From: Sacramento | Registered: Dec 2008
| :
|
|
bwkelley76
¯
Member # 8792
|
posted
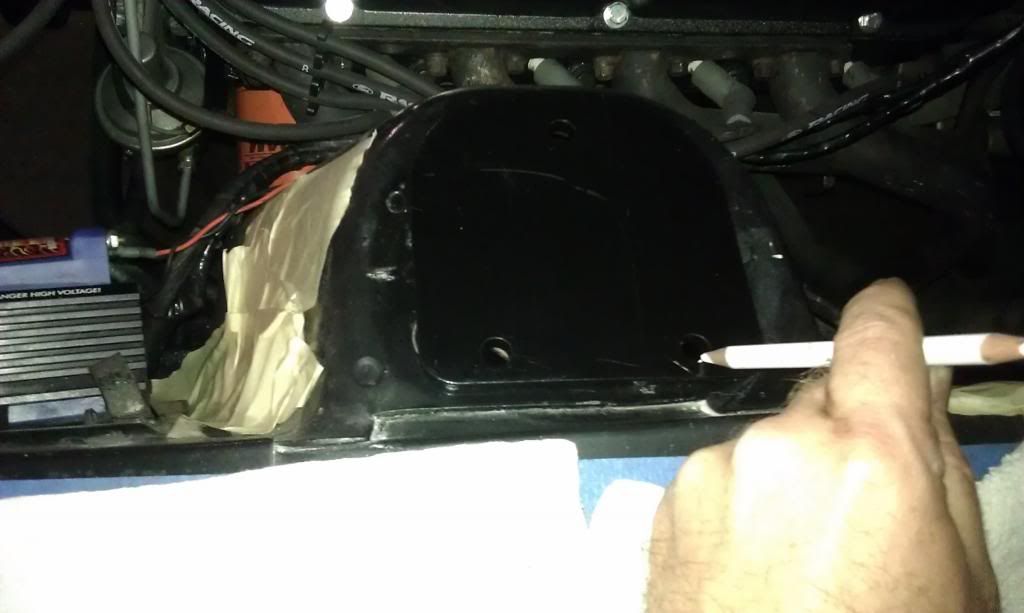
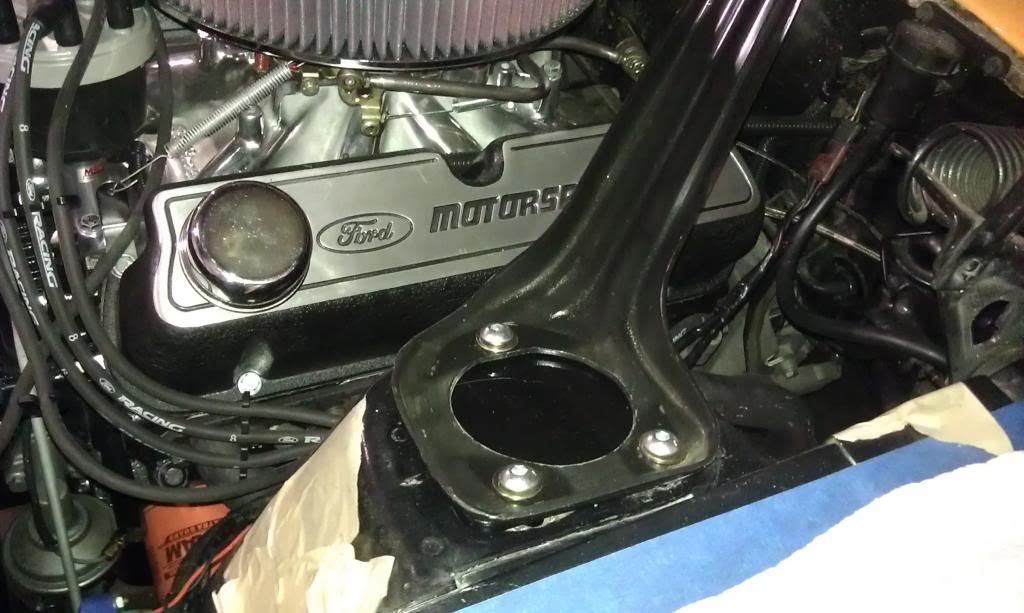
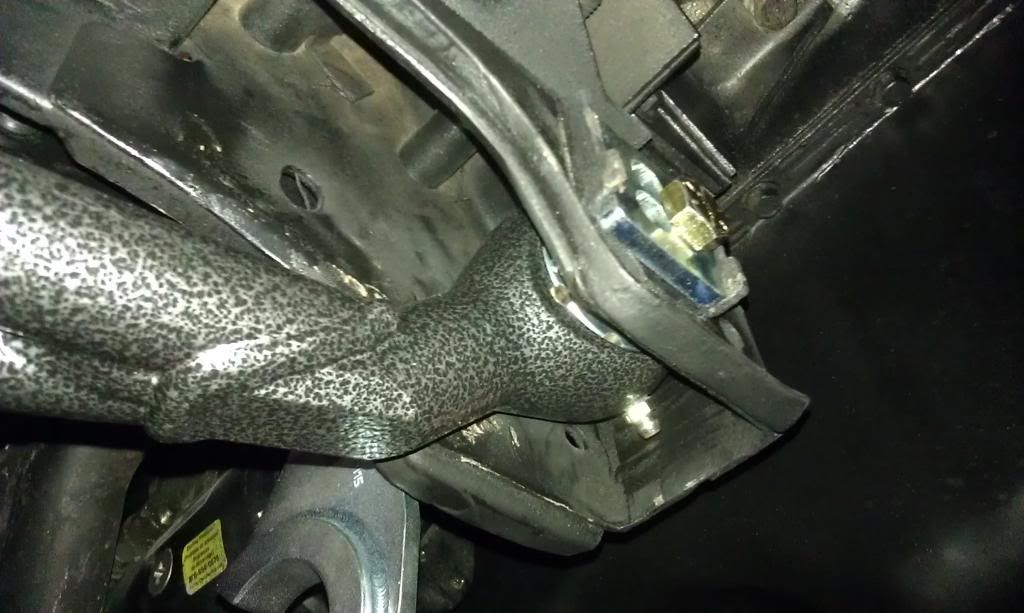
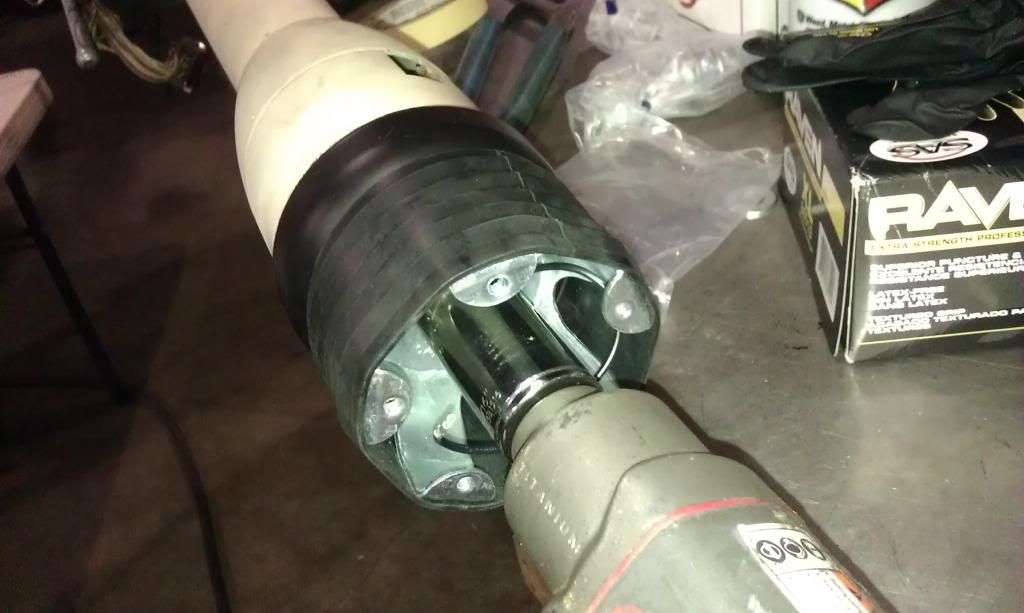
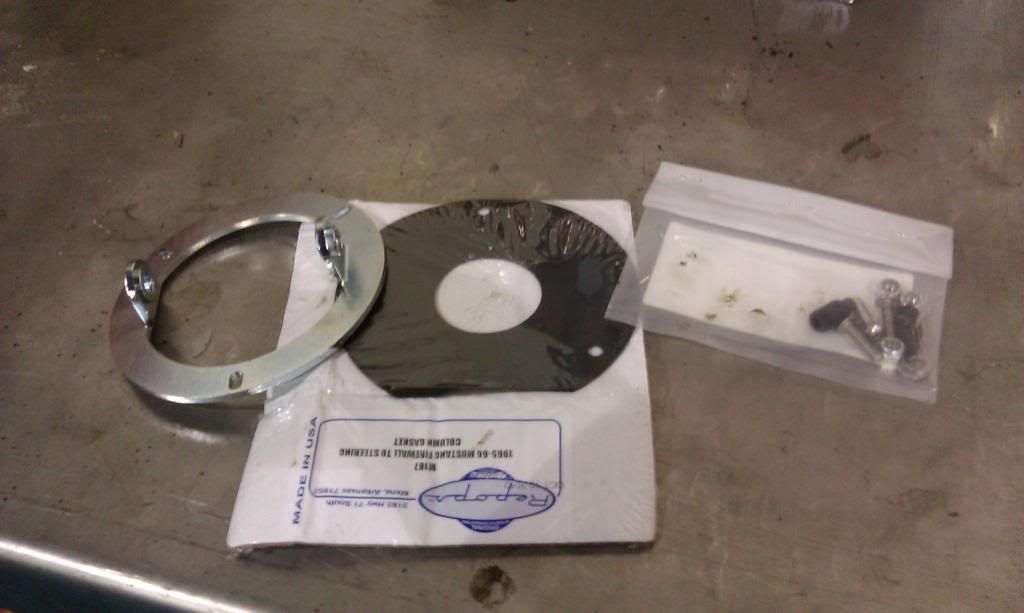
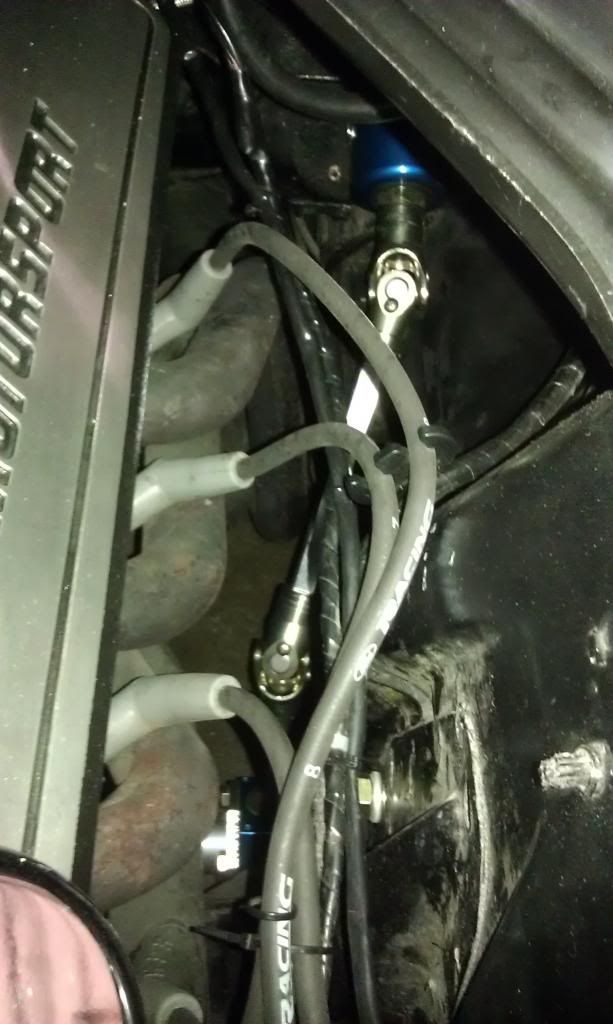
Now It's time to install the column and the lower steering shaft and u-joints into the car. I removed the old boot and installed the supplied boot and mount bracket as per the TCP instructions. These parts are universal from 65-69 as far as I know, and some cars may require you to drill new holes. My holes did not line up so I centered the assembly and drilled new holes. The column then slides in and bolts to the dash like normal. The slip-on support collar that was put on the column earlier slides down in-line with the boot and bracket and you screw the set screws into the collar.
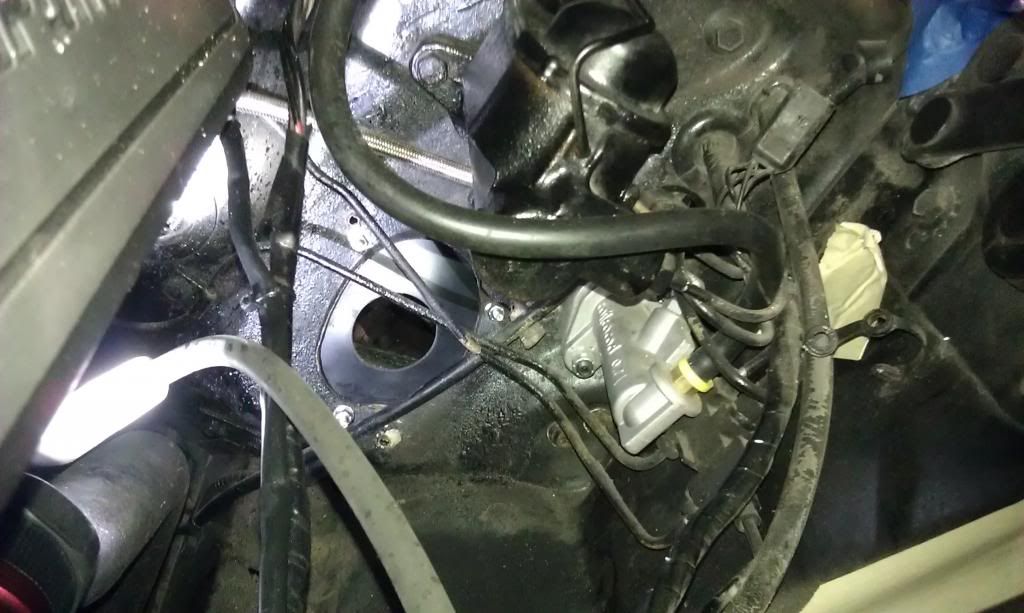
TO BE CONTINUED...
-
-
-
-
--------------------
Dont sweat the petty things and dont pet the sweaty things. "RIP George Carlin"
Posts: 886 | From: Sacramento | Registered: Dec 2008
| :
|
|
bwkelley76
¯
Member # 8792
|
posted
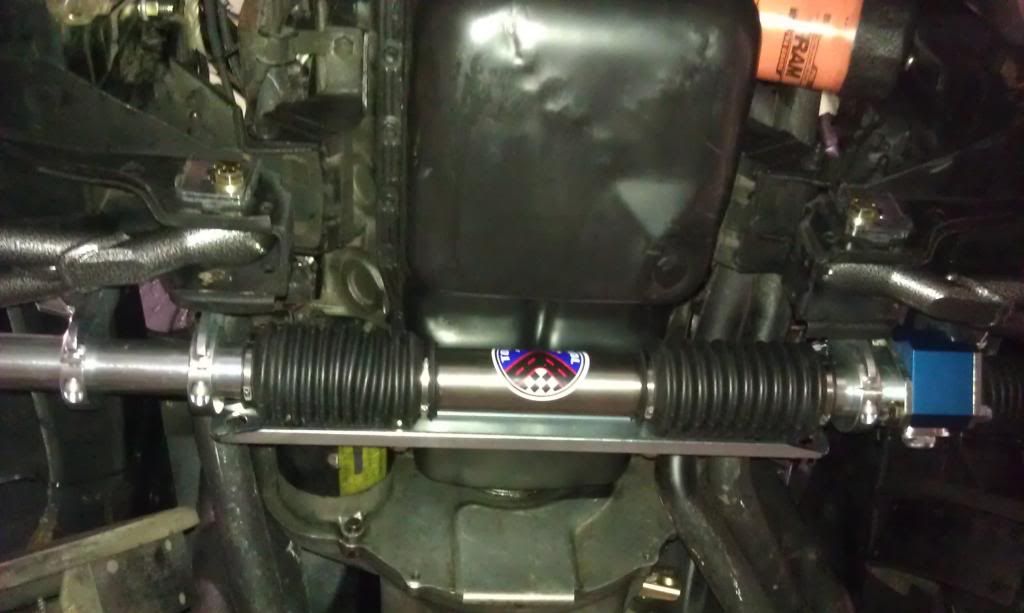
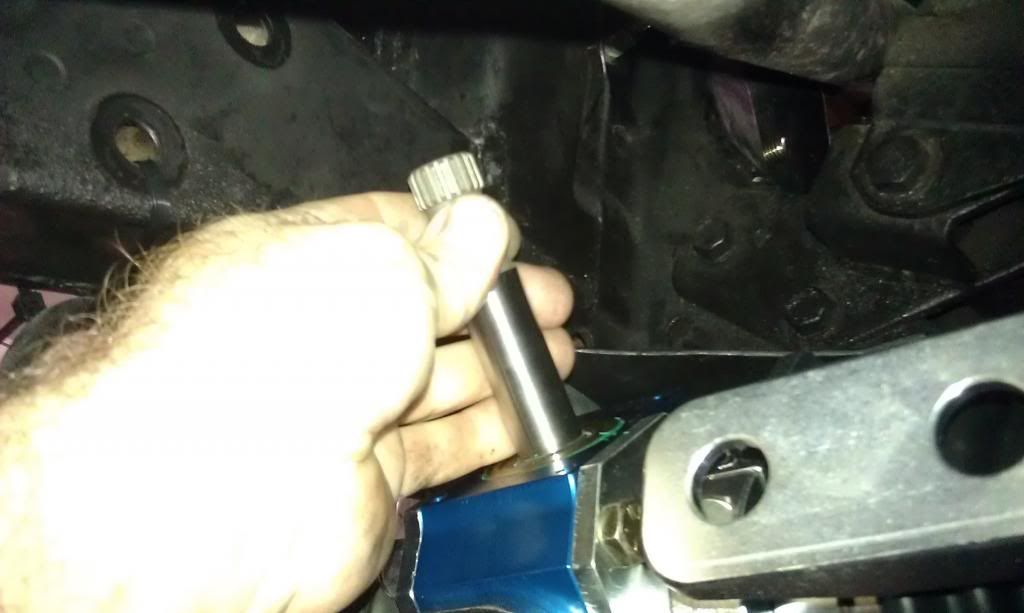
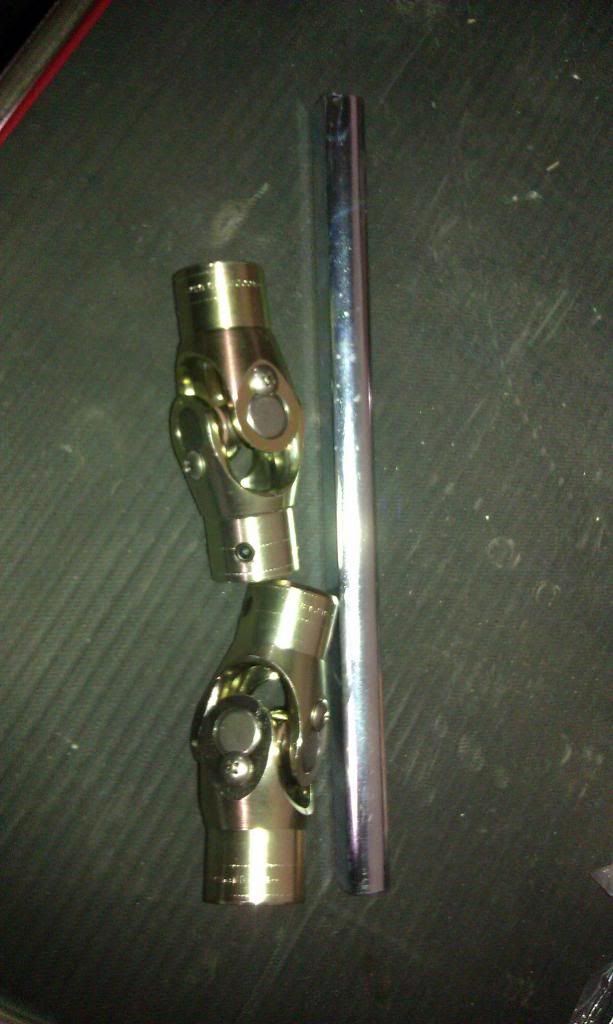
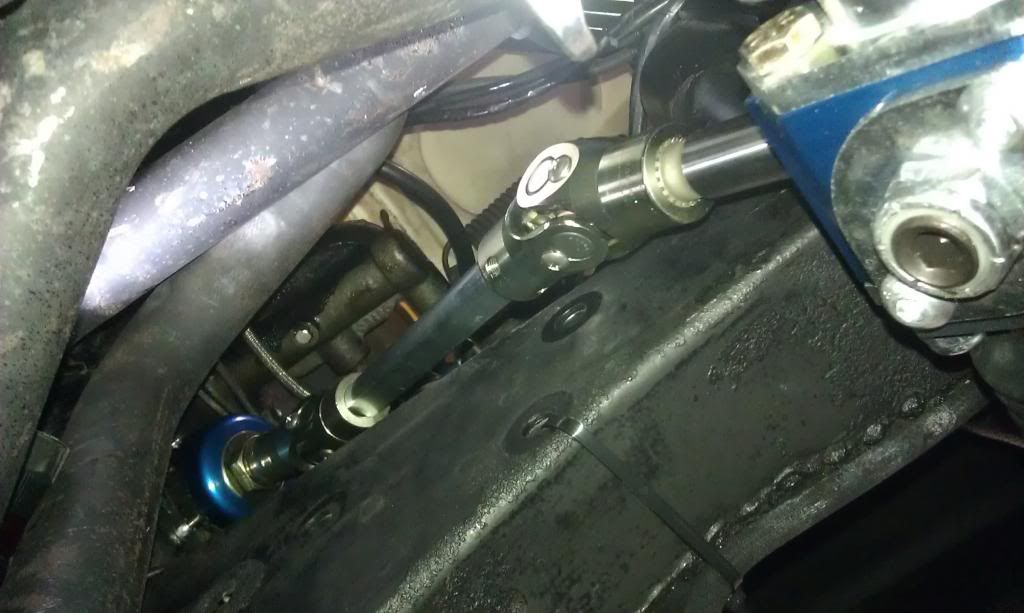
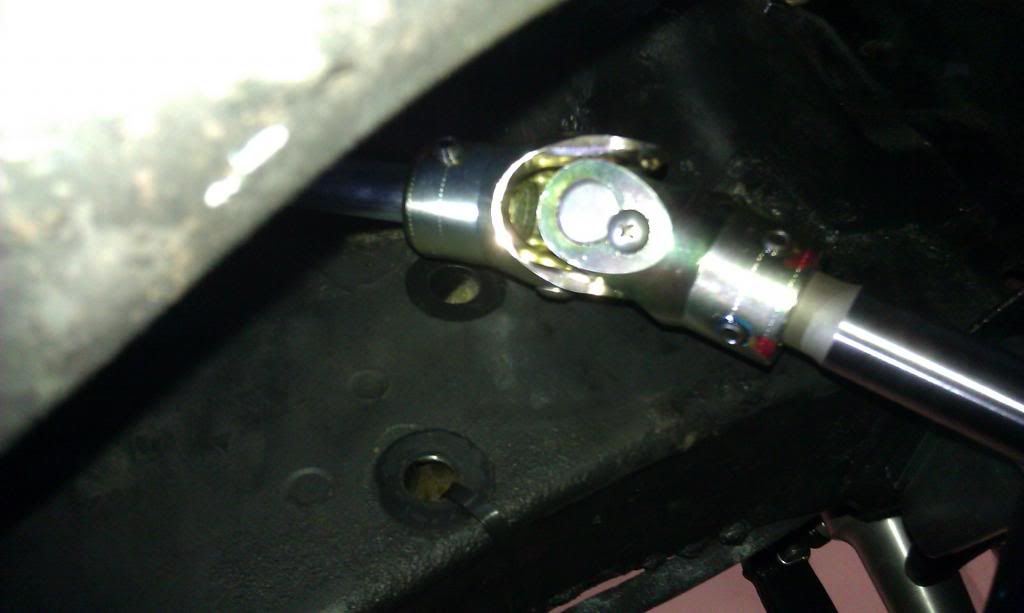
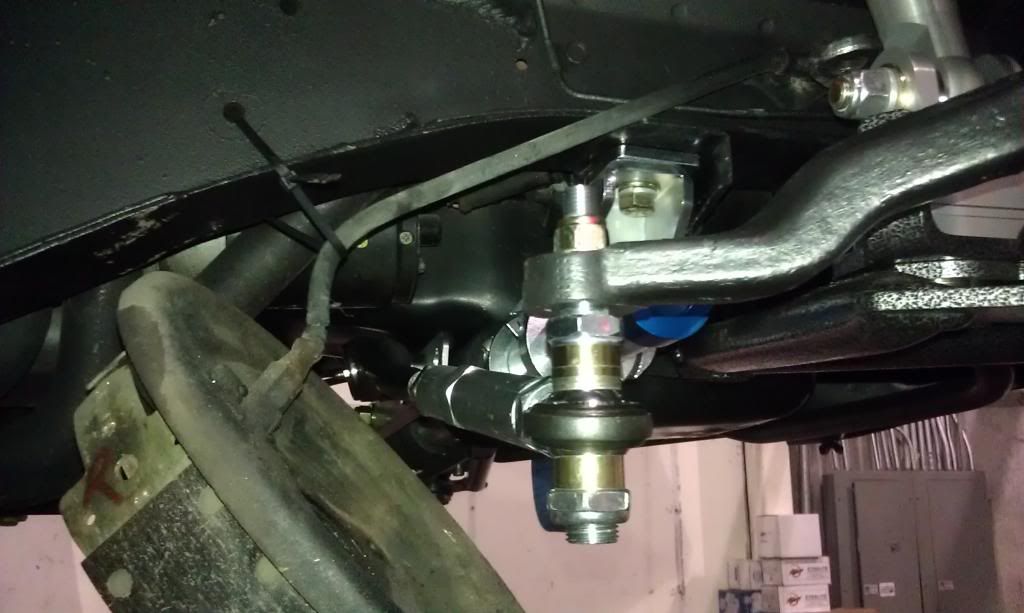
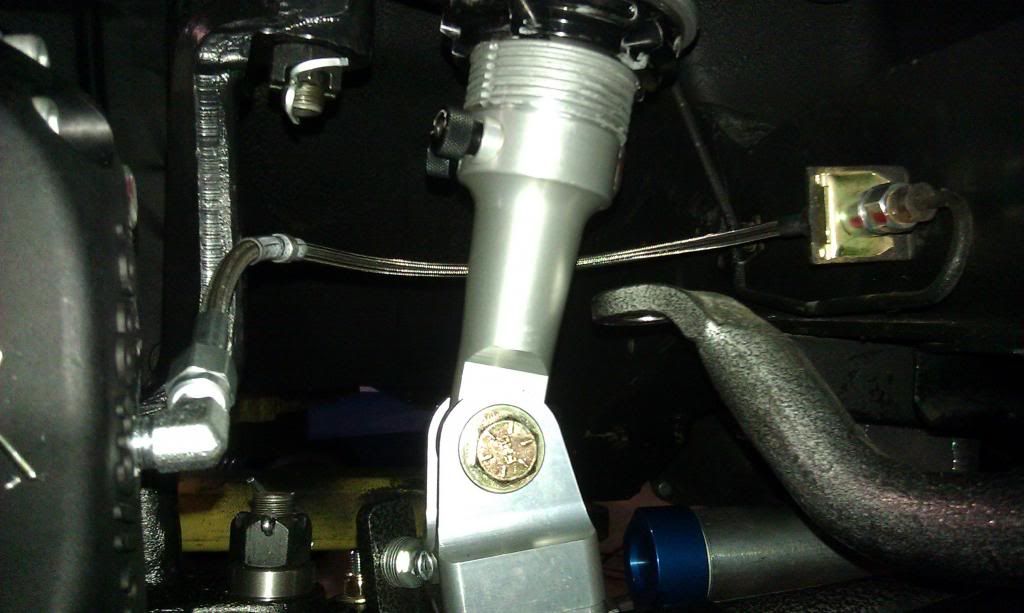
...Steering lower shaft and u-joints. First I taped the steering wheel to the column in the exact center position (would have been better if I had a nifty centering stand like the alignment shops do). Then I centered the rack & pinion as well. Next I installed the u-joints and cut the provided DD shaft to length. Finally, I used loc-tite on the allen set screws and tightened everything up.

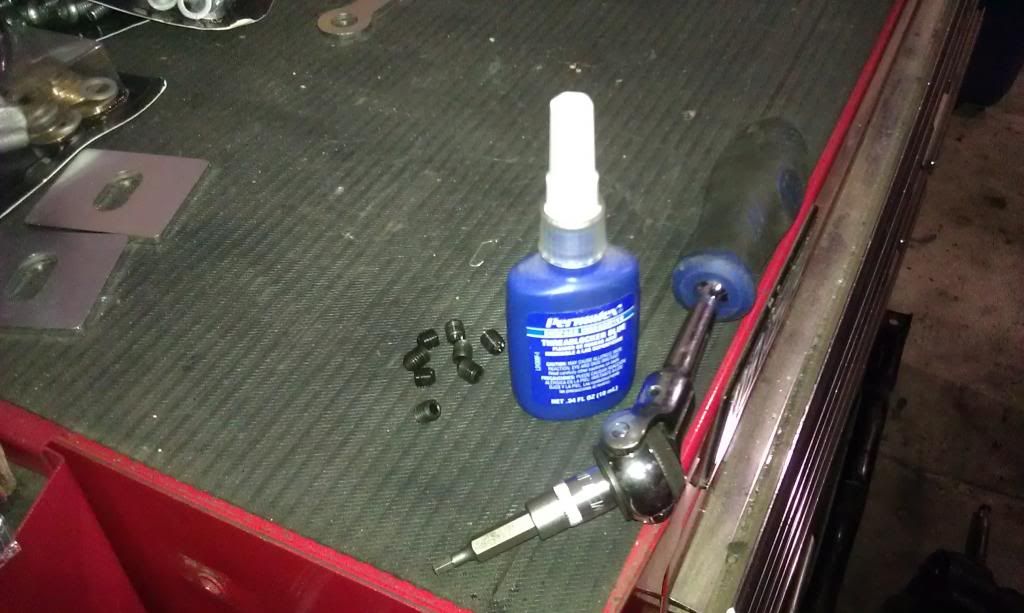
Now it's time to install the bump-steer tie rod kit. First thing I had to determine is which holes I was to use for the inner tie-rods. The rack instructions say one thing and the bump-steer tie rod kit instructions say another. I determined that my car uses the inner ones. As far as the adjuster sleeves anti-seize is your friend so use it generously. At some point you will follow the directions in further detail to measure and eliminate bump-steer by moving around the bushings that make up the custom outer tie rod ends. For the initial setting I put the single largest bushing on the bottom and the combination of smaller ones on top, and made them equal on each side. The inner tie rods are a little tricky since there is nothing to keep them from spinning internally. In my case I peeled back the boots and grabbed the tie-rods from the very back-side. The other thing that is kindof tricky and/or easy to overlook is the cotter pins can rub the rack boots if you don't keep their profile low enough.
[ December 09, 2012, 05:13 AM: Message edited by: bwkelley76 ]
--------------------
Dont sweat the petty things and dont pet the sweaty things. "RIP George Carlin"
Posts: 886 | From: Sacramento | Registered: Dec 2008
| :
|
|
bwkelley76
¯
Member # 8792
|
posted
So that pretty much wraps up the suspension and steering. Make sure to lube everything, set the coil-overs to your specs, and get a proper alignment that makes sense for your combo.
Next up is the Wilwood front disc brakes.
TO BE CONTINUED...
[ December 09, 2012, 05:11 AM: Message edited by: bwkelley76 ]
--------------------
Dont sweat the petty things and dont pet the sweaty things. "RIP George Carlin"
Posts: 886 | From: Sacramento | Registered: Dec 2008
| :
|
|
bwkelley76
¯
Member # 8792
|
posted
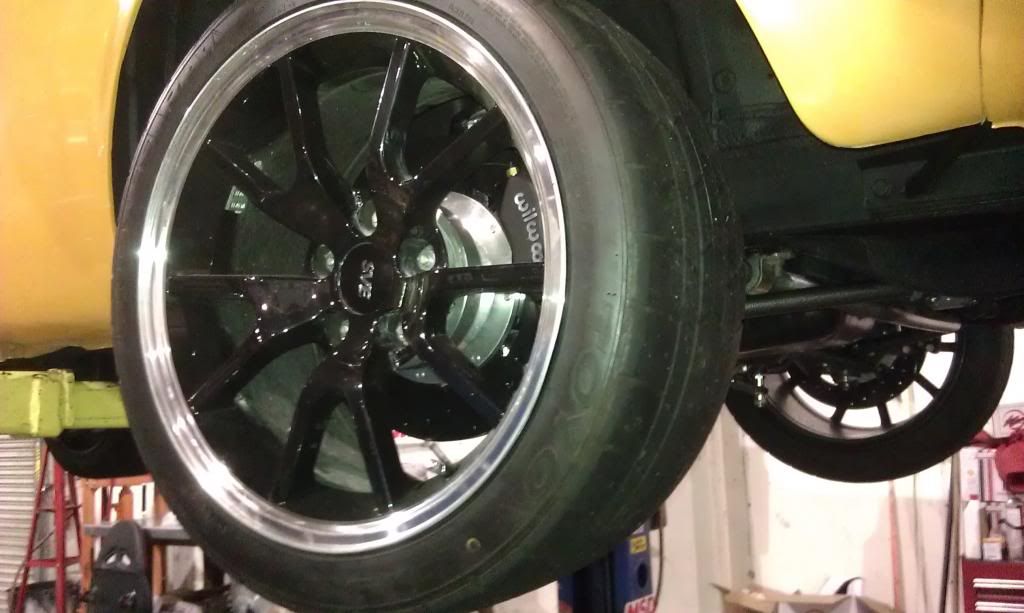
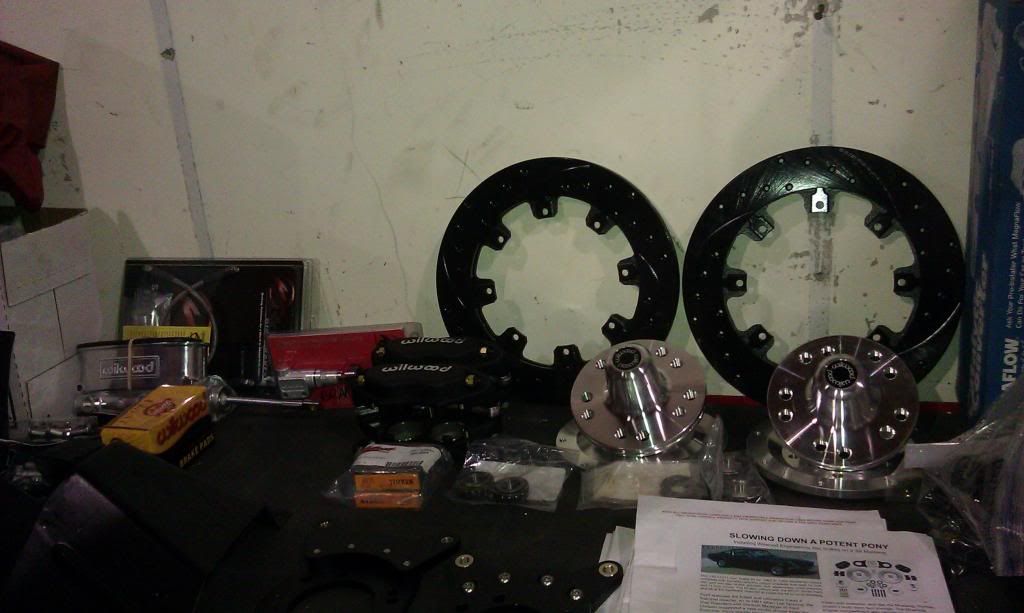
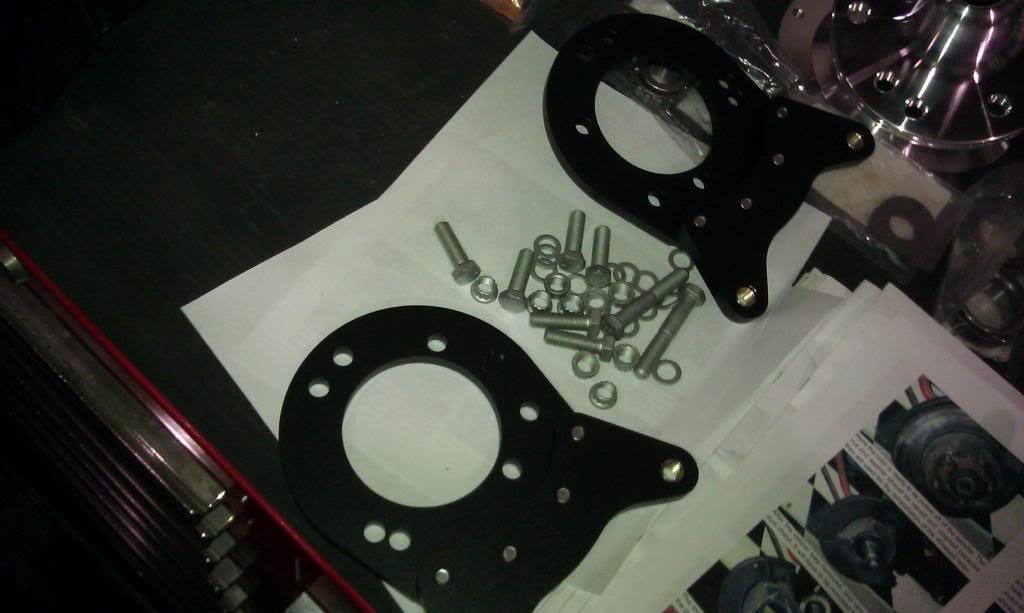
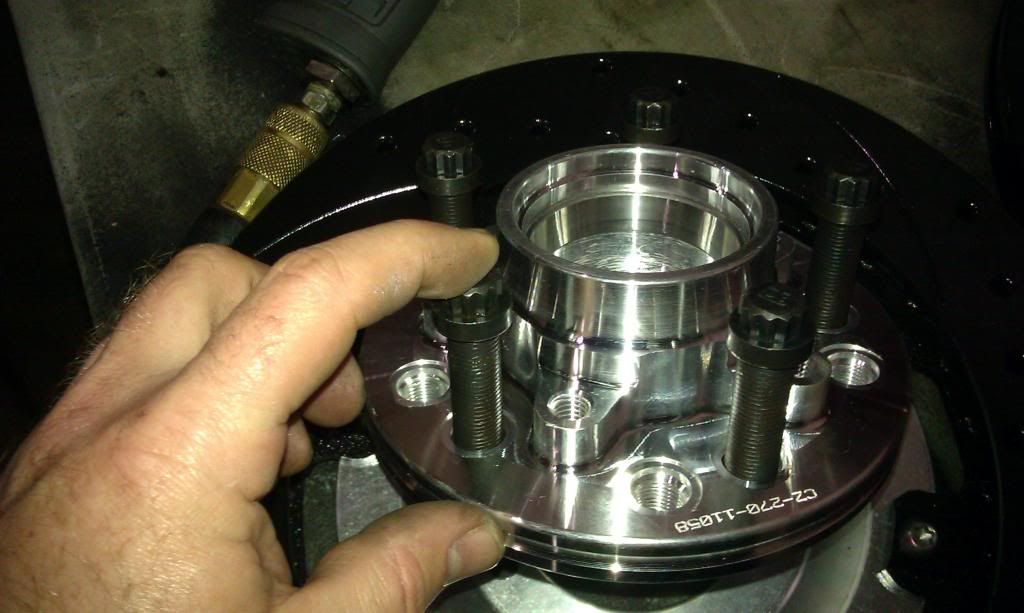
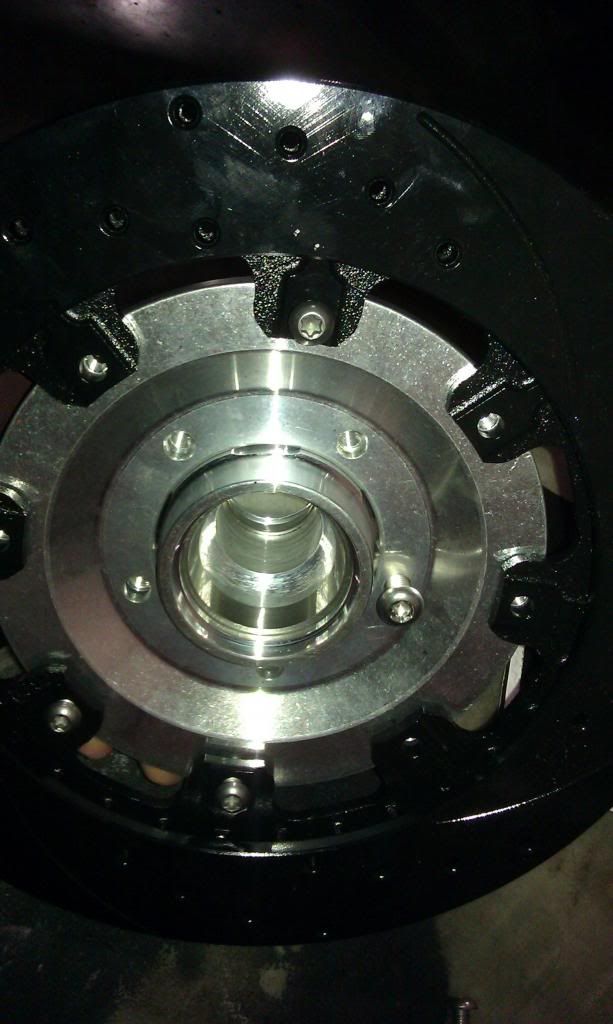
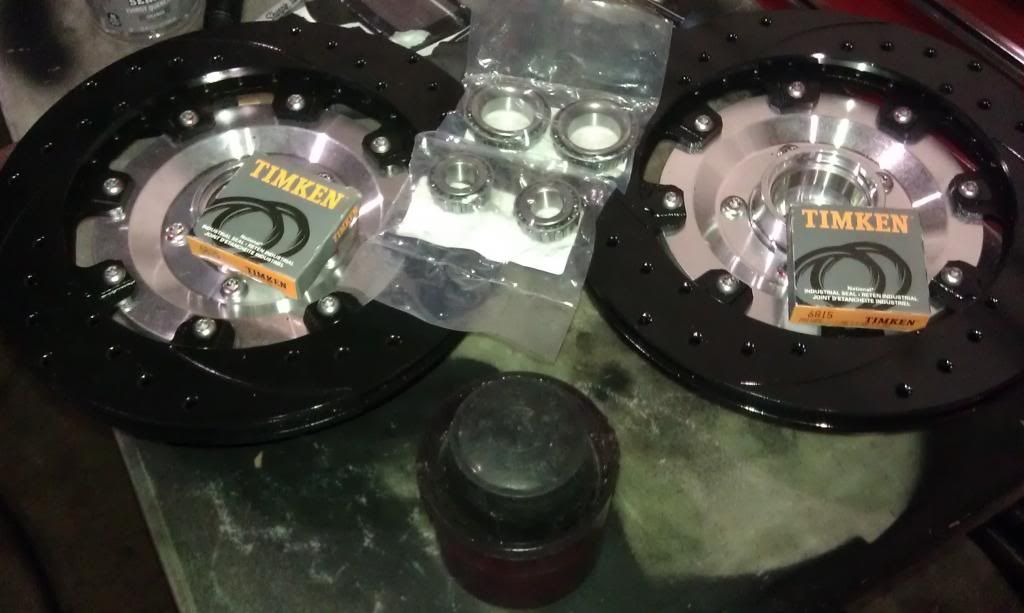
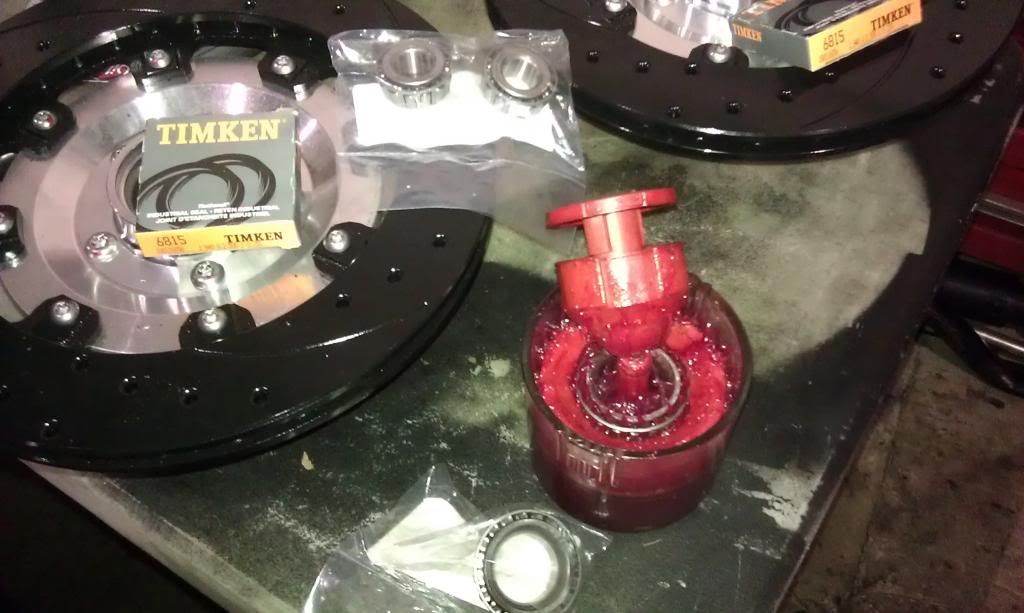
Well guys, last but not least here is the Wilwood brake install. SUPER SIMPLE AND EASY TO DO! The only thing that one needs to know is that although the parts "look" the same, the 1968 kits put the caliper on the back side when the 65-67 kit is on the front. I got my kit with a group of about 5 kits for other cars in the shop so my instructions were nowhere to be found. I downloaded a set of instructions online and they were specific for 1968. So funny enough I started out putting mine on wrong...lol. I figured out soon enough that my brackets were on backward. Oops!
Here's the RIGHT WAY to put it all together...
[ December 10, 2012, 12:21 AM: Message edited by: bwkelley76 ]
--------------------
Dont sweat the petty things and dont pet the sweaty things. "RIP George Carlin"
Posts: 886 | From: Sacramento | Registered: Dec 2008
| :
|
|
bwkelley76
¯
Member # 8792
|
posted
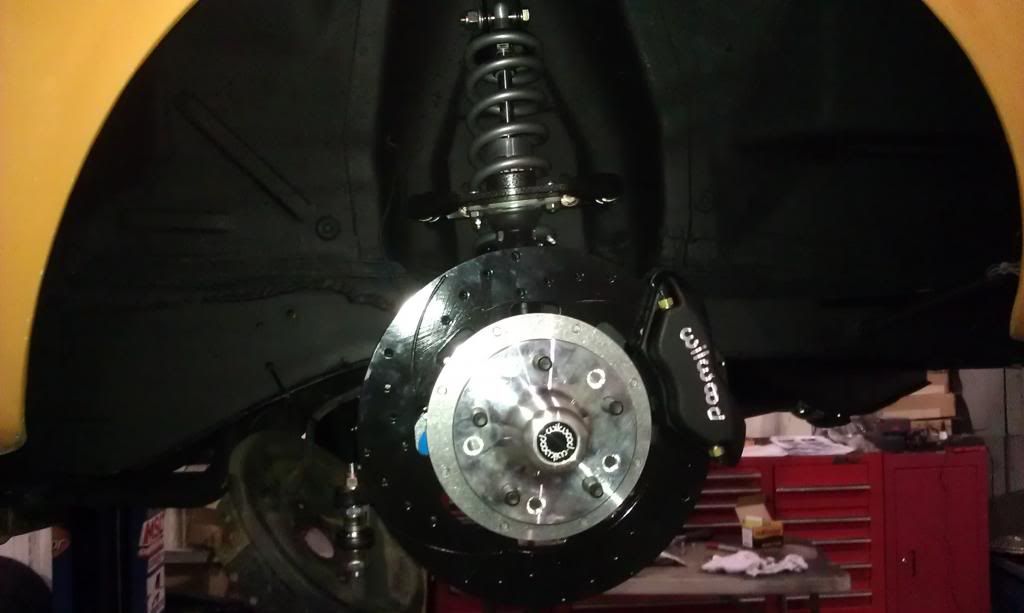
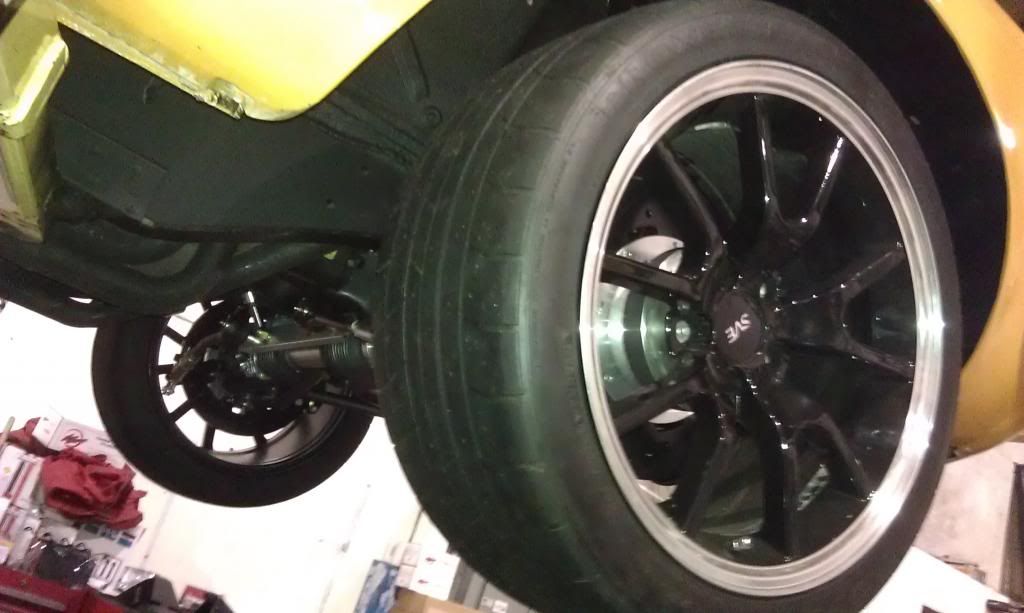
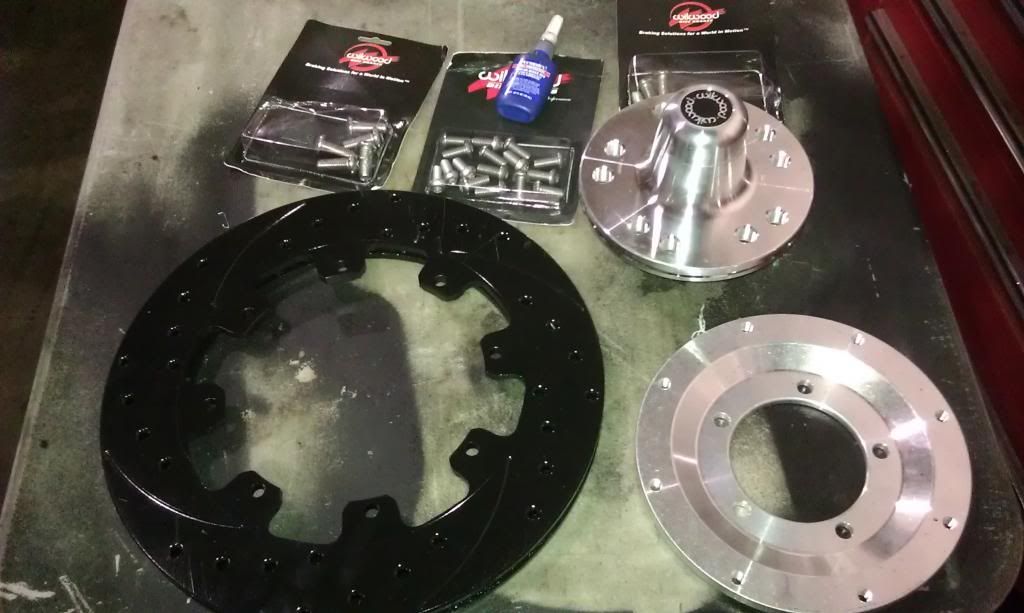
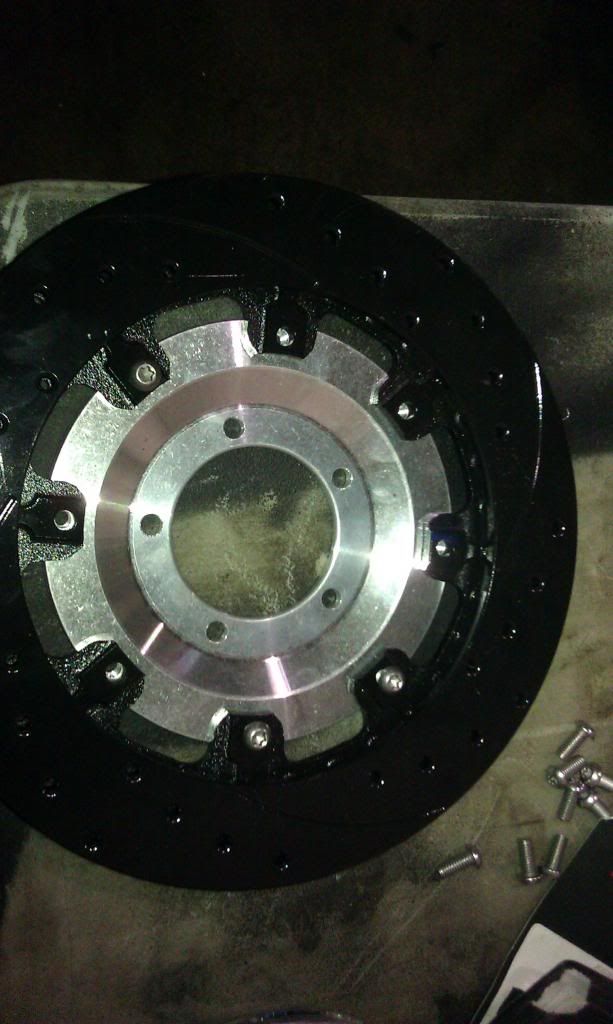
NOTE the black rotors. This is a coating Wilwood puts on that keeps them from rusting and allows for correct seat-in on the brakes. It's some kindof mystery goo that actually works well for both purposes. Some people's first reaction is to take this coating off with abrasives or chemically. I've experimented with leaving it on or taking it off on various vehicles, spent time on the phone with their tech department about this a few times, and have learned the benefits of leaving it on. One or more of the cars that we removed the coating on ended up needing pads prematurely on the front due to noise/sqeaking. ...may or may not be the reason but on this car I left it on the rear and now the front and I followed Wilwoods break-in procedure to the letter. I've had great results just leaving it on. The brakes make some HORRIBLE noises when coming to a stop during the break-in process and if one can suck it up for a few minutes it goes right away and once the brakes cool they are good to go!

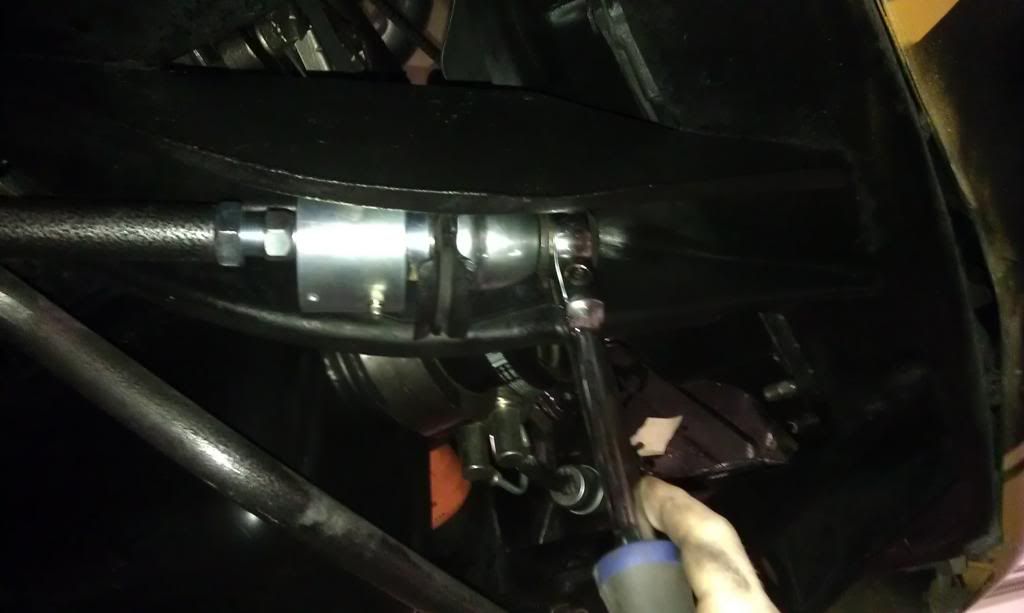
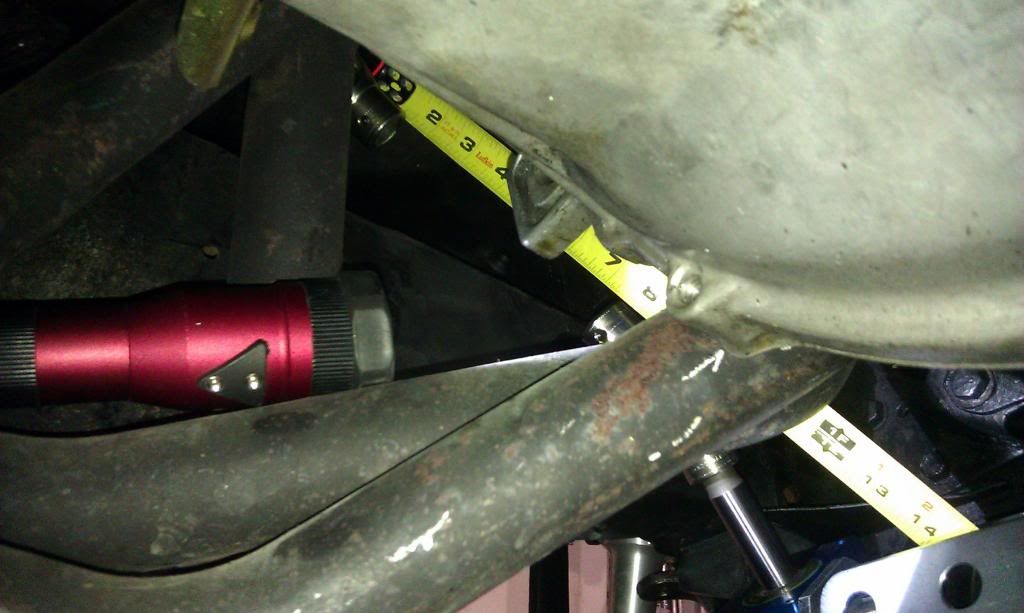
The brake lines were easy enough with the right hardware and adapters. The 14" Wilwood line kit I bought was too short but had the right adapters for -3 AN stainless braided brake hoses. I bought a set of 18" ones from the local parts place and they were perfect.
--------------------------------------
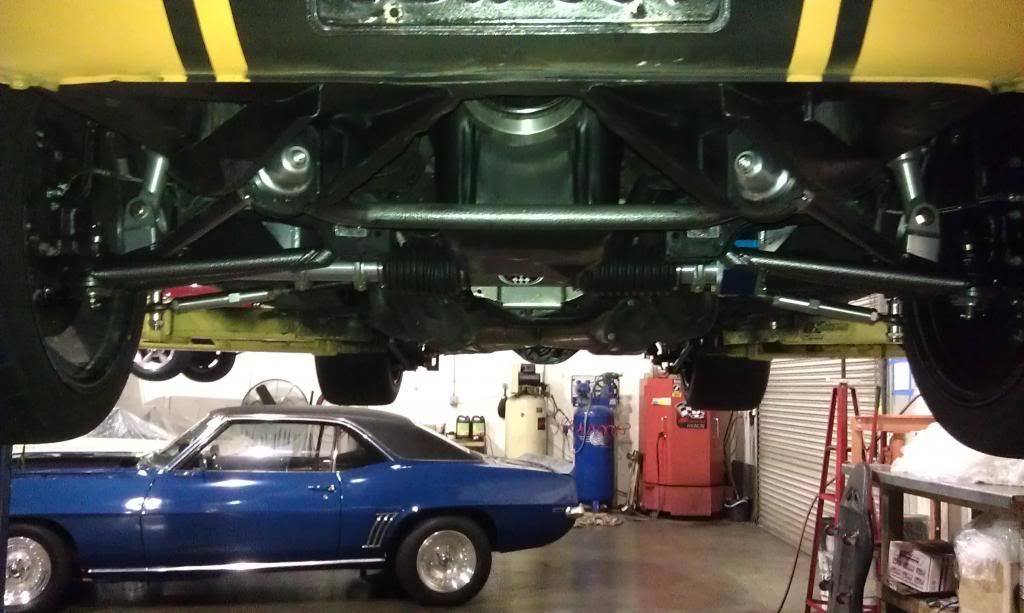
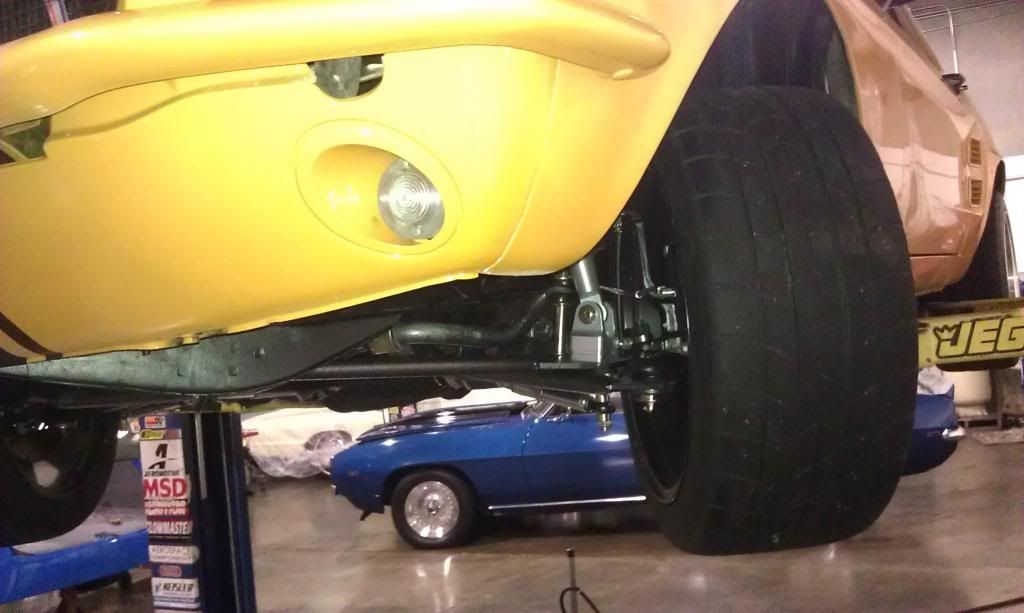
FINAL PICTURES!!!!.....
THE INSTALL IS DONE FOLKS! I hope everyone enjoyed this, it was a lot of work doing this solo and taking pics along the way but I figured many people can benefit from my efforts. Thanks for the encouragement and comments along the way! More pics and topics as the car progresses further and then some more fun stuff when I get her on the track. As the car stands now it handles, steers and stops phenomenally. I am still dialing in the car and I can't wait to get her out on the track and really give her a workout ... weather, time, and funds permitting. ![[Smile]](smile.gif)

[ December 10, 2012, 12:24 AM: Message edited by: bwkelley76 ]
--------------------
Dont sweat the petty things and dont pet the sweaty things. "RIP George Carlin"
Posts: 886 | From: Sacramento | Registered: Dec 2008
| :
|
|
|
|
COBRA50
¯
Member # 11614
|
posted
Beautiful beast
--------------------
94 SVT BLOWN LIGHTNING
Posts: 166 | From: RWC | Registered: Jan 2012
| :
|
|
bwkelley76
¯
Member # 8792
|
posted
quote:
Originally posted by COBRA50:
Beautiful beast
Thanks!
Posts: 886 | From: Sacramento | Registered: Dec 2008
| :
|
|
Hele On
¯
Member # 4107
|
posted
Excellent job and great write up!
Posts: 224 | From: Bay Area | Registered: Feb 2004
| :
|
|
bwkelley76
¯
Member # 8792
|
posted
quote:
Originally posted by Hele On:
Excellent job and great write up!
Thank you!
--------------------
Dont sweat the petty things and dont pet the sweaty things. "RIP George Carlin"
Posts: 886 | From: Sacramento | Registered: Dec 2008
| :
|
|


 Email this post to someone!
 Printer friendly view of this Ford topic