This is topic The Coupe! in forum General Talk at Northern California Ford Owners .
To visit this topic, use this URL:
https://californiafords.com/cgi-bin/ultimatebb.cgi?ubb=get_topic;f=1;t=054007
Posted by bwkelley76 (Member # 8792) on
:
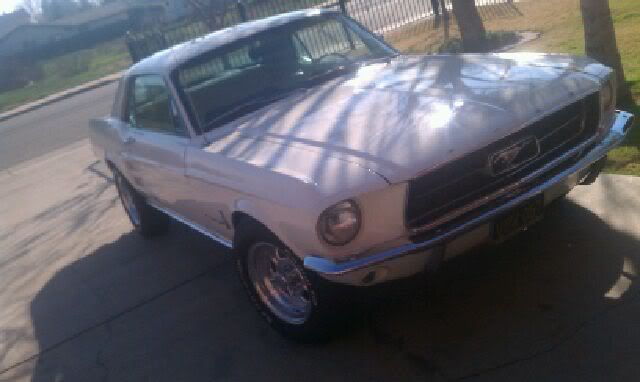
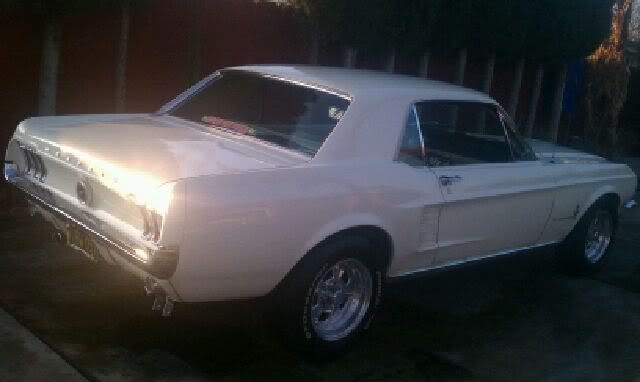
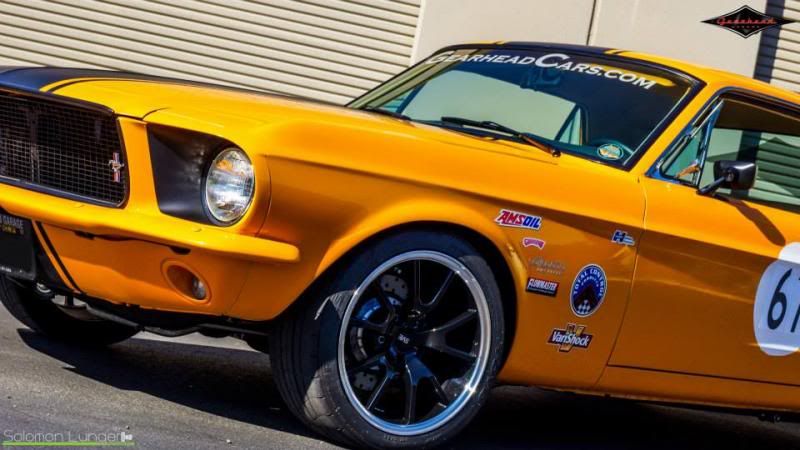
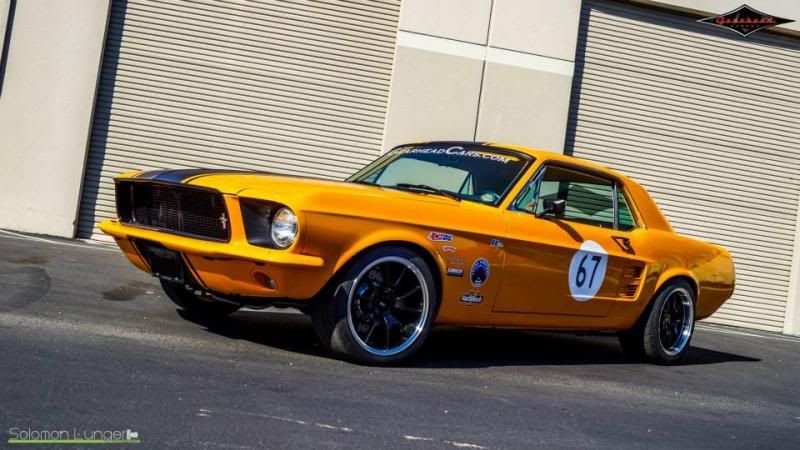
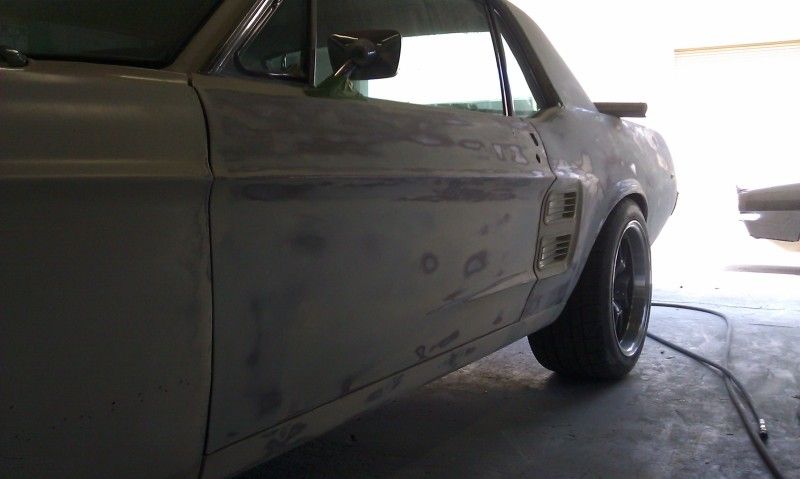
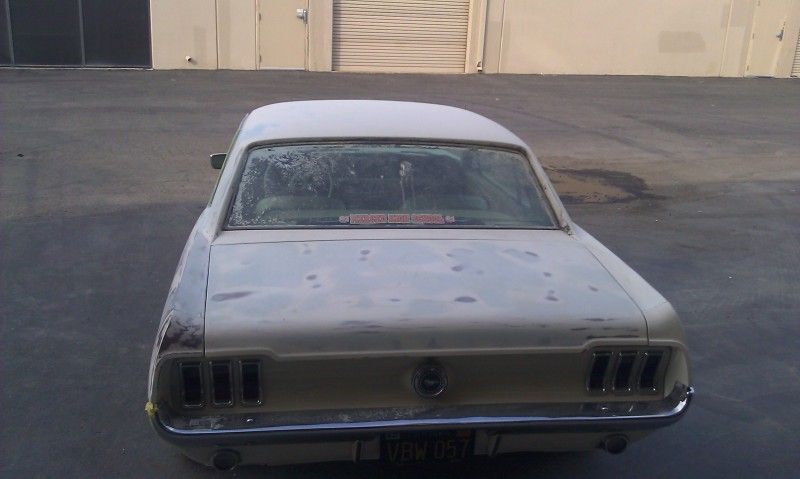
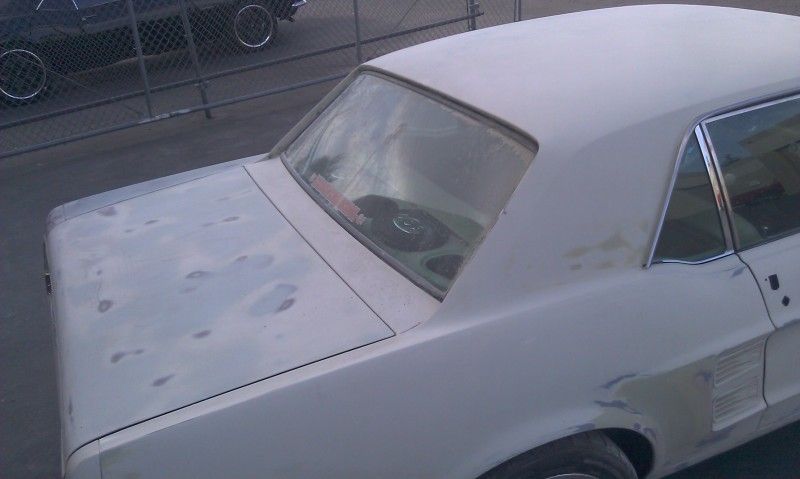
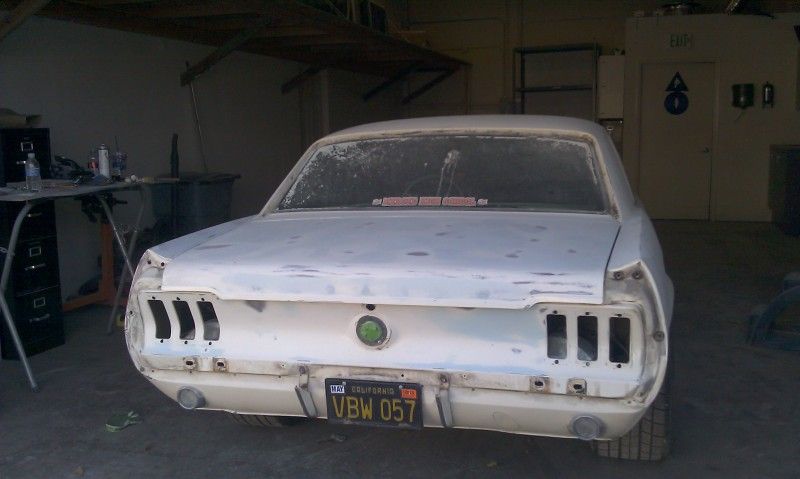
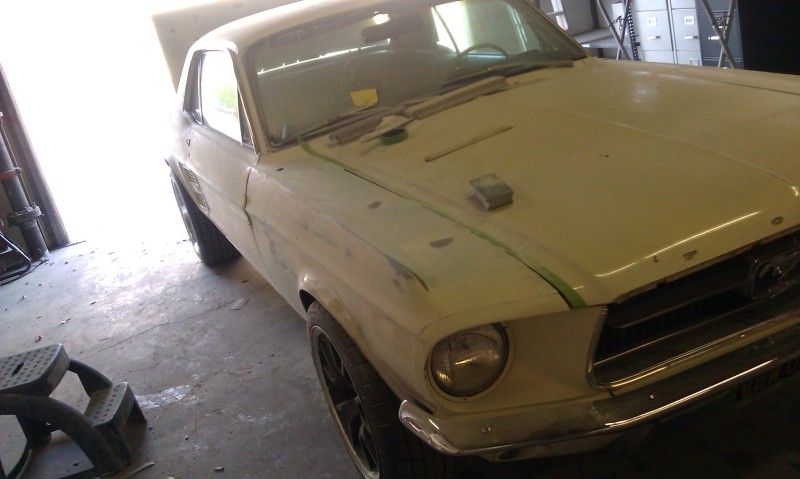
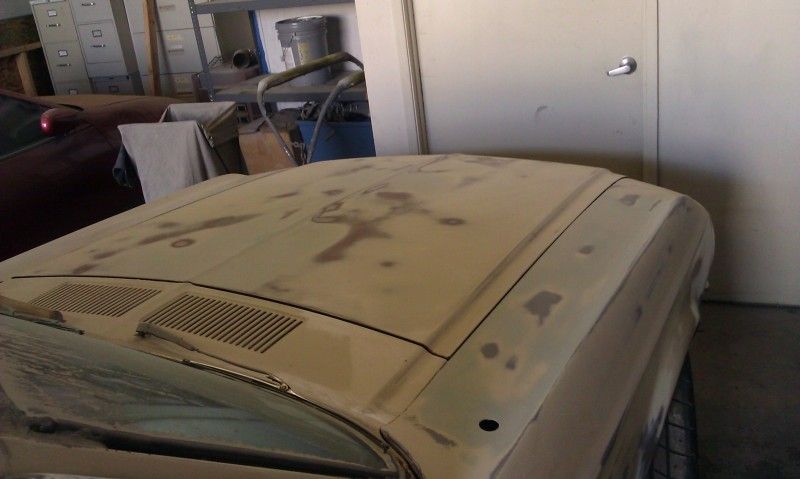
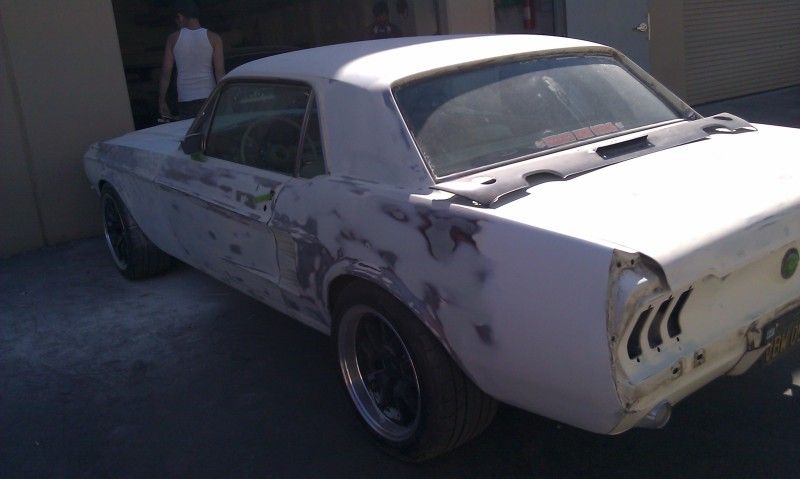
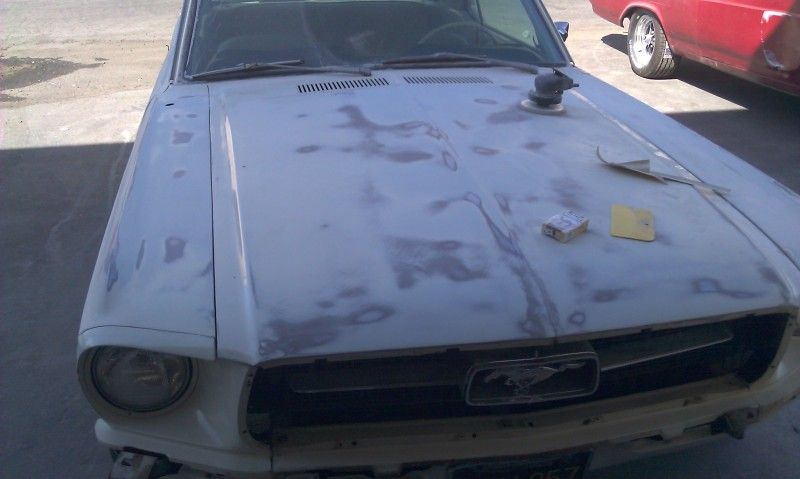
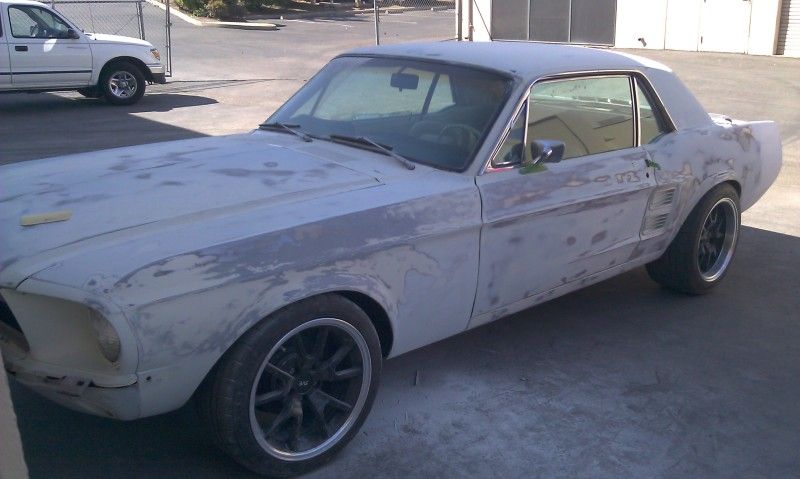
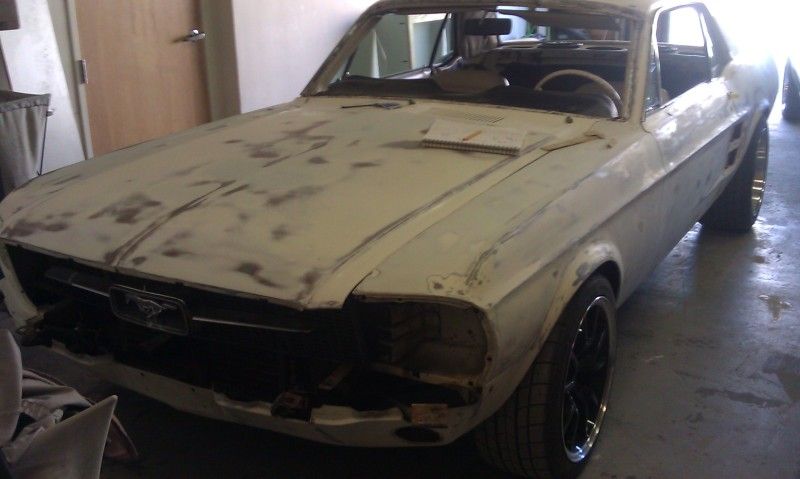
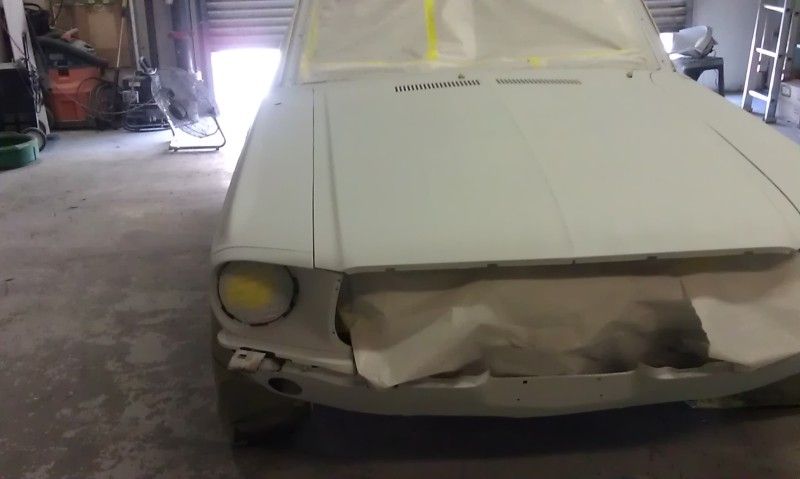
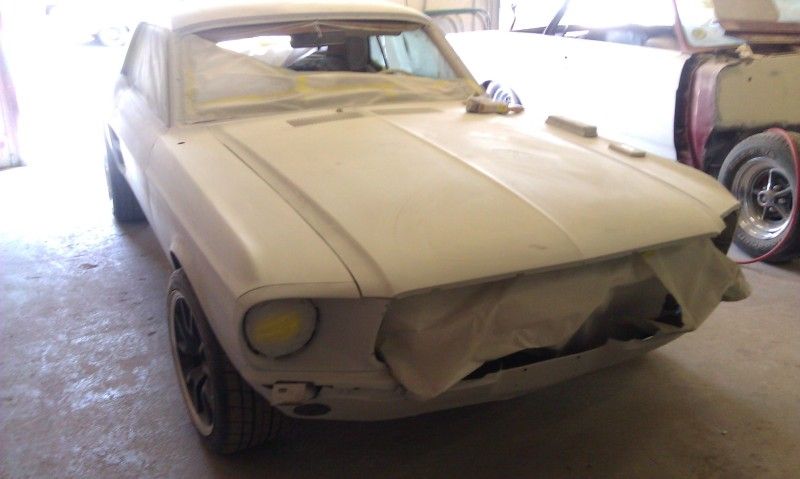
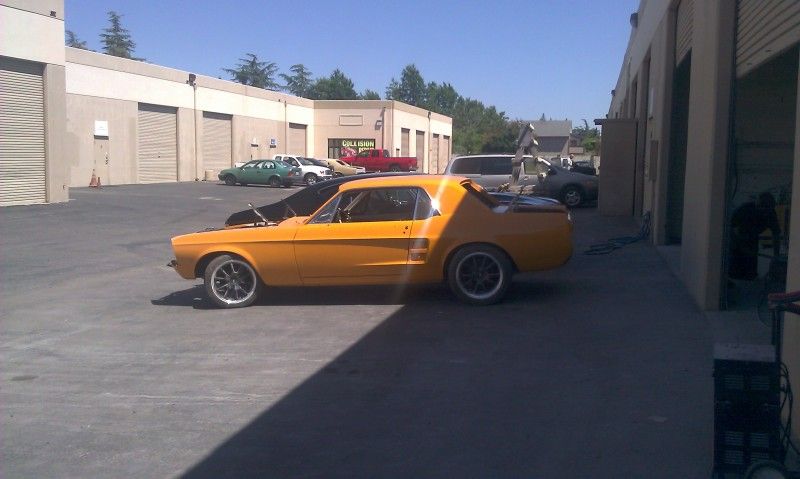
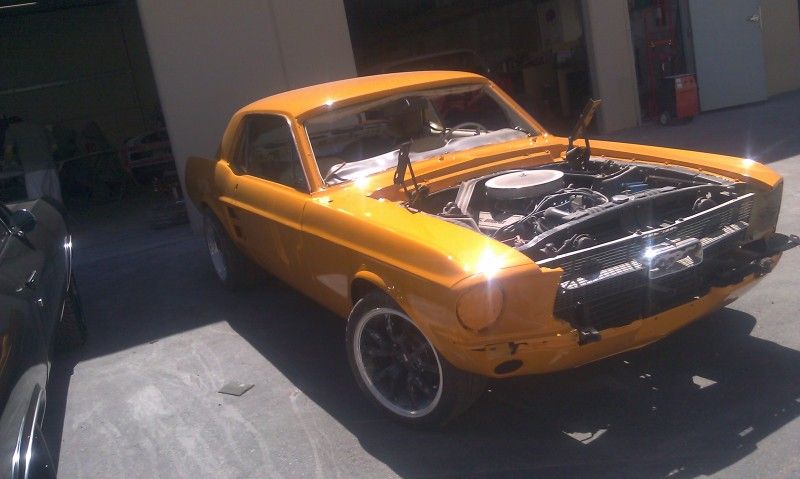
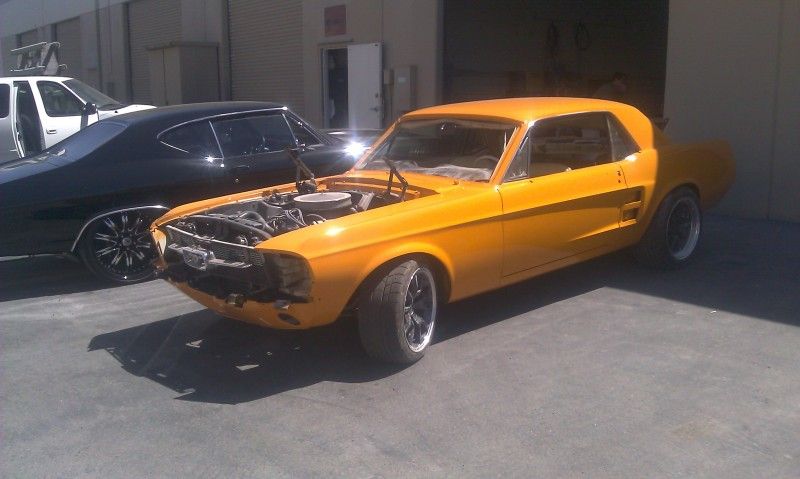
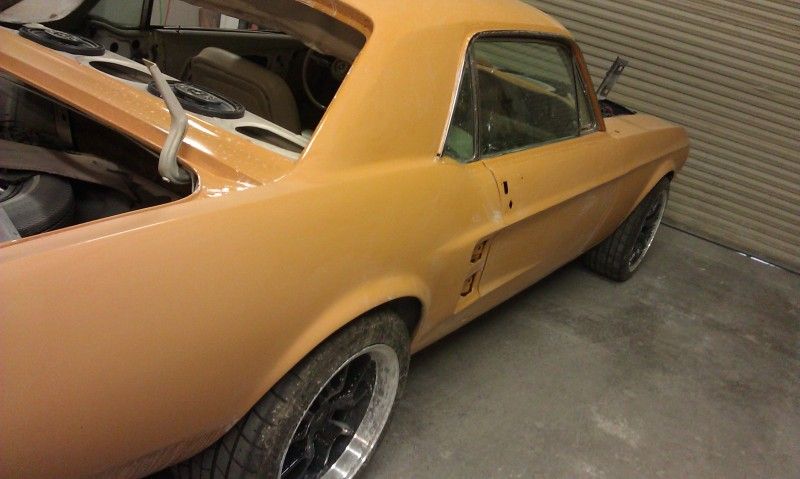
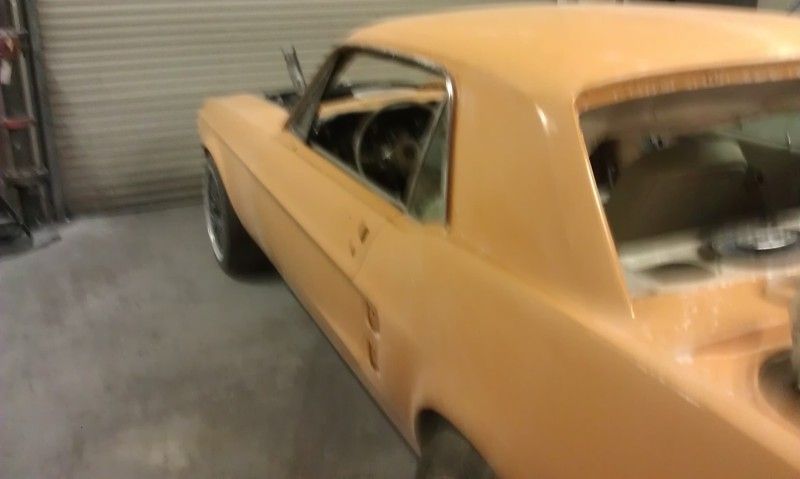
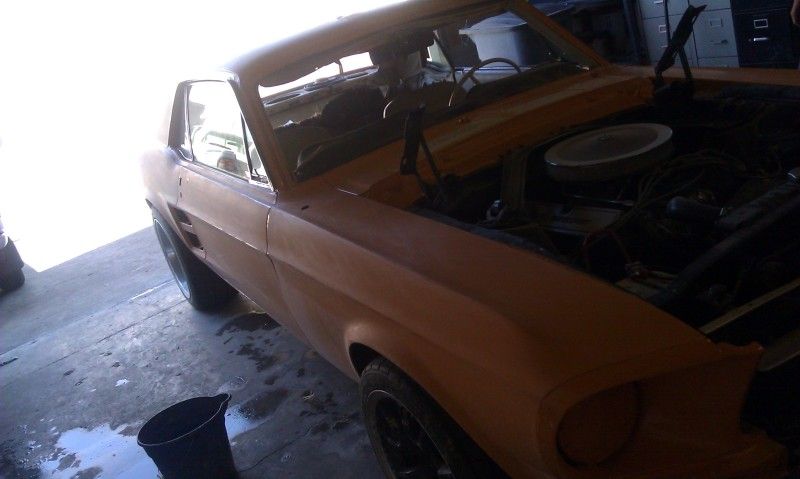
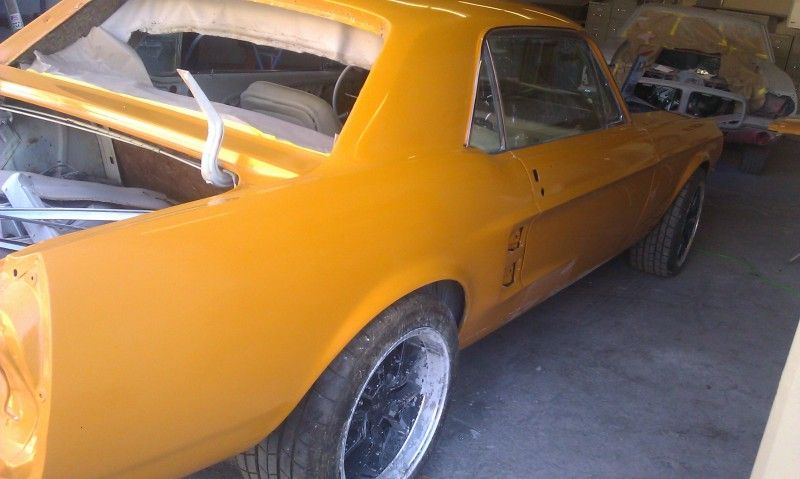
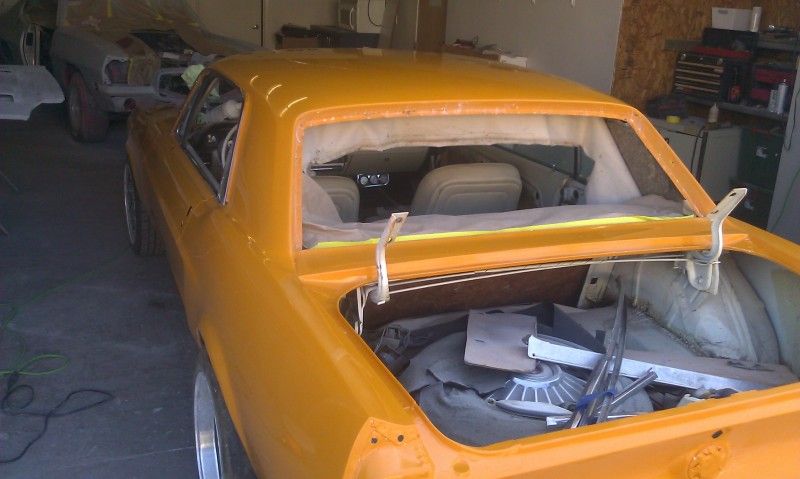
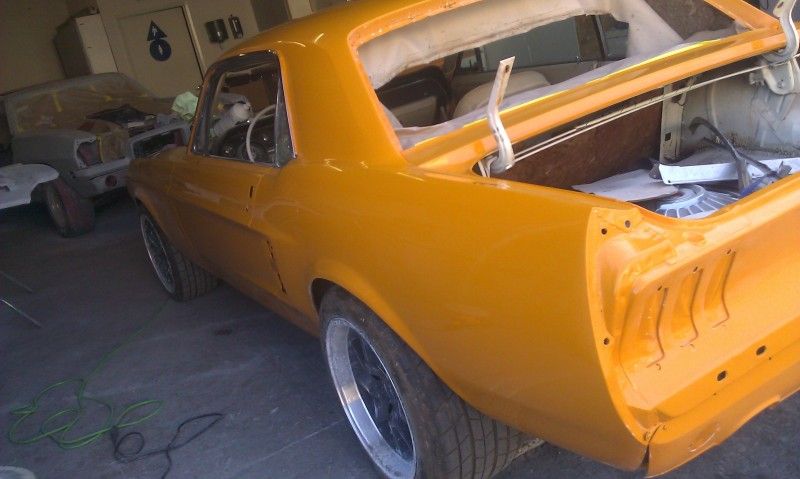
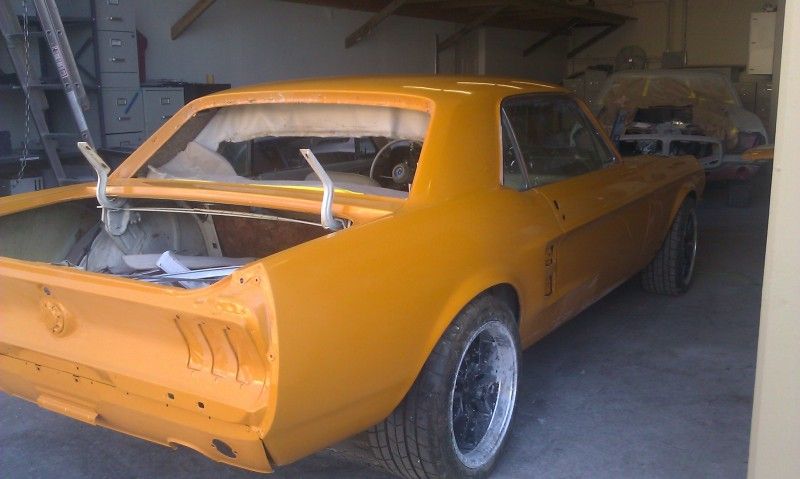
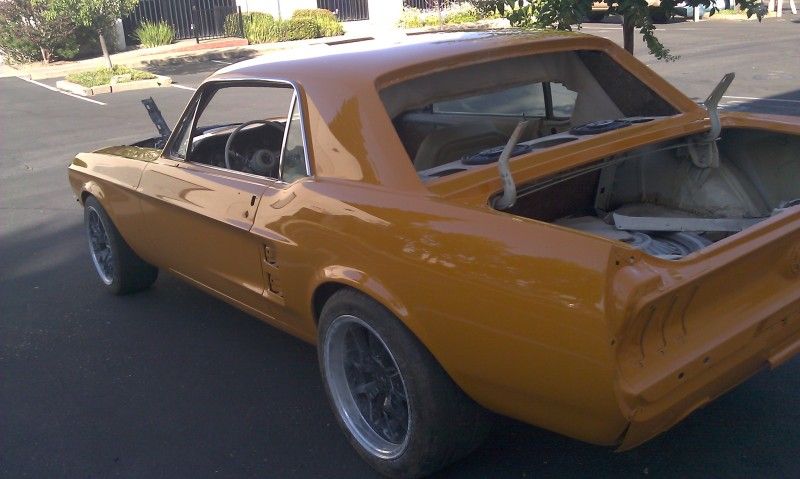
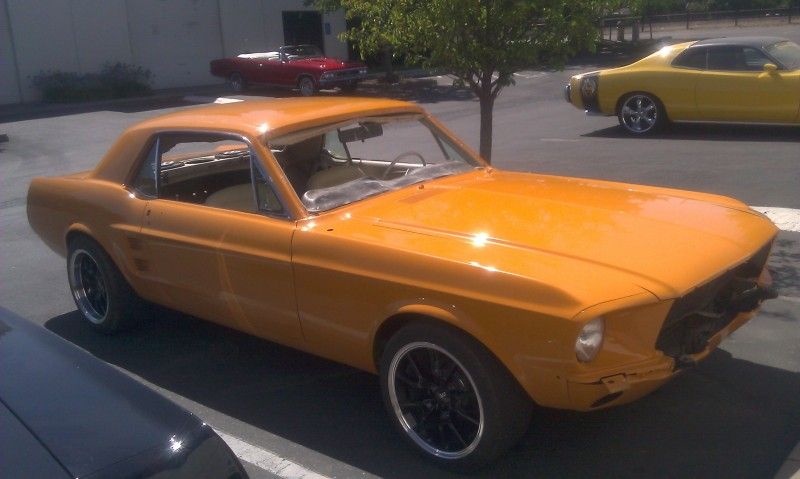
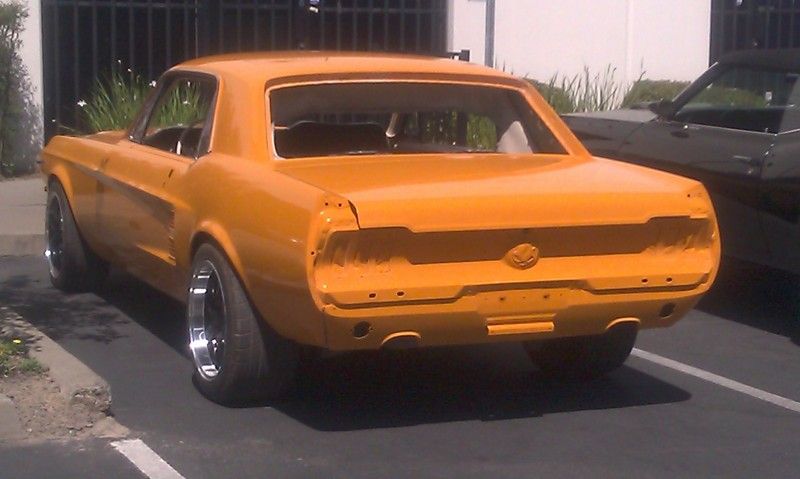
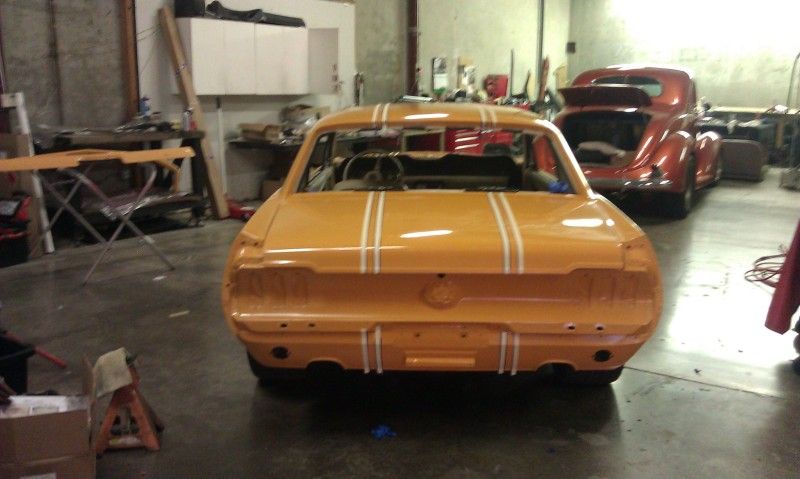
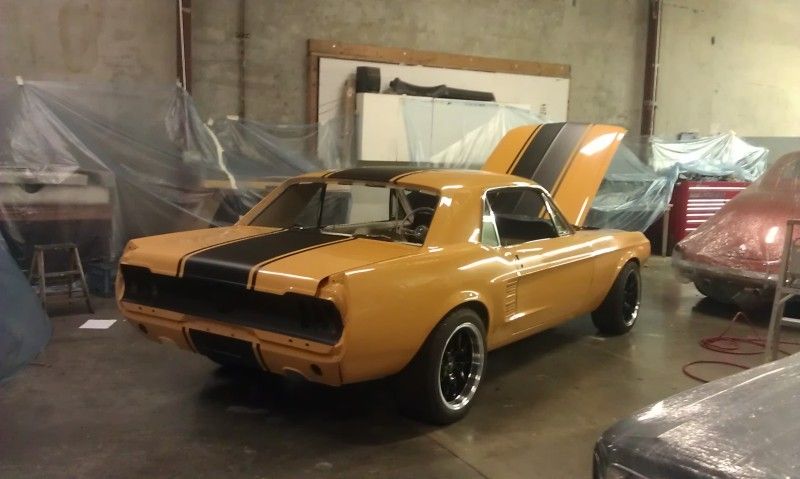
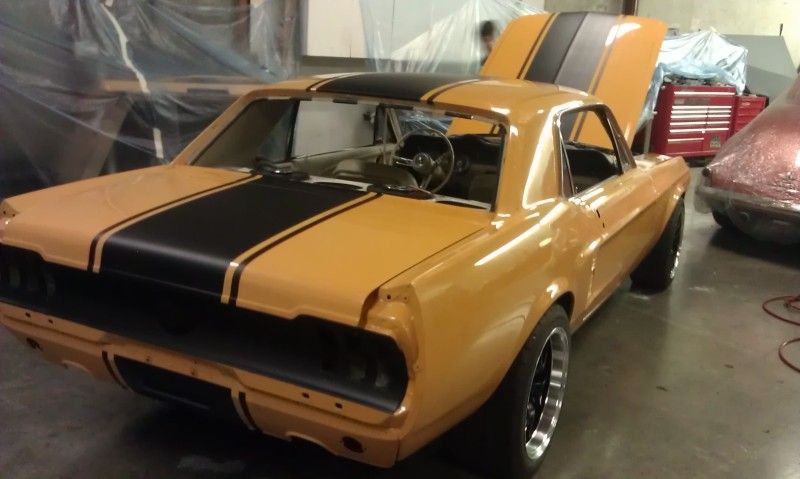
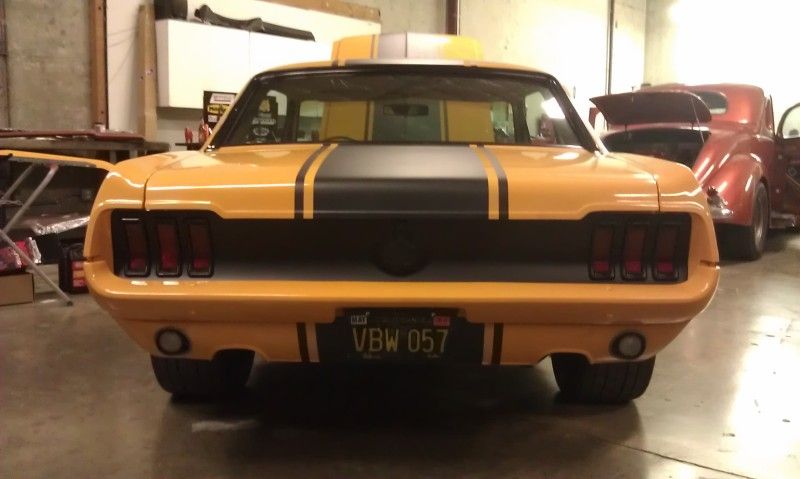
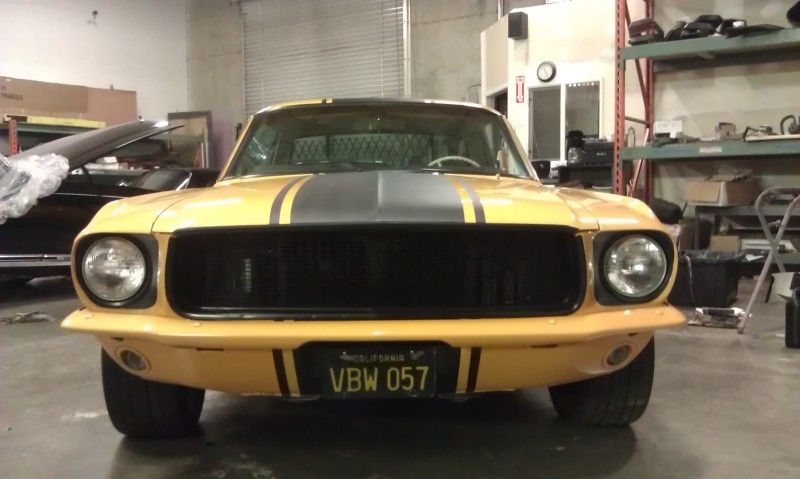
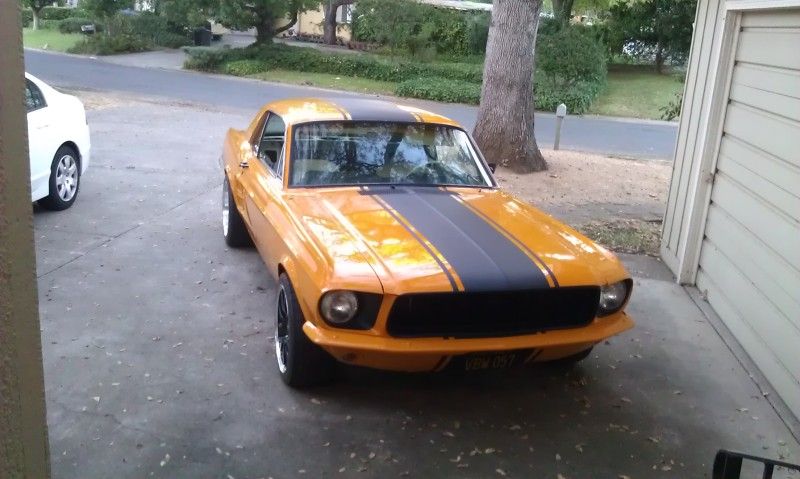
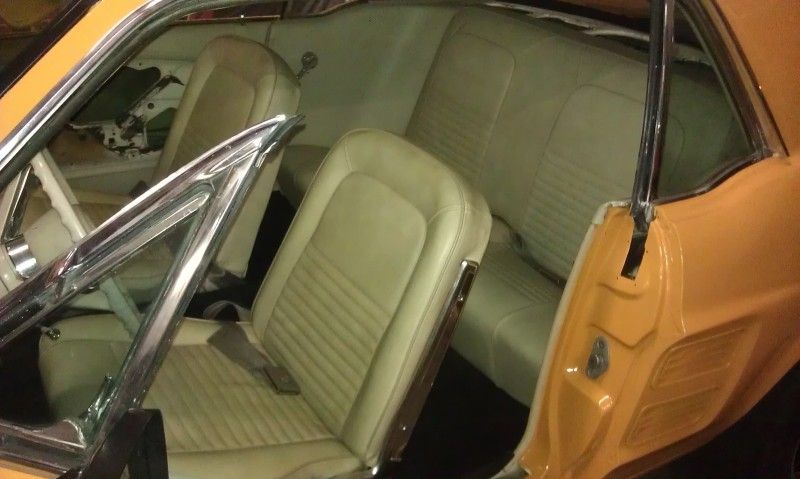
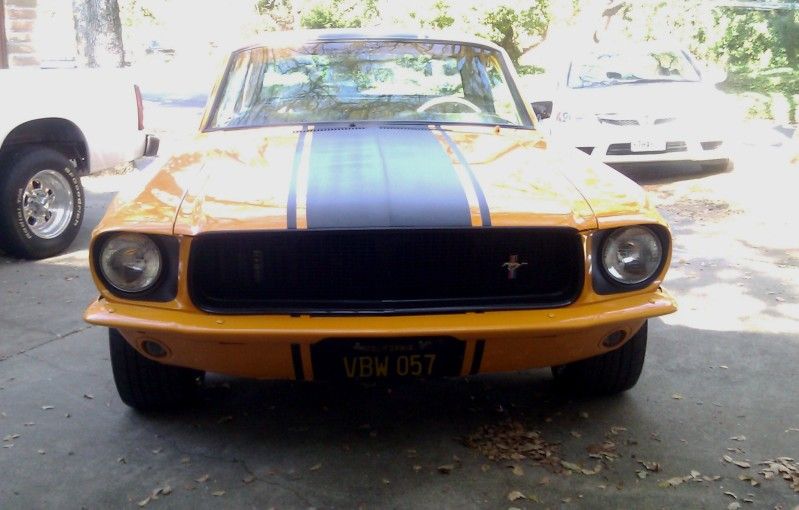
As some of you know since I sold the Shelby to Iceman302 (who is doing a GREAT JOB finishing her up by the way) I have a new little toy. I bought a nice little '67 coupe to romp around in and have some fun with.
...Check out the entire thread for the transformation
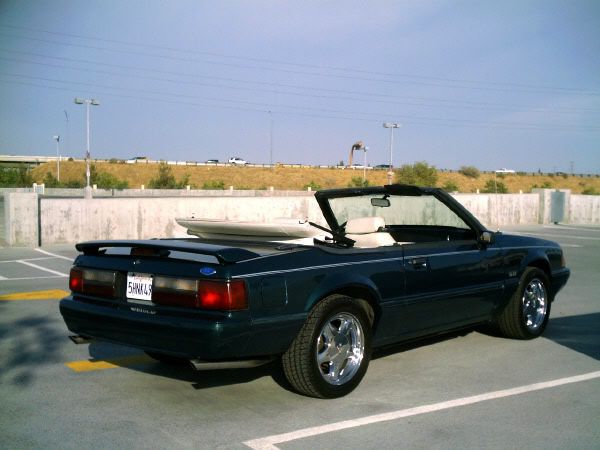
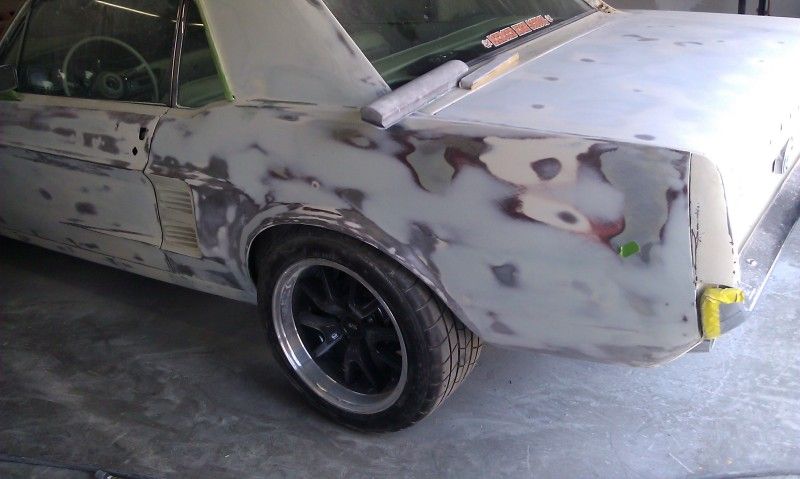
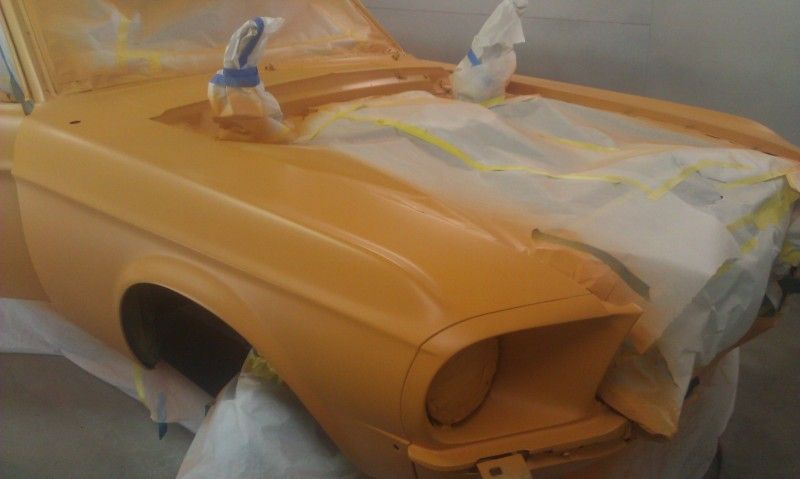
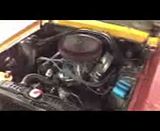
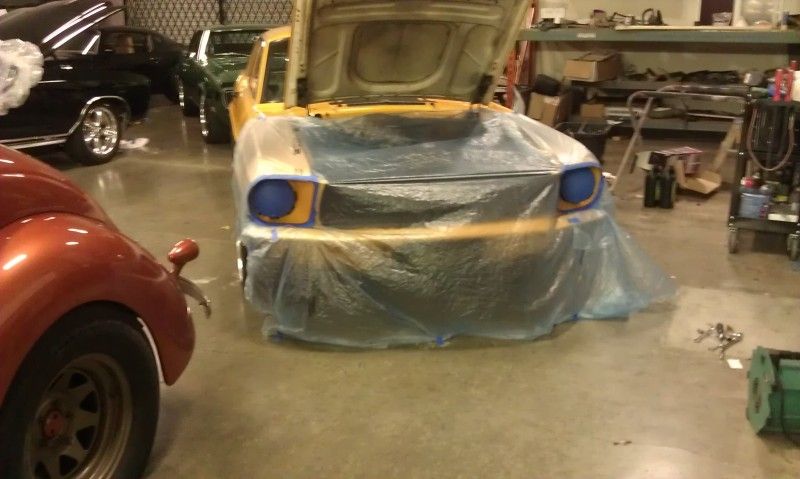
BEFORE
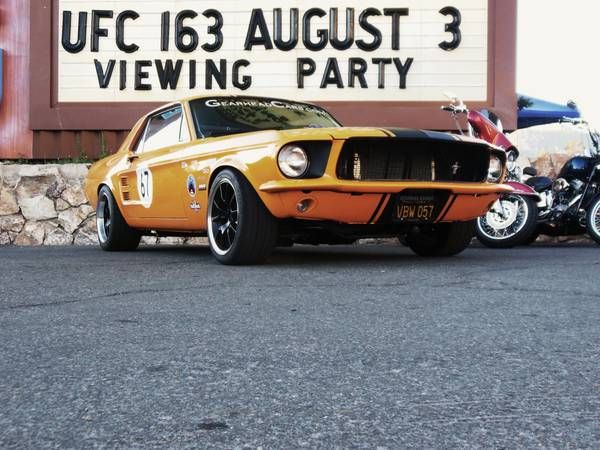
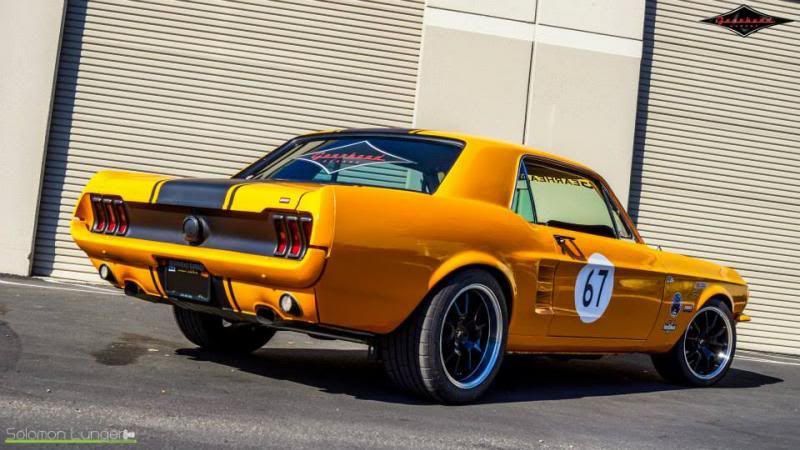
AFTER

[ 2013-11-02, 05:14 PM: Message edited by: bwkelley76 ]
Posted by Luke87GT (Member # 21) on
:
Love it!
How much are these going for these days?
Posted by bwkelley76 (Member # 8792) on
:
quote:
Originally posted by Luke87GT:
Love it!
How much are these going for these days?
Restored coupes are going for 10-15k but that doesn't matter to me. I'm building this one to suit my needs.
Posted by nitrous_bob (Member # 77) on
:
quote:
Originally posted by Luke87GT:
Love it!
How much are these going for these days?
i dont know but i want my money back for those FUCKED up chrome ponies you sold me
Posted by SIC9250 (Member # 8216) on
:
quote:
Originally posted by nitrous_bob:
quote:
Originally posted by Luke87GT:
Love it!
How much are these going for these days?
i dont know but i want my money back for those FUCKED up chrome ponies you sold me
![[Eek!]](eek.gif)
Posted by Luke87GT (Member # 21) on
:
quote:
Originally posted by nitrous_bob:
quote:
Originally posted by Luke87GT:
Love it!
How much are these going for these days?
i dont know but i want my money back for those FUCKED up chrome ponies you sold me
Who do you think you are talking to? I have not sold a set of Ponys in my entire life.
Get your facts right before calling someone out like this.
Posted by Venomousnotch (Member # 8695) on
:
quote:
Originally posted by SIC9250:
quote:
Originally posted by nitrous_bob:
quote:
Originally posted by Luke87GT:
Love it!
How much are these going for these days?
i dont know but i want my money back for those FUCKED up chrome ponies you sold me
+1
Posted by nitrous_bob (Member # 77) on
:
wow relax ....it was a joke and i was talking about some rims from way back in 2004
and they were nice....yeah wrong guy i guess
Posted by Luke87GT (Member # 21) on
:
quote:
Originally posted by nitrous_bob:
wow relax ....it was a joke and i was talking about some rims from way back in 2004
and they were nice....yeah wrong guy i guess
As you can see nobody caught it was a joke and I can't see what is funny about what you said above.
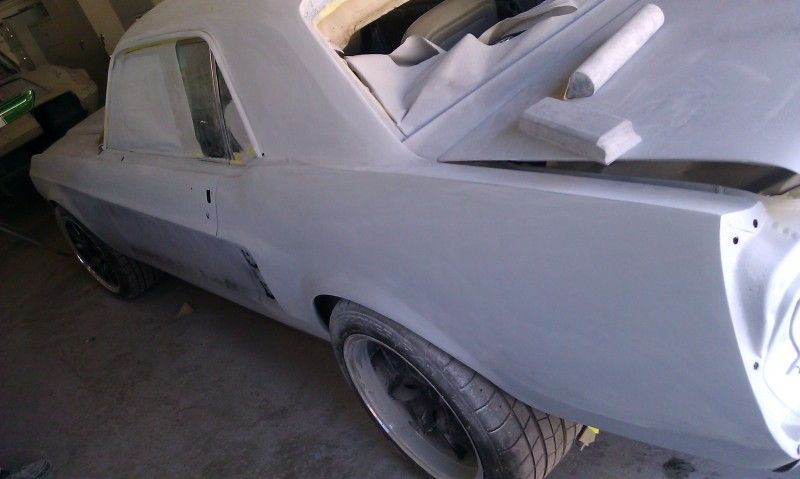
Posted by bwkelley76 (Member # 8792) on
:
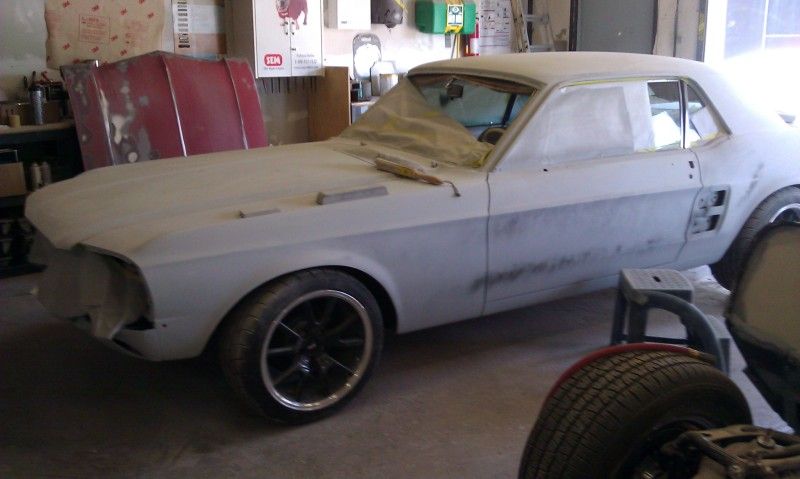
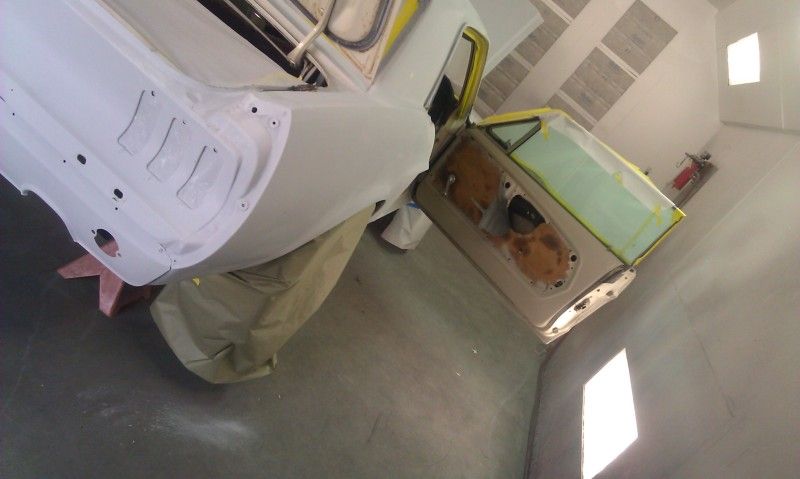
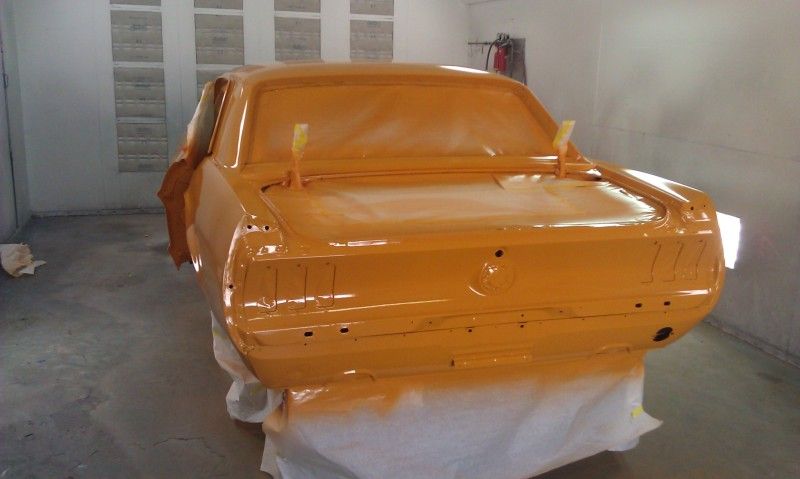
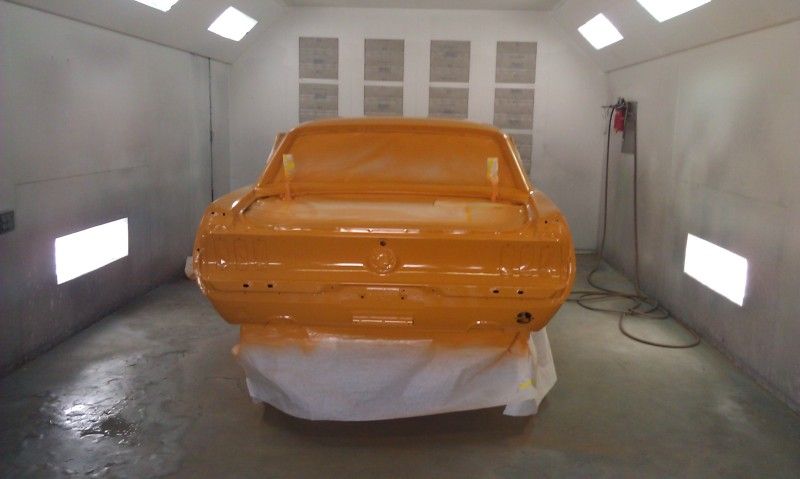
<<Thanks for the thread jack.
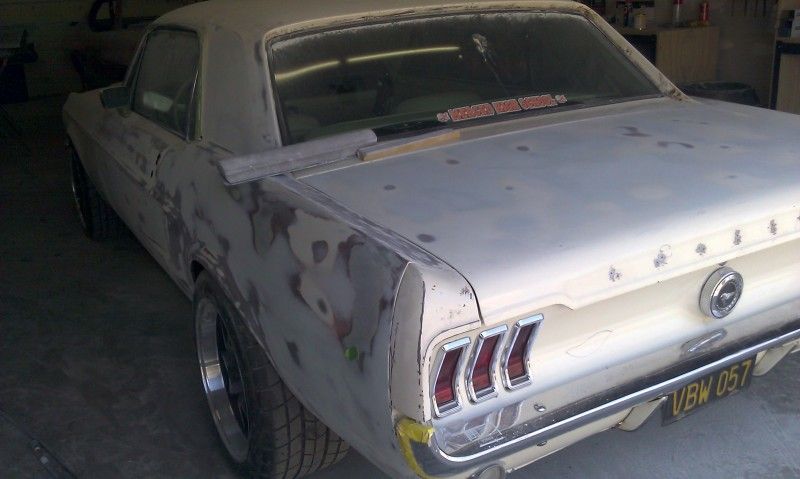
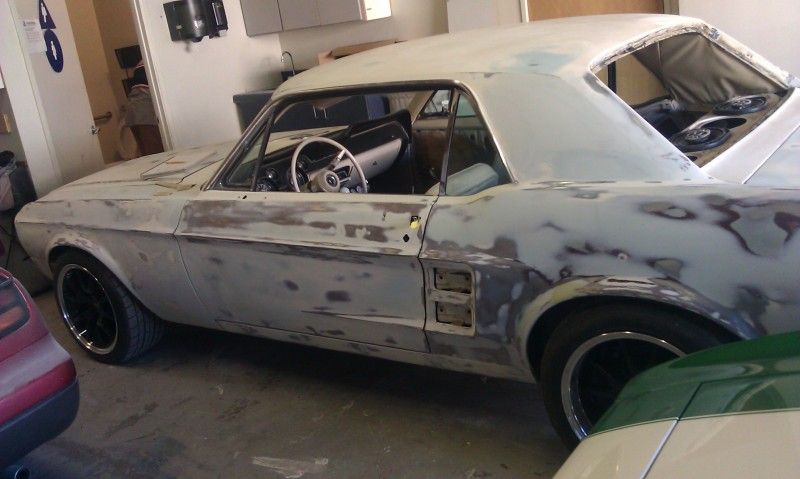
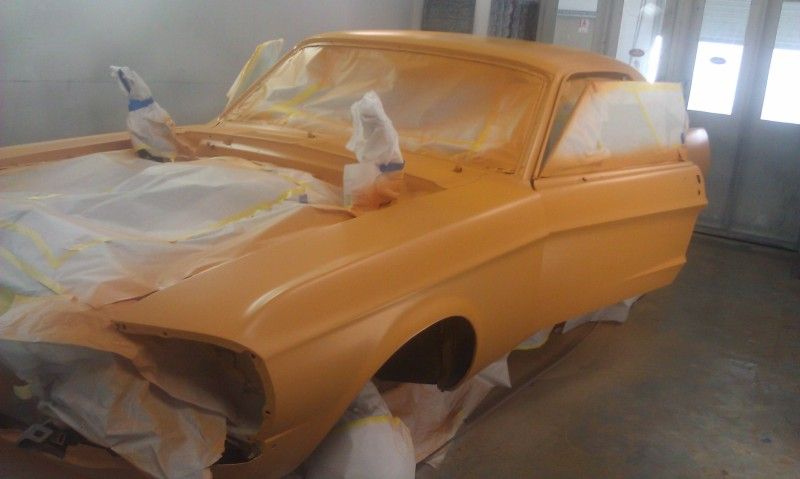
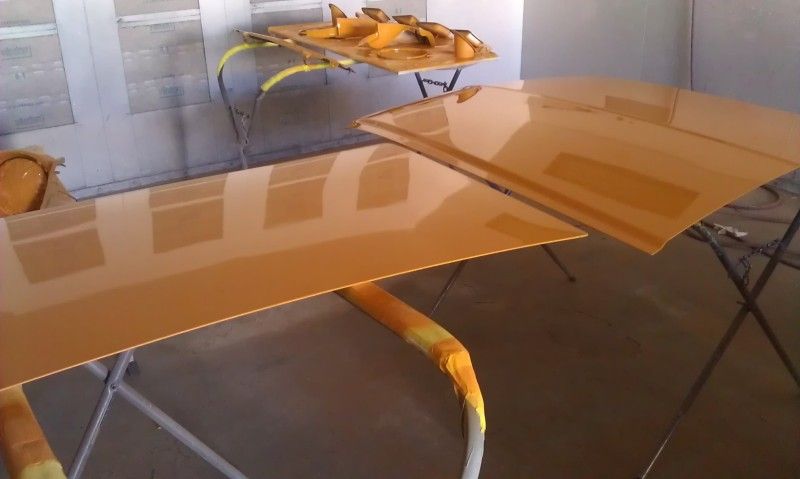
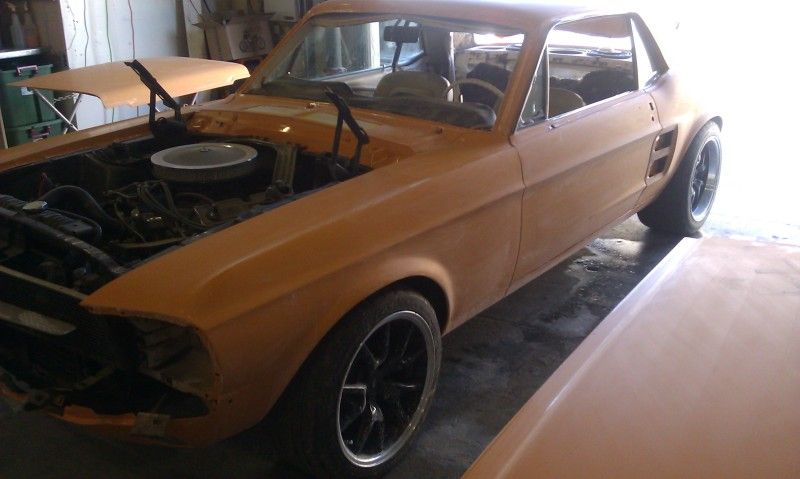
Here are some pics of the progress...
Posted by Luke87GT (Member # 21) on
:
SELL ME THIS CAR! ![[Big Grin]](biggrin.gif)
Posted by v-town coupe (Member # 2771) on
:
looks to be a cool build but throw that stock p/s away and buy a rack kit!
Posted by nitrous_bob (Member # 77) on
:
quote:
Originally posted by Luke87GT:
As you can see nobody caught it was a joke and I can't see what is funny about what you said above.
actually your the only one who said anything....and actually i dont have a "strange" sense of humor
you seem to have an unnaturally "dry" sense of humor
but i apologized both above AND in the PM's you keep sending me.....so send me your addy and i'll bake some cookies for you
and to OP...sorry for the hijack....it wasnt meant to be, i saw an original member who i mistook for another.
one who sold me a set of rims that were super clean, and well...theres more to the story but he was a good guy
Posted by bwkelley76 (Member # 8792) on
:
quote:
Originally posted by v-town coupe:
looks to be a cool build but throw that stock p/s away and buy a rack kit!
Two words BUDGET-BUILD! ![[Wink]](wink.gif)
Posted by v-town coupe (Member # 2771) on
:
quote:
Originally posted by bwkelley76:
quote:
Originally posted by v-town coupe:
looks to be a cool build but throw that stock p/s away and buy a rack kit!
Two words BUDGET-BUILD!
I hear what your say'n but once everything starts leaking or hoses are hitting or the ram bracket comes loose you'll think other wise!
Posted by bwkelley76 (Member # 8792) on
:
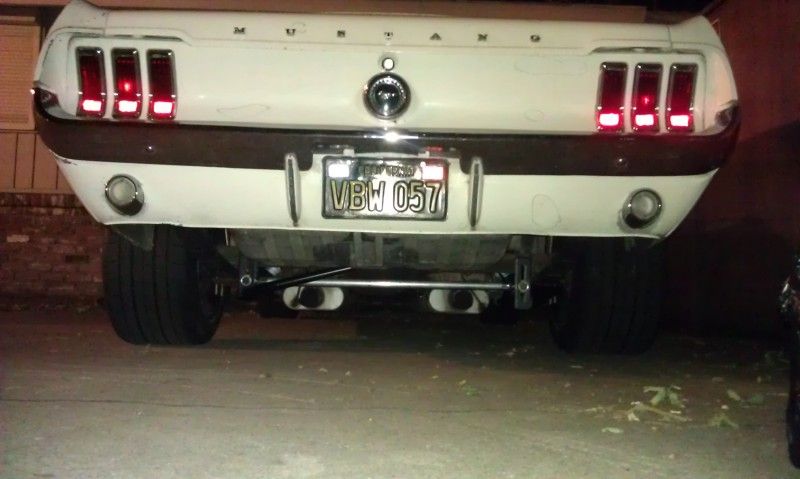
Just installed headers, 3" exhaust with x-pipe, single chamber flows, and since I have not yet configured the entire rear suspension, I've installed dumps for now. Once I get the rear all dialed in and sway-bar mounted I will configure the back-half of the exhaust. The entire exhaust including used Hooker Competition headers cost me $110 and my time. Made with lightly used pipe left over from another car as well as the mufflers, and the X-pipe is new. Working on a budget here and doing well!
[ May 06, 2012, 12:29 AM: Message edited by: bwkelley76 ]
Posted by phildog (Member # 1214) on
:
I would dump the stock power steering system pretty quickly if you plan on really using the car, ie open tracking. Otherwise, if the budget allows, I prefer the TCP kit.
Nice looking ride.
Posted by bwkelley76 (Member # 8792) on
:
quote:
Originally posted by phildog:
I would dump the stock power steering system pretty quickly if you plan on really using the car, ie open tracking. Otherwise, if the budget allows, I prefer the TCP kit.
Nice looking ride.
Thanks, the car will be going through a number of changes in the near future, and the PS system isn't that high on the list of priorities. We will see how well it holds up for now.
I also prefer the TCP setup to the other racks I've seen.
...I do wonder if I were to get a manual steering drag link and pitman arm, do I absolutely need to replace the power box? I've heard tales that the power box is actually more desirable, might have a better ratio, and possibly used by Shelby? ..any feedback is appreciated for those of you that might know.
[ May 07, 2012, 12:21 AM: Message edited by: bwkelley76 ]
Posted by phildog (Member # 1214) on
:
Might be a better question on VMF. But I will inquire with some folks in the know.
Posted by Slowback67 (Member # 6348) on
:
I'm almost positive Shelby used a manual rack on
Manual cars. On 65-66 they used a diff pitman & idler arm to make the steering faster.
When you welded in your rear Maier pan/bar...... Did you put a blanket or something covering the gas tank? I've been worried about welding mine a little LOL.
Posted by bwkelley76 (Member # 8792) on
:
quote:
Originally posted by Slowback67:
I'm almost positive Shelby used a manual rack on
Manual cars. On 65-66 they used a diff pitman & idler arm to make the steering faster.
When you welded in your rear Maier pan/bar...... Did you put a blanket or something covering the gas tank? I've been worried about welding mine a little LOL.
Didn't use a blanket. I stitch-weld and never get things too hot and the gas tank wasn't an issue at all.
Posted by bwkelley76 (Member # 8792) on
:
Body and paint starts in the AM. ![[Smile]](smile.gif)
Posted by 1Sicgt (Member # 714) on
:
How well does that Panhard Bar work with leaf springs? Just curious?
Posted by Duncan Motors (Member # 7045) on
:
nice man!!!!! i have one thats close to what youve done that i should be workin and getting on the road soon. u close to driving it yet?
Posted by bwkelley76 (Member # 8792) on
:
quote:
Originally posted by 1Sicgt:
How well does that Panhard Bar work with leaf springs? Just curious?
Works well, much more "control" in the rear. I am going to adjust the height (roll center) a bit and it should get even better.
Posted by bwkelley76 (Member # 8792) on
:
quote:
Originally posted by Duncan Motors:
nice man!!!!! i have one thats close to what youve done that i should be workin and getting on the road soon. u close to driving it yet?
Thanks! I drive it every day.
Posted by bwkelley76 (Member # 8792) on
:
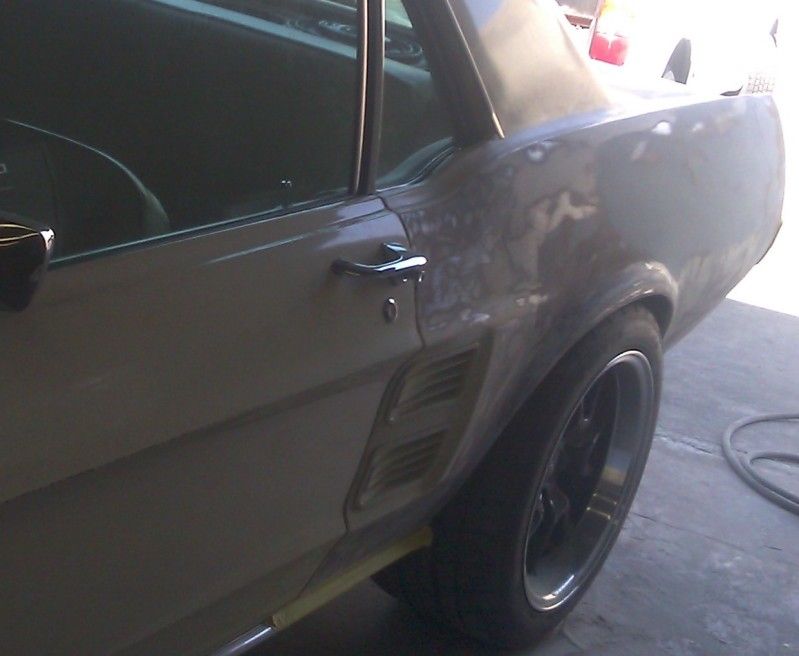
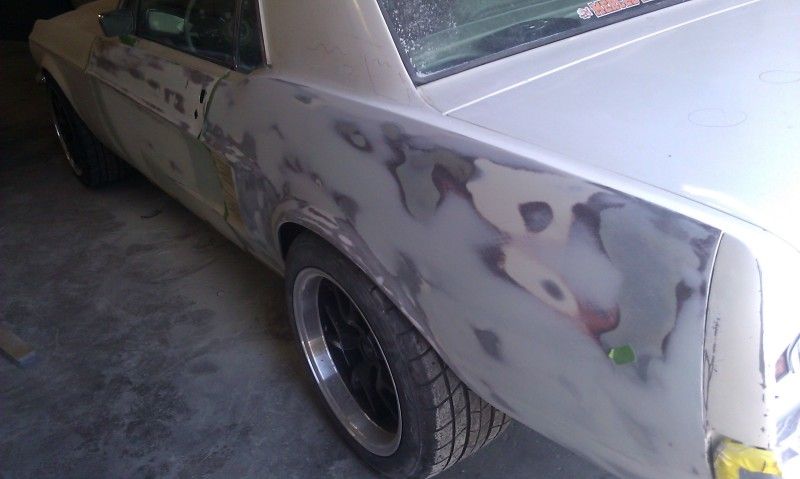
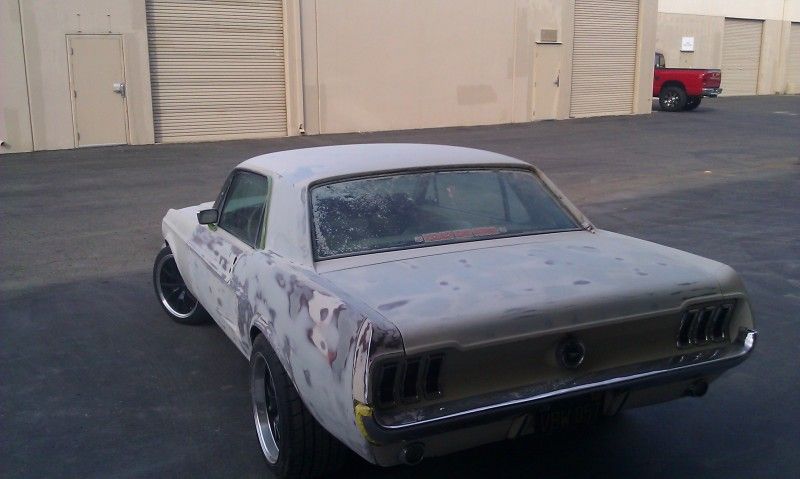
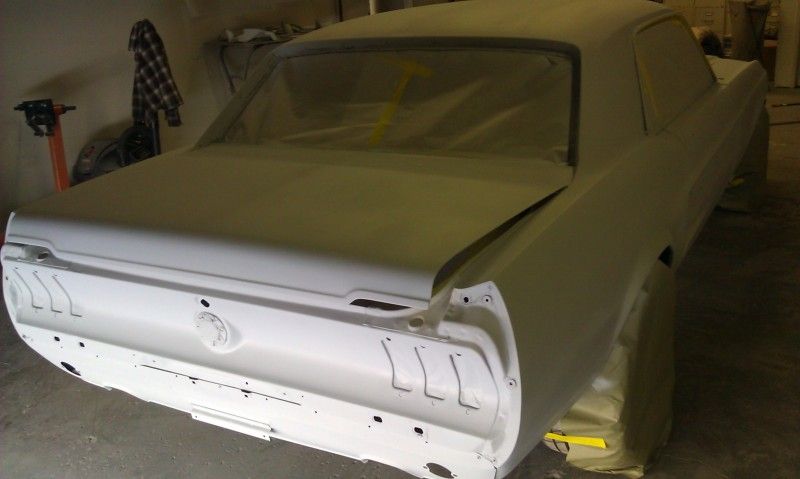
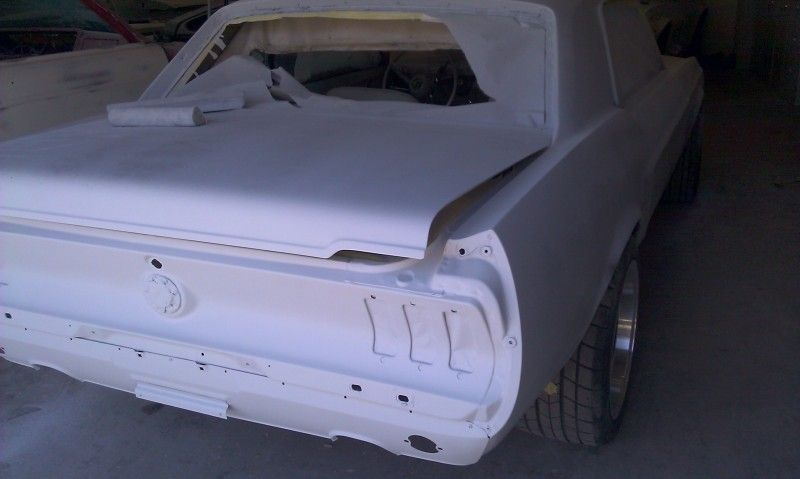
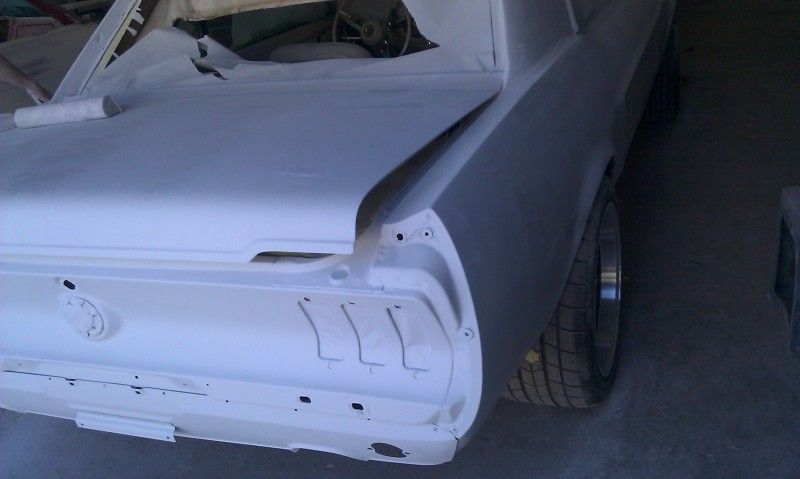
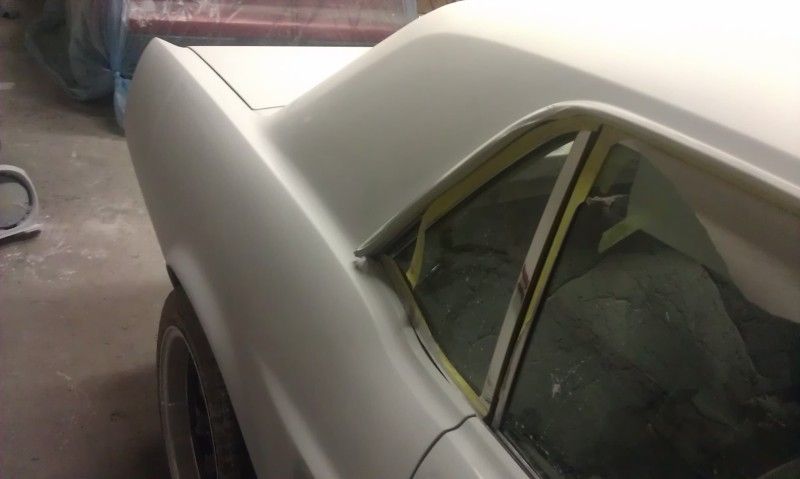
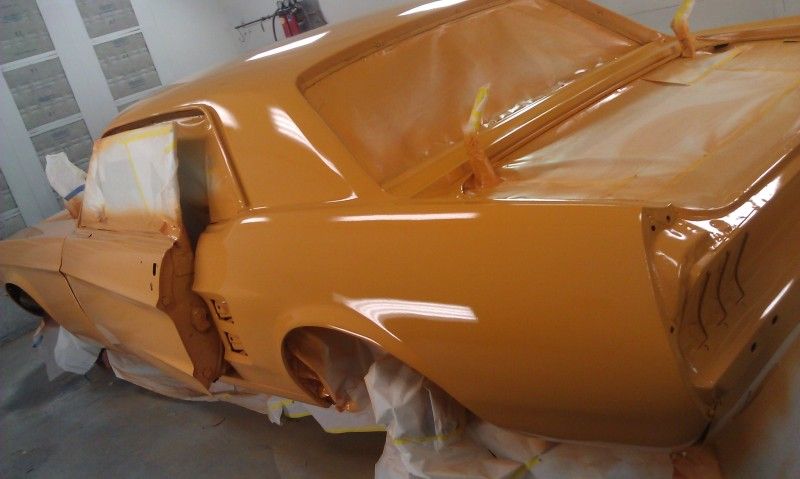
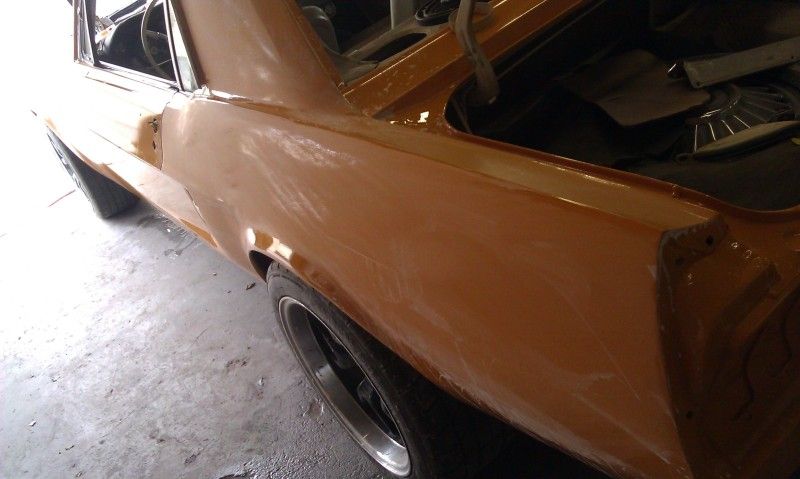
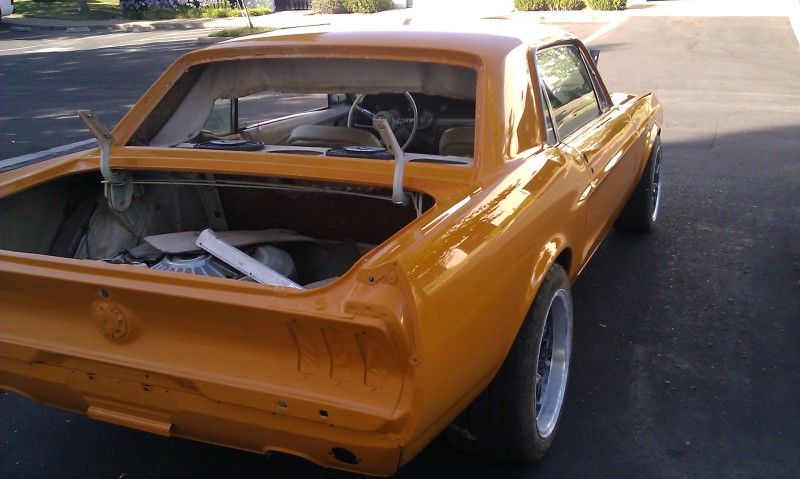
Driver's quarter will be done in the AM and we will be moving on to the next panel.
Posted by v-town coupe (Member # 2771) on
:
quote:
Originally posted by phildog:
I would dump the stock power steering system pretty quickly if you plan on really using the car, ie open tracking. Otherwise, if the budget allows, I prefer the TCP kit.
Nice looking ride.
the TCP kit is nice but does not retain stock turning radius. on a track car no big deal but on a cruiser/driver yeah and if you want to go power steering the kit with the pump you have to use comes out to $2800.
Posted by v-town coupe (Member # 2771) on
:
quote:
Originally posted by 1Sicgt:
How well does that Panhard Bar work with leaf springs? Just curious?
Ive seen a few cars run Auto X with that setup and there, they did very well.
Posted by bwkelley76 (Member # 8792) on
:
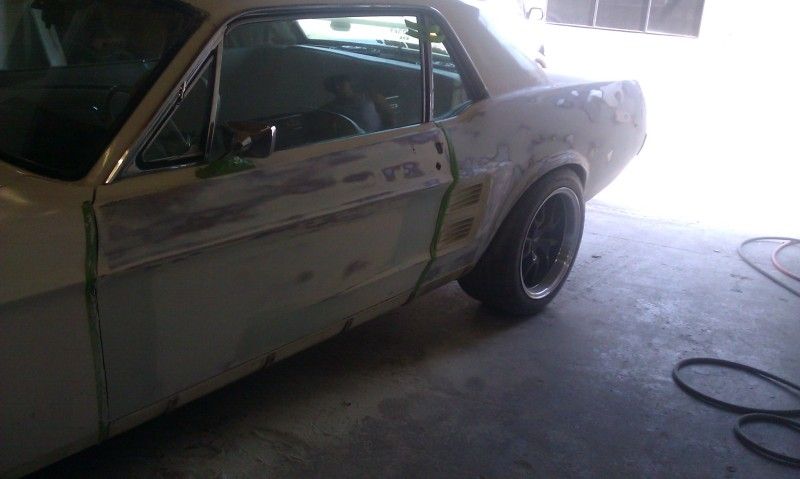
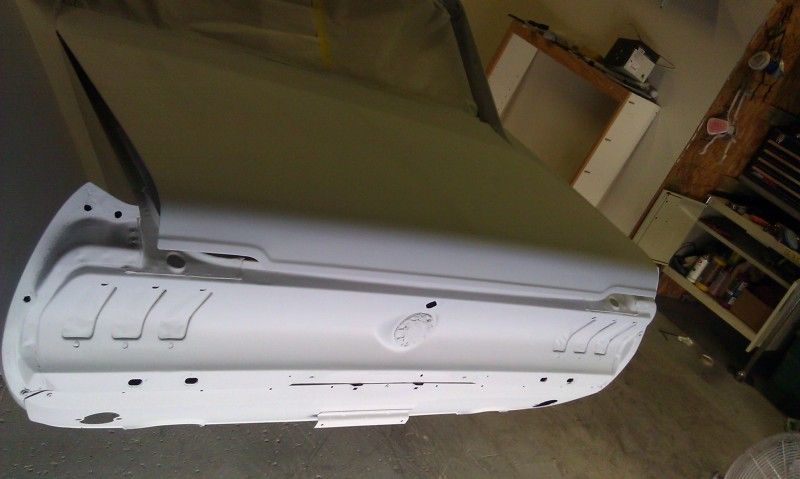
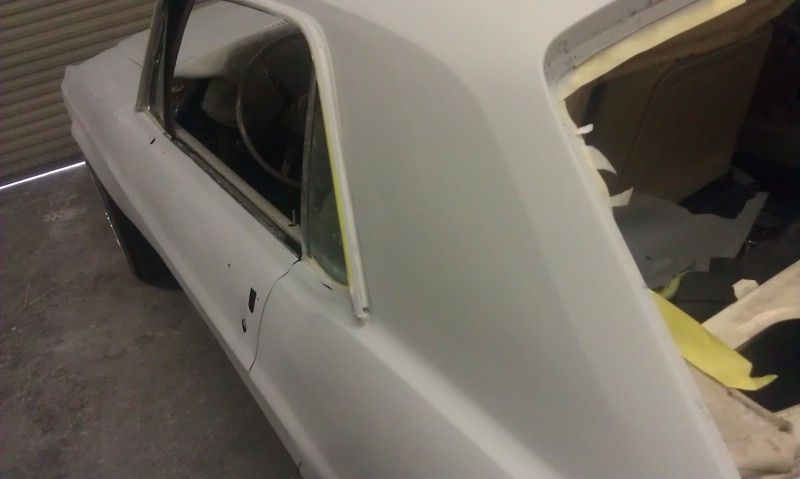
Driver's door.
[ May 12, 2012, 05:32 PM: Message edited by: bwkelley76 ]
Posted by bwkelley76 (Member # 8792) on
:
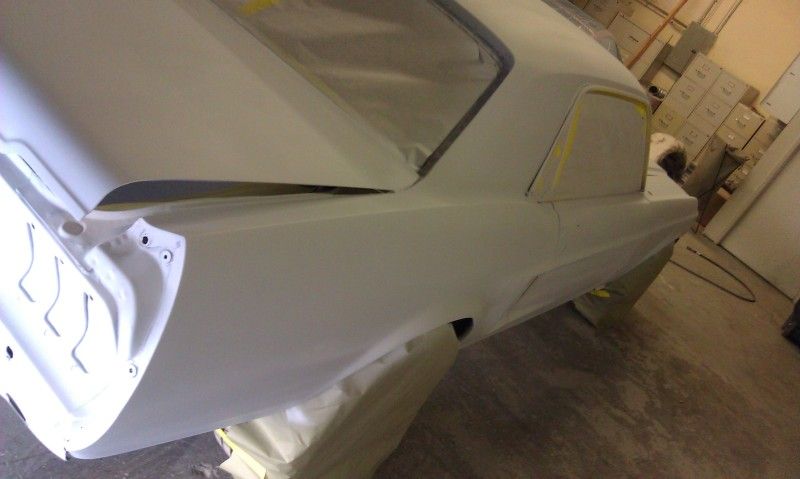
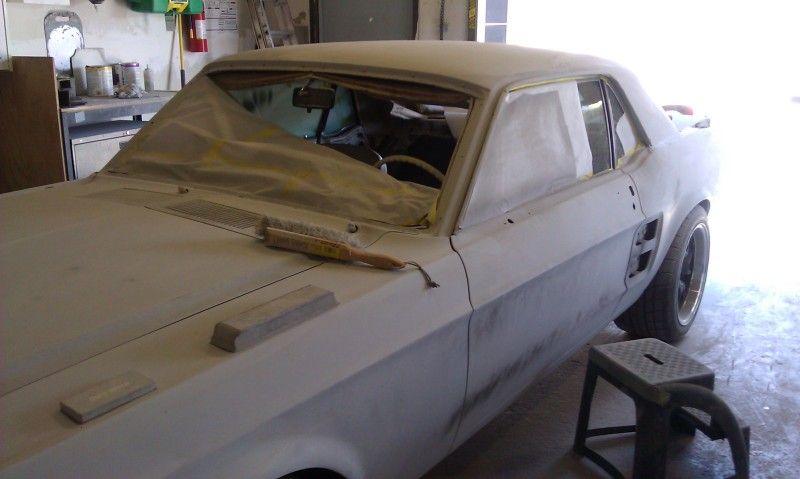
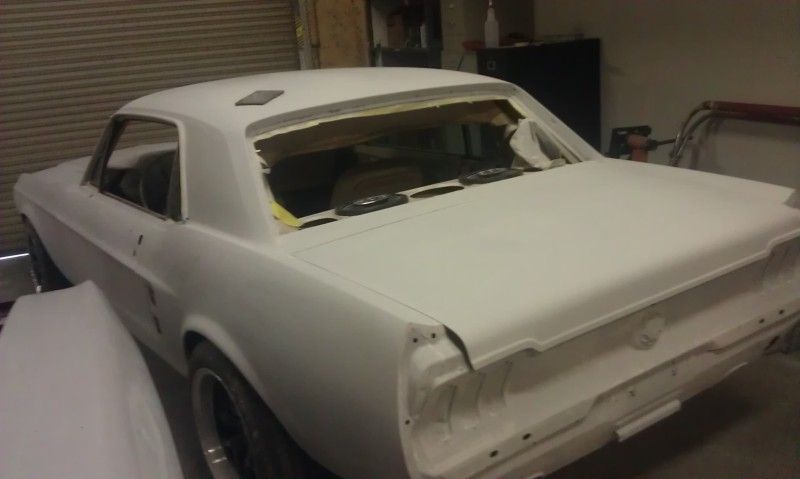
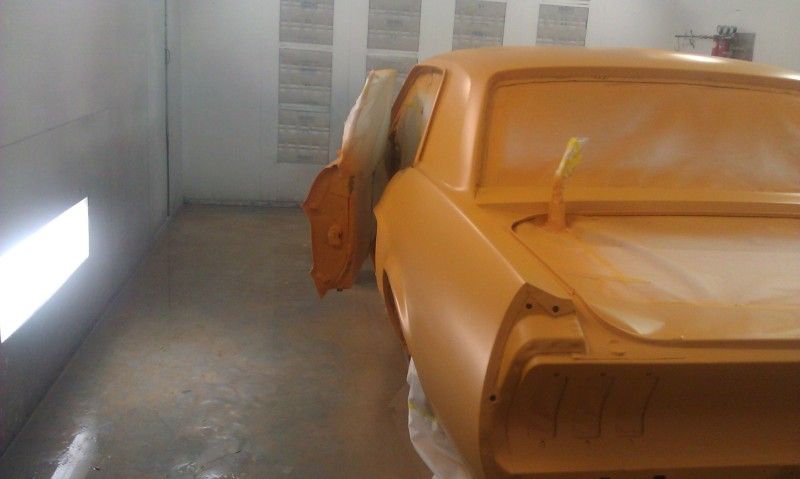
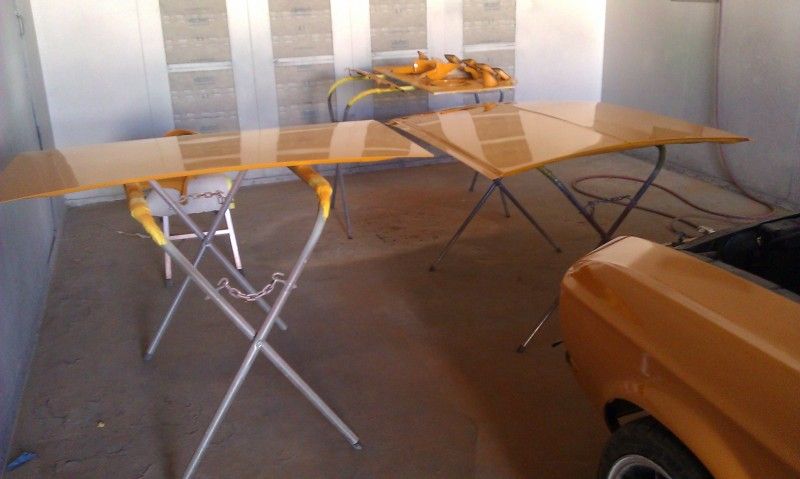
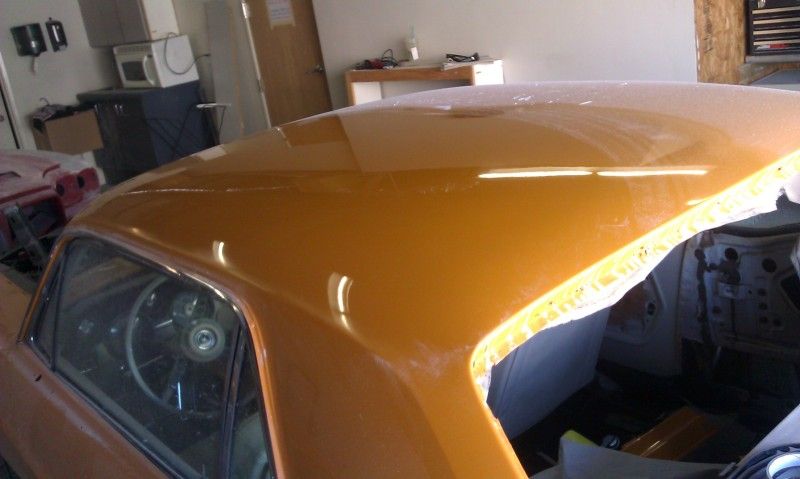
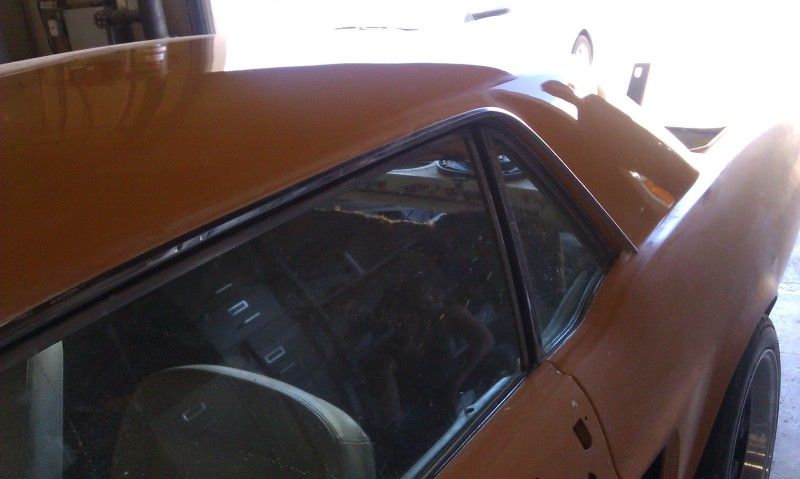
Driver's Rocker, roof sail panel, and trunk lid, we also started de-badging the car.
Posted by bwkelley76 (Member # 8792) on
:
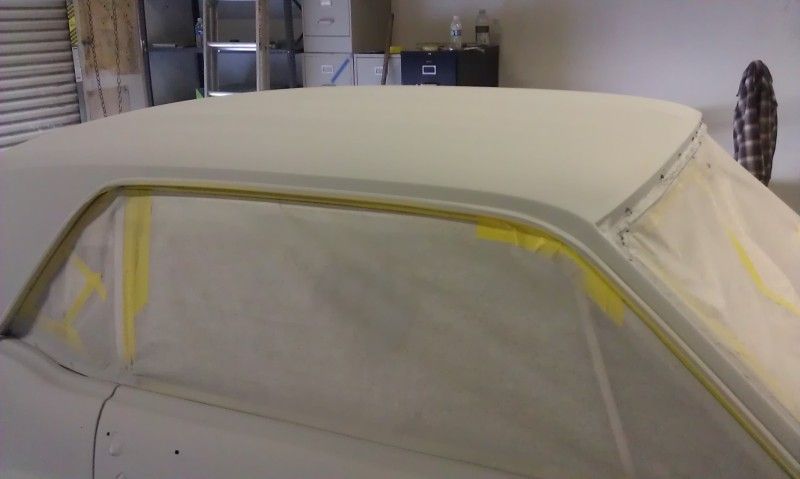
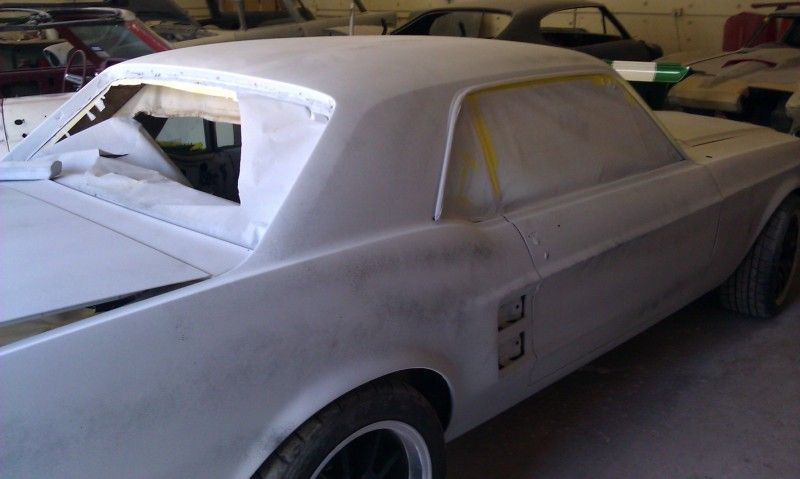
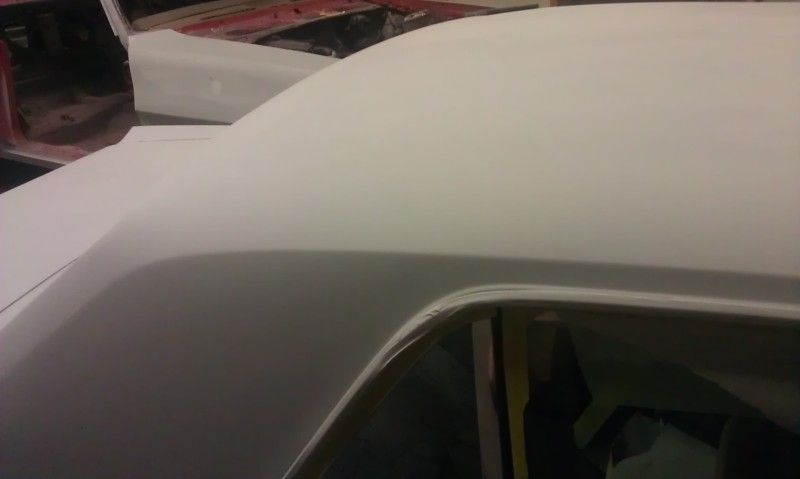
Roof, passenger sail-panel, passenger quarter, passenger rocker and door are done. Getting there!

Posted by norcalfiddy (Member # 11207) on
:
nice project! im doing a budget build rite now with my cougar, you even have the same wheel setup i wanted. lol
Posted by phildog (Member # 1214) on
:
Nice lookin 67 Camaro back there too. Car is looking great, makes me fiend for an old school again.
Posted by bwkelley76 (Member # 8792) on
:
quote:
Originally posted by norcalfiddy:
nice project! im doing a budget build rite now with my cougar, you even have the same wheel setup i wanted. lol
Thanks, Ive had a number of stangs and this one is being built for fun, not for show. The wheels just kindof "happened". They came off of a parts car that I bought recently. Not my first choice and they require spacers to work, but they look good. I saw your cougar, lookin good! What headers did you end up using to work with the P heads?
Posted by bwkelley76 (Member # 8792) on
:
quote:
Originally posted by phildog:
Nice lookin 67 Camaro back there too. Car is looking great, makes me fiend for an old school again.
Thanks! That camaro was built by us and belongs to a customer, wicked car, 800 horse injected big block, pro-charged and intercooled, mini tubbed and 4 link.
[ May 19, 2012, 03:48 PM: Message edited by: bwkelley76 ]
Posted by 66_5.0 (Member # 9974) on
:
Looking good. Whats the color choice this time?
And how wide are the rims in the rear...they look good
Posted by bwkelley76 (Member # 8792) on
:
quote:
Originally posted by 66_5.0:
Looking good. Whats the color choice this time?
And how wide are the rims in the rear...they look good
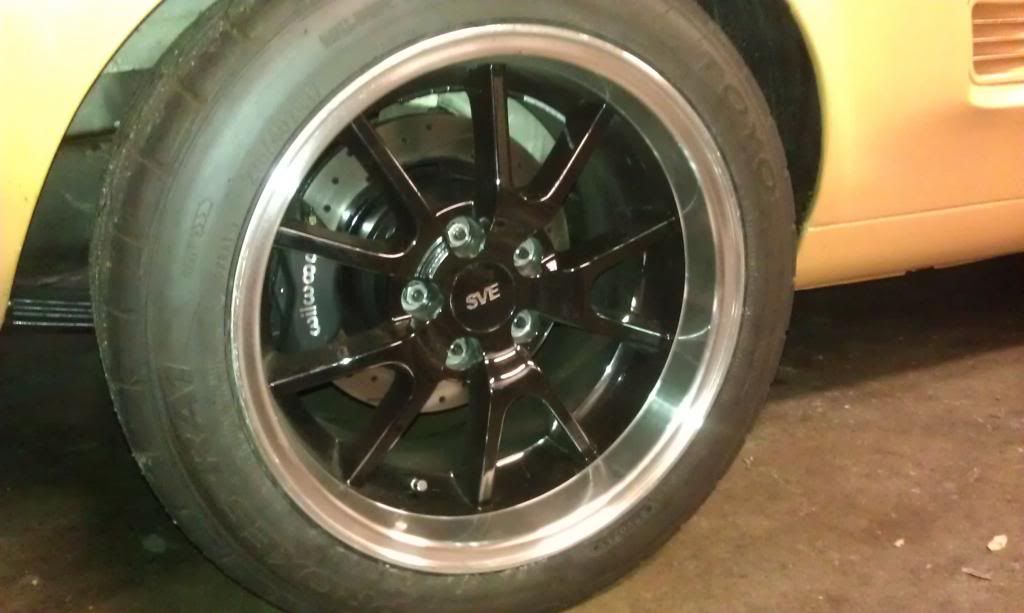
Thanks! I'm not disclosing the color just yet, it's going to be on the LOUD side if it turns out how I want. This is going to be a track/street car. The back rims are 17x10 and fronts are 17x9.
[ May 20, 2012, 01:26 AM: Message edited by: bwkelley76 ]
Posted by bwkelley76 (Member # 8792) on
:
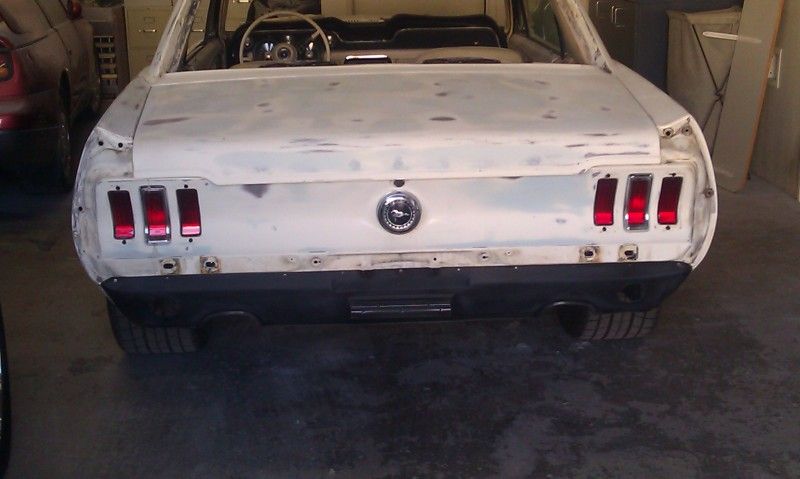
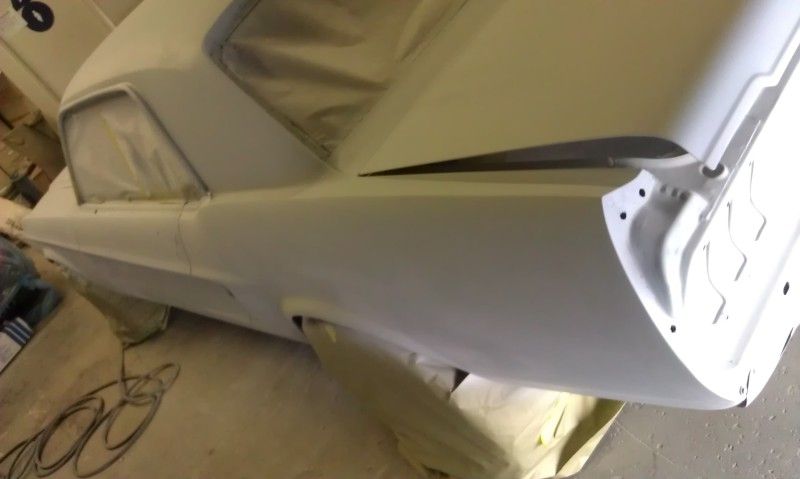
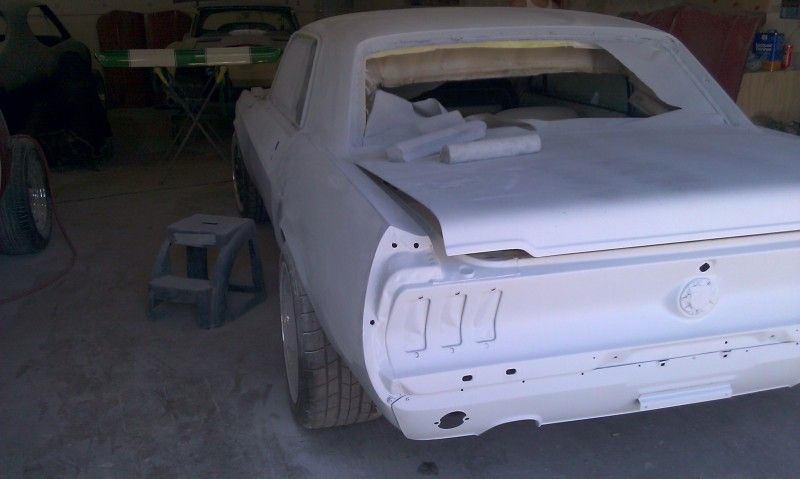
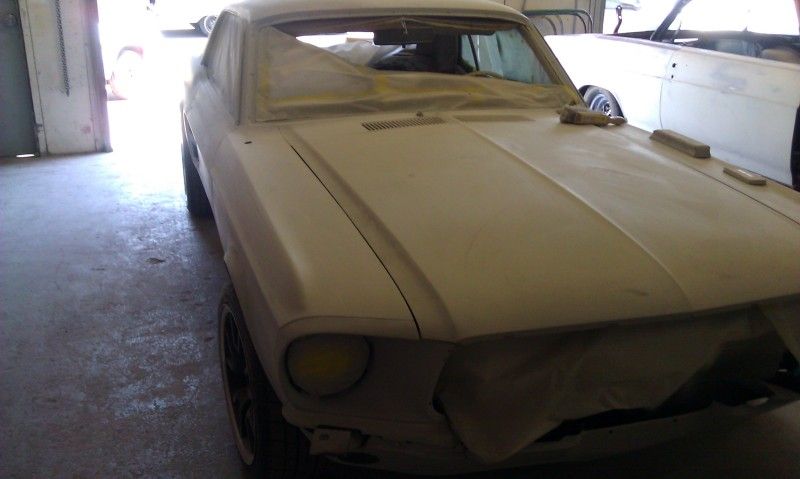
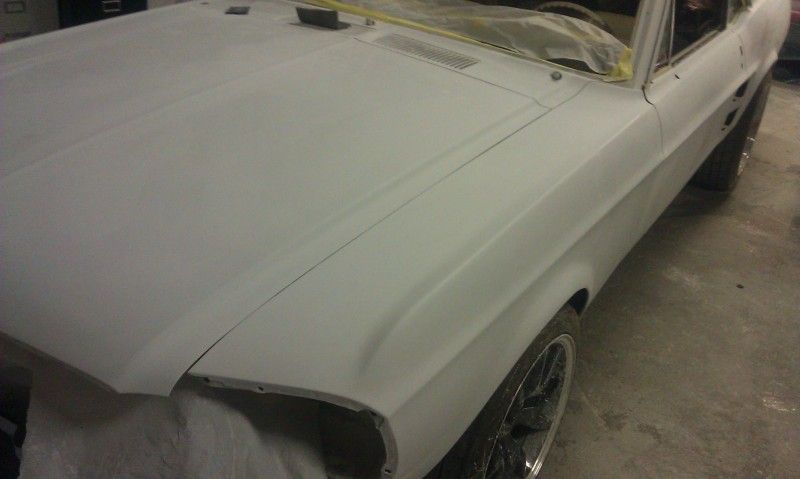
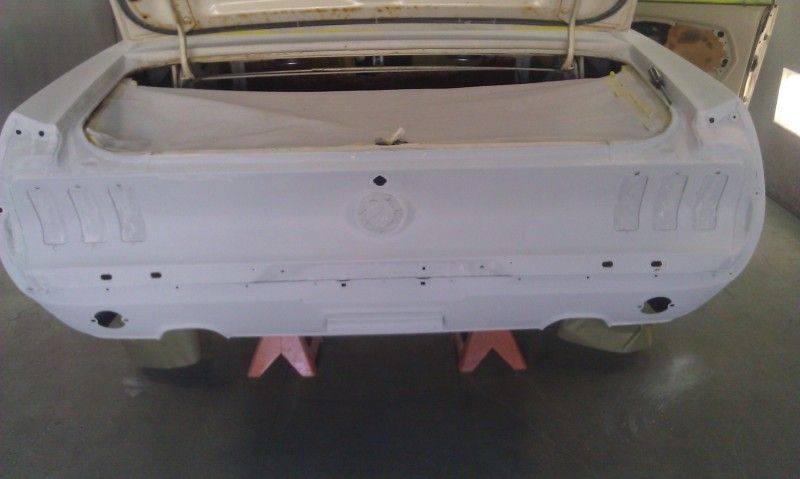
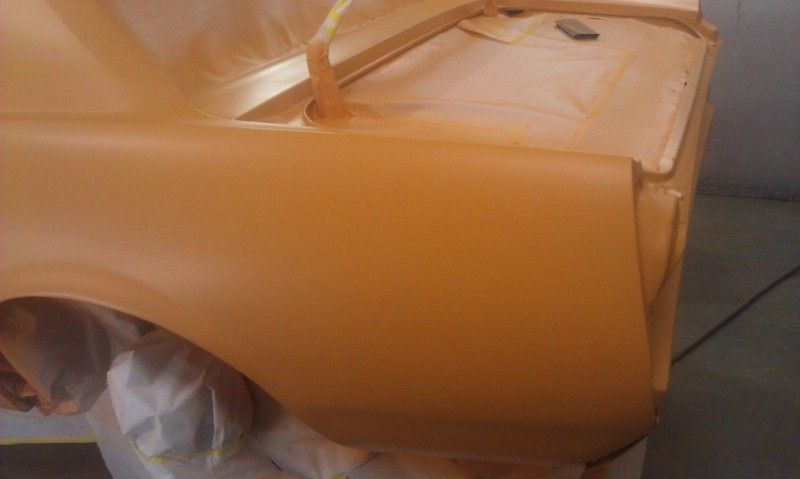
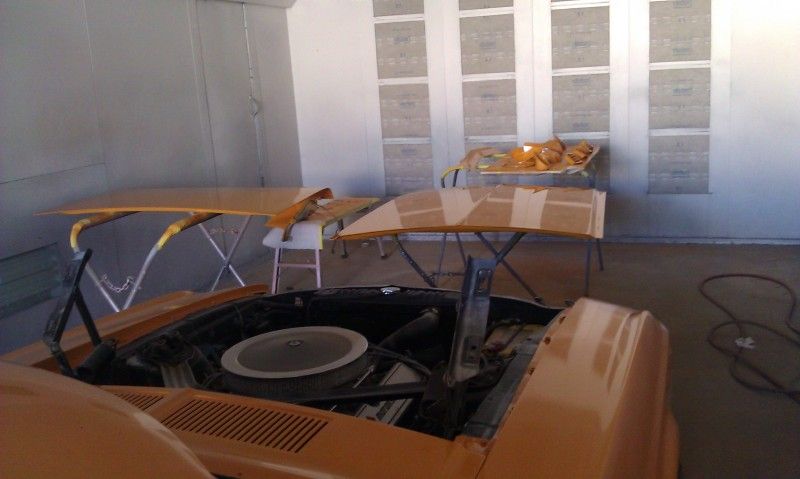
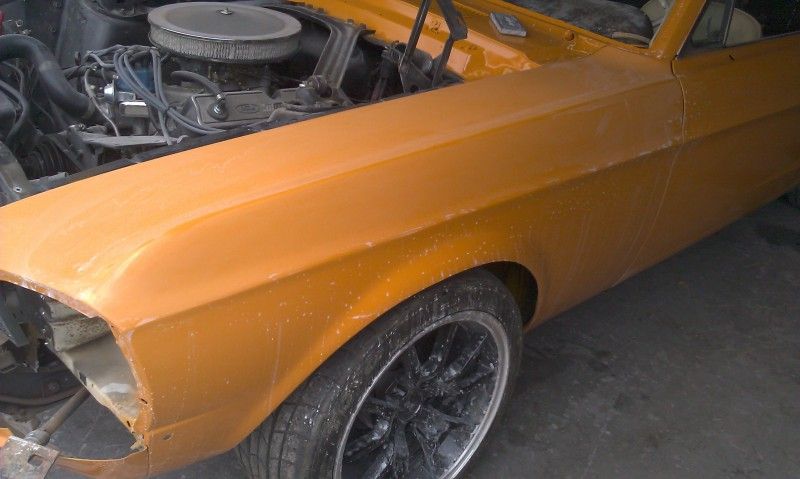
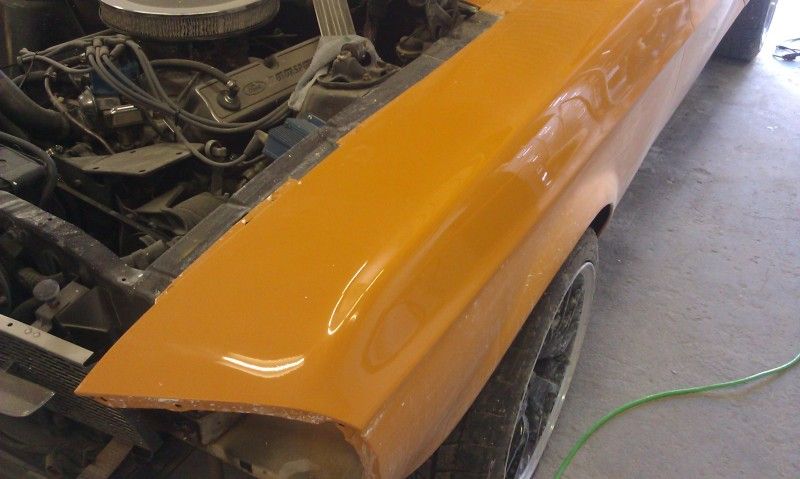
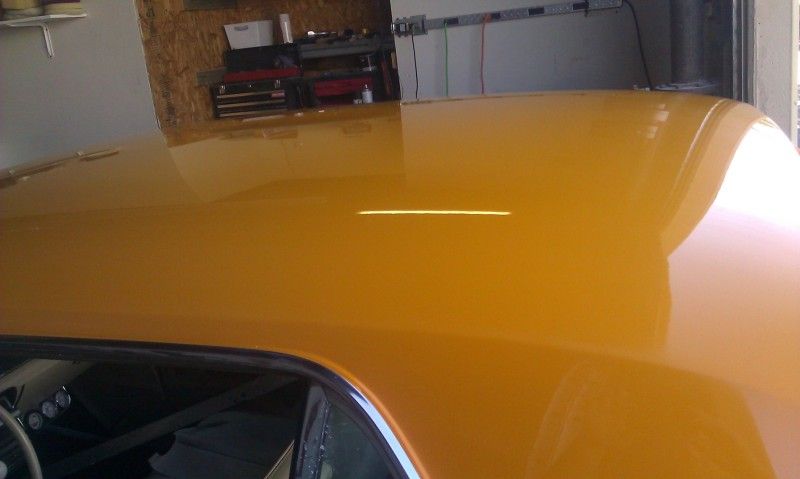
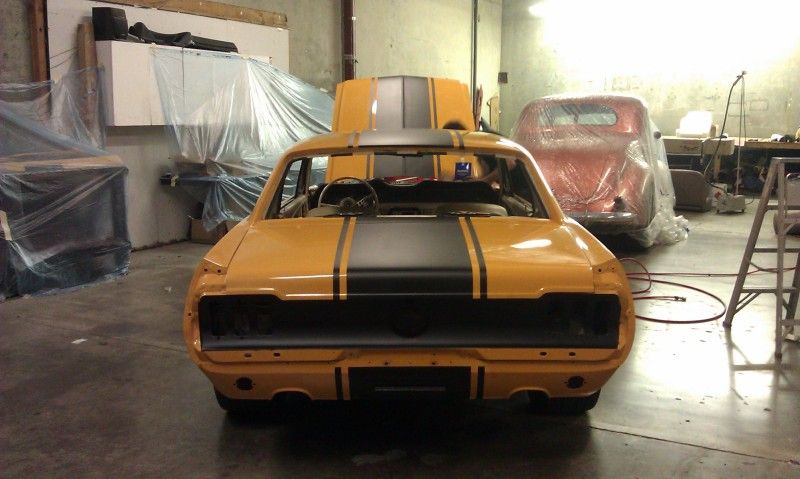
Back panel, roof, and most of passenger front fender are done.

Posted by bwkelley76 (Member # 8792) on
:
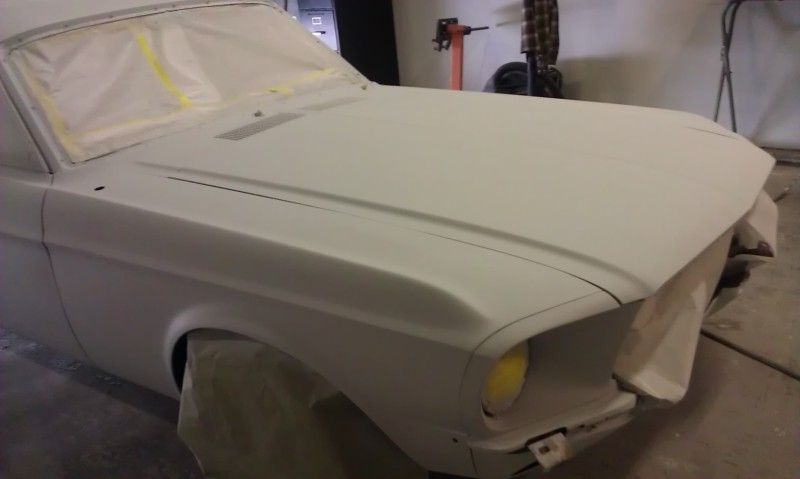
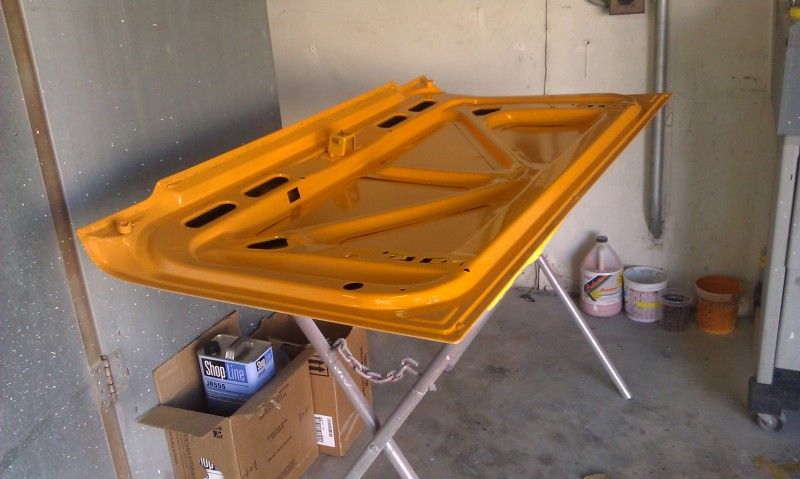
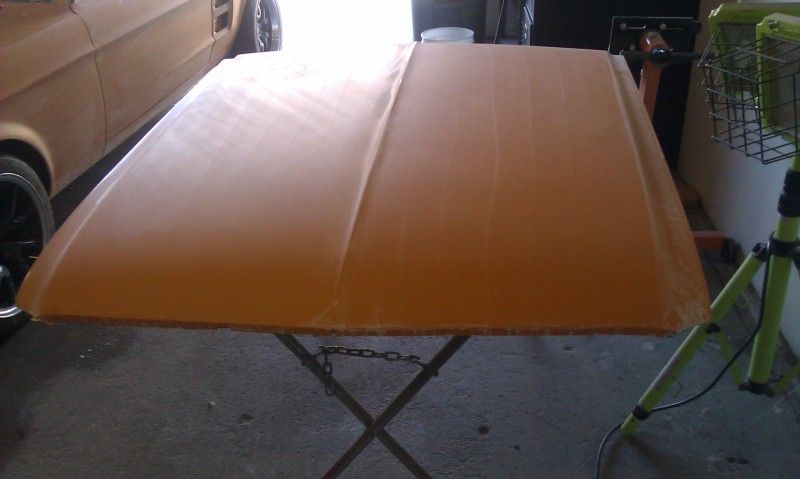
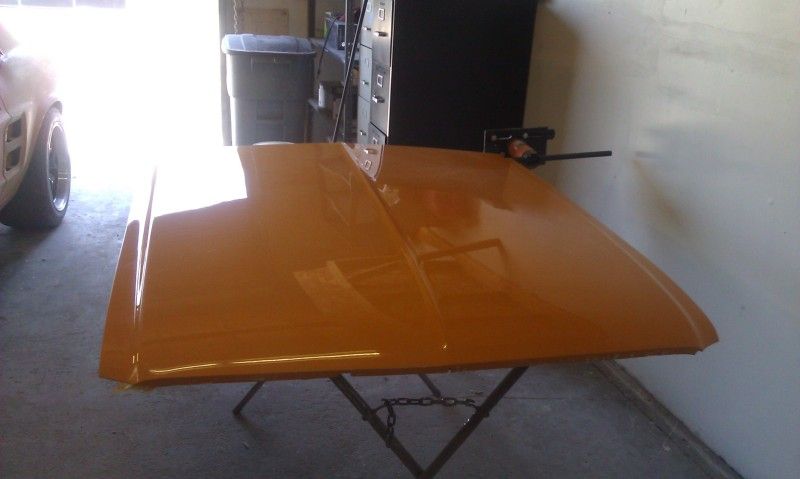
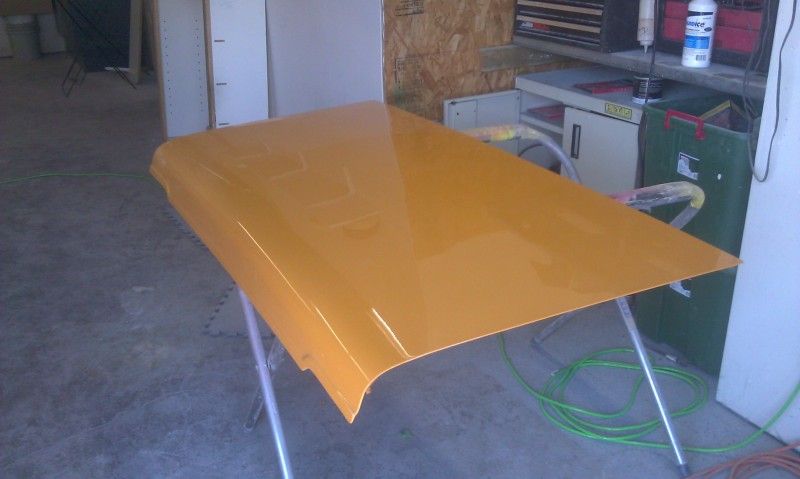
Hood is mostly done.
Posted by 68dustin (Member # 5388) on
:
damn fool u move fast on the sanding... lookin good, whats the color gonna be?
Posted by Luke87GT (Member # 21) on
:
Looks awesome!
Posted by Secnd2nun64 (Member # 1431) on
:
Liking the progress. Thought about going with a gt pan or lighted hood?
Posted by *EPIK* (Member # 7481) on
:
Looks great on those wheels... I can't wait to see the finished product!
Posted by bwkelley76 (Member # 8792) on
:
quote:
Originally posted by Secnd2nun64:
Liking the progress. Thought about going with a gt pan or lighted hood?
Stock hood for now, might add a late-model y2k era scoop to it, not sure.
Posted by bwkelley76 (Member # 8792) on
:
quote:
Originally posted by *EPIK*:
Looks great on those wheels... I can't wait to see the finished product!
Thanks!
Posted by bwkelley76 (Member # 8792) on
:
Moving right along...
Posted by Luke87GT (Member # 21) on
:
Keep the pics coming!
Posted by bwkelley76 (Member # 8792) on
:
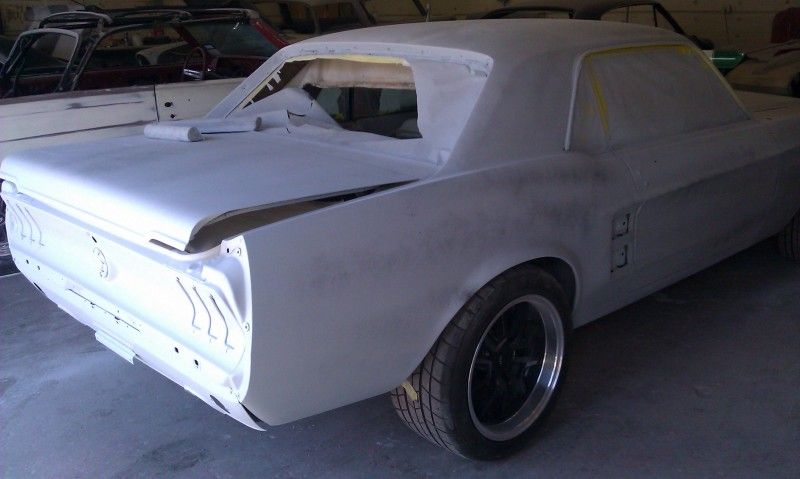
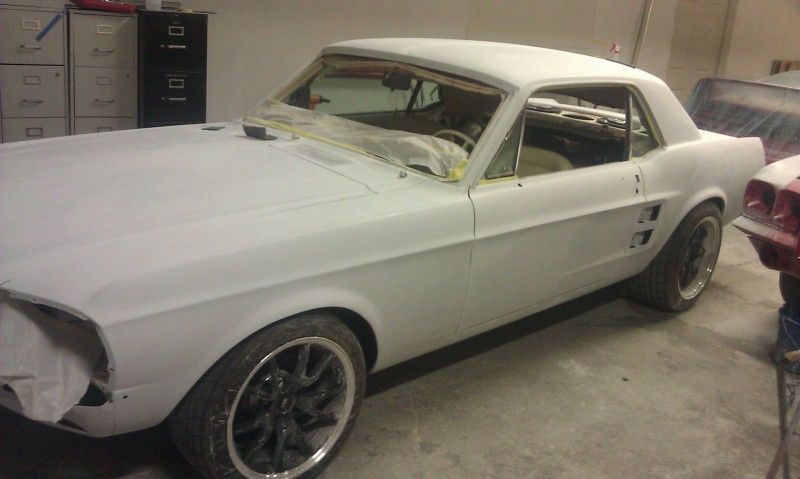
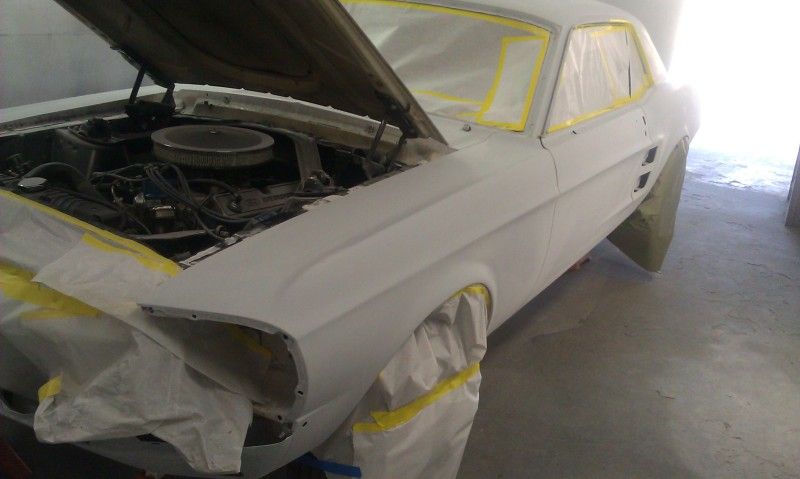
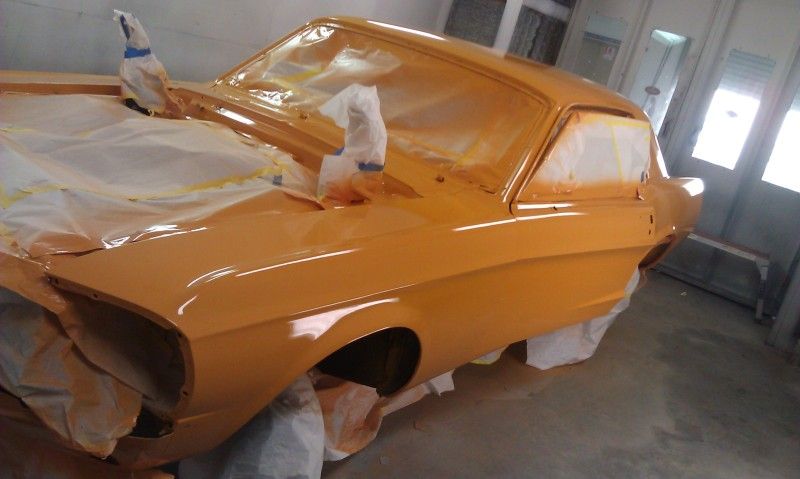
Almost ready for primer!
Posted by phildog (Member # 1214) on
:
Looks good. Are they offering any original-tooling rear valances yet? All the Taiwan repops I have seen fit like crap, with big gaps on the quarter panels.
Posted by bwkelley76 (Member # 8792) on
:
quote:
Originally posted by phildog:
Looks good. Are they offering any original-tooling rear valances yet? All the Taiwan repops I have seen fit like crap, with big gaps on the quarter panels.
This one is a Dynacorn and it fits nice. I did get a bad one before this one though. I'd say one out of 10+ has issues? I'm pleased with Dynacorn so far other than the one and I've probably used 10 in the last 4 years on customers' cars.
Posted by bwkelley76 (Member # 8792) on
:
Guide-coating and some more sanding, then comes the primer.
Posted by bwkelley76 (Member # 8792) on
:
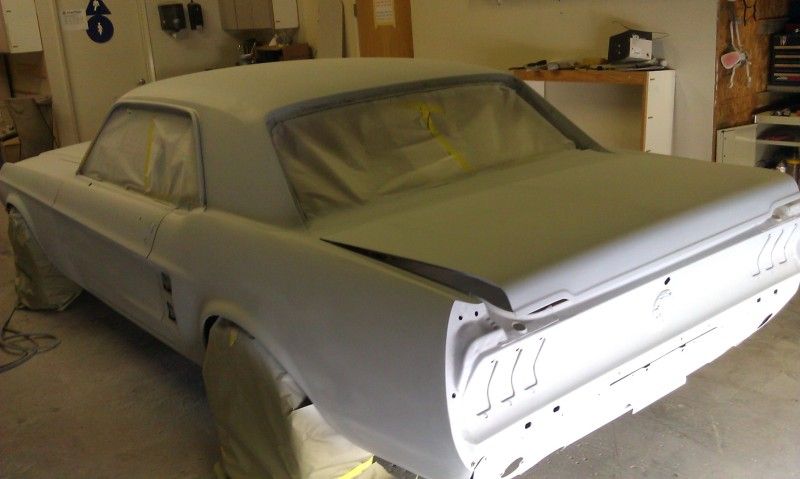
First coat of primer is on!

Posted by norcalfiddy (Member # 11207) on
:
looks good! ![[worship]](graemlins/worship.gif)
cant wait till i start doing bodywork on my cougar. ![[patriot]](graemlins/patriot.gif)
Posted by v-town coupe (Member # 2771) on
:
the FB @ 6:03 is running the panhard setup with leafs, the owner of that car is a high school buddy of mike maiers:
http://www.youtube.com/watch?v=_oU-j...eature=related
Posted by bwkelley76 (Member # 8792) on
:
quote:
Originally posted by norcalfiddy:
looks good!
cant wait till i start doing bodywork on my cougar.
Thanks! ..Whats stoppin ya? ...get-er-done!
Posted by bwkelley76 (Member # 8792) on
:
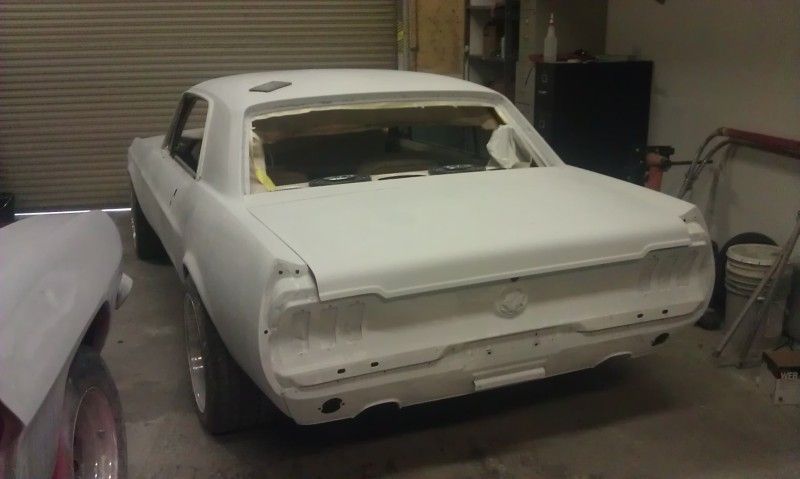
More guide coating and sanding, almost ready for paint!
Posted by bwkelley76 (Member # 8792) on
:
Colors are picked out, hopefully shooting the car in a few days.
Posted by bwkelley76 (Member # 8792) on
:
99.999999% ready to shoot! Paint and chemicals should be here tomorrow.
Posted by 50Reasons (Member # 6452) on
:
Any color yet
Posted by norcalfiddy (Member # 11207) on
:
quote:
Originally posted by bwkelley76:
quote:
Originally posted by norcalfiddy:
looks good!
cant wait till i start doing bodywork on my cougar.
Thanks! ..Whats stoppin ya? ...get-er-done!
money, lol and im doing drivetrain work right now so i wanna get it driveable before i start lol
Posted by bwkelley76 (Member # 8792) on
:
quote:
Originally posted by 50Reasons:
Any color yet
all paint and chemicals are here. Shootin next week some time.
Posted by 89bluenotch (Member # 7454) on
:
Looks great! Keep us updated!
Posted by bwkelley76 (Member # 8792) on
:
We be Jambin!!! ...Well, getting ready to at least.

Posted by v-town coupe (Member # 2771) on
:
what color?
Posted by bwkelley76 (Member # 8792) on
:
<<secret!
Shooting color tomorrow AM!
[ June 20, 2012, 01:30 AM: Message edited by: bwkelley76 ]
Posted by STREETFIGHTER50 (Member # 2973) on
:
Man your builds are the sickest bro! All of your build threads have been. Can't wait to see it finished!
Posted by bwkelley76 (Member # 8792) on
:
quote:
Originally posted by STREETFIGHTER50:
Man your builds are the sickest bro! All of your build threads have been. Can't wait to see it finished!
Thanks!!! I do what I like!
Posted by bwkelley76 (Member # 8792) on
:
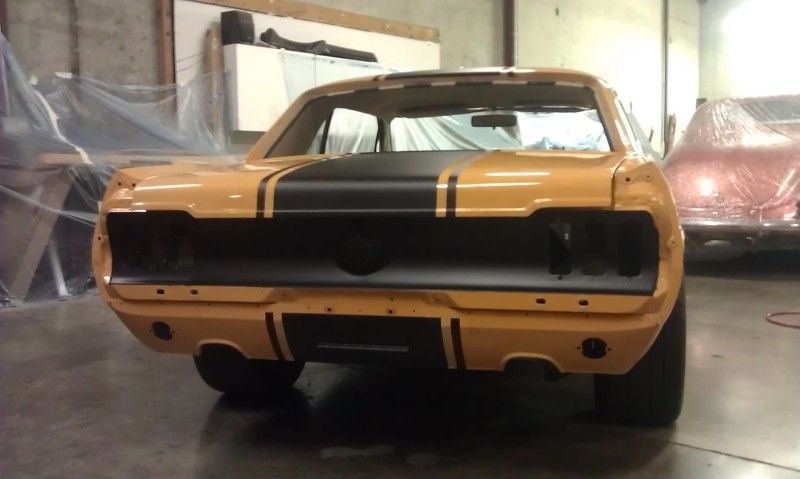
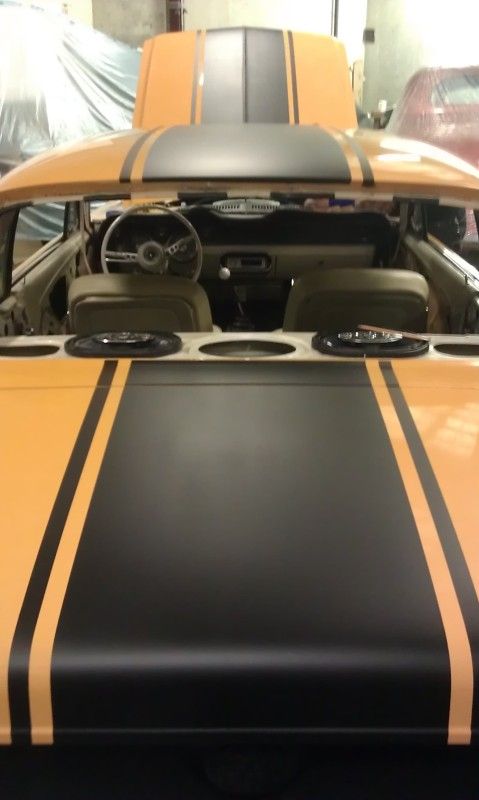
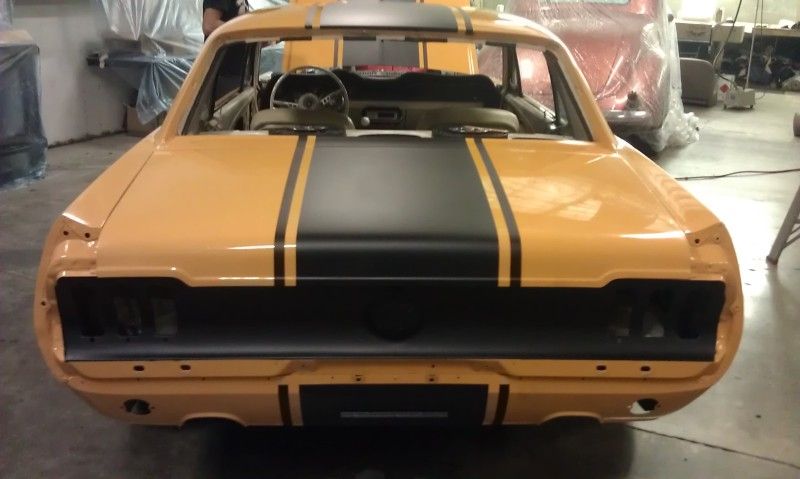
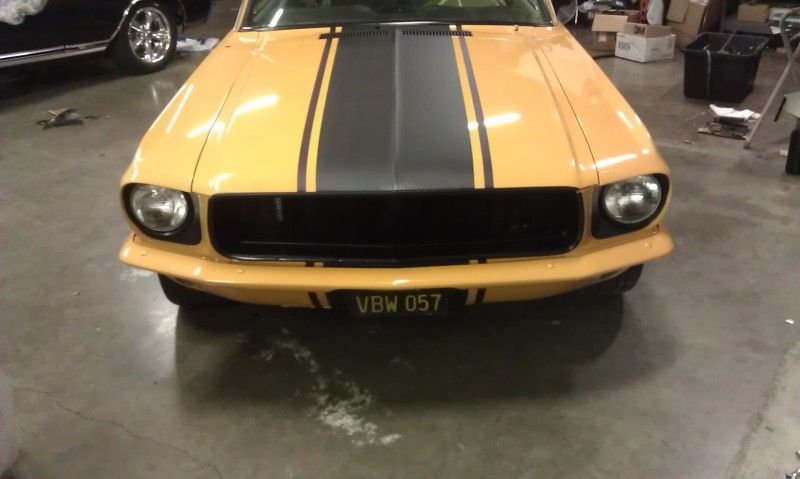
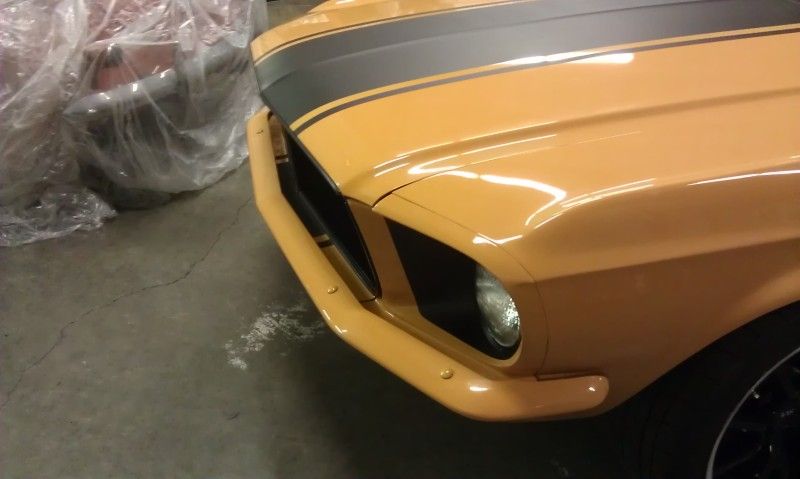
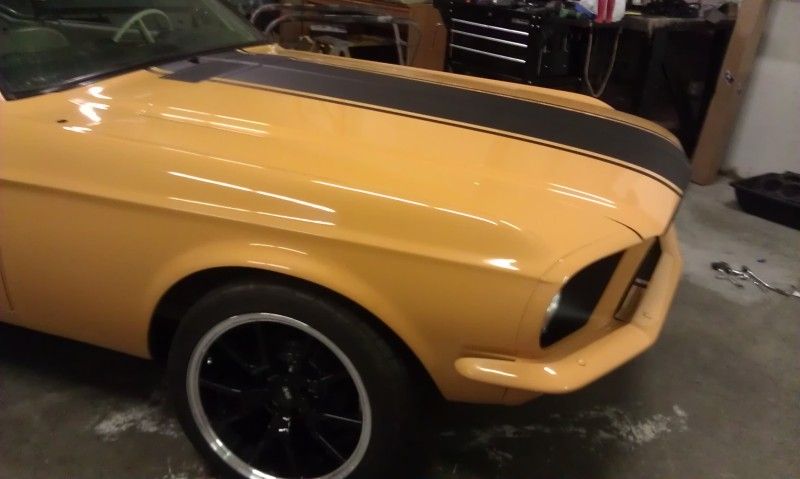
OK EVERYONE, WE HAVE PAINT!
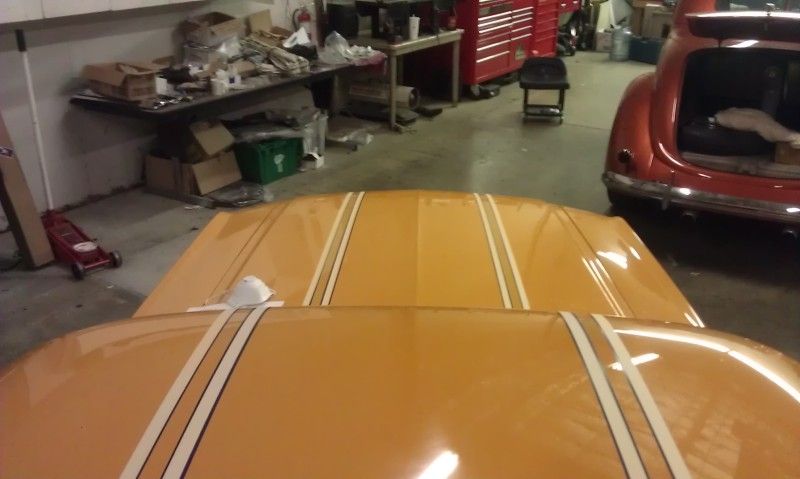
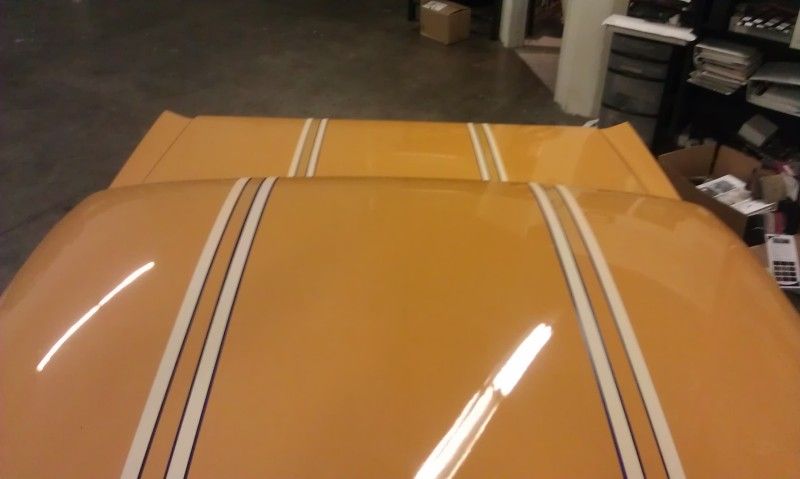
Just in case anyone can't visualize, this is the scheme...

BASE COAT: "U3" 2007-2013 GRABBER ORANGE WITH FLAT-BLACK SUPER SNAKE STRIPES
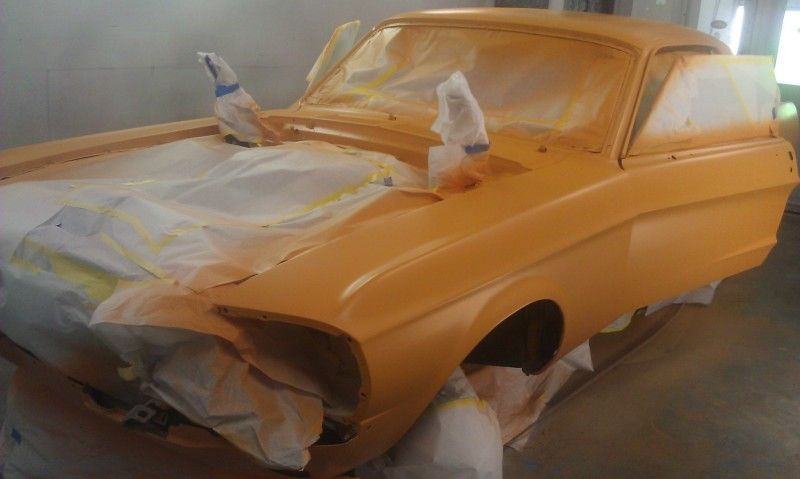
WITH CLEAR...
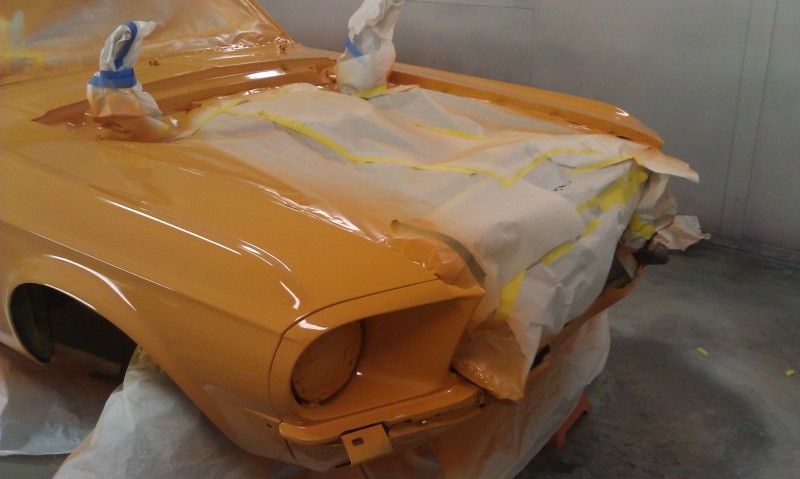
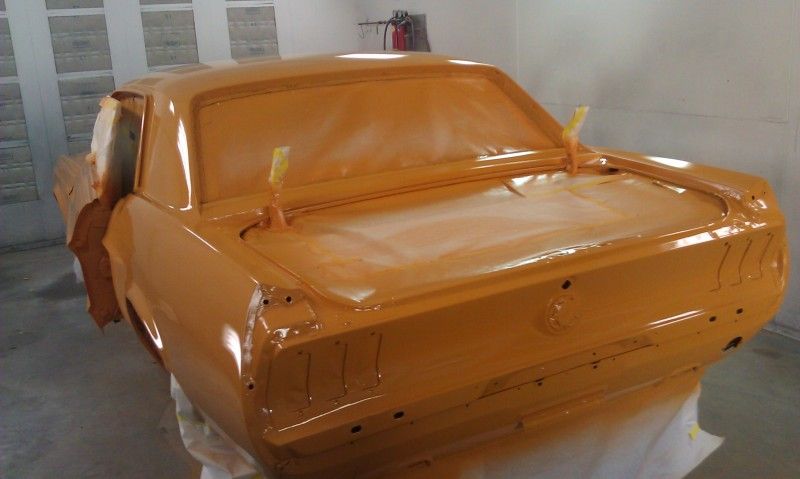
OUT IN THE SUN IT CHANGES A BIT
Posted by 50Reasons (Member # 6452) on
:
Let me guess orange
Posted by STREETFIGHTER50 (Member # 2973) on
:
Yeeeah nice! Orange definately one of my fav colors!
Posted by bwkelley76 (Member # 8792) on
:
... a little more booth action;
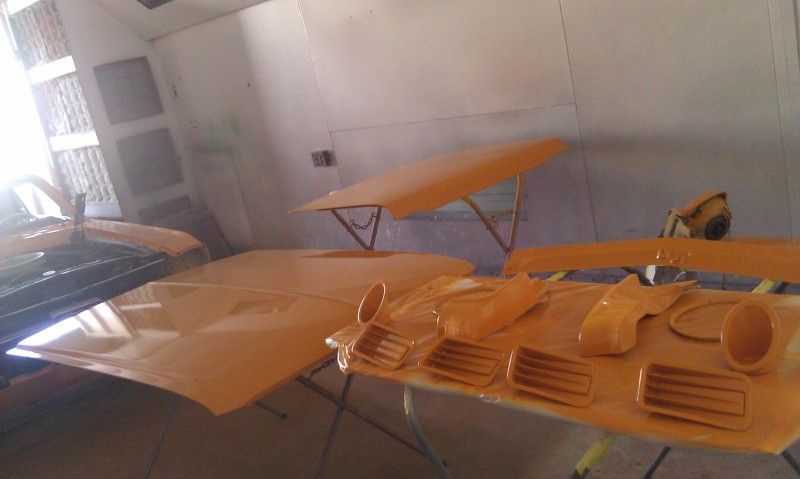
LET THERE BE SUNLIGHT!!

Posted by norcalfiddy (Member # 11207) on
:
came out nice so far!
wanna paint mine? lol
Posted by bwkelley76 (Member # 8792) on
:
quote:
Originally posted by norcalfiddy:
came out nice so far!
wanna paint mine? lol
Thanks! I can get you in touch with one of my painters if you'd like
[ June 22, 2012, 04:26 AM: Message edited by: bwkelley76 ]
Posted by kingdavid (Member # 11179) on
:
Great job. Love the color.
Posted by bwkelley76 (Member # 8792) on
:
quote:
Originally posted by kingdavid:
Great job. Love the color.
Thanks!
A little wet-sanding for the masses.

Posted by v-town coupe (Member # 2771) on
:
I like it!
Posted by 91blackonblack (Member # 11591) on
:
![[dance]](graemlins/dance.gif)
Posted by 91blackonblack (Member # 11591) on
:
Think u should do those vents on the side black itll bring out those wheels bro.not to much but jus a little touch.
Posted by 91blackonblack (Member # 11591) on
:
Posted by Venomousnotch (Member # 8695) on
:
Nice car..That's a bad ass color.Can't wait to see the finished product..You sir have good taste in color schemes..
Posted by bwkelley76 (Member # 8792) on
:
THANKS EVERYONE!
This is my favorite pic so far.
Posted by Slowback67 (Member # 6348) on
:
That color just goes perfect on a mustang.
Looks like a retro trans am car. ![[burnout]](graemlins/burnout.gif)
Posted by bwkelley76 (Member # 8792) on
:
quote:
Originally posted by Slowback67:
That color just goes perfect on a mustang.
Looks like a retro trans am car.
Thanks! This one should be a good mix of new and old.
Posted by bwkelley76 (Member # 8792) on
:
Color sanding stage 2, not quite ready for polish...
[ July 03, 2012, 12:01 AM: Message edited by: bwkelley76 ]
Posted by SAMACH1 (Member # 7042) on
:
car looks AMAZING, i would do the wheels all black cant wait to see the finished product
Posted by kingdavid (Member # 11179) on
:
you do work on engine bays for the early mustang smooth and shave?
Posted by bwkelley76 (Member # 8792) on
:
<< THANKS! If I do any painting to the wheels they will get a Grabber Orange outer lip.
<<Kingdavid; shoot me a PM about the engine bay.
Well it looks like we'll be polishing the next day or two, then flat-black stripes over the clear, new headliner and window install, and reassembling the body and painting bumpers, then back to the suspension and drive-train work.
I need to get this thing back on the road if I want to autocross it this year. I have LOT left to do and most of the parts are just sitting there waiting. ...Camshaft and heads, EFI conversion, 4-wheel disc brakes, narrowed 9", dial in the suspension, repair electrical and gauges, yard-out the old under-dash A/C system, and the list goes on. ...paint wasn't supposed to happen actually, but I take opportunities as they come.
[ July 01, 2012, 12:21 AM: Message edited by: bwkelley76 ]
Posted by bwkelley76 (Member # 8792) on
:
Alright, finally down to 1500 grit and ready for polish! ...I did not realize how much sanding was required.
Posted by bwkelley76 (Member # 8792) on
:
Coarse buffing has begun...
Posted by kingdavid (Member # 11179) on
:
Looks amazing.
Posted by bwkelley76 (Member # 8792) on
:
quote:
Originally posted by kingdavid:
Looks amazing.
Thanks!
Quarter panel is starting to show some shine.

Posted by v-town coupe (Member # 2771) on
:
damn your shit still aint back together! ![[Razz]](tongue.gif)
Posted by bwkelley76 (Member # 8792) on
:
quote:
Originally posted by v-town coupe:
damn your shit still aint back together!
lol, My painter is taking his time actually, but I don't mind as long as he keeps doing a good job.
Posted by bwkelley76 (Member # 8792) on
:
Well crap, it's always somethin' right? My painter's appendix ruptured last week and he is out recovering from surgery for at least 3 weeks. I have someone that is going to finish cutting and polishing the car the early part of next week, so at least I should be able to move forward on getting the car assembled after that. Stripes probably wont happen until my painter gets back on his feet.
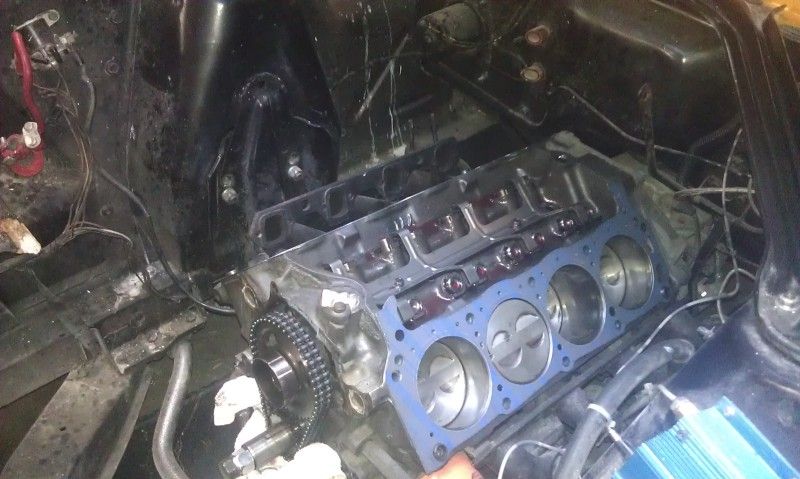
A few mechanical changes are in the works. To make up for some time and money I am selling the really nice complete EFI system I have, and will be going with a quick-fuel carb and torker 289 intake (one of my favorite old-school combos on a SBF). I am working on a set of seriously ported old-school Iron cylinder heads, and 1.72 adjustable roller rockers to go with the E303 camshaft I have. Kindof an old-school meets new-school setup.
Posted by tonkaboyrich496 (Member # 9877) on
:
that color is clean ass fuck...looks even better with the black
Posted by bwkelley76 (Member # 8792) on
:
quote:
Originally posted by tonkaboyrich496:
that color is clean ass fuck...looks even better with the black
Thanks!
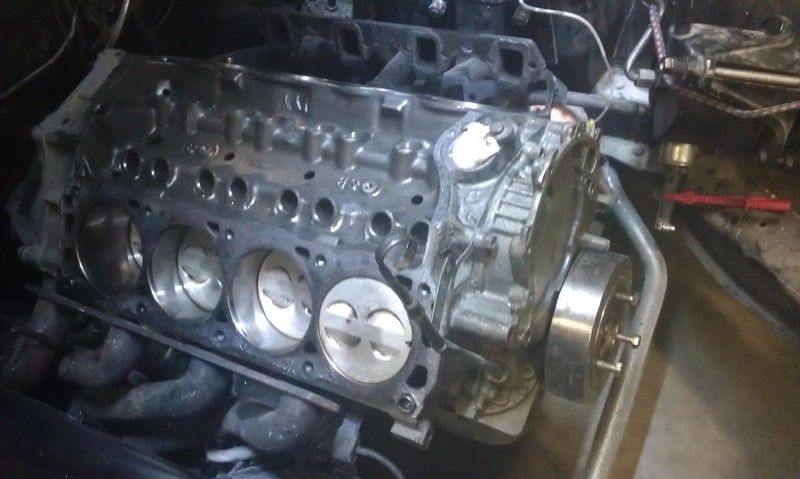
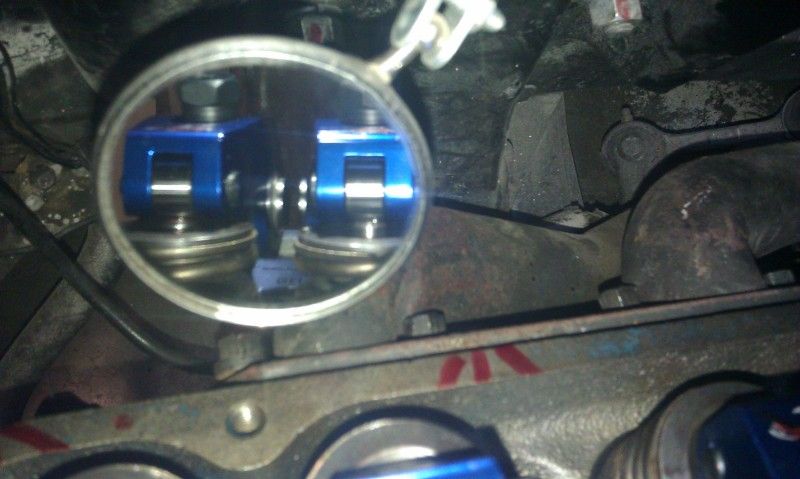
So, I put a scope down into the #1 spark plug hole today and I was very pleased with what I saw. I was told by the seller of this car that the engine has less than 1k miles on the rebuild. The piston looked brand new and still shiny, and cylinder wall had fresh hone marks. I was able to read the piston part# so I did some research. Pistons in this motor are 4.040" TRW flat-tops (cast unfortunately but luckily TRW cast pistons are plenty good up to 400 HP, even on a low psi boosted motor). I will stay naturally aspirated and under 400HP with this motor so I'm golden. These pistons have large, deep valve reliefs so I wont have any PTV issues with the 1.94/1.6 valves I'm running. Cam lift will be at .540 and 280 duration, also no problem. I've run larger cams with the same size valves and smaller valve reliefs in the past, without any issues at all. Things are working out nicely with this car so far. Not bad for a budget-minded build.
Posted by bwkelley76 (Member # 8792) on
:
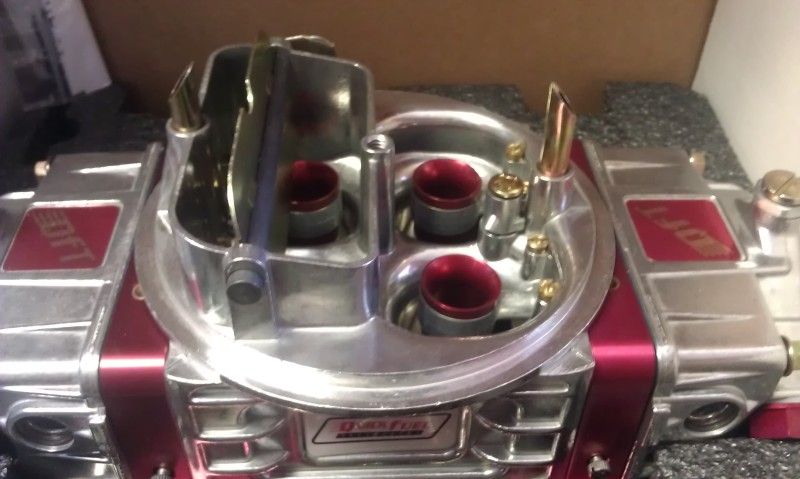
Sold the EFI system today and ordered a Quick-Fuel carb. I decided to go with the 650cfm "Super Street" model with annular boosters.
Posted by kingdavid (Member # 11179) on
:
quote:
Originally posted by bwkelley76:
Sold the EFI system today and ordered a Quick-Fuel carb. I decided to go with the 650cfm "Super Street" model with annular boosters.
Excellent carb ran that same one on my old setup you will definitely be satisfied.
Posted by bwkelley76 (Member # 8792) on
:
quote:
Originally posted by kingdavid:
quote:
Originally posted by bwkelley76:
Sold the EFI system today and ordered a Quick-Fuel carb. I decided to go with the 650cfm "Super Street" model with annular boosters.
Excellent carb ran that same one on my old setup you will definitely be satisfied.
Great to hear! I have a customer that has one and I love the throttle response. Usually we just go with the regular "Q-series down-leg" model which is still nice, but the annular boosters are that much better.
Polishing is almost done!
[ July 18, 2012, 09:28 AM: Message edited by: bwkelley76 ]
Posted by bwkelley76 (Member # 8792) on
:
Annular boosters are a wonderful thing
Posted by v-town coupe (Member # 2771) on
:
damn forgot how big those boosters are, so whats that thing flow now like 550 cfm?LOL
Posted by bwkelley76 (Member # 8792) on
:
quote:
Originally posted by v-town coupe:
damn forgot how big those boosters are, so whats that thing flow now like 550 cfm?LOL
LOL, I know right? Those things look like TBI injectors! The boosters will cut down flow slightly, but gain 5-15hp across the board at every RPM. I've seen the dyno comparisons. Go figure. ...Way more efficient fuel atomization.
[ July 19, 2012, 03:56 AM: Message edited by: bwkelley76 ]
Posted by bwkelley76 (Member # 8792) on
:
Cut n polish is finally done!
Posted by 88gtstang (Member # 10370) on
:
quote:
Originally posted by bwkelley76:
Cut n polish is finally done!
Posted by Secnd2nun64 (Member # 1431) on
:
Looking good! You could almost have it done by hot august nights.
Posted by bwkelley76 (Member # 8792) on
:
Thanks guys!!
quote:
Originally posted by Secnd2nun64:
Looking good! You could almost have it done by hot august nights.
I'm sure I could make it for week 2 if I pushed things real hard.
[ July 24, 2012, 09:59 PM: Message edited by: bwkelley76 ]
Posted by bwkelley76 (Member # 8792) on
:
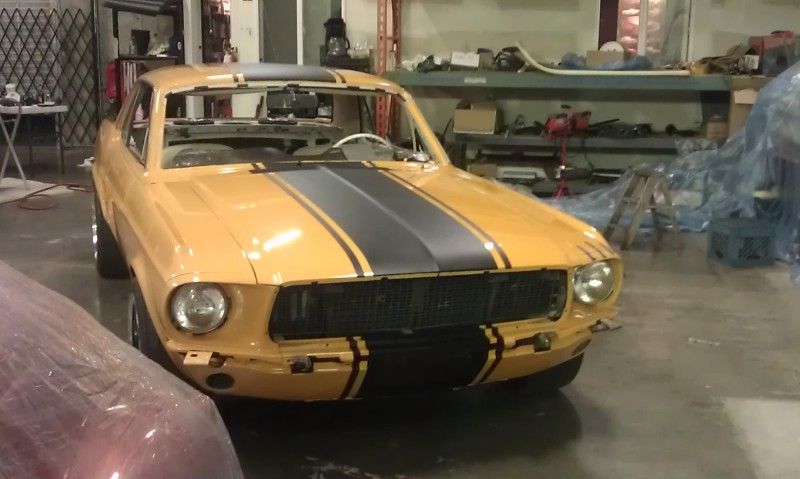
Hood and trunk lid are on. Sure looks good out in the sun.

Posted by Slowback67 (Member # 6348) on
:
Looks like you have a Maier pan hard bar set up in the rear... You running their leafs too?
Posted by bwkelley76 (Member # 8792) on
:
quote:
Originally posted by Slowback67:
Looks like you have a Maier pan hard bar set up in the rear... You running their leafs too?
Running Grab-a-Tracks 5 leaf reverse-eye.
Posted by kingdavid (Member # 11179) on
:
Looks awesome.
Posted by Secnd2nun64 (Member # 1431) on
:
Where' s the chrome man? I'd be itching to get that car finished at this point. Get'r done!
Posted by 91blackonblack (Member # 11591) on
:
Yeh let us just see when its done.
Posted by bwkelley76 (Member # 8792) on
:
quote:
Originally posted by Secnd2nun64:
Where' s the chrome man? I'd be itching to get that car finished at this point. Get'r done!
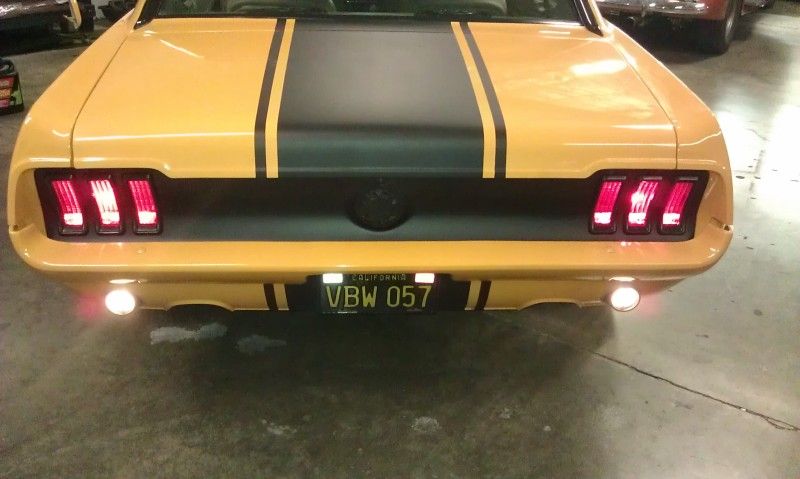
No chrome. Bumpers have been powder-coat primed and painted Grabber Orange. Window trim, tail light bezels, grille and grille trim are black. Probably doing door handles black, too.
Posted by Duncan Motors (Member # 7045) on
:
IM JEALOUSE YOUR CAR IS SO FAR AHEAD OF MINE, I DO NOT LIKE THOSE WHEELS ON OLD SCHOOLS, NOR AM I FAN OF THAT COLOR BUT YOUR CAR WITH that COMBO IS PERFECT!!!! great job man it looks bad ass! i didnt expect that combo to look so gd!!!
Posted by bwkelley76 (Member # 8792) on
:
quote:
Originally posted by Duncan Motors:
IM JEALOUSE YOUR CAR IS SO FAR AHEAD OF MINE, I DO NOT LIKE THOSE WHEELS ON OLD SCHOOLS, NOR AM I FAN OF THAT COLOR BUT YOUR CAR WITH that COMBO IS PERFECT!!!! great job man it looks bad ass! i didnt expect that combo to look so gd!!!
Thanks man, I already had the wheels so I chose a color that would look good with them. I'm not a fan of these wheels on a classic either, nor am I fan of this color on a classic (the Trans Am '69 and '70 models by Parnelli Jones were kindof cool but not exactly my style). I think the 2008 GT500 looks great in this color with the right wheels and stripes. This car when done will look more like an updated/newer car than a classic in scheme, and the goal is not to lose it's classic appeal either. I played it safe with the classic/retro color and it really panned out.
Posted by bwkelley76 (Member # 8792) on
:
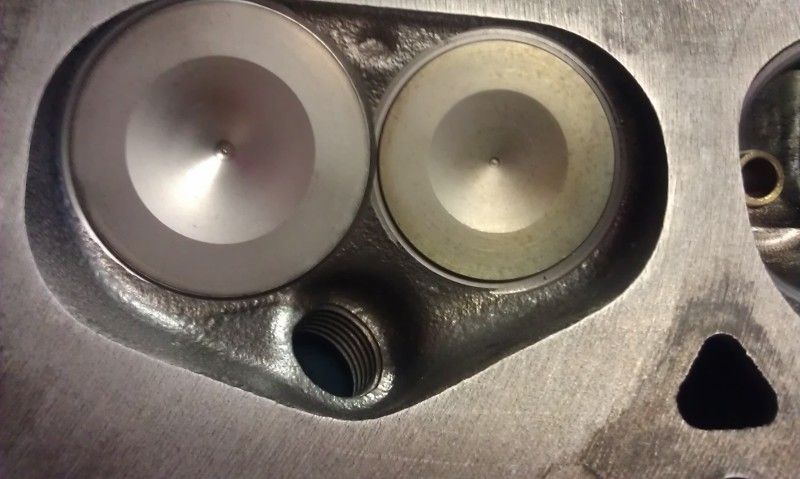
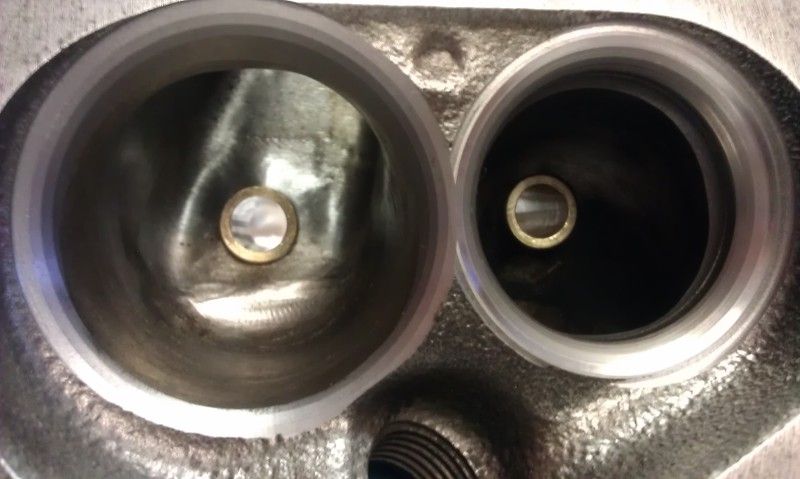
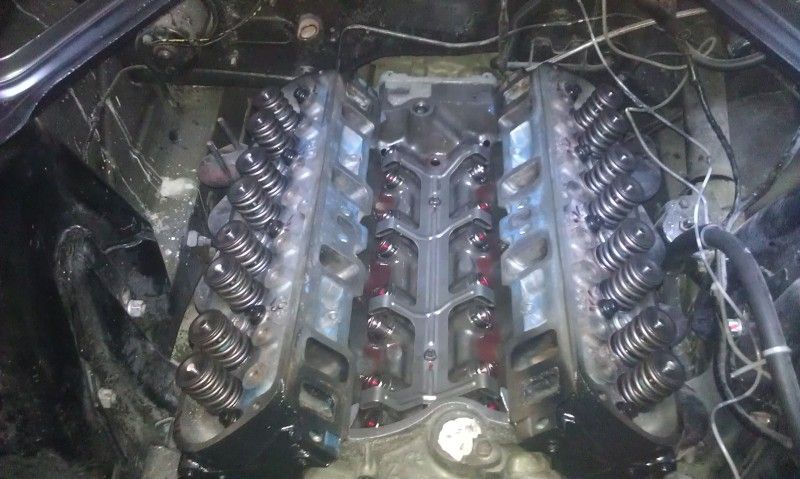
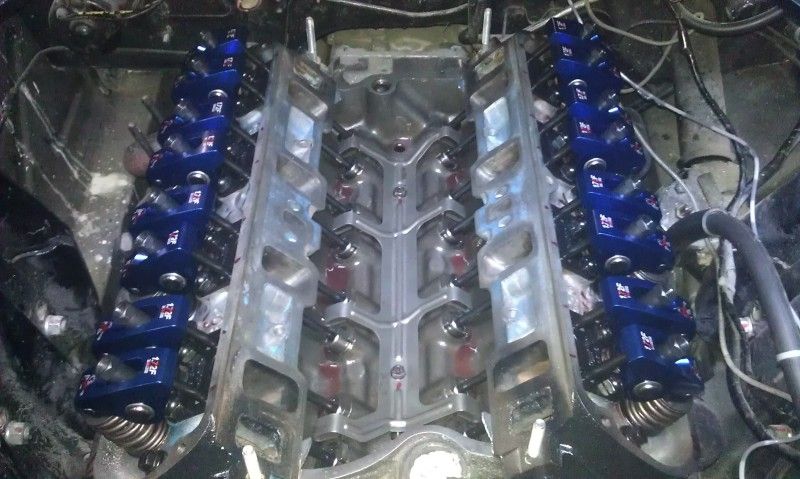
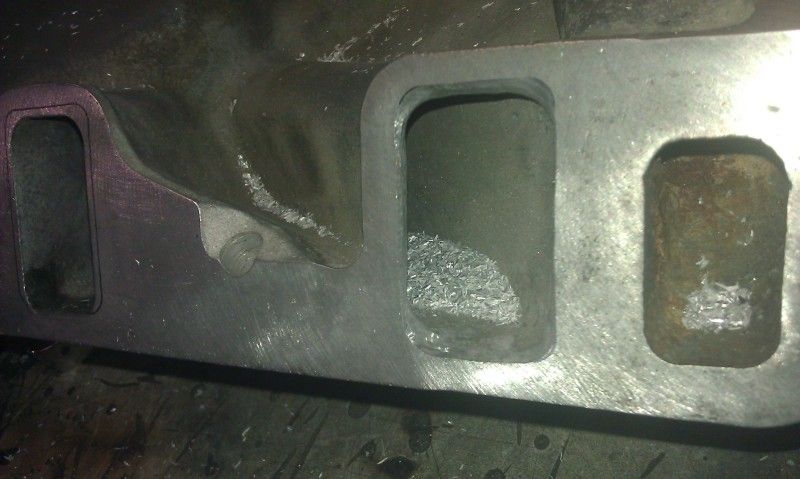
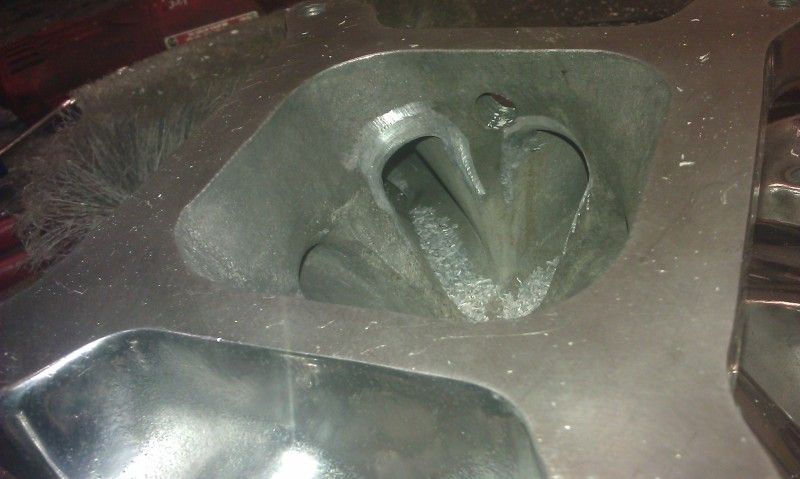
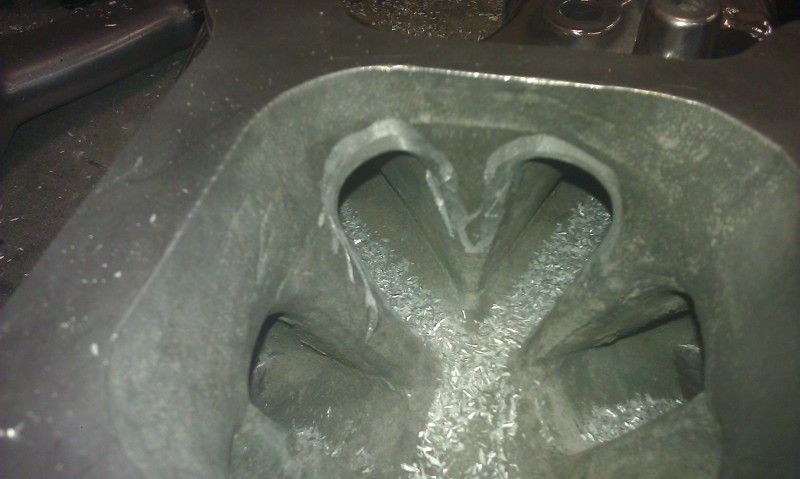
A little sneak peak of the cylinder heads...
(DOOE 302 closed-chamber heads with 1.94/1.6 stainless valves, VERY NICE port job by "Powerheads", ARP 7/16" screw-in studs, Comp Cams guideplates, dual springs, and viton seals. Other valve-train components include 1.72 Scorpion rockers, TFS one-piece chromoly pushrods, and E303 camshaft)
Posted by 88gtstang (Member # 10370) on
:
when are the stripes going on i wanna see it already lol
Posted by turbo50 (Member # 6700) on
:
quote:
Originally posted by bwkelley76:
A little sneak peak of the cylinder heads...
(DOOE 302 closed-chamber heads with 1.94/1.6 stainless valves, VERY NICE port job by "Powerheads", ARP 7/16" screw-in studs, Comp Cams guideplates, dual springs, and viton seals. Other valve-train components include 1.72 Scorpion rockers, TFS one-piece chromoly pushrods, and E303 camshaft)
What made you decide to use those ancient beasts brandon???
Off cuff all I use is annular carbys they are awesome!!
Posted by bwkelley76 (Member # 8792) on
:
<<<Money mostly, and no need for more than 350horsepower or so. I have $500 into these versus 1k+ for even a cheap set of aluminums. Also, I'm limited to valve size with this setup so these are perfect.
Annular boosters are really nice.
Posted by bwkelley76 (Member # 8792) on
:
quote:
Originally posted by 88gtstang:
when are the stripes going on i wanna see it already lol
as soon as possible. Waiting on OTHERS. ![[Frown]](frown.gif)
Posted by bwkelley76 (Member # 8792) on
:
Headliner was installed today, waiting on my painter to do the stripes next (end of this week or next), then windows and mouldings go in and I can reassemble after that.
[ August 18, 2012, 02:18 AM: Message edited by: bwkelley76 ]
Posted by 940sick3 (Member # 2713) on
:

Posted by bwkelley76 (Member # 8792) on
:
Cylinder heads are supposed to be done tomorrow or Monday. I can't wait to see how she breathes with some new lungs!
Posted by bwkelley76 (Member # 8792) on
:
Laying out and masking stripes.
Posted by JACK FROST (Member # 9987) on
:
Very Nice ! I love that color, will the stipe be on it be white ?
Posted by bwkelley76 (Member # 8792) on
:
quote:
Originally posted by JACK FROST:
Very Nice ! I love that color, will the stipe be on it be white ?
Flat black
Posted by bwkelley76 (Member # 8792) on
:
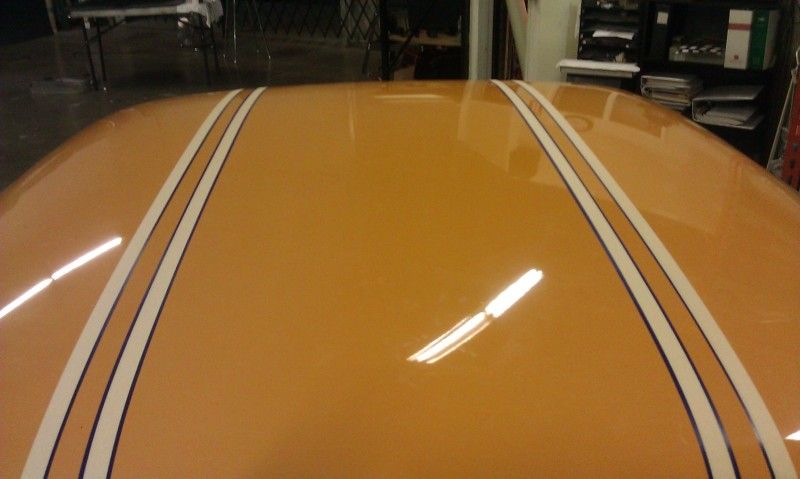
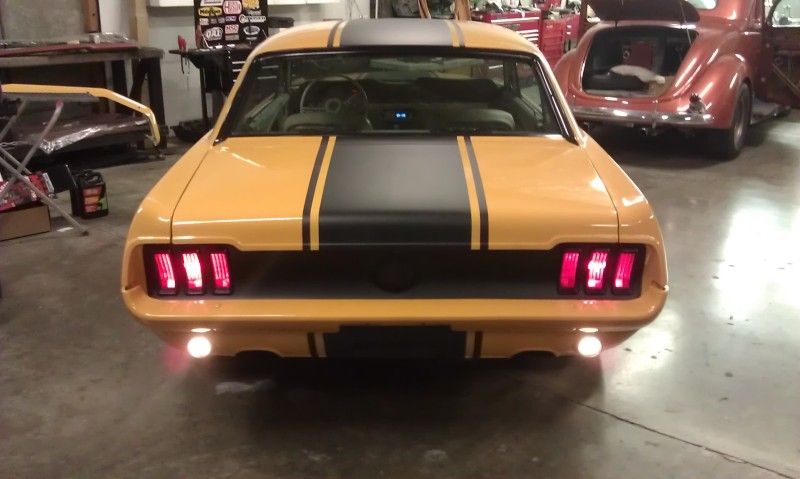
WE HAVE STRIPES!
Posted by 88gtstang (Member # 10370) on
:
SICK!!!!
Posted by v-town coupe (Member # 2771) on
:
That was a great idea sir!!! I Really dig the way this is looking!
Posted by 68dustin (Member # 5388) on
:
u were braver than me.. i was thinking of putting a satin stripe on my car when i painted it, but didnt know how it would hold up to the elements. looks sweet though..
Posted by Slowback67 (Member # 6348) on
:
Looks real nice.
^^^^^ Dustin^^^^^
You can probably use that satin clear on the stripe so it holds up.
Posted by NEIGHT (Member # 8741) on
:
WOW Badass!!!! How much you wanna let go of this one for?
Posted by bwkelley76 (Member # 8792) on
:
quote:
Originally posted by NEIGHT:
WOW Badass!!!! How much you wanna let go of this one for?
haha, "Everything" is For Sale.
Posted by NEIGHT (Member # 8741) on
:
quote:
Originally posted by bwkelley76:
quote:
Originally posted by NEIGHT:
WOW Badass!!!! How much you wanna let go of this one for?
haha, "Everything" is For Sale.
How much is that?
Posted by bwkelley76 (Member # 8792) on
:
quote:
Originally posted by NEIGHT:
quote:
Originally posted by bwkelley76:
quote:
Originally posted by NEIGHT:
WOW Badass!!!! How much you wanna let go of this one for?
haha, "Everything" is For Sale.
How much is that?
Let me enjoy this one for a while.
Posted by sinisterblk (Member # 8425) on
:
Love the stripe, similar to what I want to do, but
I'm bummed about having a raised edge. It's looking
like Jerry Titus's trans am car.
Posted by fstryde3 (Member # 8436) on
:
Man that is one bad ass looking car man.
Posted by 50Reasons (Member # 6452) on
:
Looks good !!!!
Posted by ISP89LX (Member # 8949) on
:
quote:
Originally posted by bwkelley76:
WE HAVE STRIPES!
Holy moly that's beautiful , great job sir and keep up the great work im deff in love with the whole car.
Posted by v-town coupe (Member # 2771) on
:
how big were the wheel spacer you needed to get the fr'500's on there?
Posted by 306calypsodrop (Member # 10881) on
:
Bad ass car
Posted by bwkelley76 (Member # 8792) on
:
quote:
Originally posted by v-town coupe:
how big were the wheel spacer you needed to get the fr'500's on there?
1"
Posted by bwkelley76 (Member # 8792) on
:
quote:
Originally posted by 306calypsodrop:
Bad ass car
Thank you!
Posted by bwkelley76 (Member # 8792) on
:
Cam and head swap is going well. Engine only has about 900 miles on it. Looks purty inside!

Posted by Slowback67 (Member # 6348) on
:
What cam did you pick up?
Posted by bwkelley76 (Member # 8792) on
:
quote:
Originally posted by Slowback67:
What cam did you pick up?
E-303 and 1.72 rockers
Posted by bwkelley76 (Member # 8792) on
:
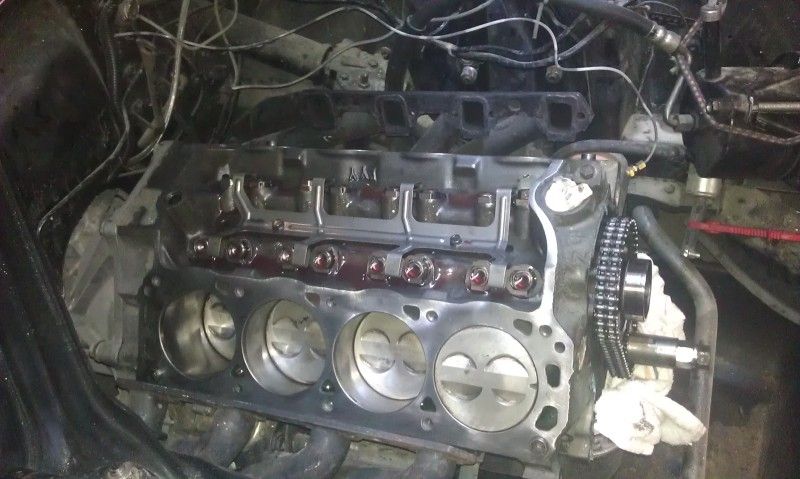
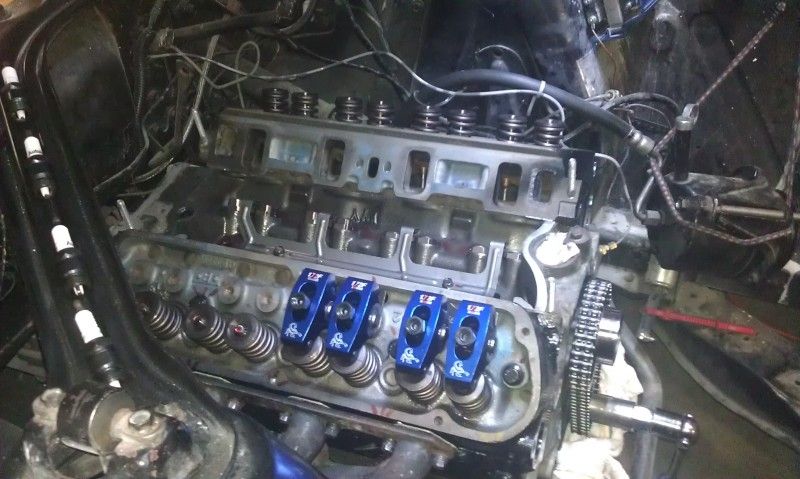
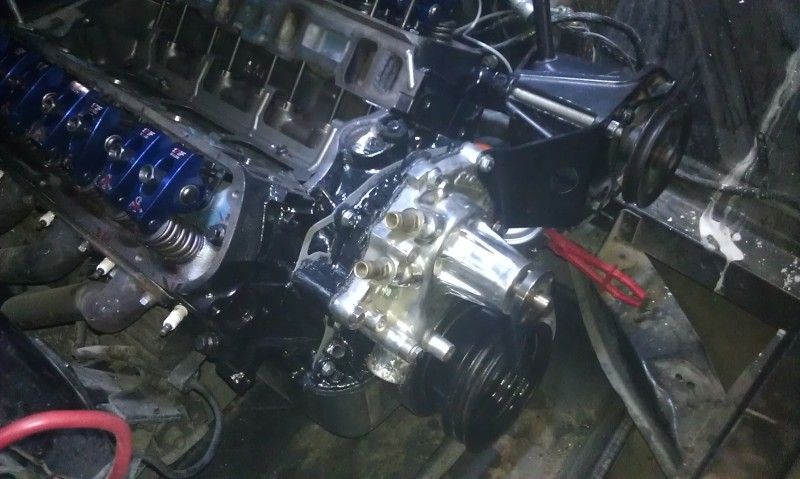
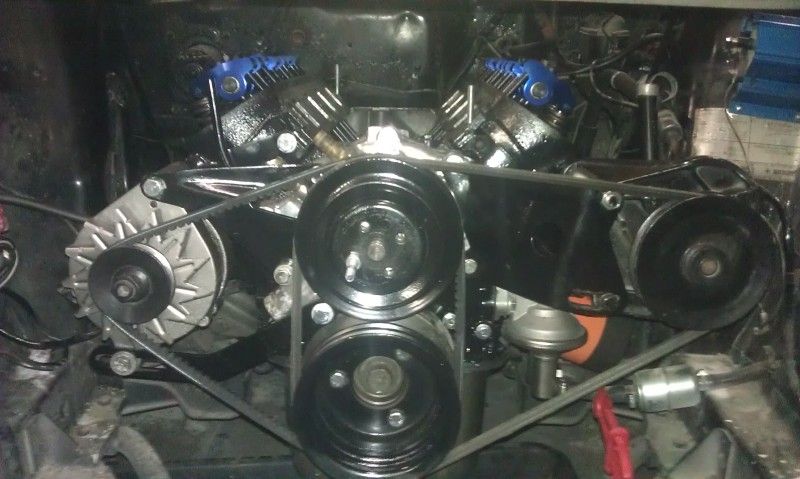
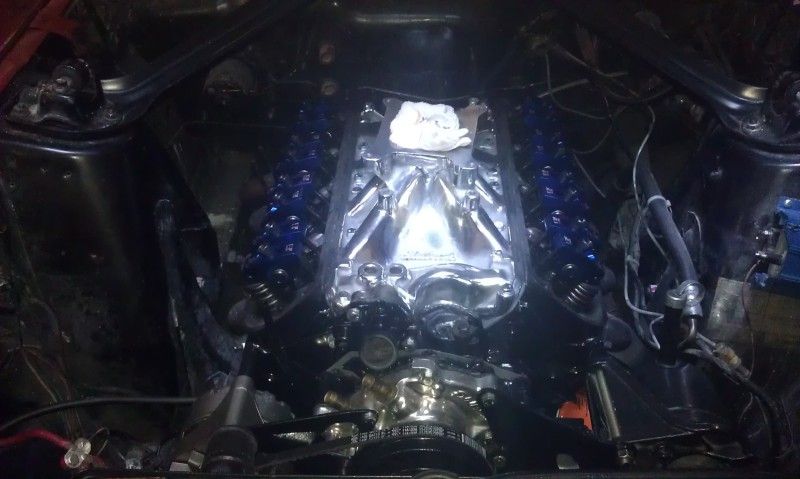
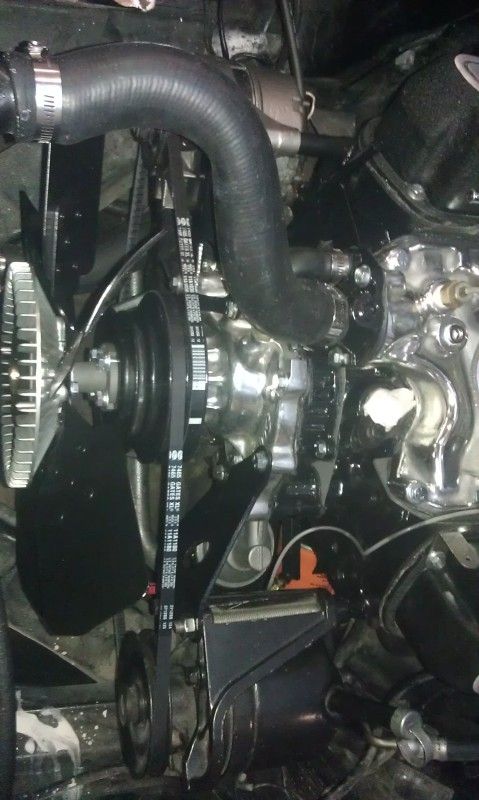
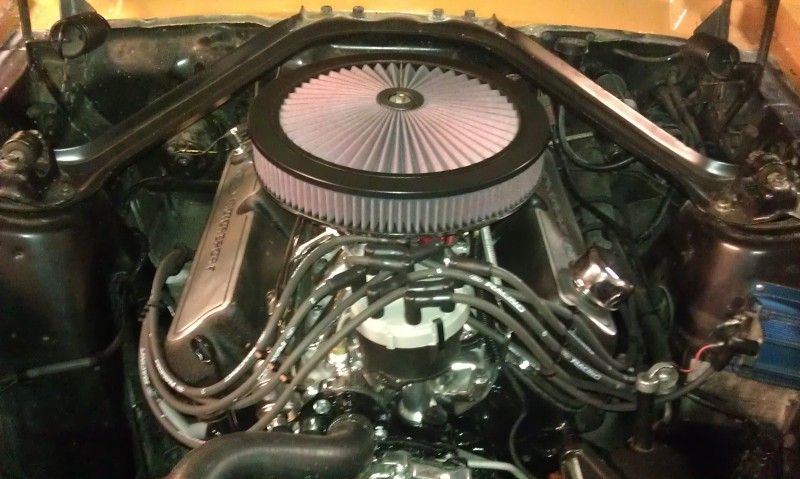
Here's a few better quality pics of the motor going back together. Excuse the engine bay, it looks horrible and I have not had a chance yet to clean it up after paint and body. ...I will be shooting the rest of the motor black to match the heads also, instead of the hideous "cast-iron grey" it was before.
E303 cam, new Ford Racing roller lifters installed, APR head bolts, and Comp Cams double-roller timing chain.
...Next comes the Scorpion 1.72 rockers, hardened one-piece TFS push-rods, screw in 7/16" studs, and guideplates. I will also be mocking up the polished Toker 289 intake manifold to get a "gasket height" so I can properly port-match the runners.
Posted by bwkelley76 (Member # 8792) on
:
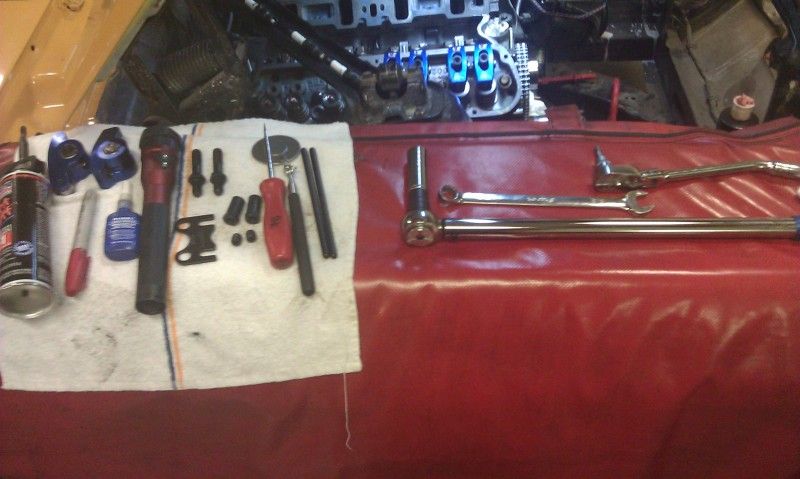
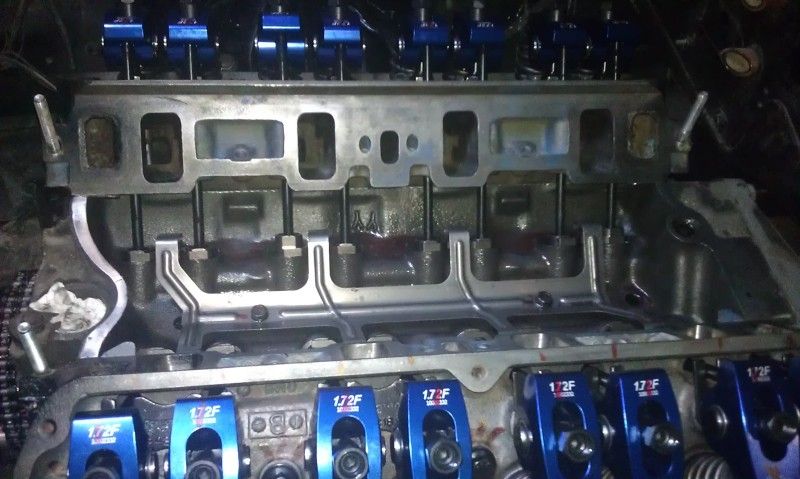
The Doctor at work. One cylinder at a time, checking guide-plates and valve geometry/roller centers, marking everything as I go and properly torquing every stud and lock. Valve setup is actually one of my fortes, definitely something I take seriously. These should never need re-adjusted once I'm done.
Posted by bwkelley76 (Member # 8792) on
:
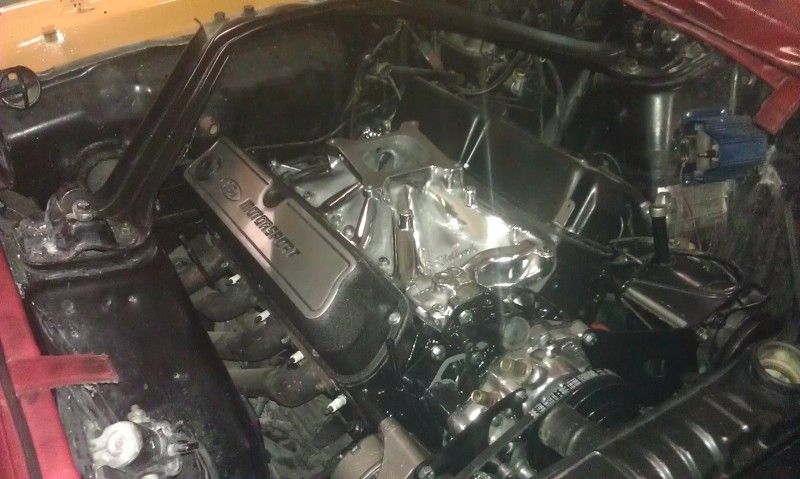
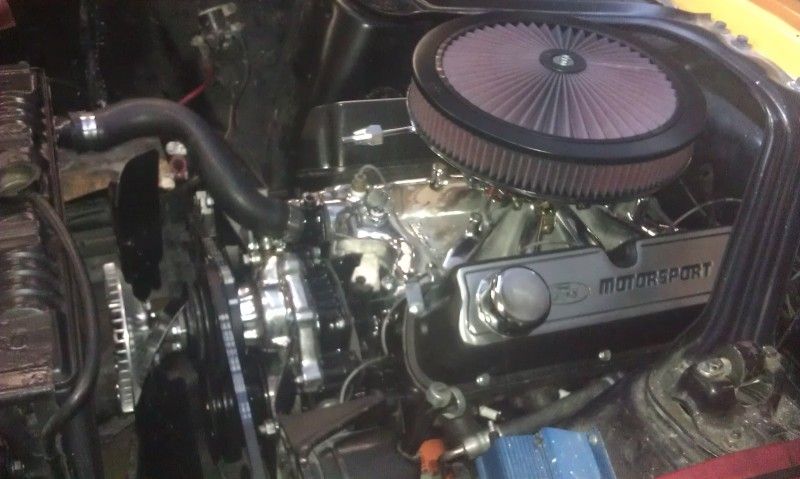
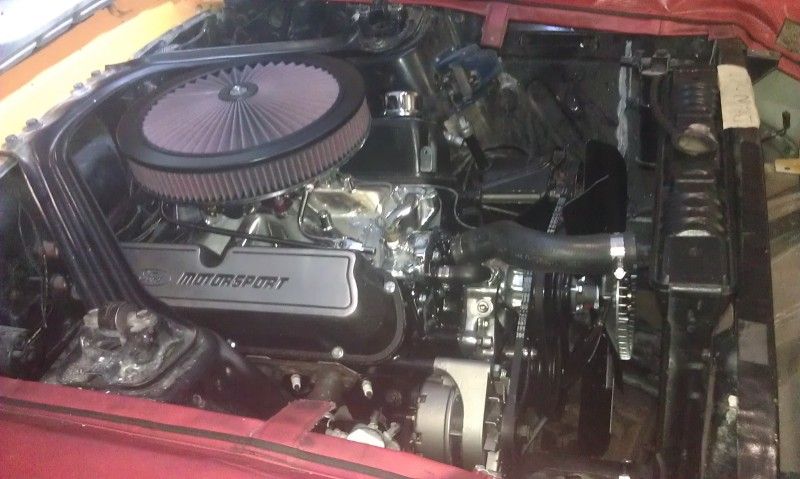
Productive day! Motor is all back together, just a few minor things left and I can start her back up again.
Posted by 50Reasons (Member # 6452) on
:
Is she running?
Posted by bwkelley76 (Member # 8792) on
:
It's alive! All back together and running, fired right up on the first try, no leaks, no valvetrain noise at all, and it sounds pretty damn impressive! I scrounged up an MSD Pro Billet distributor for it but I need to install the steel gear on it for my roller cam. (Maybe I'll do that tomorrow night if I have the energy left, it's been a long week) I put the old "Pro-Comp" distributor back in it for now so I could hear it run. I'm very impressed with the throttle response this thing has. Success! ..I will tell you what, it was a lot of work but it was worth it. Can't wait to get her on the street and see how she pulls.
Posted by 91blackonblack (Member # 11591) on
:
Give us a walk areound adlease i mean u made seven pages out of it we followed u like twitter so give us a video.dont we deserve that?lol but im serious tho.
Posted by v-town coupe (Member # 2771) on
:
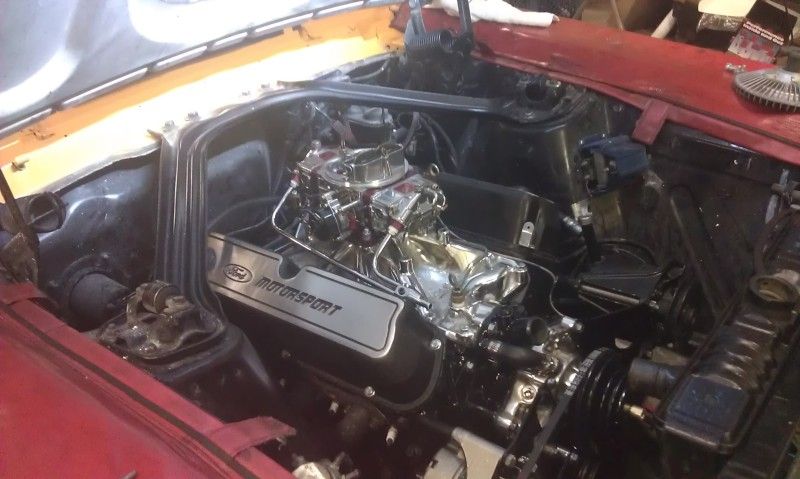
Is that and old torker manifold with the "kicked" carb base?
Posted by bwkelley76 (Member # 8792) on
:
quote:
Originally posted by 91blackonblack:
Give us a walk areound adlease i mean u made seven pages out of it we followed u like twitter so give us a video.dont we deserve that?lol but im serious tho.
lol, I took a video last night and it came out horrible, the bass/rumble from the exhaust was completely distorted. I'll take another one with a better camera here soon. It sounds pretty damn good.
Posted by bwkelley76 (Member # 8792) on
:
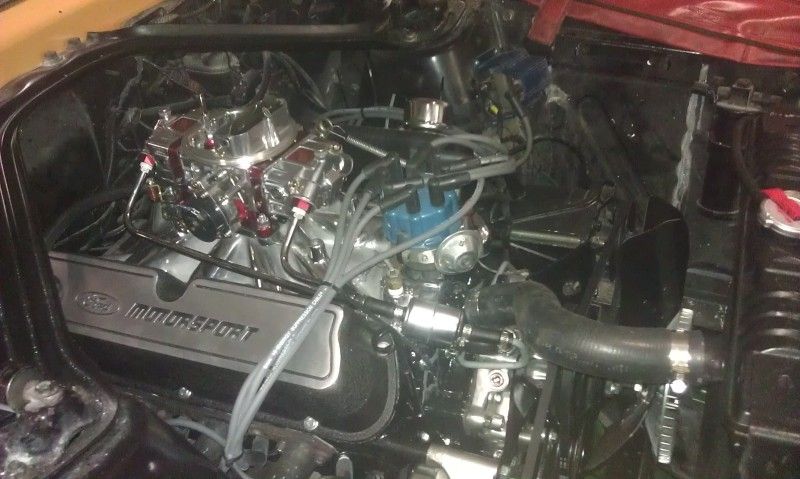
quote:
Originally posted by v-town coupe:
Is that and old torker manifold with the "kicked" carb base?
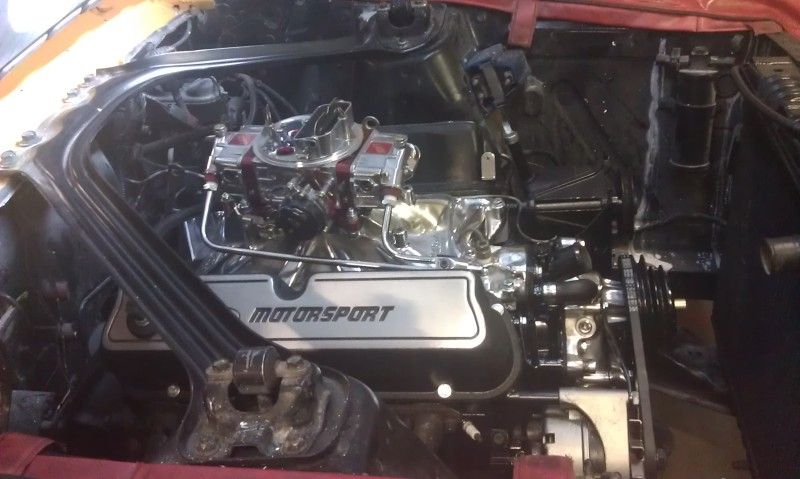
It is! ...One of my favorite intakes for SBF.
Posted by 91blackonblack (Member # 11591) on
:
quote:
Originally posted by bwkelley76:
quote:
Originally posted by 91blackonblack:
Give us a walk areound adlease i mean u made seven pages out of it we followed u like twitter so give us a video.dont we deserve that?lol but im serious tho.
lol, I took a video last night and it came out horrible, the bass/rumble from the exhaust was completely distorted. I'll take another one with a better camera here soon. It sounds pretty damn good.
ok sounds like a plan.
Posted by bwkelley76 (Member # 8792) on
:
Here's a video clip. (not the best quality but it works) ...Click on the picture to start the video.
Posted by 91blackonblack (Member # 11591) on
:
Tweet tweet..nice thnx nice follow..lol good job
Posted by bwkelley76 (Member # 8792) on
:
Maiden Voyage! (2 videos, click pics to play) ....This kindof cracks me up but it was fun... It sounds good but it has really sticky tires, no posi, insane wheel-hop and 2.73 or 3.0 gears at the moment. She still gets it though! ...2nd gear is kindof a joke...lol can you say BOG! haha. 4.11 gears and posi coming soon! ...I just need to get off my butt and weld the pads onto the new 9" rear..lol
Posted by p1mp1n (Member # 1961) on
:
Very nice build!!! Sounds great
Posted by bwkelley76 (Member # 8792) on
:
quote:
Originally posted by p1mp1n:
Very nice build!!! Sounds great
Its coming along nicely, thanks!
Posted by 68dustin (Member # 5388) on
:
sounds good, but just to let you know.. u are at that point to which you sell all ur cars lol. .. keep this one! ........... at least for a little while to enjoy...
Posted by bwkelley76 (Member # 8792) on
:
quote:
Originally posted by 68dustin:
sounds good, but just to let you know.. u are at that point to which you sell all ur cars lol. .. keep this one! ........... at least for a little while to enjoy...
lol, I plan on it. Everything is for sale for the right price. I'm not going to turn down a really good offer if it's on the table though.
Posted by kingdavid (Member # 11179) on
:
Sounds good and looks good. Awesome job.
Posted by v-town coupe (Member # 2771) on
:
not sure what T-5 your using but 3.80's may work better in your situation if you have one of the really low first gear T-5's.
Posted by bwkelley76 (Member # 8792) on
:
<<Thanks David.
quote:
Originally posted by v-town coupe:
not sure what T-5 your using but 3.80's may work better in your situation if you have one of the really low first gear T-5's.
....I believe it is one of the lower ones. You're right regarding the street/strip, first gear will be a little short. The 4.11's are something that I already have, so I'm going to give them a try. Nice thing is a 9" pumpkin is easy to drop out and swap. lol. I'm hoping that with the 4.11's 2nd gear will be a nice broad gear for the autocross track. I wont need first gear except to accelerate from a dead stop, and even then the 4.11's might be low enough to allow me to start off in 2nd if I absolutely had to.
[ September 08, 2012, 04:31 PM: Message edited by: bwkelley76 ]
Posted by iceman302 (Member # 7180) on
:
The car is lookin' good!
Posted by bwkelley76 (Member # 8792) on
:
quote:
Originally posted by iceman302:
The car is lookin' good!
<<<Thanks, It's going to be a great 10-footer, nothin special. The Shelby is lookin good there, can't wait to see her on the road!
Posted by Luke87GT (Member # 21) on
:
Good to see some of these projects moving ahead quickly! Nice work!
Posted by STREETFIGHTER50 (Member # 2973) on
:
Sick ass build bro! That orange & them stripes are just killin it! Love that combo!
Would've been sick sittin next to my ZX10R. Are you really gonna sell it already? How much??
[ September 11, 2012, 02:04 AM: Message edited by: STREETFIGHTER50 ]
Posted by bwkelley76 (Member # 8792) on
:
..Haha, everything is For Sale but I want to enjoy this one for a little while at least.
Reassembly is going well! ..Back-half is done.
Posted by Chavez66 (Member # 9812) on
:
^^^^^^wow looking real NICE^^^^^^^^
Posted by bwkelley76 (Member # 8792) on
:
Thanks!
....
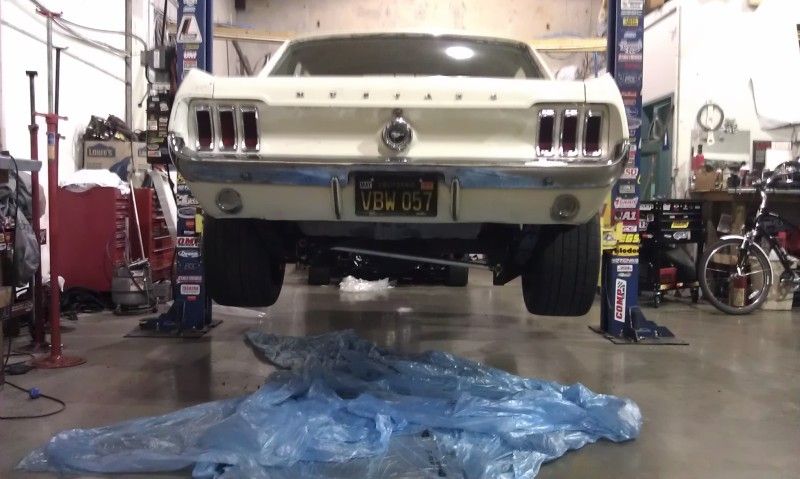
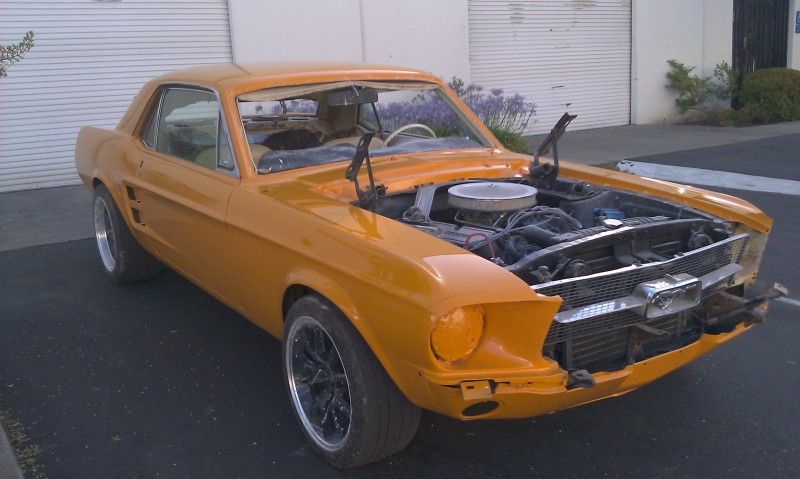
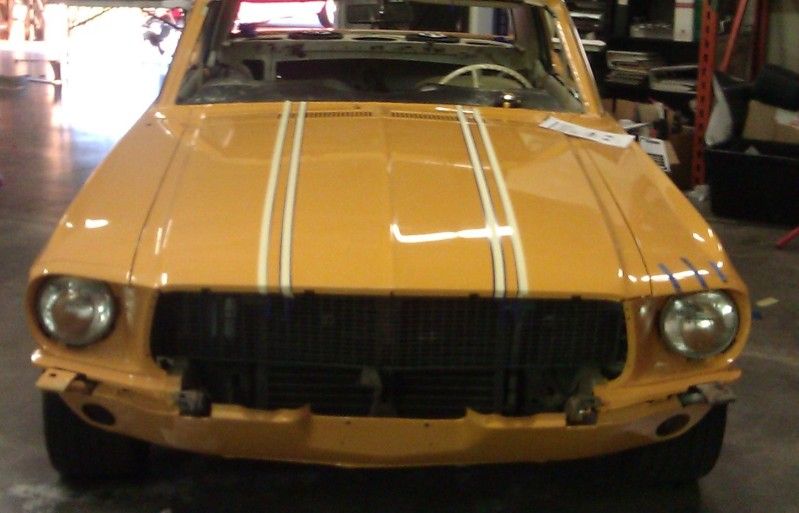
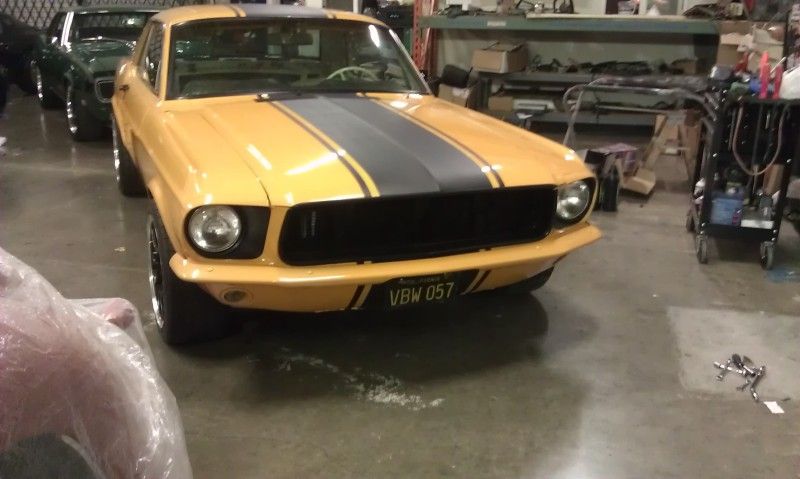
So the exterior is all back together. Drove her home from the shop tonight.
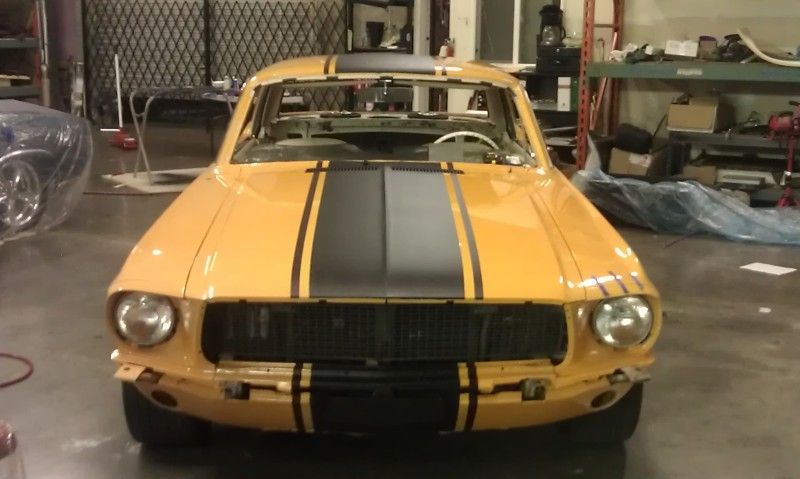
Here are some pics of the front. I'm not sure if I want to add stripes to the front bumper. ...it's possible.
Posted by AJBlackGT (Member # 3936) on
:
Man you got more balls than me doing a head and cam swap over that sweet fresh paint job!
Posted by bwkelley76 (Member # 8792) on
:
quote:
Originally posted by AJBlackGT:
Man you got more balls than me doing a head and cam swap over that sweet fresh paint job!
...Story of my life? lol. Working in the resto industry you learn to do what you can, when you can, and to just BE CAREFUL! ....wool-lined fender covers are a good thing as well...lol
Home Sweet Home!...
How much carpet insulation does one car need?!! ... ...Just lost some weight...
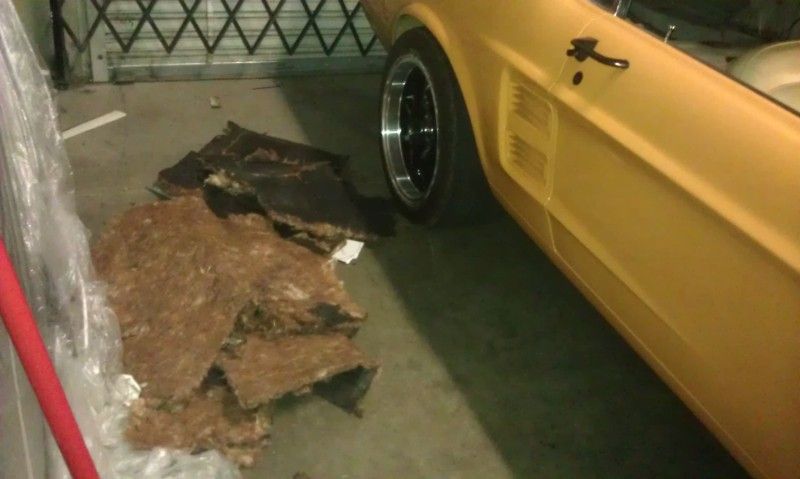
LONG WEEKEND! ...In addition to removing the carpet insulation, some mandatory under-dash wiring functional cleanup, fix headlight switch and ignition switch wiring, remove under-dash A/C unit, install MSD system (hide under dash), install tachometer, clean and reinstall interior.
[ September 18, 2012, 02:32 AM: Message edited by: bwkelley76 ]
Posted by dvuspny (Member # 10949) on
:
Very......very nice!!!! Sleek
Posted by Duncan Motors (Member # 7045) on
:
u do very nice work! looks beautiful!!!
Posted by 925_GT (Member # 11891) on
:
That thing is tits. You have me sold on the 10 series flowmasters too. Exactly how I want my car to sound.
Posted by bwkelley76 (Member # 8792) on
:
<<Thanks guys!
quote:
Originally posted by 925_GT:
That thing is tits. You have me sold on the 10 series flowmasters too. Exactly how I want my car to sound.
It has a pretty decent sound, I'm definitely wanting to run the pipes all the way out the back though, one of these days.
Posted by bwkelley76 (Member # 8792) on
:
Hello all, I just got back from a week's vacation in Cancun, Mexico. Maybe I need to get my priorities straight but the best part of the week was getting HOME, driving my Mustang and having a freakin' cheeseburger! lol ..the simple things we take for granted.
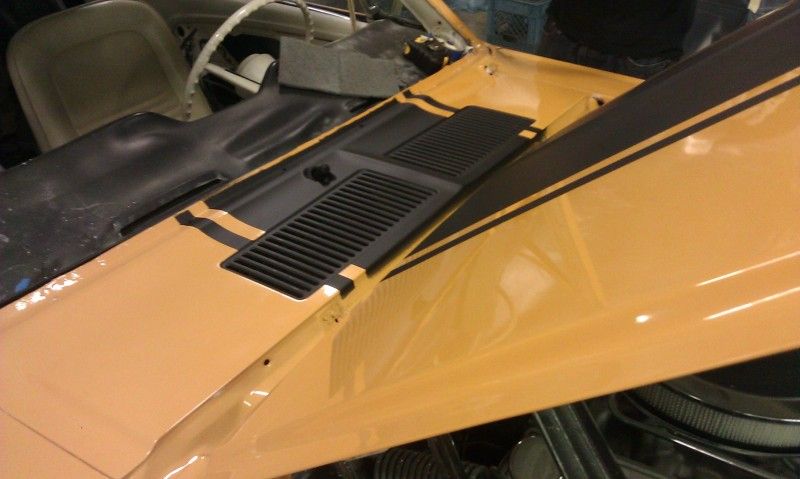
Today I spent the day doing some minor things to the car like installing the rear package tray, interior door lock ferrules, horse emblem on the grille (looks great), and completed the daunting task of finding the correct cooling fan/clutch assembly and a shroud. ...<<Tight quarters up there!
Pics coming soon. I may do stripes on the side, possibly FIA stripes on the fenders or something. I've visited all the basics like c-stripes, CS stripes, shelby/GT style rocker stripes, yadda yadda. This one deserves something that "fits"! ...and the vote around town so far is NO BUMBER STRIPES! ...interesting how "in person" people have different opinions.
[ September 29, 2012, 11:33 PM: Message edited by: bwkelley76 ]
Posted by bwkelley76 (Member # 8792) on
:
Grille Emblem is on.
Definitely leaving the bumper plain, no stripes. I'm thinking about getting rid of the stripes on the rock-guard between the grille and bumper as well.
..any comments?
Posted by Hele On (Member # 4107) on
:
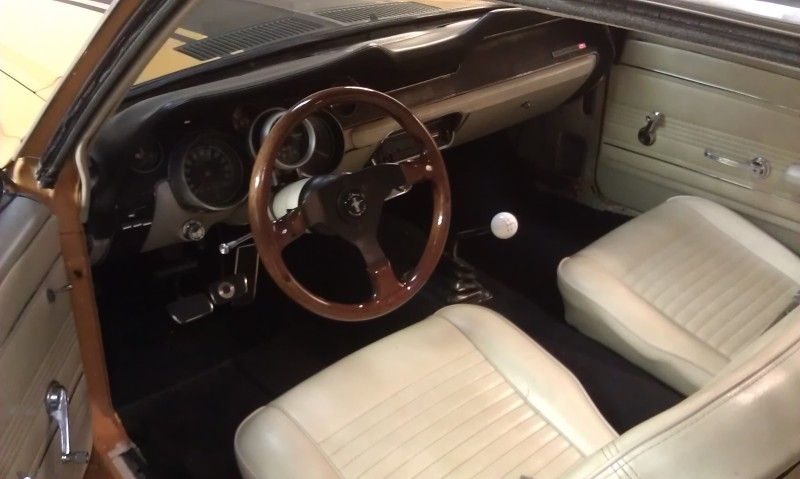
I miss my old parchment interior! Stripes look good, personally wouldn't add any more. Headlight buckets need to be painted to match the body, IMHO it takes away from the grill and overall look of the car... It accentuates the lights in a bad way, looks rough but not in a "racer" kind of way.
Posted by BLoWN FR500 (Member # 8766) on
:
Posted by 925_GT (Member # 11891) on
:
quote:
Originally posted by Hele On:
I miss my old parchment interior! Stripes look good, personally wouldn't add any more. Headlight buckets need to be painted to match the body, IMHO it takes away from the grill and overall look of the car... It accentuates the lights in a bad way, looks rough but not in a "racer" kind of way.
I would have to agree on the "raccoon eyes". It just dosent look quite right on this car.
Posted by 98 ROUSH (Member # 10309) on
:
I would it just leave it the way you have it bro, badass Old School
Posted by bwkelley76 (Member # 8792) on
:
quote:
Originally posted by 98 ROUSH:
I would it just leave it the way you have it bro, badass Old School
Thanks 98! ...I still want to do something on the side though, even if its minor.
Posted by bwkelley76 (Member # 8792) on
:
Haven't changed the front or sides yet, it's growing on me like it is so I'll probably leave it at least for a while. I definitely have other things to deal with so I'll revisit the front later.
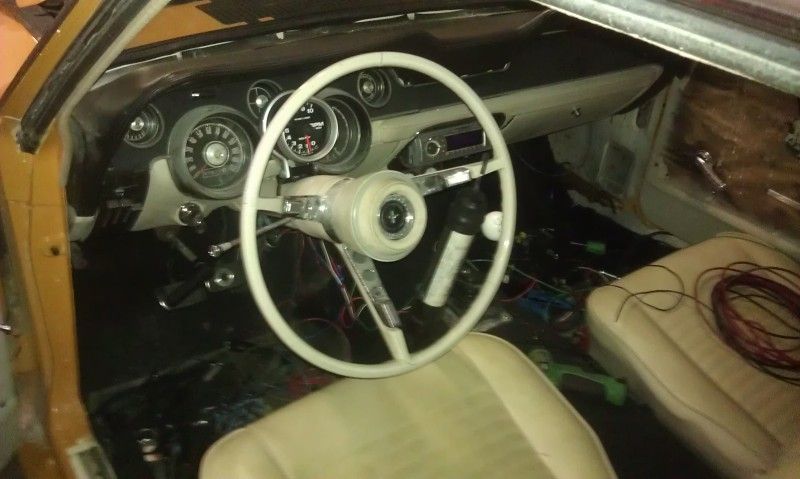
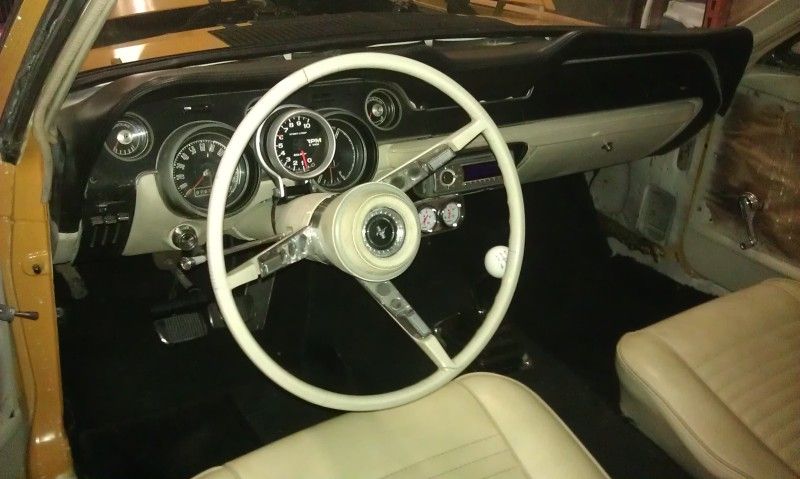
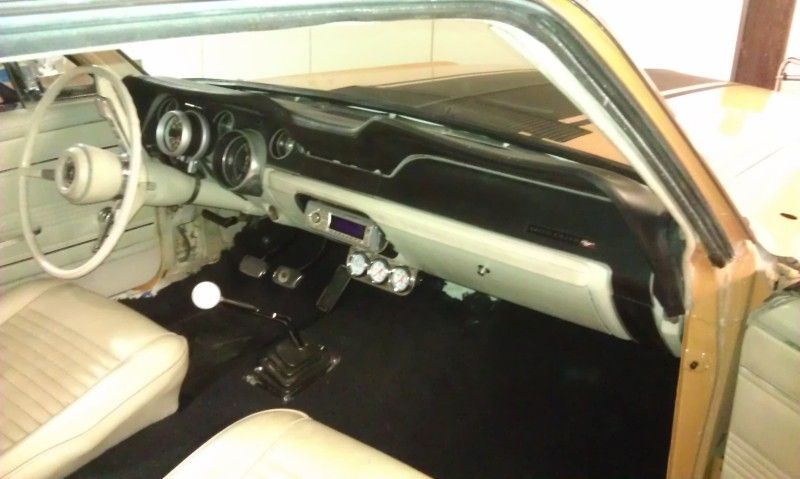
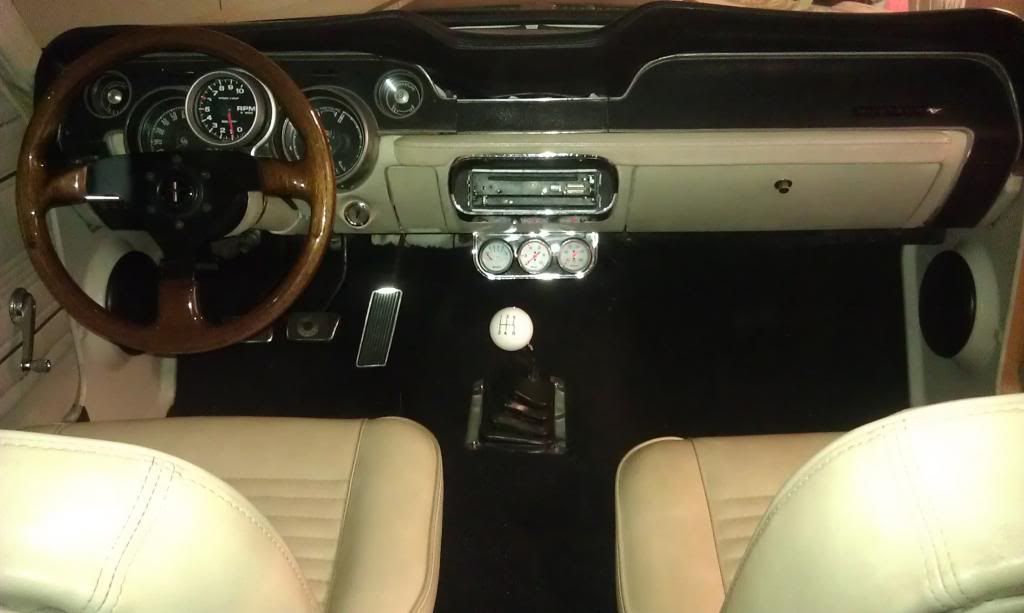
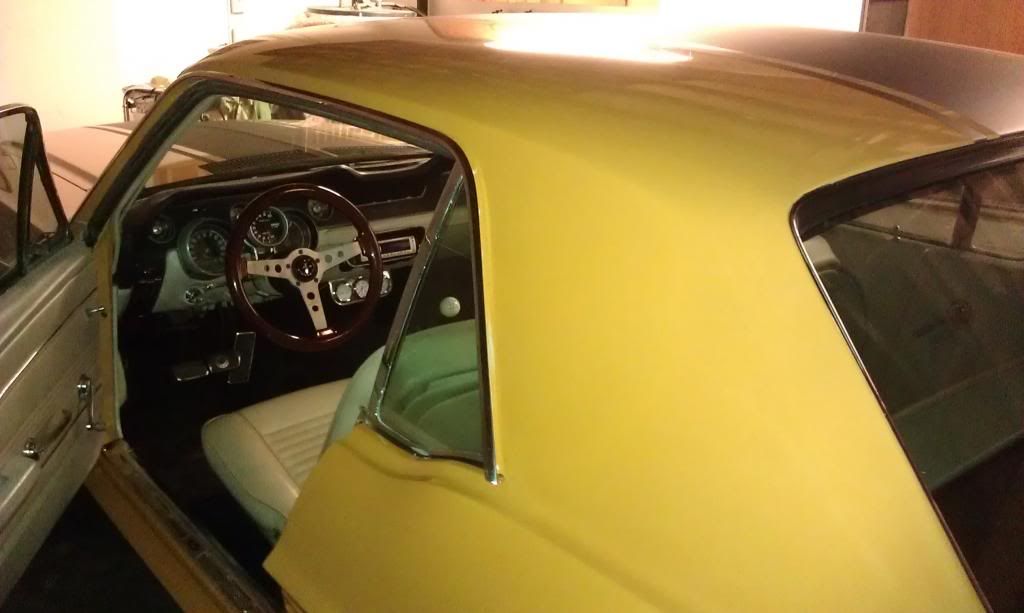
Currently dialing in the front steering and suspension. I changed the steering wheel, power steering control valve, and have been playing with steering box adjustments.
I'm also chasing a nasty vibration at freeway speeds, possibly driveline and/or tailshaft bushing. It's definitely speed related, not RPM. I hung a wrench on some things and did some inspecting, etc. The rear u-joint caps were not as tight as I prefer but not completely loose, so not sure if that was it or not. ...havent' test-driven it yet to verify.
Here is a picture before and after of the steering wheel I installed.
It's just one that I had lying around, definitely better than the GARGANTUAN stock wheel.
Looks pretty decent so I'll probably leave it. The difference in handling with just the smaller wheel diameter is AMAZING.
BEFORE
AFTER
[ October 06, 2012, 05:41 PM: Message edited by: bwkelley76 ]
Posted by v-town coupe (Member # 2771) on
:
The parchment interior looks out of place, just go black! nice car none the less.
Posted by bwkelley76 (Member # 8792) on
:
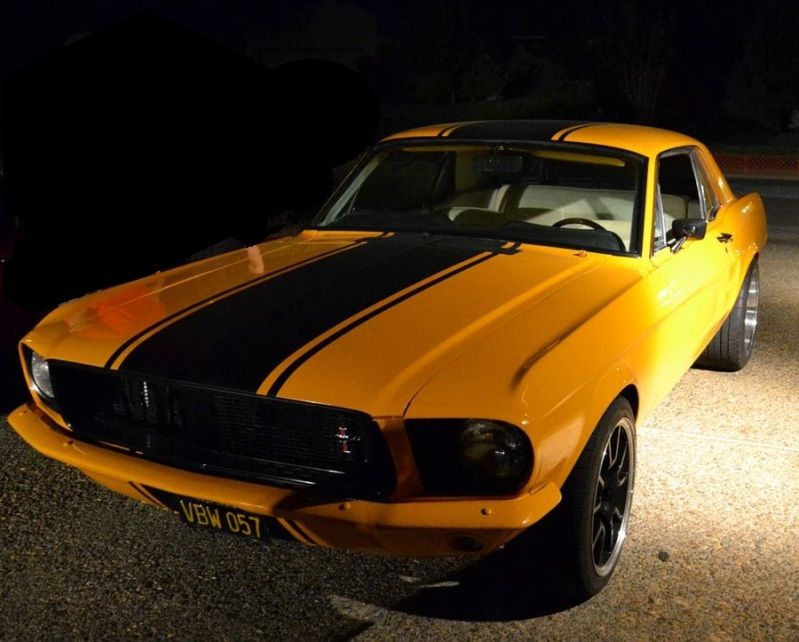
Nice night time pic of the car.
Posted by phildog (Member # 1214) on
:
Looks dope, although my vote would be to black out the grille area completely, from headlight to headlight. And run the stripes through the bumpers.
Great looking ride, and thank you for axing the stock steering wheel!
Posted by 166 Merlot (Member # 1549) on
:
Dp
[ October 08, 2012, 01:25 AM: Message edited by: 166 Merlot ]
Posted by 166 Merlot (Member # 1549) on
:
quote:
Originally posted by 925_GT:
quote:
Originally posted by Hele On:
I miss my old parchment interior! Stripes look good, personally wouldn't add any more. Headlight buckets need to be painted to match the body, IMHO it takes away from the grill and overall look of the car... It accentuates the lights in a bad way, looks rough but not in a "racer" kind of way.
I would have to agree on the "raccoon eyes". It just dosent look quite right on this car.
I dont concur.. I think it makes it look more modern- restomod if u would. Kind of like a new 2012-2013. I wouldnt change it. And yes, keep the stripes off the bumper. Looks good man. I like it! And i hate yellow, If that means anything...
[ October 08, 2012, 01:29 AM: Message edited by: 166 Merlot ]
Posted by SETONKILL (Member # 7277) on
:
Looks really good i like thr color,just not feeling the painted bumpers to late 80's pro street for my taste
Posted by bwkelley76 (Member # 8792) on
:
...Having an all steel driveshaft made. The original "tube-in-tube" rubber shaft has got to go! ...I thought about doing aluminum but I really don't need it and don't want to spend the cash at the moment.
Posted by bwkelley76 (Member # 8792) on
:
I HAVE RESOLUTION! ...holy hell if driveshaft vibrations don't cause headaches. I had a bad vibration at 60-70 MPH when coasting/cruising, ESPECIALLY when in neutral or clutch-in. I decided to replace the old rubberized driveshaft with a steel one, that changed nothing, I checked pinion and tailshaft angles and shimmed the rearend accordingly, that did nothing.
I read up on NUMEROUS forums, checked everything accordingly, etc, and I stumbled upon a guy online that got rid of his poly trans mount in favor of a stock rubber one and all his troubles went away.
So, I took his advice and for a measly $ 8 dollars I solved the problem.... I got rid of the poly trans mount and installed a factory rubber one.
VIBRATION GONE! Who woulda thought!?
Posted by bwkelley76 (Member # 8792) on
:
Dialing in the steering today... Found that my brand new idler arm was bad. Bought a MOOG unit and the steering feels MUCH better!
Posted by bwkelley76 (Member # 8792) on
:
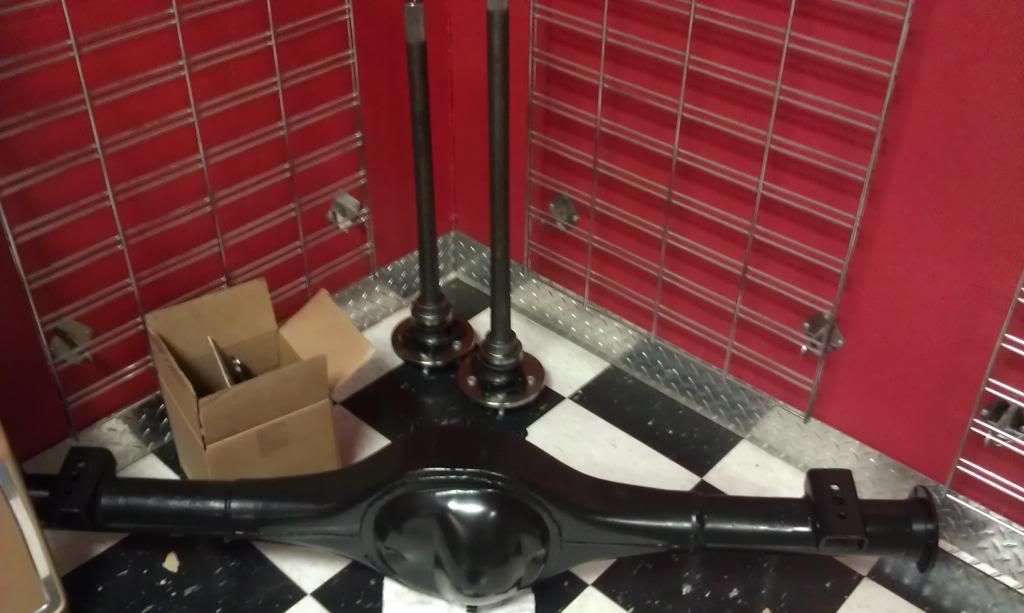
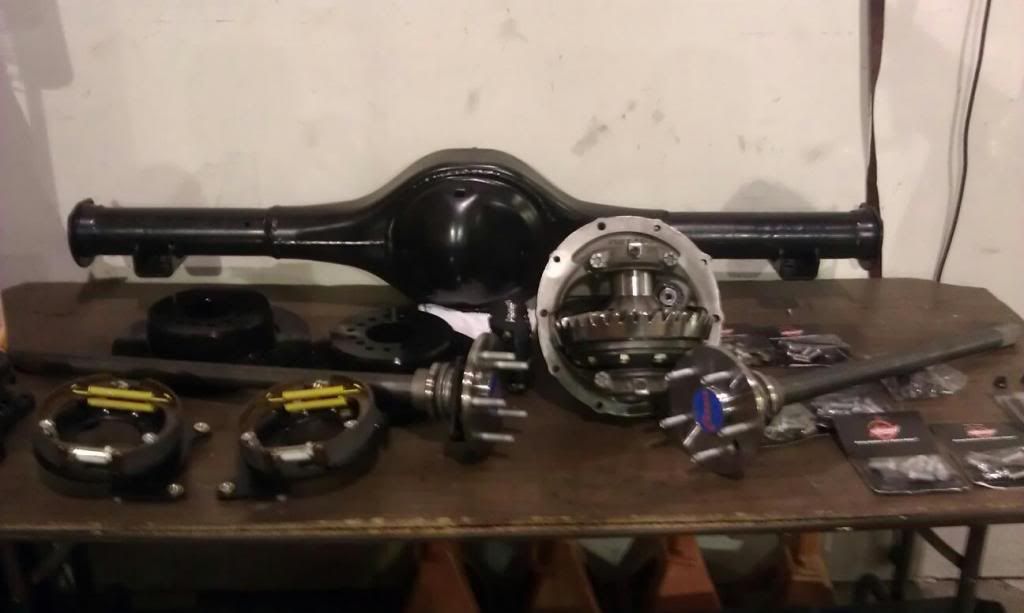
9" rear woes!!
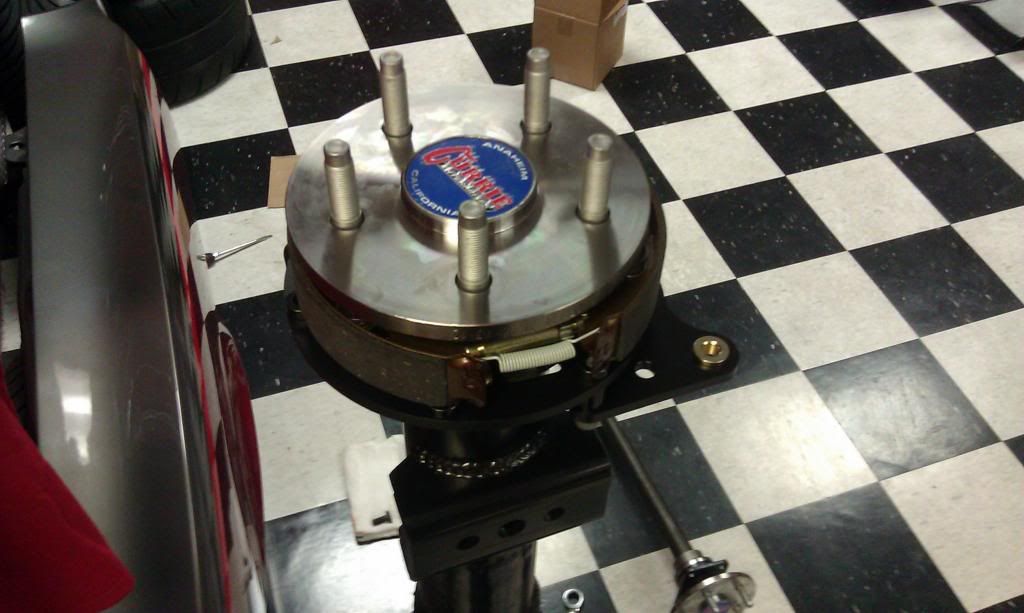
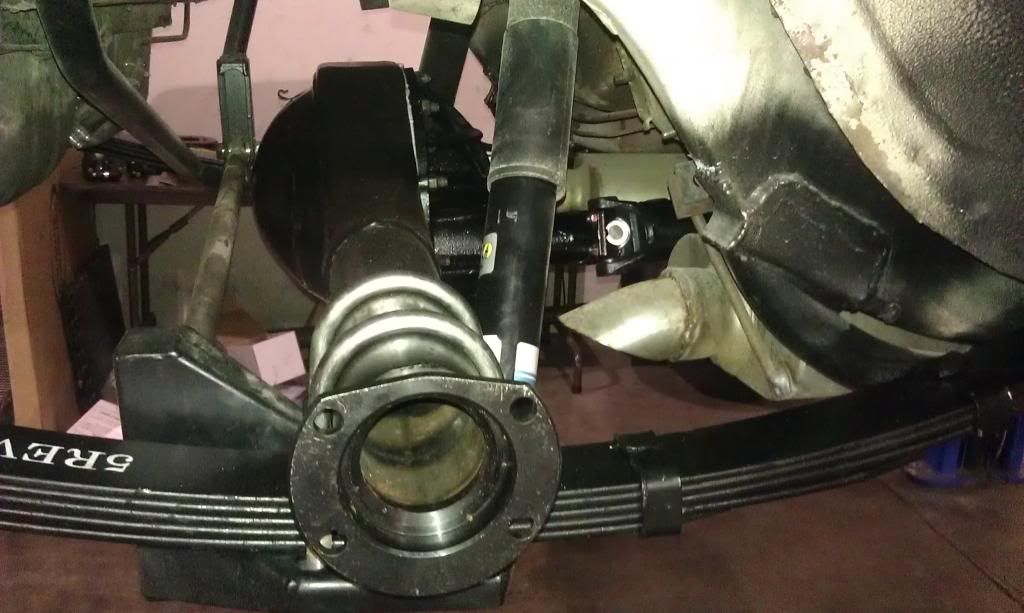
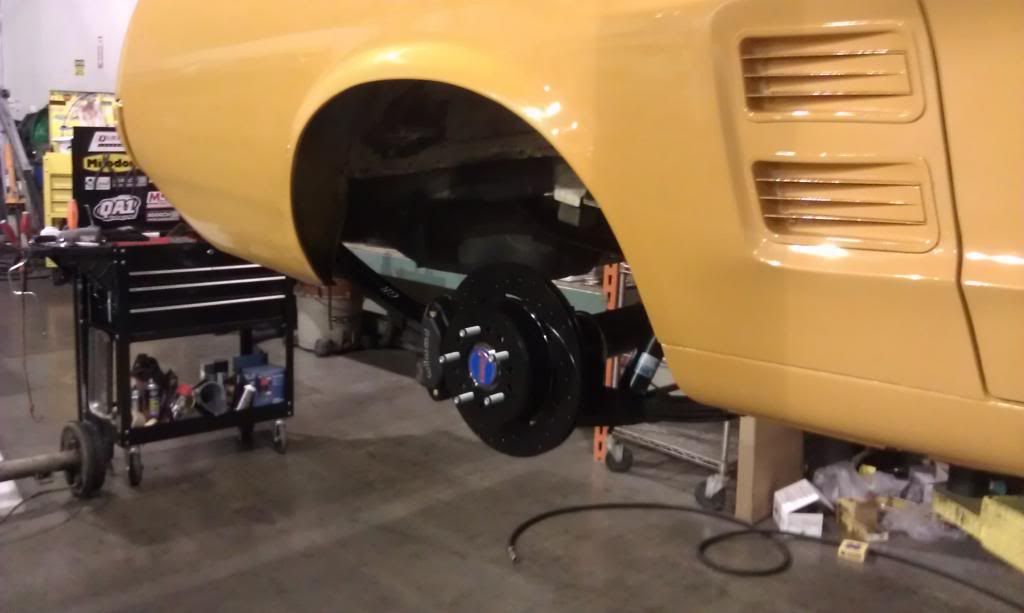
Dang it, my 9" rear isn't coming along as nicely as I hoped. Turns out I have a freakin mini-spool instead of the POSI/limited slip differential I was promised, my axle tubes on my narrowed housing are 3.25" wide (HUGE) so I'm going to need to modify my lower plates (right side being integral to the panhard bar), and also just found out the ends that were welded onto the tubes are OLD-SCHOOL big-bearing that have an odd bolt pattern and do not use a traditional seal rather an o-ring and aren't the TORINO NEW ends I was promised. Had to re-order my Wilwood parts for the rear today for correct fitment and now I'm trying to find a rebuildable trac-loc or other posi unit to replace the stupid mini-spool. ........It's ALWAYS SOMETHING RIGHT?
Posted by bwkelley76 (Member # 8792) on
:
DOH!....
You know how you wash your car and it rains? How about when you decide to sell your car and has a major break-down the very day you find a buyer?
Looks like my 8" rear wants the last word....
Now that I've decided to start working on my 9" swap, the 8" decides to blow an axle seal, real BAD! ...Gear oil all over the r/r brakes and wheel. YUK.
So, now I'm really making progress on the 9" rear, ...out of necessity! (that and I really don't want to put a dime into the 8")
Today I ordered the posi unit, 31-spline custom length Currie axles with "Set-20" tapered bearings, all the attachment hardware, and weld-on axle perches.
For those of you that are wondering, I have a big-bearing/VERY ROBUST 9" truck housing that was narrowed to fit the stang (less 1/4" width on each side) as well as a set of crio-treated 4.11's that unfortunately have a mini-spool currently, as to why I've ordered a reworked/upgraded Trac-Loc setup. The housing is the largest/beefiest housing that Ford ever made, with 3.25" axle tubes and a v-gusset center. I will be modifying my lower plates, including the side with the Maier panhard bracket to incorporate the 3.25" tubes.
...FUN! lol
[ October 23, 2012, 02:09 AM: Message edited by: bwkelley76 ]
Posted by v-town coupe (Member # 2771) on
:
quote:
Originally posted by bwkelley76:
DOH!....
You know how you wash your car and it rains? How about when you decide to sell your car and has a major break-down the very day you find a buyer?
Looks like my 8" rear wants the last word....
Now that I've decided to start working on my 9" swap, the 8" decides to blow an axle seal, real BAD! ...Gear oil all over the r/r brakes and wheel. YUK.
So, now I'm really making progress on the 9" rear, ...out of necessity! (that and I really don't want to put a dime into the 8")
Today I ordered the posi unit, 31-spline custom length Currie axles with "Set-20" tapered bearings, all the attachment hardware, and weld-on axle perches.
For those of you that are wondering, I have a big-bearing/VERY ROBUST 9" truck housing that was narrowed to fit the stang (less 1/4" width on each side) as well as a set of crio-treated 4.11's that unfortunately have a mini-spool currently, as to why I've ordered a reworked/upgraded Trac-Loc setup. The housing is the largest/beefiest housing that Ford ever made, with 3.25" axle tubes and a v-gusset center. I will be modifying my lower plates, including the side with the Maier panhard bracket to incorporate the 3.25" tubes.
...FUN! lol
The Only thing I took out of all that was your selling it already?
Posted by 66_5.0 (Member # 9974) on
:
quote:
Originally posted by v-town coupe:
quote:
Originally posted by bwkelley76:
DOH!....
You know how you wash your car and it rains? How about when you decide to sell your car and has a major break-down the very day you find a buyer?
Looks like my 8" rear wants the last word....
Now that I've decided to start working on my 9" swap, the 8" decides to blow an axle seal, real BAD! ...Gear oil all over the r/r brakes and wheel. YUK.
So, now I'm really making progress on the 9" rear, ...out of necessity! (that and I really don't want to put a dime into the 8")
Today I ordered the posi unit, 31-spline custom length Currie axles with "Set-20" tapered bearings, all the attachment hardware, and weld-on axle perches.
For those of you that are wondering, I have a big-bearing/VERY ROBUST 9" truck housing that was narrowed to fit the stang (less 1/4" width on each side) as well as a set of crio-treated 4.11's that unfortunately have a mini-spool currently, as to why I've ordered a reworked/upgraded Trac-Loc setup. The housing is the largest/beefiest housing that Ford ever made, with 3.25" axle tubes and a v-gusset center. I will be modifying my lower plates, including the side with the Maier panhard bracket to incorporate the 3.25" tubes.
...FUN! lol
The Only thing I took out of all that was your selling it already?
+1 Dont sell it just yet! Have some fun make sure the car can perform properly
Posted by bwkelley76 (Member # 8792) on
:
<<Nope, not for sale. Just funny how I decide I want to build the 9" rear and now the 8" rear decides to be problematic! ...All I needed was a few more weeks.
...Here is an edited post that might make more sense, I was babbling a bit before....
DOH!....
You know how you wash your car and it rains? How about when you decide to sell your car and it has a major break-down the very day you find a buyer?
Haha, now that I've been plotting things for my 9" swap, MIRACULOUSLY the 8" decides to blow an axle seal, real BAD! ...Gear oil all over the r/r brakes and wheel. YUK. BAD TIMING, as I'm not quite ready to do the 9" swap just yet and I've been having some issues along the way doing so.
So, now out of necessity the 9" is going in soon, do or die! (I really don't want to put a dime into the 8" either)
That being said I've ordered the posi unit for the 9" to replace the spool that it already has, 31-spline custom length Currie axles with "Set-20" tapered bearings, all the attachment hardware, and weld-on axle perches.
For those of you that are wondering the 9" I have is a big-bearing/EXTEMELY ROBUST 9" truck housing that was narrowed to fit the Stang (less an additional 1/4" width on each side just for kicks) as well as a 3rd-member equipped with set of crio-treated 4.11 gears. I'm also adding 12.19" Wilwood cross-drilled and slotted discs to the housing.
Unfortunately the 9" has a mini-spool currently as I mentioned, so I've ordered an upgraded Trac-Loc Posi carrier from Summit.
The 9" housing I'm using is the largest/beefiest housing that Ford ever made, with 3.25" axle tubes and a v-gusset center. The larger tubes make it certain that I will be modifying my lower leaf spring plates though, including the side with the Maier panhard bracket. Being that it was a truck housing I will be welding new pads on and removing the old ones that mounted on the TOP surface for the over-slung truck.
...So I have my work cut out for me. The next few weeks are going to be FUN! lol
I'll post pics as it comes together.
[ October 24, 2012, 04:50 AM: Message edited by: bwkelley76 ]
Posted by 50Reasons (Member # 6452) on
:
Is Jeff going to have anything to do with the 9" build?
Posted by bwkelley76 (Member # 8792) on
:
quote:
Originally posted by 50Reasons:
Is Jeff going to have anything to do with the 9" build?
Jeff is installing the posi unit, I'm doing the rest.
Posted by bwkelley76 (Member # 8792) on
:
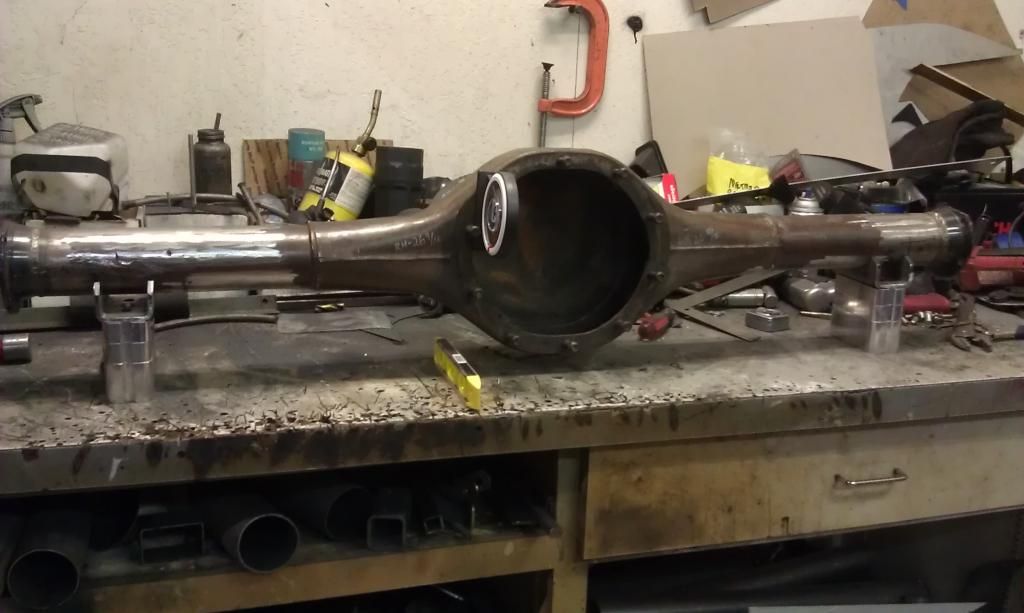
PICS!
OK here goes! 9" swap from truck to Mustang.
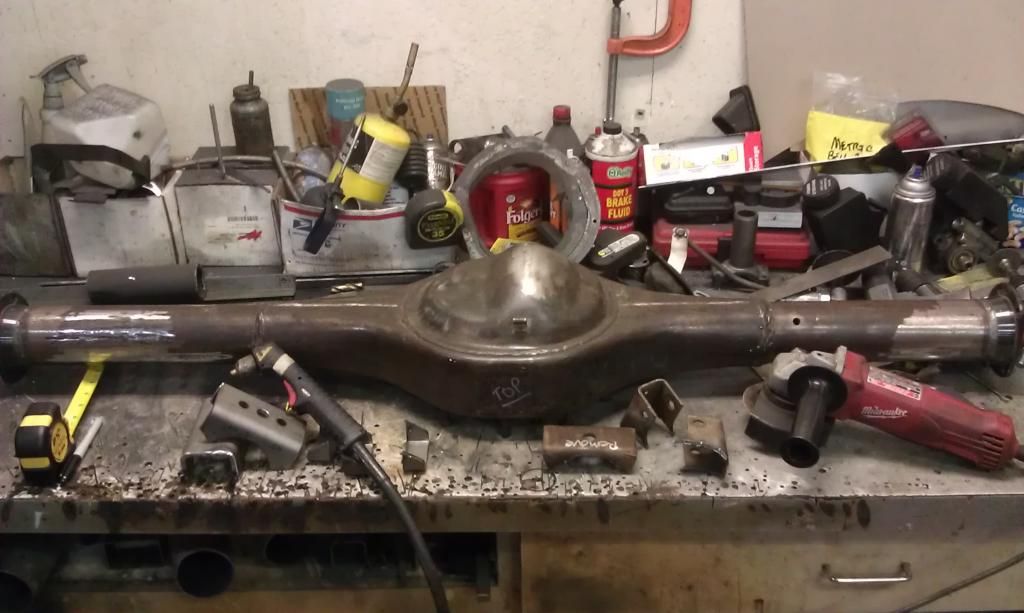
The truck 9" housing needed to be narrowed to Mustang specs (less 1/2 in my case) and had Big Bearing "Strange" axle ends welded onto it, using a jig for straightness. The old spring perche(s) from the truck were plasma-cut off then ground flush with the housing. Next I needed to weld on the new spring perches for the Mustang. ...(VERY IMPORTANT NOT TO GET TOP AND BOTTOM MIXED UP AS THE TRUCK HOUSING ORIGINALLY HAD THE PERCHES ON THE TOP SINCE THE LEAFS ARE "OVER" THE REAR INSTEAD OF BELOW) The 9" and 8" rears have a short and a long axle, make sure these are on the correct side of the car when welding everything up.
The new leaf spring perches were measured out on the tubes at 43" center to center and just marked for now. We need to set the pinion angle to factory specs BEFORE tacking and welding them up.
Using a LEVEL table I mocked the housing up on some axle blocks I had in the shop. I used a magnetic angle finder and set the axle housing to 5-degrees UP. ..This is the factory angle for most Ford cars (if not darn near all), including Mustangs in the 60's.
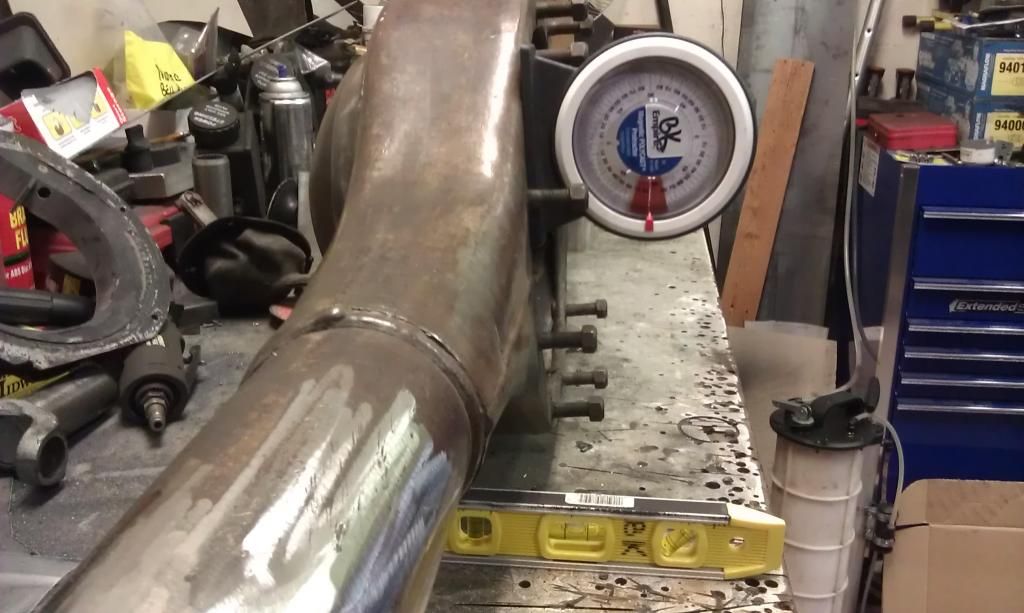
Once I tried the angle finder in numerous places and was SURE the angle was right I tack-welded the pads on.
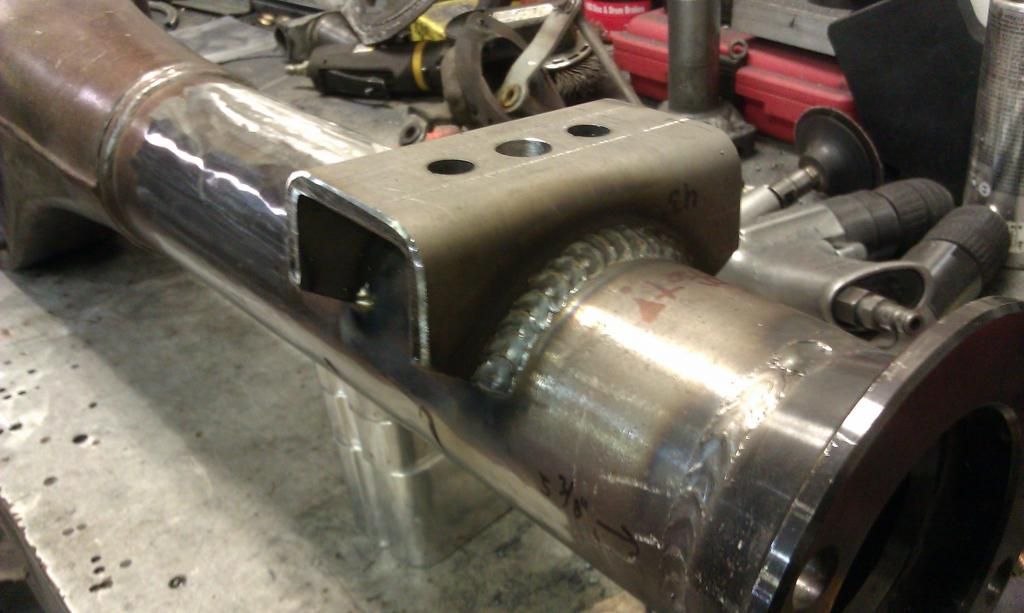
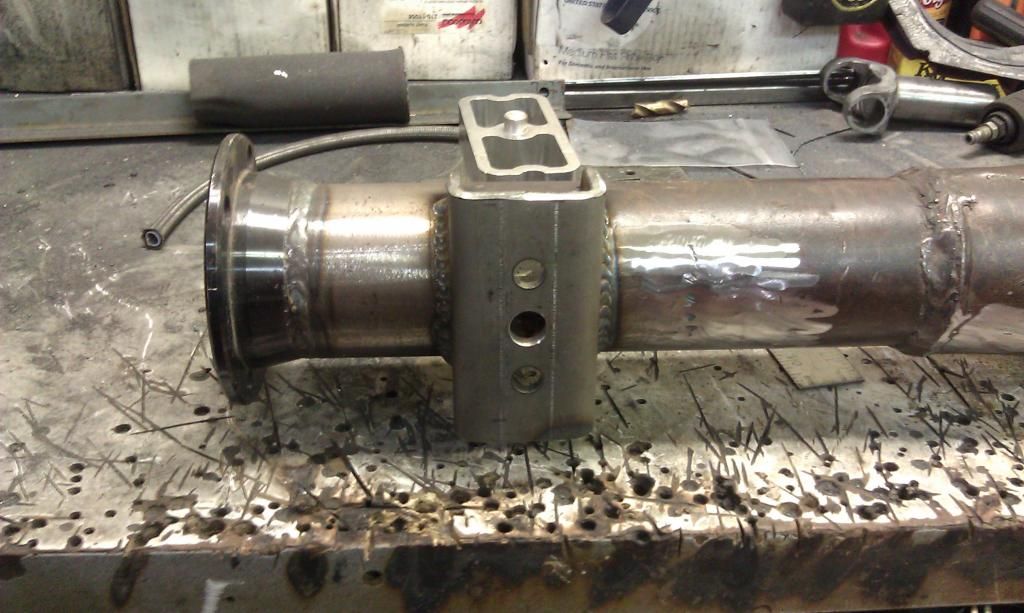
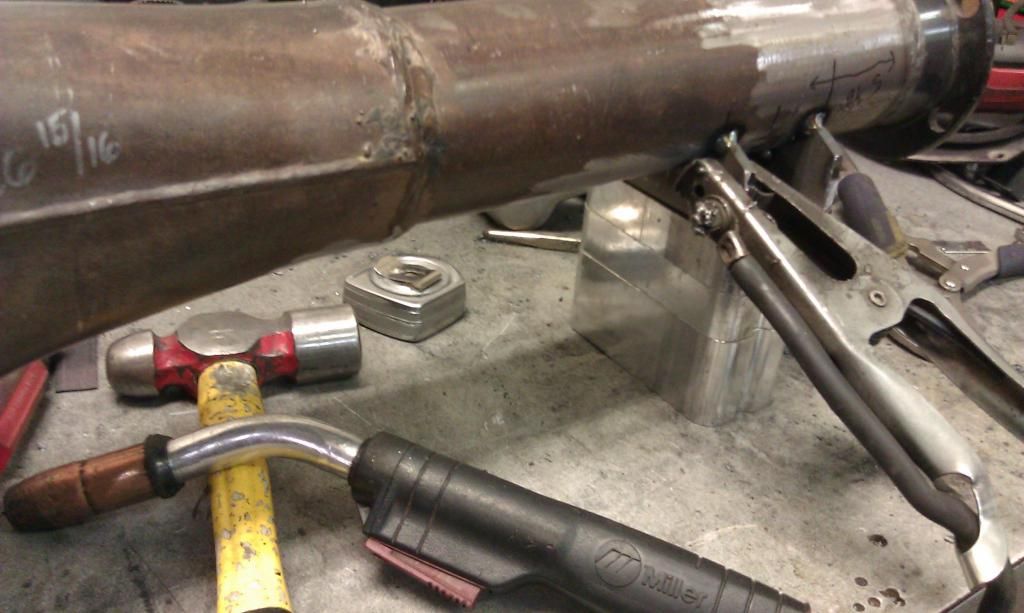
Now it's time to weld it all up. I welded one side of each perch, and alternated back and forth from tube to tube as not to overheat and bend the tubes. And Viola! ..Perches are installed.
Coming soon are the new axles and tapered bearings, fitting up the Wilwood discs, and making/mounting the rear brake lines to the housing.
[ October 25, 2012, 10:42 PM: Message edited by: bwkelley76 ]
Posted by v-town coupe (Member # 2771) on
:
FYI I used some of that VHT epoxy paint for my rearend and that stuff is pretty bullet proof for coming out of a can. bought it at my local kragens and just followed the instructions, used wax and grease remover wipes and the whole 9.
Posted by bwkelley76 (Member # 8792) on
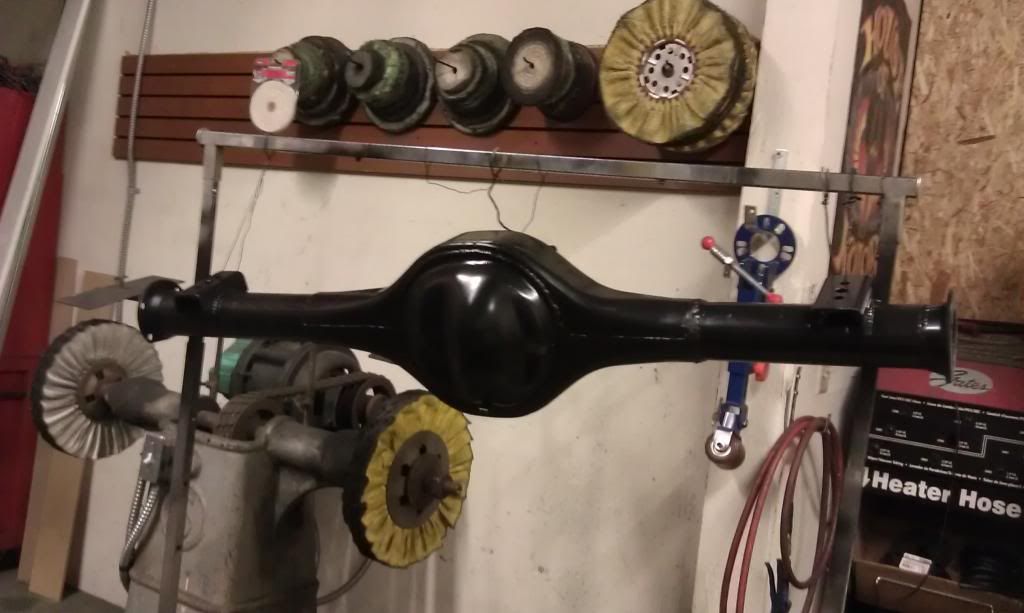
:
Thanks, I'll have to try it some time. This rear is getting a laquer paint called "Orr-Lac"
Posted by bwkelley76 (Member # 8792) on
:
Still haven't received the axles, maybe Monday or Tuesday. I can't wait!
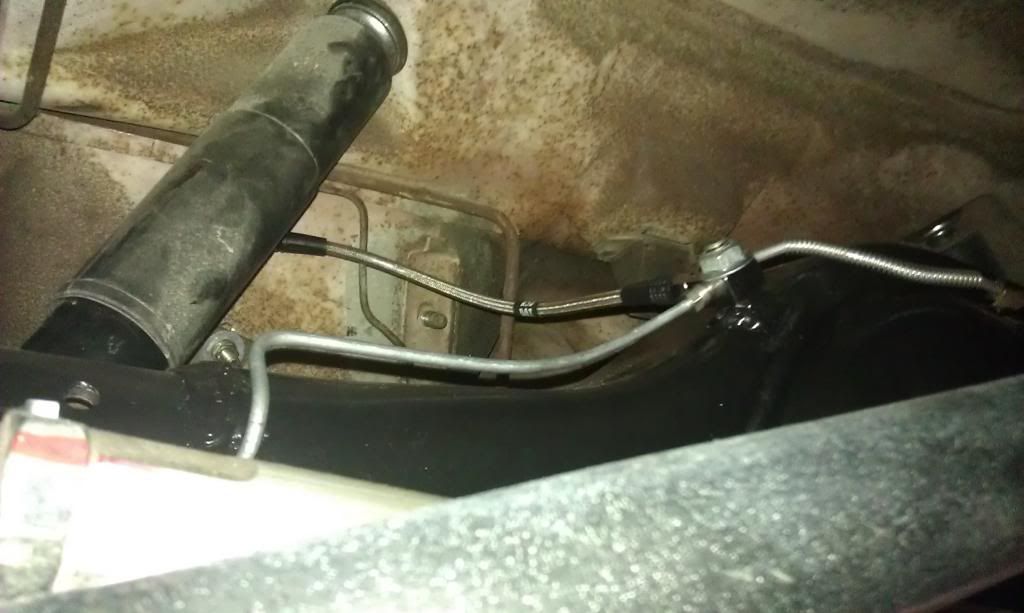
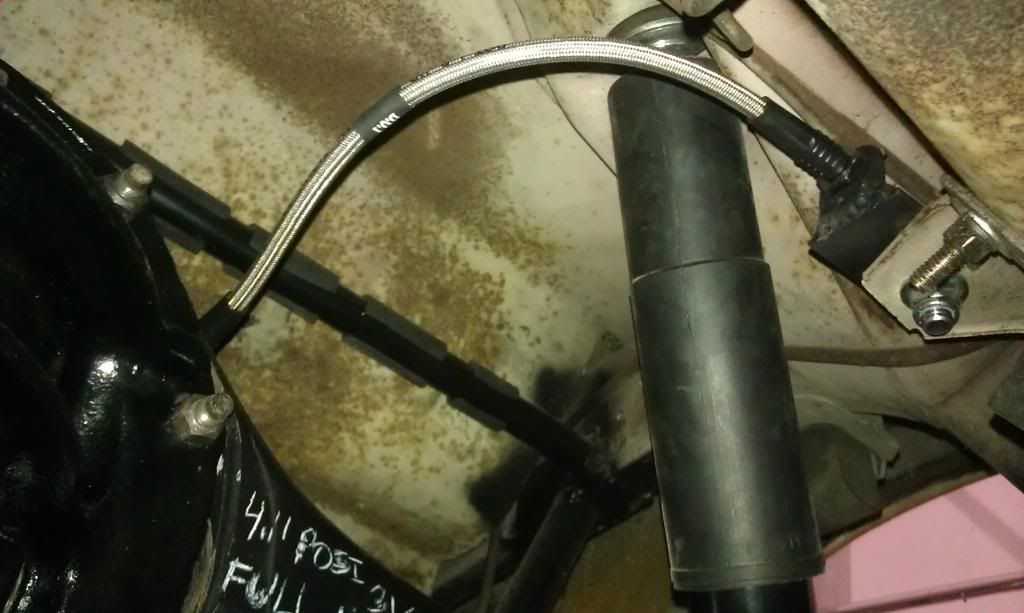
I limped the car down to a nearby car show today, leaky 8" and all. Unfreakinbelievably it broke a power steering line when I got there and had to fix it in front of hundreds of people and clean up a huge mess. Not the "debut" I had hoped for let me tell ya.
Haha, the joys of owning a classic!
[ October 28, 2012, 01:52 AM: Message edited by: bwkelley76 ]
Posted by 66_5.0 (Member # 9974) on
:
Haha come on man you should know that they have feelings. You made her mad and she made you pay the price!
Posted by bwkelley76 (Member # 8792) on
:
quote:
Originally posted by 66_5.0:
Haha come on man you should know that they have feelings. You made her mad and she made you pay the price!
I guess that's what I get for wanting to upgrade her "rearend".
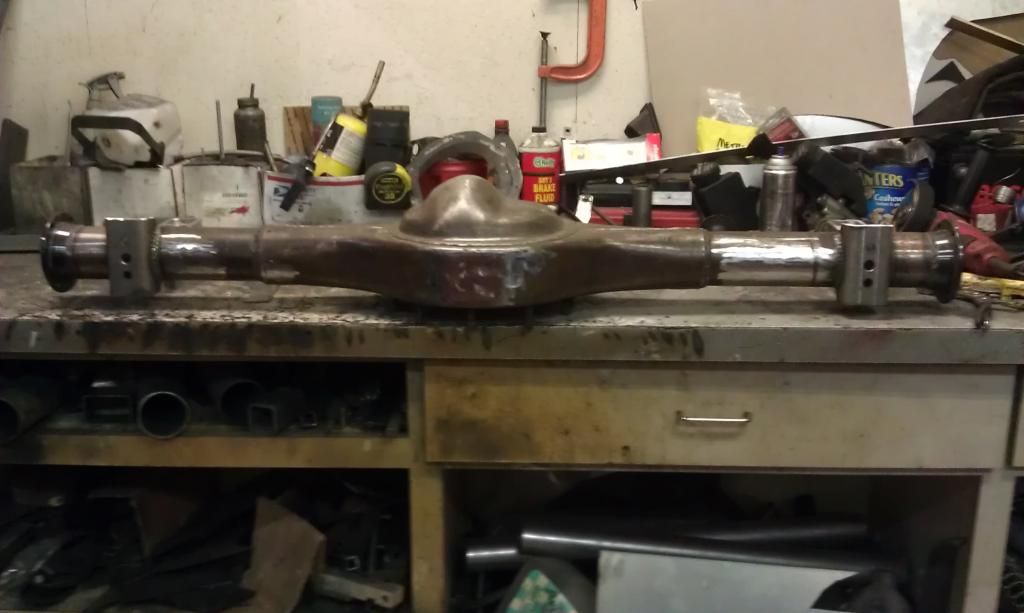
Posted by bwkelley76 (Member # 8792) on
:
HOUSING: Ready and patiently awaiting axles and gears
Posted by bwkelley76 (Member # 8792) on
:
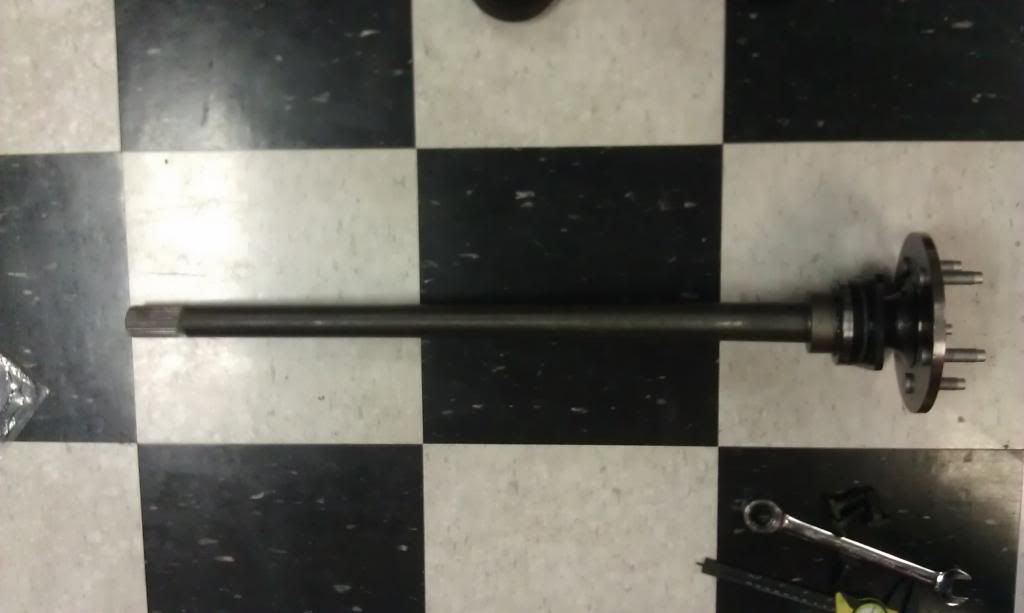
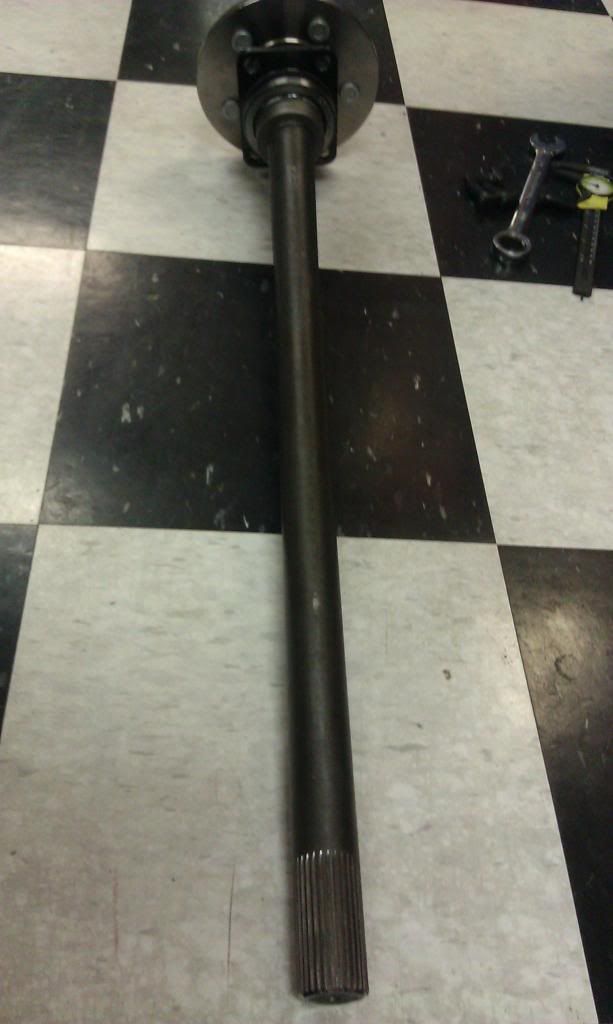
Axles came in today, still waiting on the third-member. ..maybe tomorrow.
If all of my measurements came out right the axles should slip right into the carrier. (crossing my fingers!)
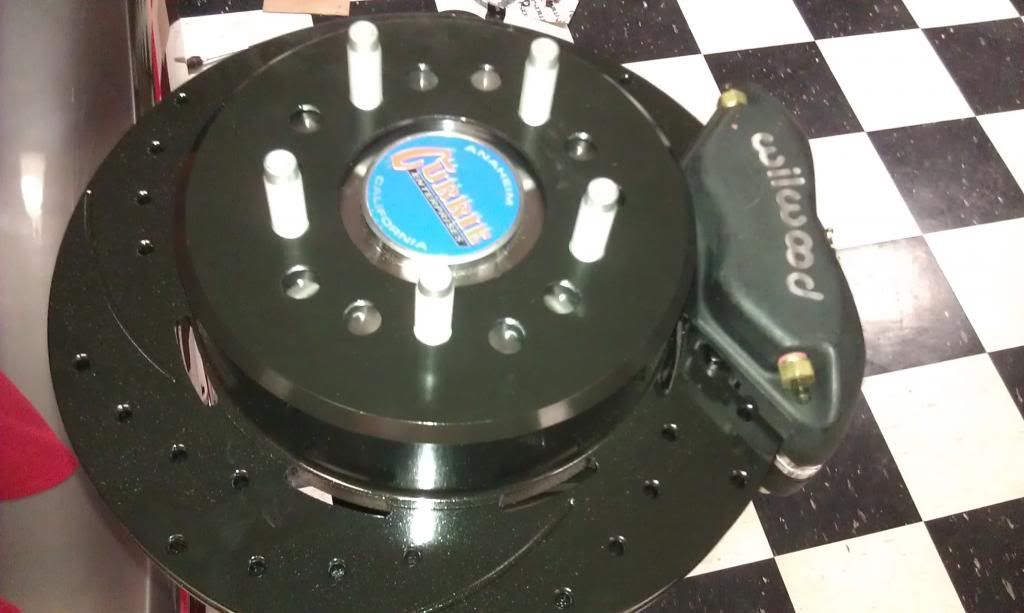
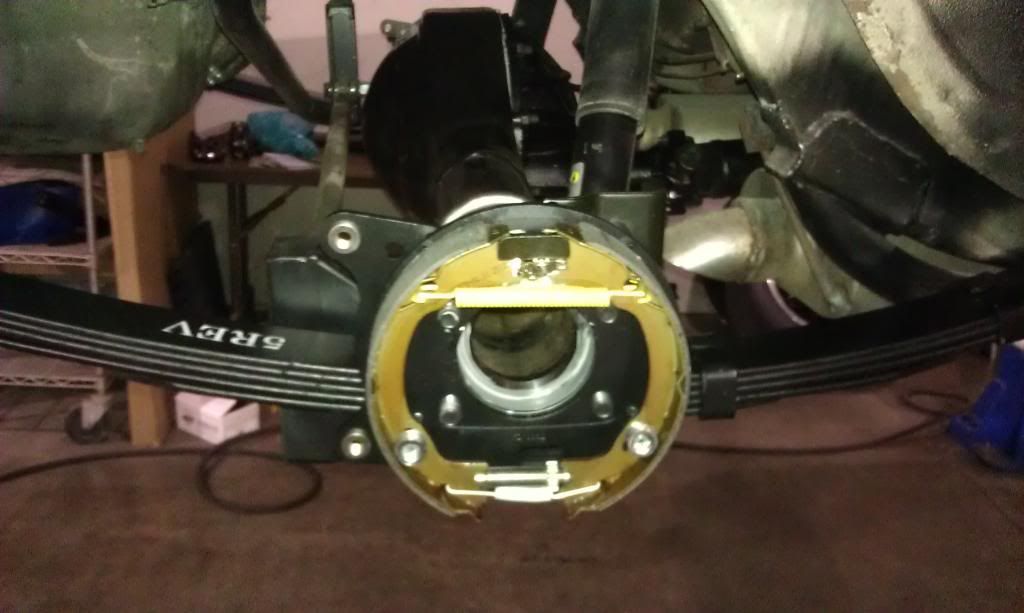
Mocked up the brakes and everything looks good there.
THESE AXLES ARE REALLY ROBUST! They start out HUGE on the bearing end and taper down very gradually to the 31-spline ends. NICE, I LIKE! Good 'ol "Currie", they make some nice axles.
Posted by bwkelley76 (Member # 8792) on
:
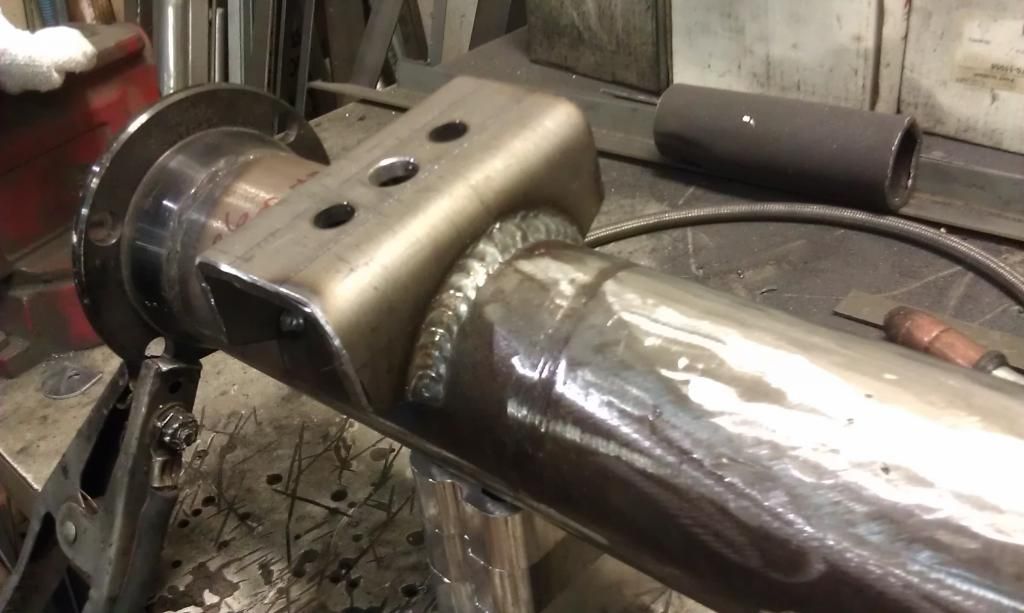
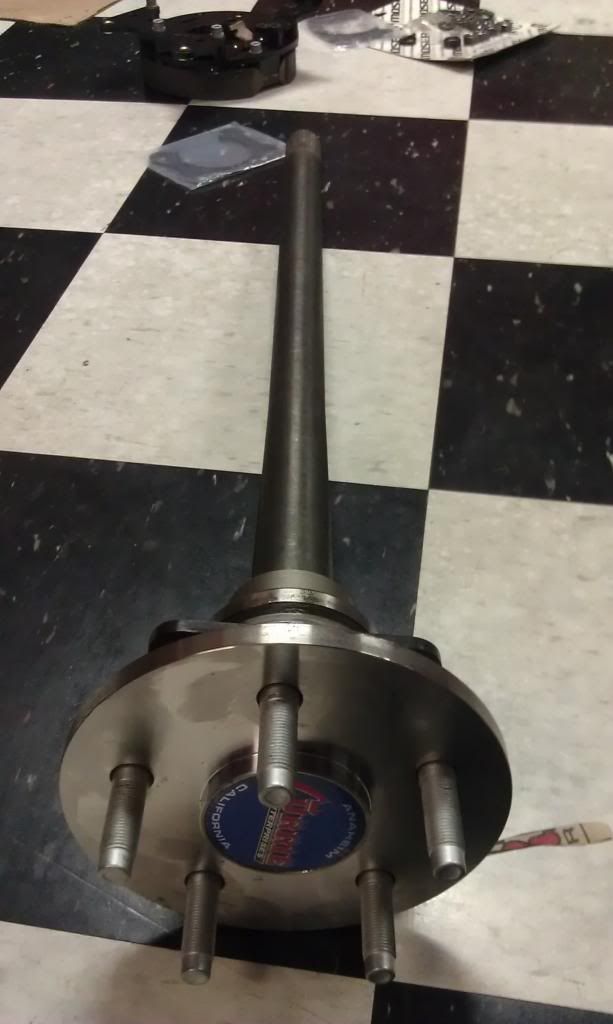
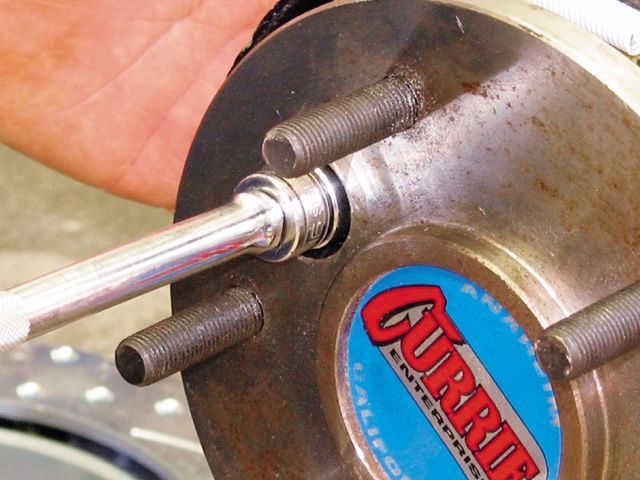
I had to have an access "window" /hole cut into the axle flanges so I can get to my bearing retainer bolts! (most factory axles have this already)
So the axles are at the machine shop for another day or so.
I told Currie when I ordered them that I would be running Wilwood brakes and according to popular belief they were supposed to ask me about this? Apparently it's super common with the Wilwood parking brake assembly to need the access window. Otherwise there is NO WAY IN HELL to get to the nuts to tighten the backing plates.
Part of my problem also is that the combo of the big tubes and the big-bearing housing use a larger bolt, and you can NOT put a nut on the back-side of the housing flange for easier access. There is not enough room between the stud and the axle tube for anything other than a t-bolt.
Just another delay, no big deal. lol
NO ACCESS WINDOW >>>>>>>>
This is what it should look like >>>>>>
[ November 02, 2012, 01:38 AM: Message edited by: bwkelley76 ]
Posted by bwkelley76 (Member # 8792) on
:
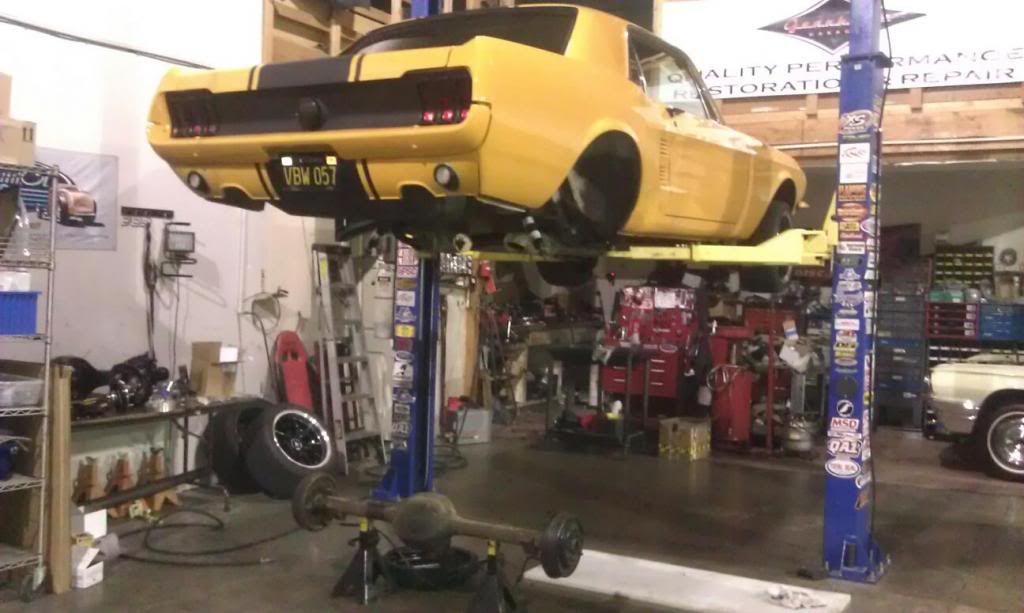
I have my work cut out for me this weekend!
Old rear is out, taking a break to eat and then back at it!
I had do drive a few hours today round-trip to get a replacement set of leaf springs at Mustangs Plus. The Grab a Track rear leafs I had were faulty, arched different from eachother. No wonder I had the "gangsta lean"! lol
[ November 03, 2012, 07:42 PM: Message edited by: bwkelley76 ]
Posted by phildog (Member # 1214) on
:
Nice dimes on those spring perches.
Posted by capriman (Member # 11659) on
:
what are you doing with the old 8", anything good in it? I.E gears or lsd?
Posted by bwkelley76 (Member # 8792) on
:
<<thanks Phil, all stock Cap. $200 if you want it, it needs an axle seal.
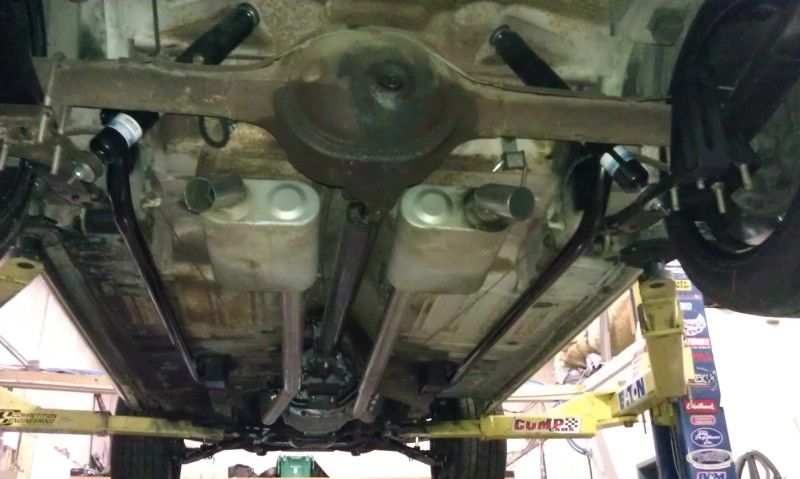
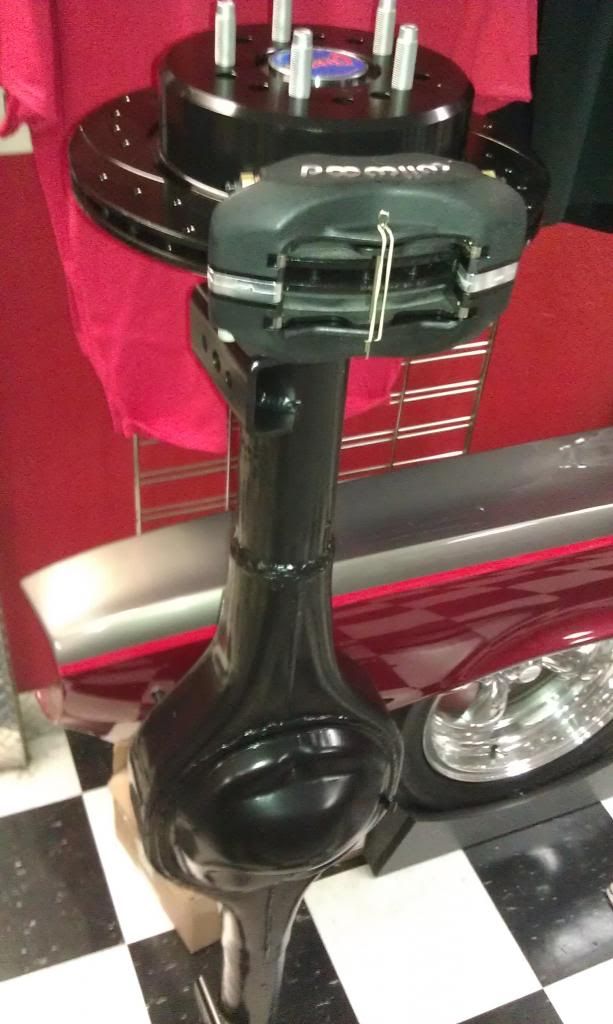
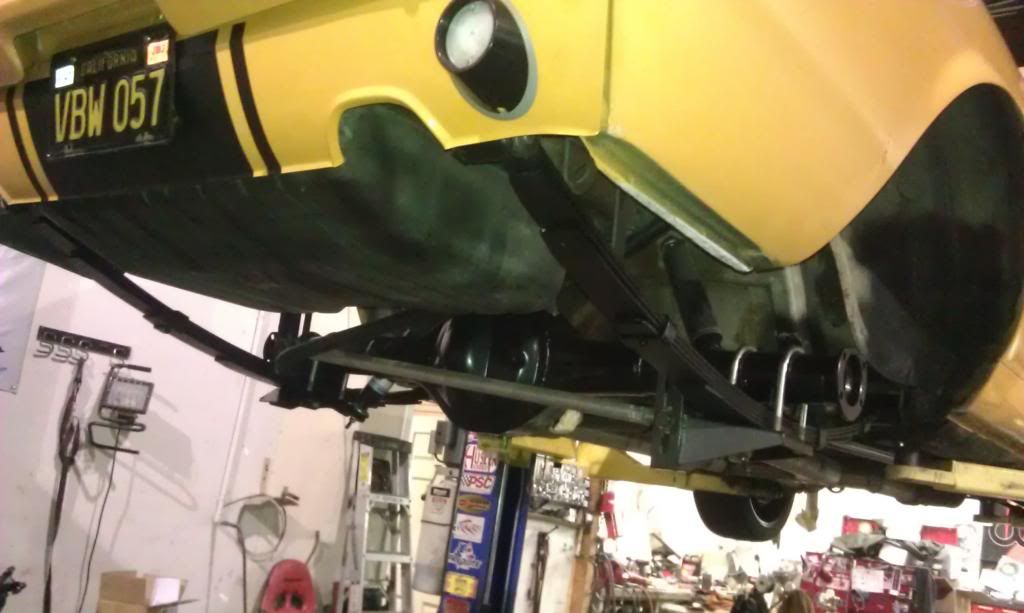
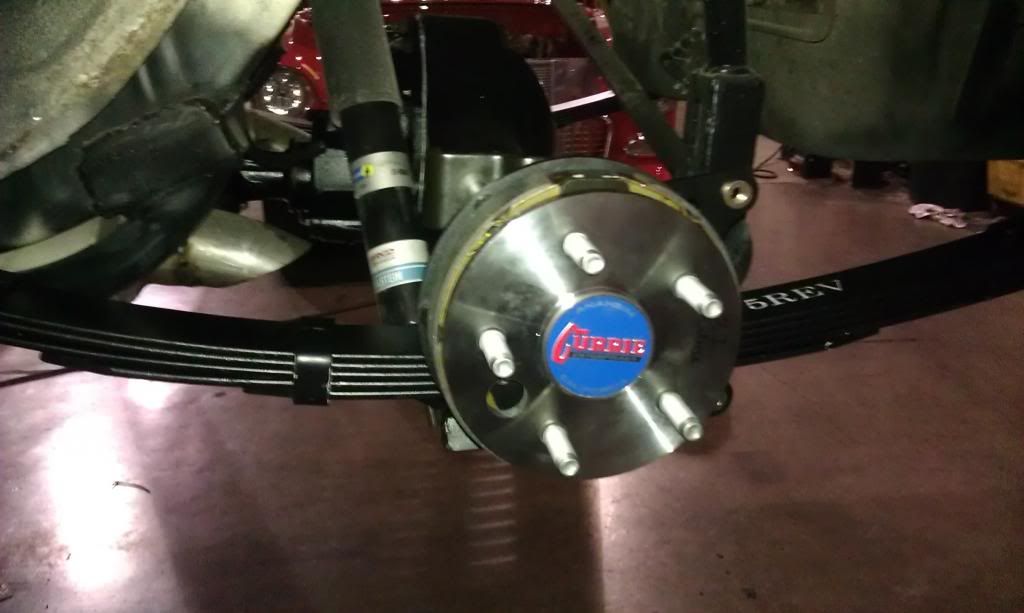
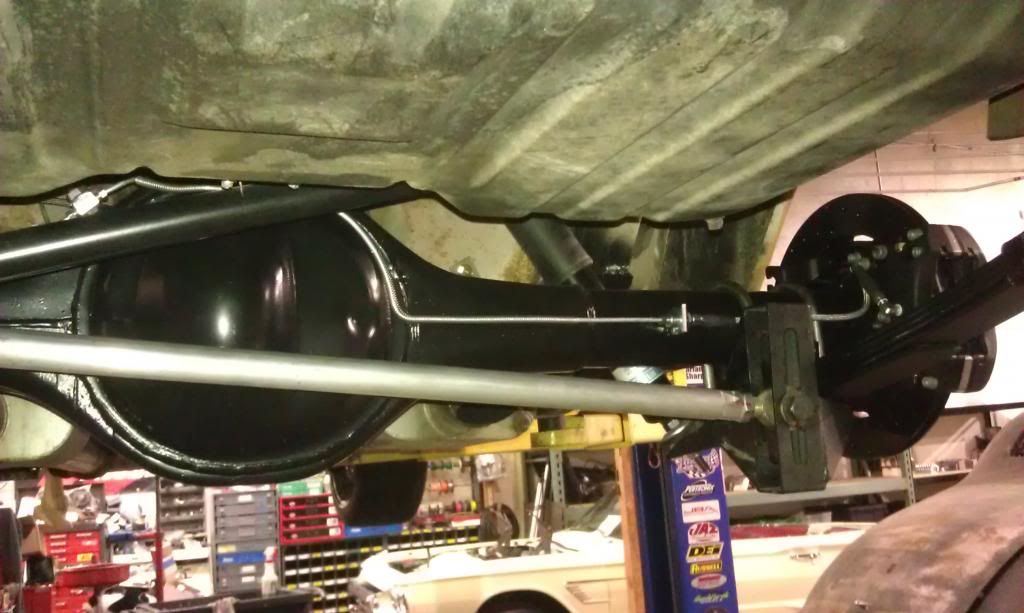
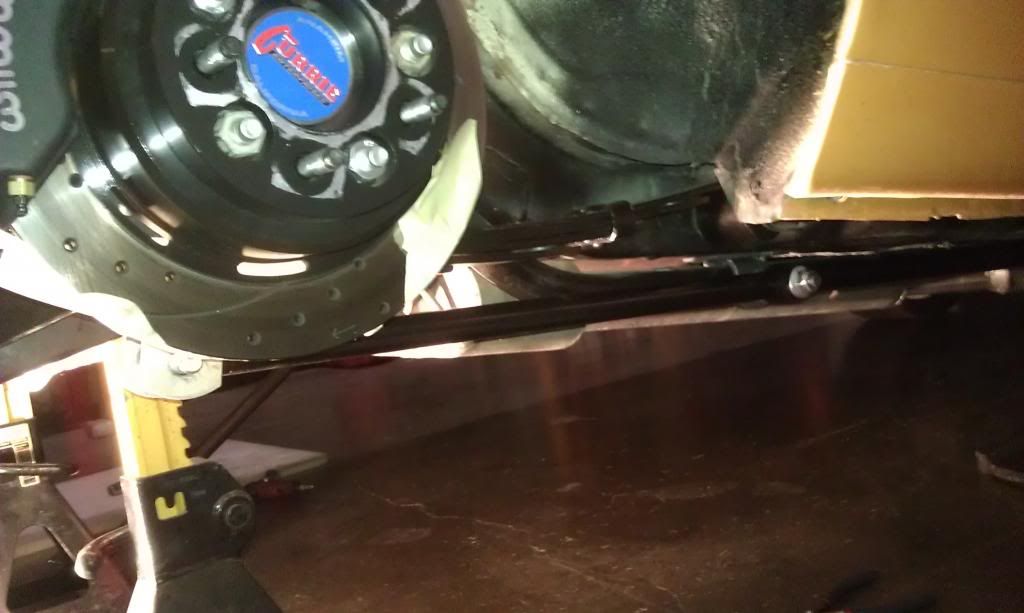
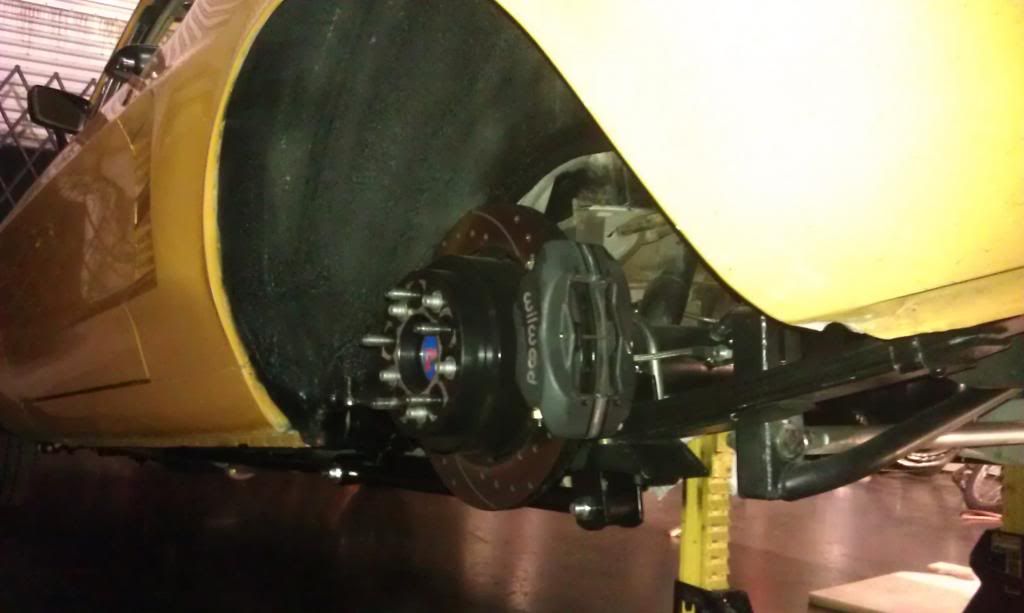
Well, most of the heavy work is done. 9" complete with Wilwood brakes and Currie axles is all together and installed. Next comes plumbing the rear brakes and installing the entire front brake system.

[ November 04, 2012, 02:08 AM: Message edited by: bwkelley76 ]
Posted by bwkelley76 (Member # 8792) on
:
Rear lines are plumbed, rear brakes are bled and work great. The gears are perfect, awesome difference in all gears under acceleration. Now I need to raise my rev limiter from 6000-6500 RPM.
The lines came out really clean. Note the relocation of the line going from the body to the axle housing. Why Ford couldn't do this to begin with perplexes me.
Posted by 50Reasons (Member # 6452) on
:
Looks good
Posted by Secnd2nun64 (Member # 1431) on
:
Your not doing that rear end justice with the crud on the underside of your car. Time for wire brush cleaning and black paint under there.
Posted by bwkelley76 (Member # 8792) on
:
quote:
Originally posted by 50Reasons:
Looks good
Thanks!
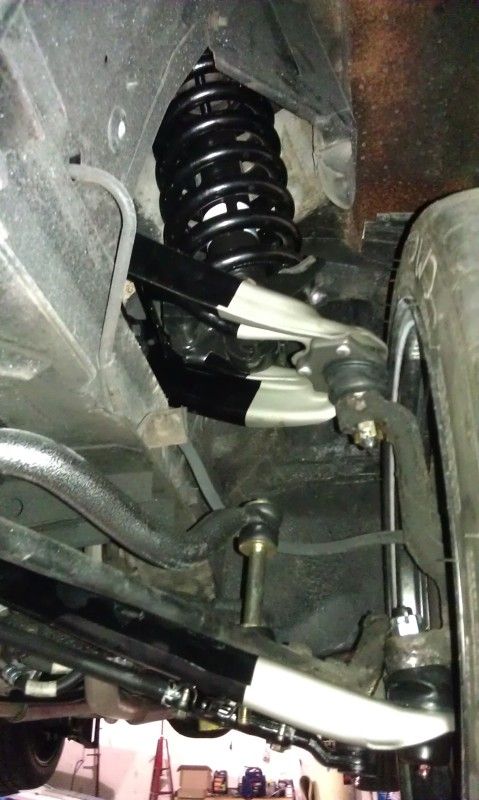
Now I'm moving on to the front and it seems as though the BRAND NEW Scott Drake lower control arms are JUNK! I have a ton of play in the driver's side lower ball-joint and a good amount also in the passenger's. My $220/each Toyo tires are wearing on the outsides badly although I have aligned the front-end 3-times now.
I'm seriously thinking about going with tubular upper and lowers with coil-overs and ball-socket strut-rods. We'll see what happens, I'm pricing options today.
[ November 06, 2012, 08:54 AM: Message edited by: bwkelley76 ]
Posted by bwkelley76 (Member # 8792) on
:
It shall be mine!
http://www.totalcontrolproducts.com/download/datasheets/FCOC_DS_WEB.pdf
Posted by bwkelley76 (Member # 8792) on
:
I just got back from the Goodguys show in Pleasanton, CA and I'm looking at a few other options. ...Anyone know anything about Ride Tech's front coilover setup?
Posted by bwkelley76 (Member # 8792) on
:
How about the SOT setup? ..anyone?
Posted by bwkelley76 (Member # 8792) on
:
SOT ...Street or Track setup. I Like it. (video/picture brightens up at about 30-seconds in) Totally worth watching...
http://www.youtube.com/watch?v=Mb69grzywIQ&feature=player_embedded#!
Posted by bwkelley76 (Member # 8792) on
:
SOT ...Street or Track setup. I Like it. (video/picture brightens up at about 30-seconds in) Totally worth watching...
http://www.youtube.com/watch?v=Mb69grzywIQ&feature=player_embedded#!
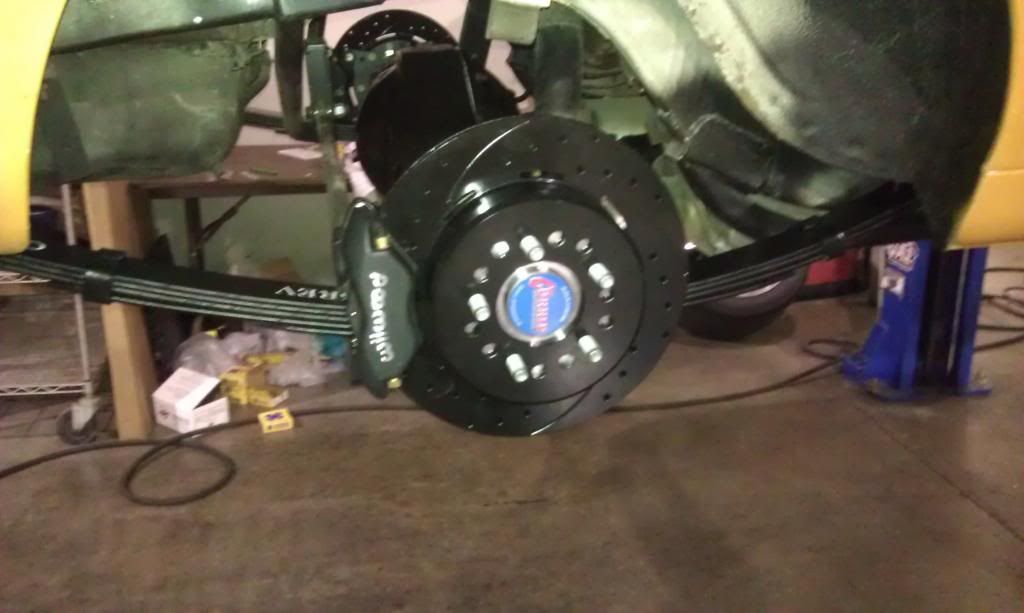
Rear brakes are properly seated. Another great product from the guys at Wilwood!
[ November 17, 2012, 05:47 PM: Message edited by: bwkelley76 ]
Posted by bwkelley76 (Member # 8792) on
:
So, I don't know if funds will hold up here but I'm thinking about Total Control's rack-n-pinion also. ...any feedback?
Posted by Wildfire532FB (Member # 1482) on
:
I am running Flaming River Rack and Pinion.
Posted by v-town coupe (Member # 2771) on
:
quote:
Originally posted by bwkelley76:
So, I don't know if funds will hold up here but I'm thinking about Total Control's rack-n-pinion also. ...any feedback?
yup, you'll spend a lot of money and loose turning radius. they were having a ton of issues with the housings warping and breaking, leaking due to the rack tube being a stress member. they have come a long way but spending that kind of money on just a rack is ridiculous. unisteer kit will give you full turn radius and cost you a lot less.just an added note anything From chris alston chassis is garbage. so many problems with shit being welded crooked not using jigs.
[ November 20, 2012, 07:42 PM: Message edited by: v-town coupe ]
Posted by v-town coupe (Member # 2771) on
:
SOT stuff is legit, Shaun is a great guy and has done a ton of R&D I was running his LCA's and his strut rods and I'm still running his Strut rods. If you are going to Run a coil over setup run one of the long travel setups. it will ride nicer because you wont have to use a s stiff of a spring for same results, plus more suspension travel. I believe there is only 3 companies making a bolt in place of stock stuff long travel setup(long travel meaning the coil over bolts to the LCA) Global west, SOT, TCP. I know shaun was using penske for a sec and is now using bilstein's in his Coil over kits. going to a strut setup would also give you the longer travel and better ride, but thats a whole different animal. if you look the maier setup and ride tech both use the short travel with a ridiculous spring rate.
When buying front end parts for a car you care about and want to last, you have to buy moog. everything else is crap unless your buying some afco dirt track or beefy race car ball joints, etc.
depending on when this all goes down for you I may have a set of SOT front strut rods and some open tracker lowers for sale since I will be going to the new DSE setup.
Posted by bwkelley76 (Member # 8792) on
:
quote:
Originally posted by v-town coupe:
SOT stuff is legit, Shaun is a great guy and has done a ton of R&D I was running his LCA's and his strut rods and I'm still running his Strut rods. If you are going to Run a coil over setup run one of the long travel setups. it will ride nicer because you wont have to use a s stiff of a spring for same results, plus more suspension travel. I believe there is only 3 companies making a bolt in place of stock stuff long travel setup(long travel meaning the coil over bolts to the LCA) Global west, SOT, TCP. I know shaun was using penske for a sec and is now using bilstein's in his Coil over kits. going to a strut setup would also give you the longer travel and better ride, but thats a whole different animal. if you look the maier setup and ride tech both use the short travel with a ridiculous spring rate.
When buying front end parts for a car you care about and want to last, you have to buy moog. everything else is crap unless your buying some afco dirt track or beefy race car ball joints, etc.
depending on when this all goes down for you I may have a set of SOT front strut rods and some open tracker lowers for sale since I will be going to the new DSE setup.
Shaun is great actually, you're right. He and I talked the other day and still have an email conversation going. So far he has offered me a heck of a deal on front and rear suspension (3-link rear and sport-valve front coilover). Other than the financial, the major problem is that the rear setup is still in production and wont be ready until January.
We shall see, I'm still on the fence with this suspension. I talked to Drake yesterday and it sounds like they will stand behind the lower control arms so I should be able to get a refund on those, or at least get a new set so I can maybe sell my old suspension to someone who has a regular driver. I have customers (a dozen or so) that are running around with the drake stuff and no issues so far. Strange how mine went kaput.
[ November 22, 2012, 04:52 PM: Message edited by: bwkelley76 ]
Posted by bwkelley76 (Member # 8792) on
:
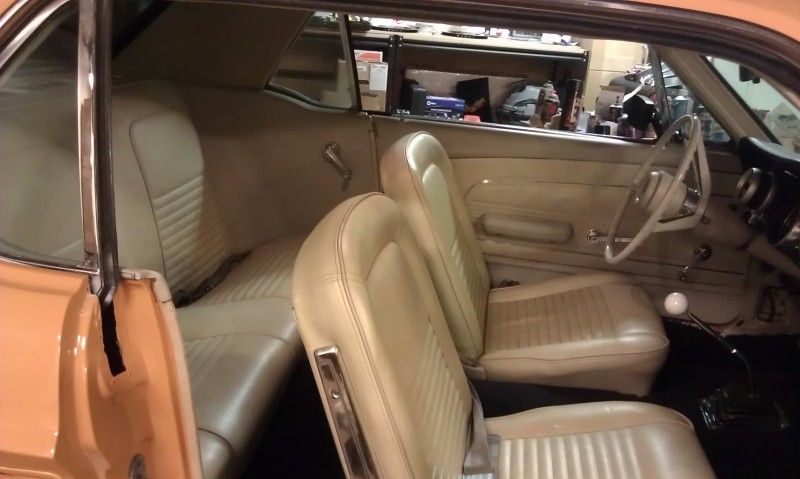
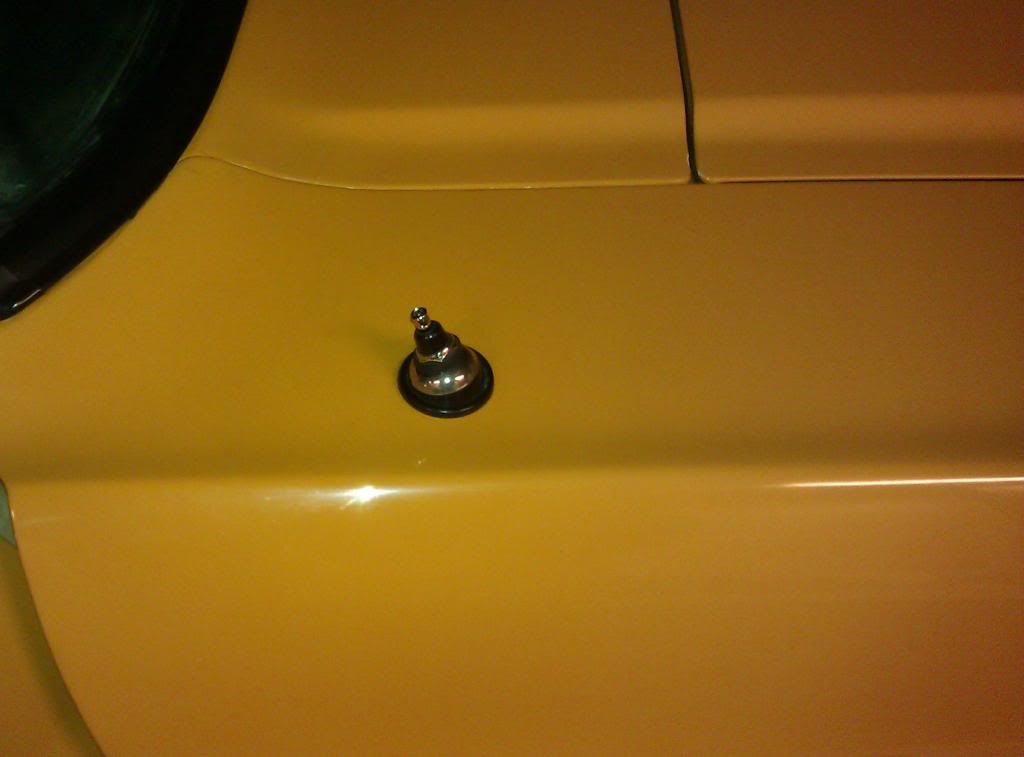
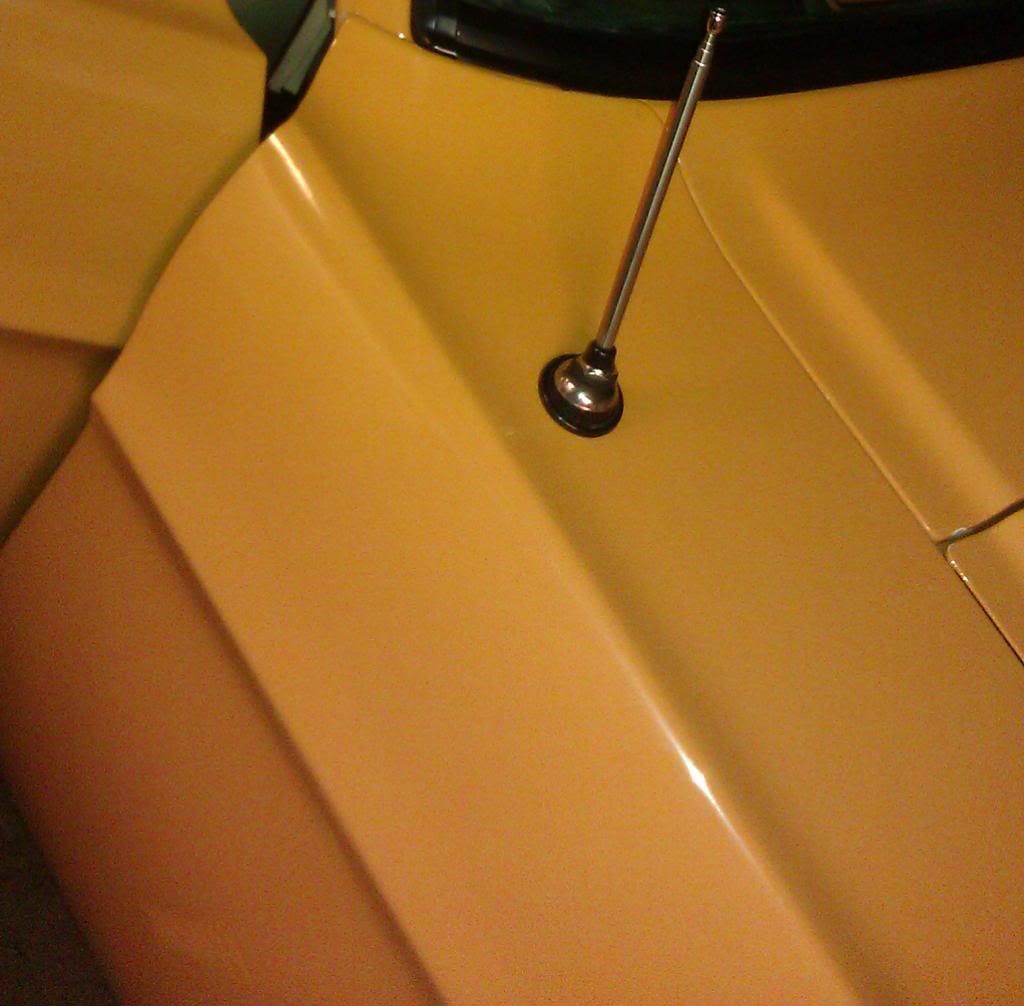
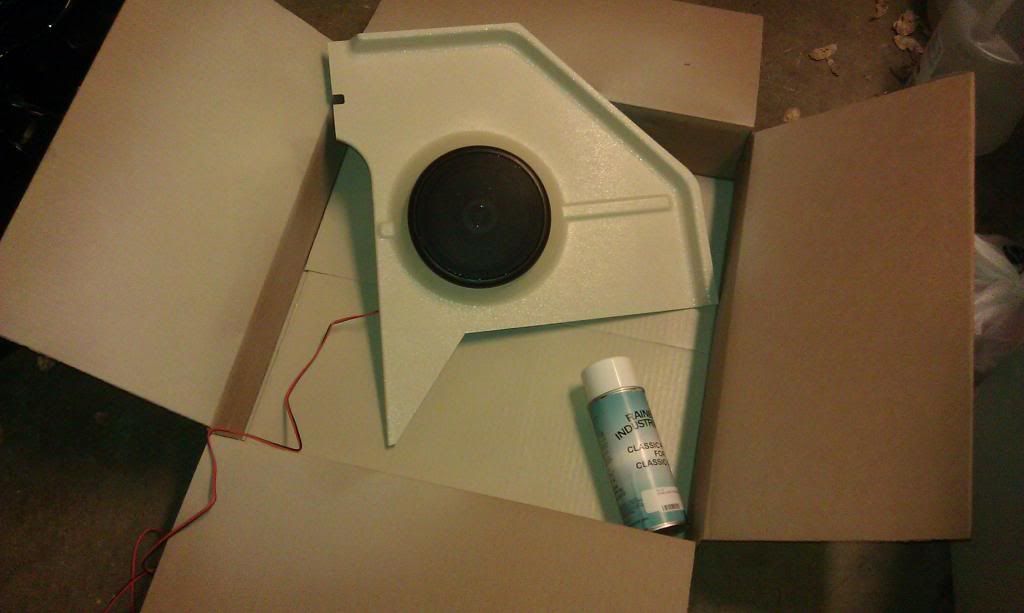
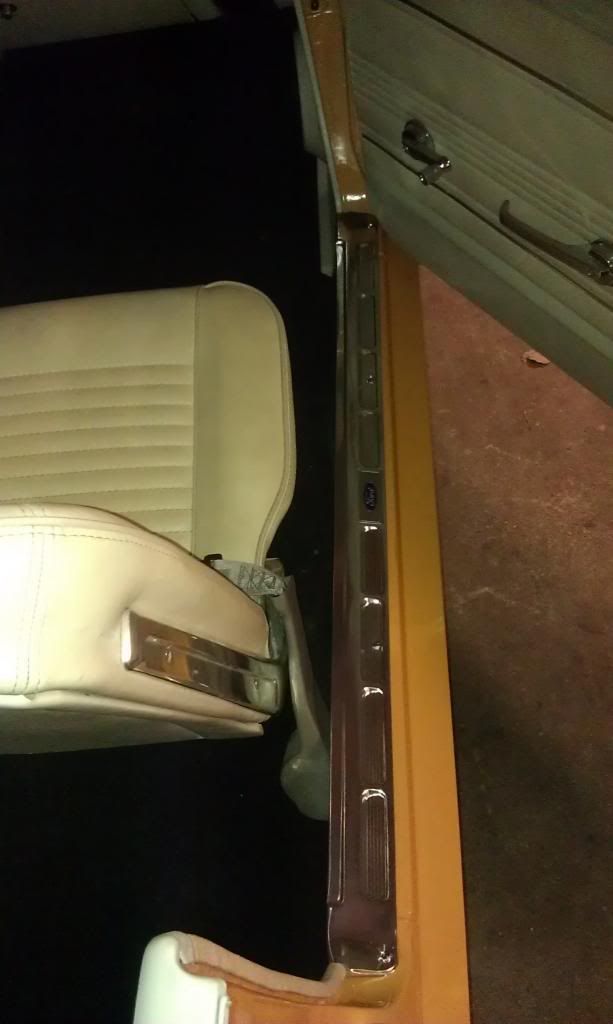
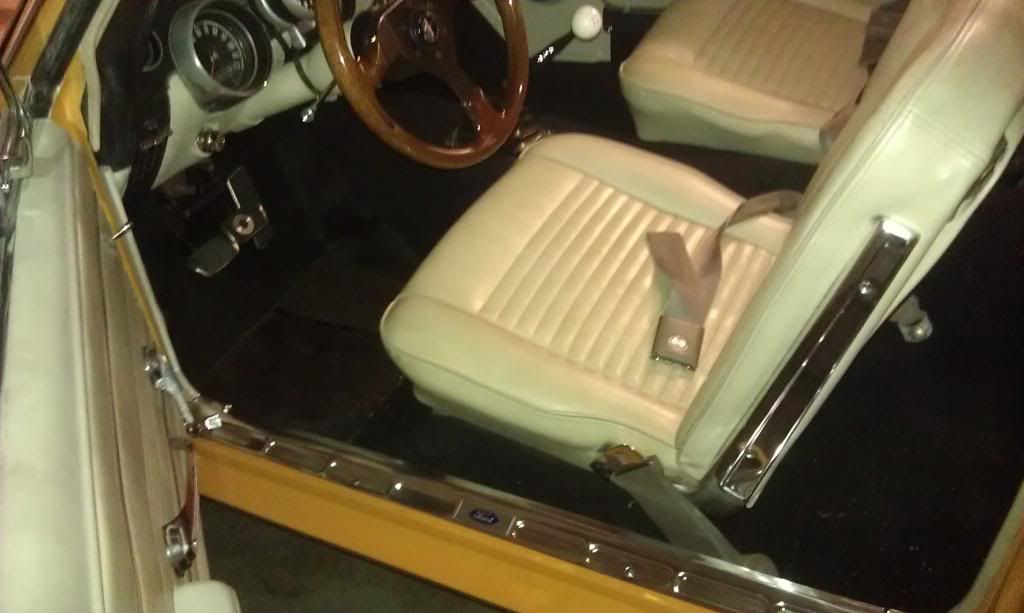
So I spent last night tying up some loose ends on the interior and other Misc.
-Custom Auto Sound front kicks with speakers, painted parchment to match
-Retractable radio antenna
-New dome lamp assembly
-New sill plates
I also purchased a set of "Traction Masters" which I am going to reinforce and modify a bit so I can kick out of the corners a little harder (assuming I don't completely replace the rear suspension)
Posted by bwkelley76 (Member # 8792) on
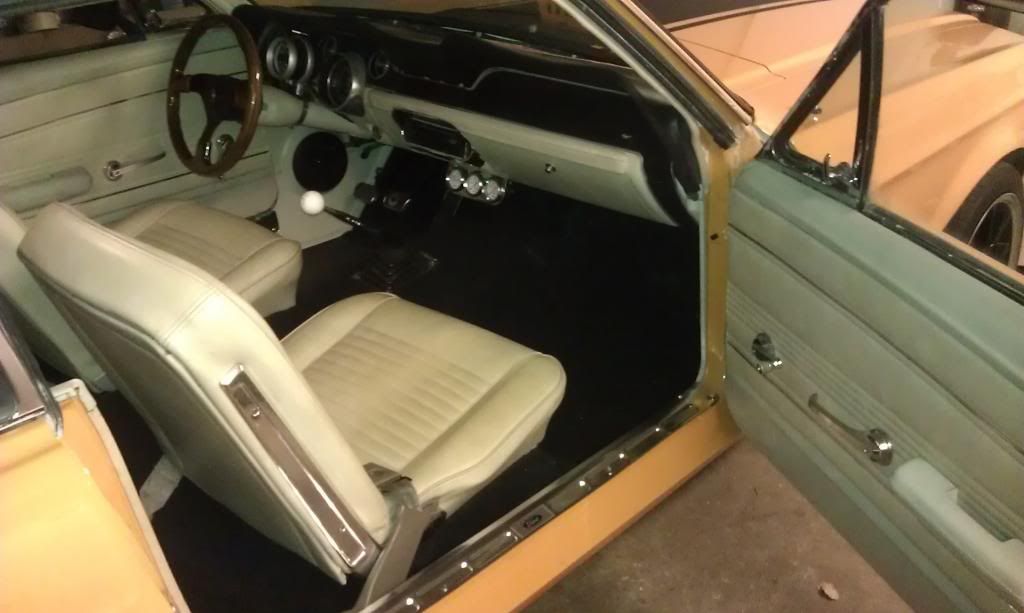
:
Better steering wheel. (Still not my first choice but the price was right) ...Craigslist $40 USED, retails for about $150 and it's in pretty good condition.
Posted by kingdavid (Member # 11179) on
:
Car's coming along real nice great job. I have also been looking at the SOT setup for my 67 as well looks like a real solid kit and seems to get good reviews on the track. I bought an AJE front K-member kit for my 67 thats not installed yet, but haven't seen any reviews with that kit road racing so im still up in the air with what im going to do.
Posted by v-town coupe (Member # 2771) on
:
the SOT stuff is solid, shaun knows his stuff and really beats on his stuff hard when doing R&D. At the shelby mini nats I got him to give me a ride in his car and I was very impressed. I know its a lot of $$$ but the DSE kit hands down is the best aftermarket suspension setup for the older mustangs, The dse stuff is pounding on R compound fully prepped race cars while just using a 200 treadwear radial. If I were looking for something to bolt in the stock place the SOT kit would be it.
As mentioned before, the AJE kit is a cool, cost effective way to upgrade the factory suspension, but in no way will it perform better then the SOT setup. a lot of the hardcore race cars that are factory strut end up going to an SLA setup in order to be more competitive. so unless you are on a budget and going to go mod motor,etc. your better off staying with the traditional style suspension with a longer travel coil over setup.
Posted by bwkelley76 (Member # 8792) on
:
quote:
Originally posted by kingdavid:
Car's coming along real nice great job. I have also been looking at the SOT setup for my 67 as well looks like a real solid kit and seems to get good reviews on the track. I bought an AJE front K-member kit for my 67 thats not installed yet, but haven't seen any reviews with that kit road racing so im still up in the air with what im going to do.
Thanks, as stated above the AJE kit doesn't seem to be ideal for road racing. ...I've heard limited static camber and poor camber gain in corners. I'm not really sold on the strength of the K-member either. AJE advertizes their stuff for street and drag-racing, not road racing from what I've seen. I actually have access to an AJE kit for a really good price that a friend of mine is selling and I passed on it. ...Not say it wouldn't perform well, I'm just a skeptic.
Posted by bwkelley76 (Member # 8792) on
:
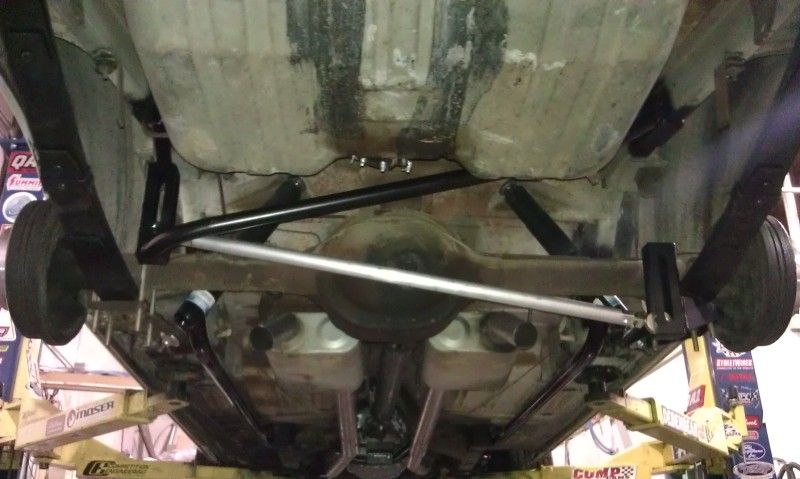
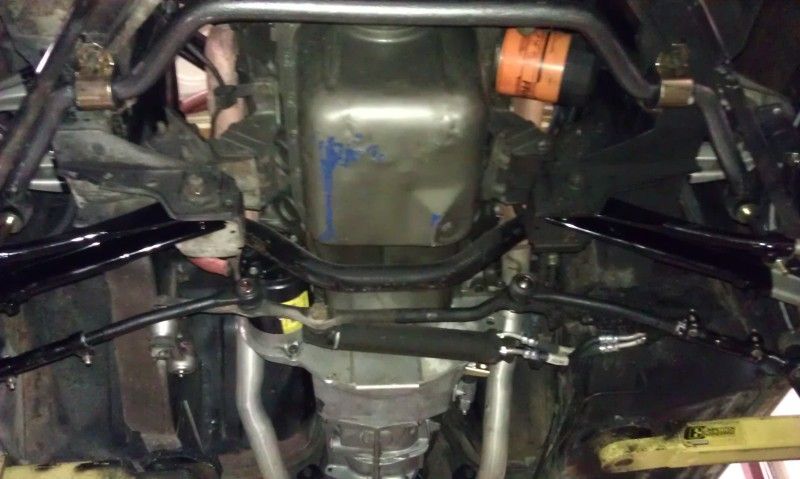
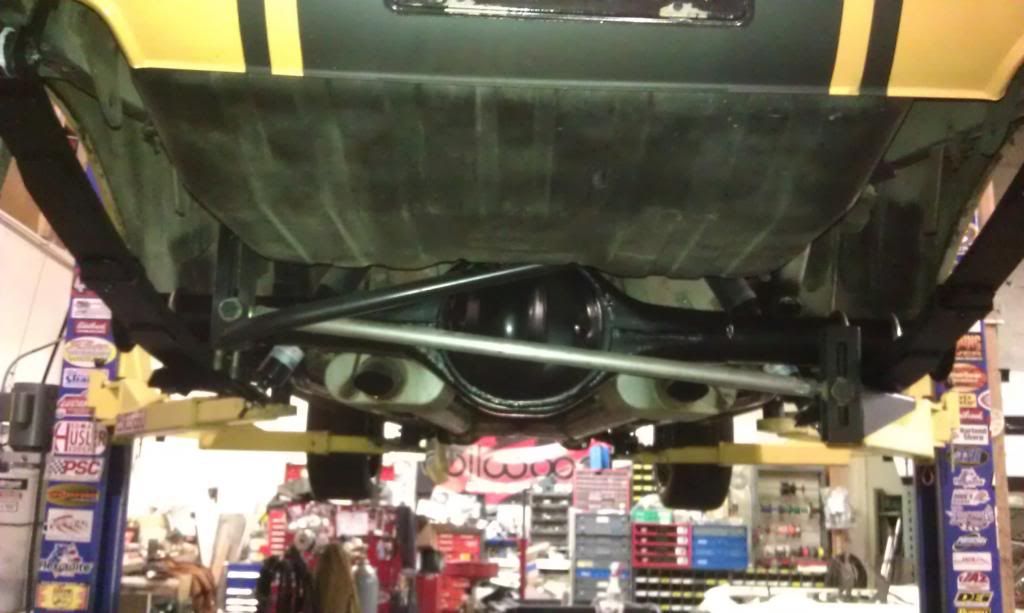
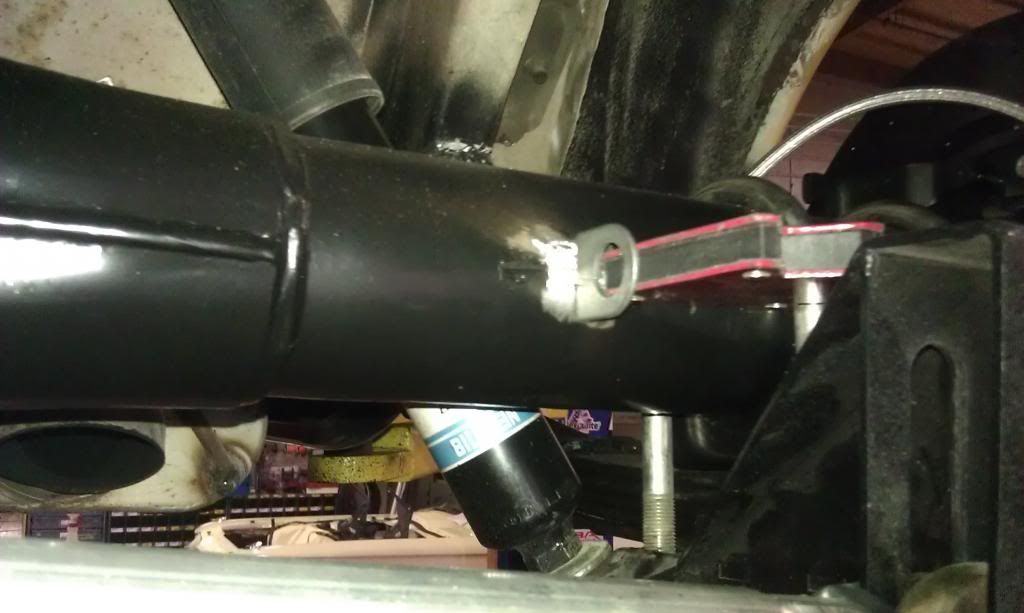
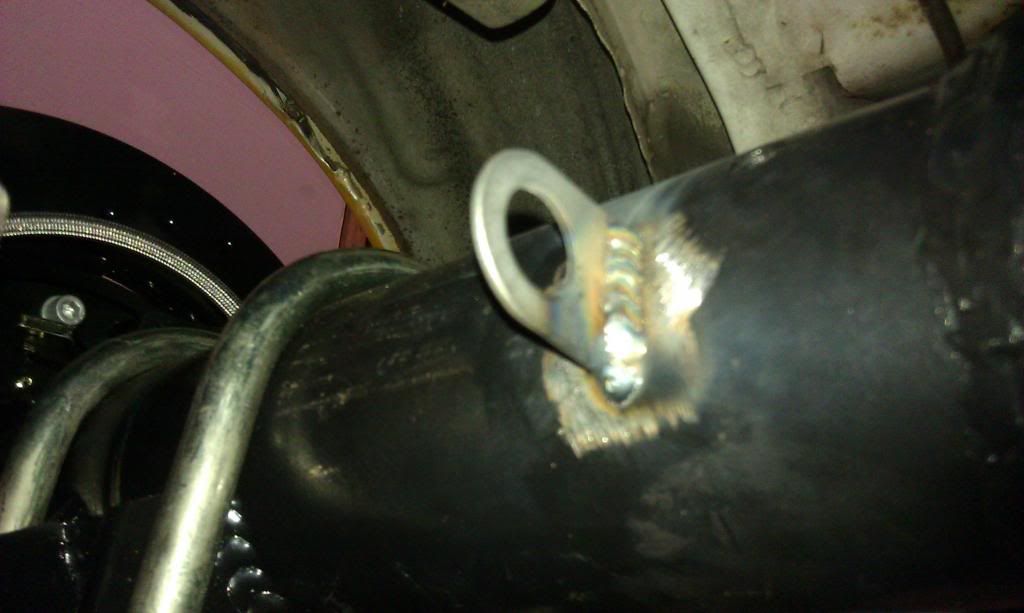
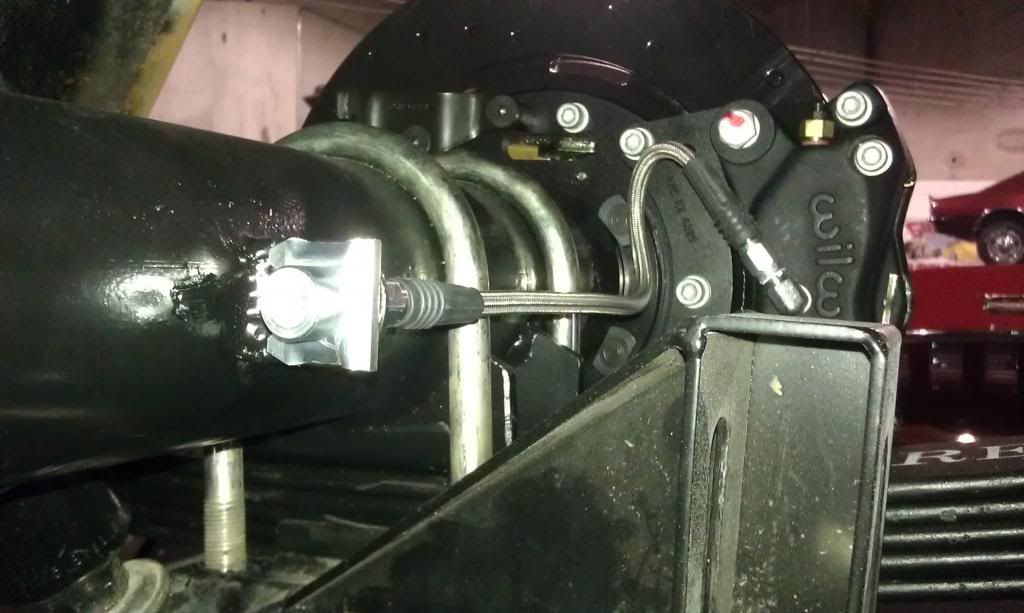
Added traction bars today
These normally bolt below the factory leaf spring plates. My plates have been modified for the Maier panhard and the wider spacing for the 3.25" U-bolts. So I decided to weld them to my modified plates. I also welded the front mounts to the subframe connectors AND the frame rails.
MOCKING UP THE REAR
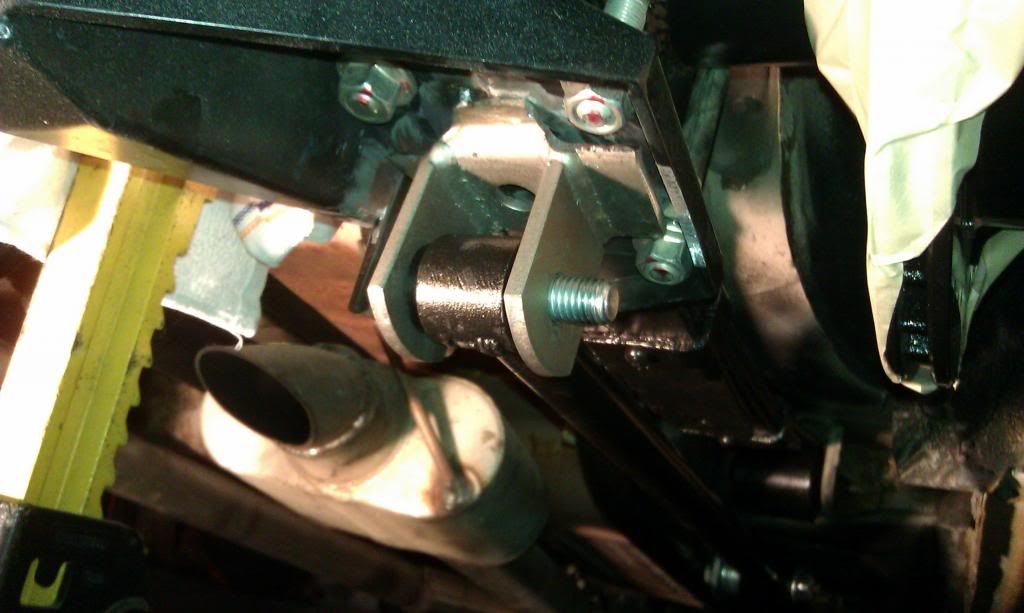
MOCKING UP THE FRONT
NICE AND STRAIGHT
A LITTLE TOO CLOSE TO THE MAIER PLATE
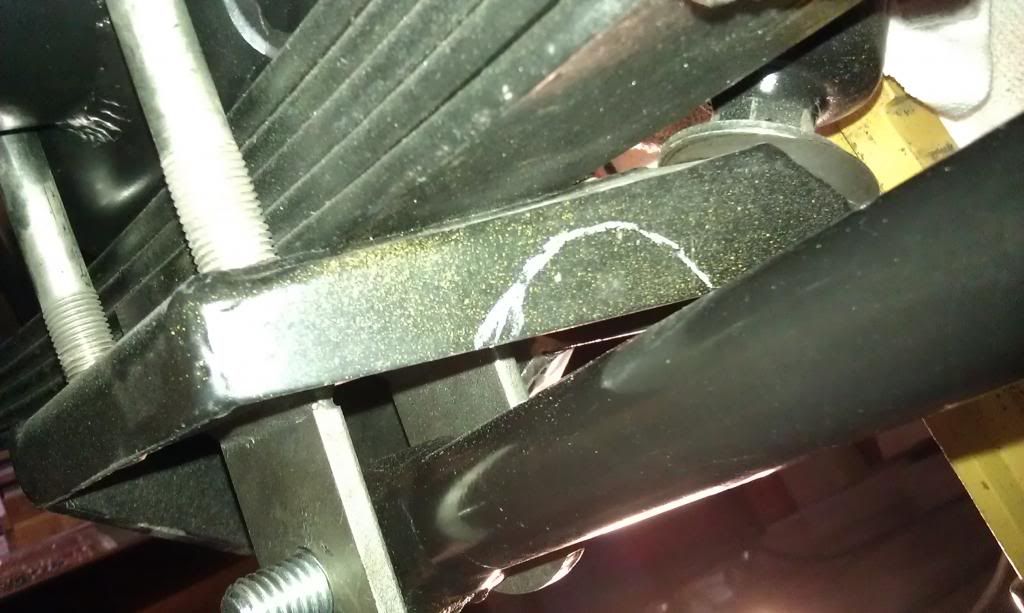
A LITTLE CLEARANCE FOR GOOD MEASURE
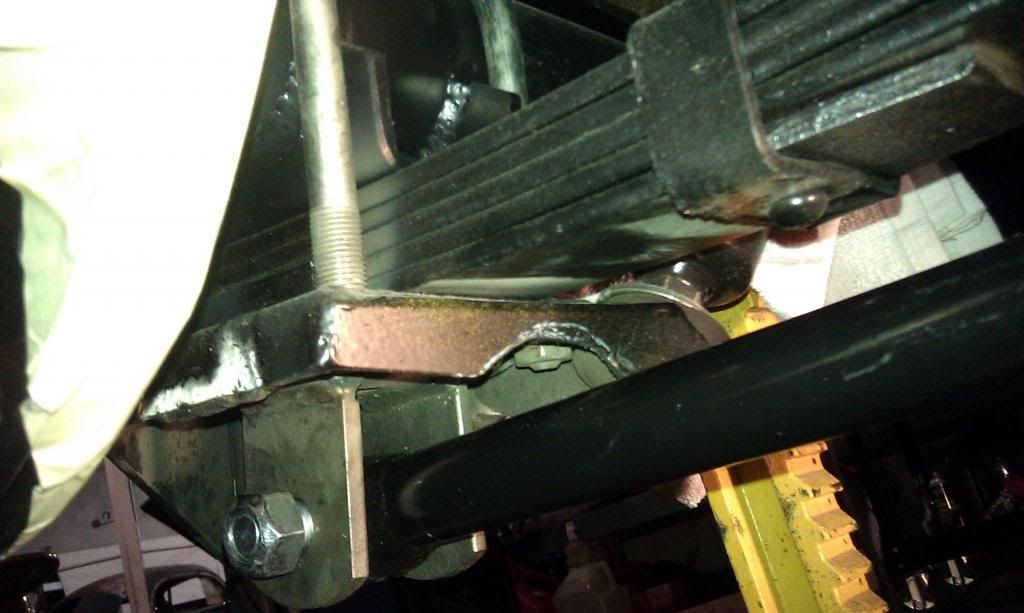
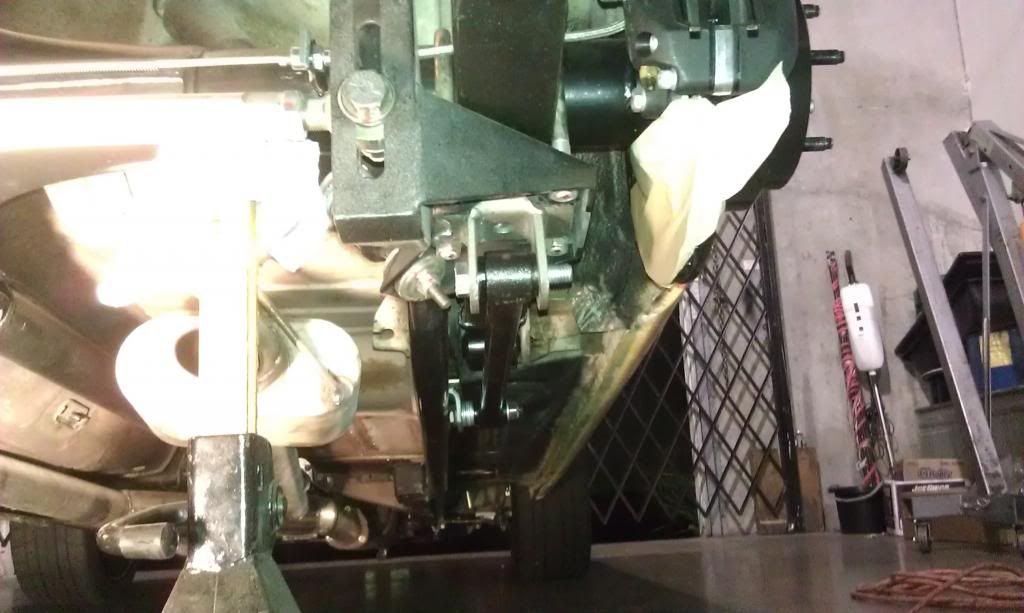
LOTS OF WELDING! ...PASSENGER SIDE ALL DONE
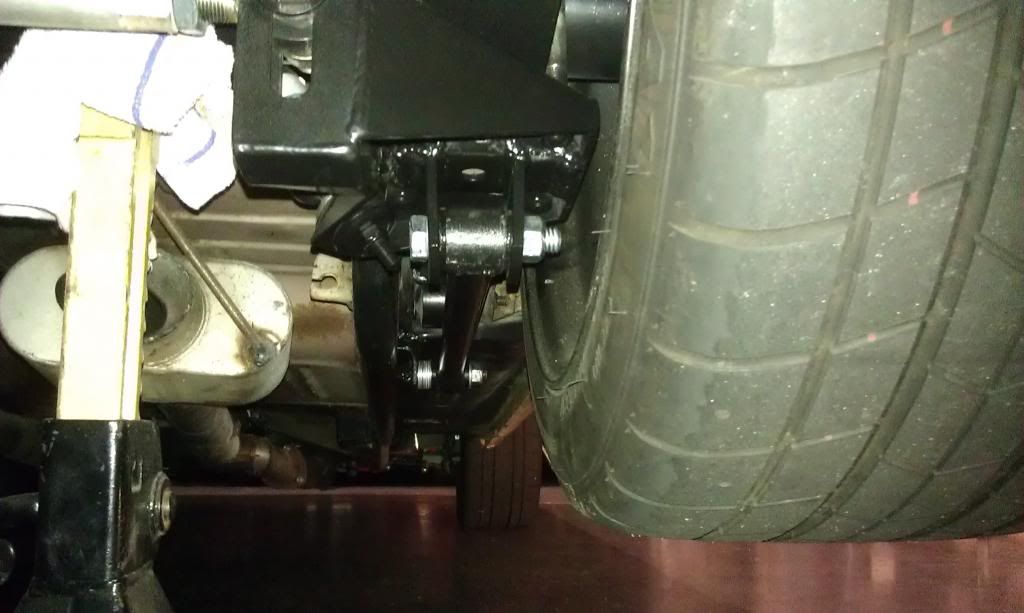
DRIVERS SIDE ALL DONE
Took her for a little test drive and SHE HOOKS! Zero wheel-hop and much better communication in corners on and off throttle.
Best $100 I've spent so far.
Posted by v-town coupe (Member # 2771) on
:
your damn near 3 link'd out back, mine as well create some beefier LCA's and get some coil overs and delete the leafs.
Posted by bwkelley76 (Member # 8792) on
:
quote:
Originally posted by v-town coupe:
your damn near 3 link'd out back, mine as well create some beefier LCA's and get some coil overs and delete the leafs.
We shall see, the rear suspension feels awesome and I've seen some of these cars that handle great on the track with leafs. I may run this for a while and see how she does.
$2-4k is a lot of money for a pre-fabbed kit and although I could probably make it work I don't really have the time to fab my own complete rear suspension.
[ November 26, 2012, 02:33 AM: Message edited by: bwkelley76 ]
Posted by kingdavid (Member # 11179) on
:
quote:
Originally posted by v-town coupe:
the SOT stuff is solid, shaun knows his stuff and really beats on his stuff hard when doing R&D. At the shelby mini nats I got him to give me a ride in his car and I was very impressed. I know its a lot of $$$ but the DSE kit hands down is the best aftermarket suspension setup for the older mustangs, The dse stuff is pounding on R compound fully prepped race cars while just using a 200 treadwear radial. If I were looking for something to bolt in the stock place the SOT kit would be it.
As mentioned before, the AJE kit is a cool, cost effective way to upgrade the factory suspension, but in no way will it perform better then the SOT setup. a lot of the hardcore race cars that are factory strut end up going to an SLA setup in order to be more competitive. so unless you are on a budget and going to go mod motor,etc. your better off staying with the traditional style suspension with a longer travel coil over setup.
After doing more research the AJE stuff is more directed towards drag racing car's or cruising street car's, It's a nice set up and as you stated cost effective, But it lack's the reviews on a road coarse to back it's performance, I'm not building a track spefic car, But would like to have the option to cruise to the track do some lap's then head home for the day. I like the SOT and the TCP from coilover setup. The DSE product is a very nice peice but way out of my budget, Thanks for the advice
Posted by DEVERO2 (Member # 6155) on
:
Looking good brandon. I am looking for a 67 coupe. I have an Idea in my head LOL
Posted by bwkelley76 (Member # 8792) on
:
quote:
Originally posted by DEVERO2:
Looking good brandon. I am looking for a 67 coupe. I have an Idea in my head LOL
Thanks Paul, glad you chimed in. ..Shoot me a PM with your ideas some time if you want.
----
Well love it or hate it folks, I made my final decision and ordered the front suspension today.
Although I really wanted to try the "Street or Track" setup I just couldn't get if for the right price. I went with the top of the line Total Control coilover setup with the dual adjustable shocks. I also upgraded to the bumpsteer kit, and a manual rack & pinion.
My employer is a dealer for Total Control plus they are local here in Sacramento. They gave me such a GREAT DEAL that I just could not afford to turn it down.
All the parts will be in my hands in a few weeks and I'm pretty excited about it.
-
-
-
-
-
-
-
[ November 27, 2012, 02:34 AM: Message edited by: bwkelley76 ]
Posted by 66_5.0 (Member # 9974) on
:
Thats going to handle very nice! Post pics
Posted by kingdavid (Member # 11179) on
:
quote:
Originally posted by bwkelley76:
quote:
Originally posted by DEVERO2:
Looking good brandon. I am looking for a 67 coupe. I have an Idea in my head LOL
Thanks Paul, glad you chimed in. ..Shoot me a PM with your ideas some time if you want.
----
Well love it or hate it folks, I made my final decision and ordered the front suspension today.
Although I really wanted to try the "Street or Track" setup I just couldn't get if for the right price. I went with the top of the line Total Control coilover setup with the dual adjustable shocks. I also upgraded to the bumpsteer kit, and a manual rack & pinion.
My employer is a dealer for Total Control plus they are local here in Sacramento. They gave me such a GREAT DEAL that I just could not afford to turn it down.
All the parts will be in my hands in a few weeks and I'm pretty excited about it.
-
-
-
-
-
-
-
Let us know how it works out i've been going back and fourth on the SOT kit and the TCP kit.
[ November 27, 2012, 12:59 PM: Message edited by: kingdavid ]
Posted by bwkelley76 (Member # 8792) on
:
Suspension and steering arrived early! ...pics coming soon
[ November 30, 2012, 03:55 AM: Message edited by: bwkelley76 ]
Posted by bwkelley76 (Member # 8792) on
:
Merry Christmas to the Mustang and I!
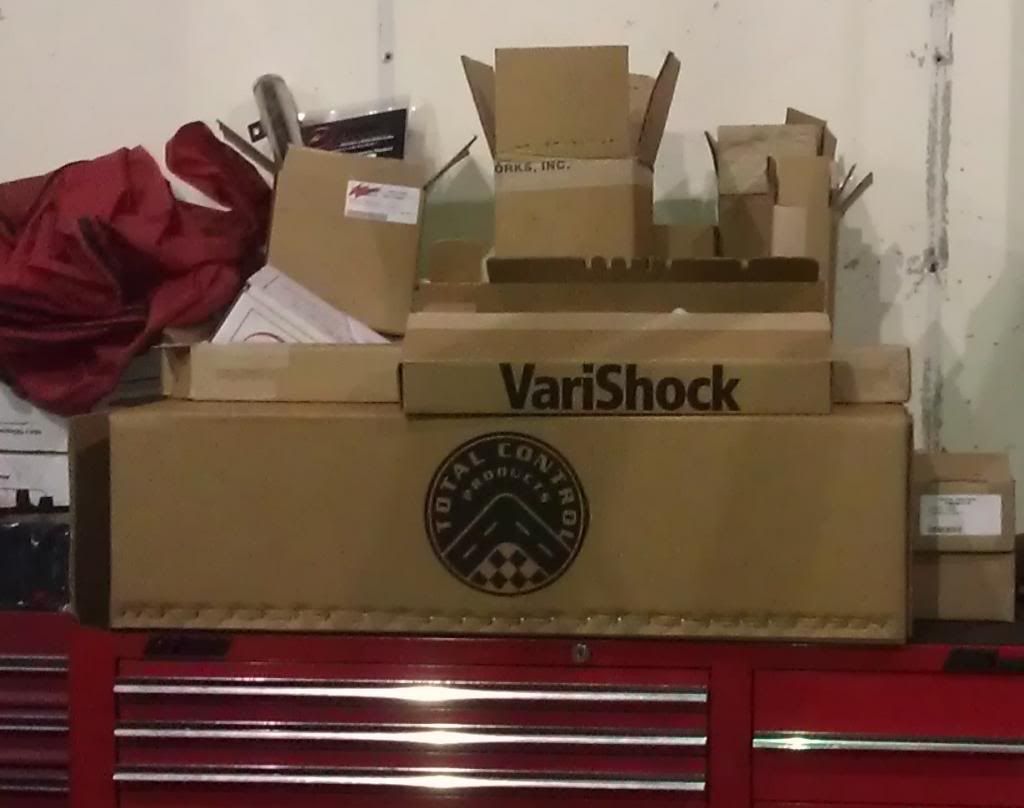
[ December 01, 2012, 04:11 AM: Message edited by: bwkelley76 ]
Posted by bwkelley76 (Member # 8792) on
:
TCP FRONT-END, RACK & PINION, and WILWOOD BRAKE INSTALL
The TCP rack reuses the factory column or an aftermarket coulmn, your choice. For the '65-early '67 Mustangs that have the one-piece steering box and shaft combo it comes with a new center shaft that replaces the factory one, lower u-joints, and coupling shaft to attach to the rack down below. You will need to cut the stock column so the TCP kit also includes a retainer bearing/column cap assembly, a firewall support bracket and boot.
The stock column popped right out and slid off of the factory steering shaft that is one-peice with the box. I used a little persuasion (pry bar) between the box and the column to unseat 45 years of stick! Only took about 20 minutes and it was out and on the bench.
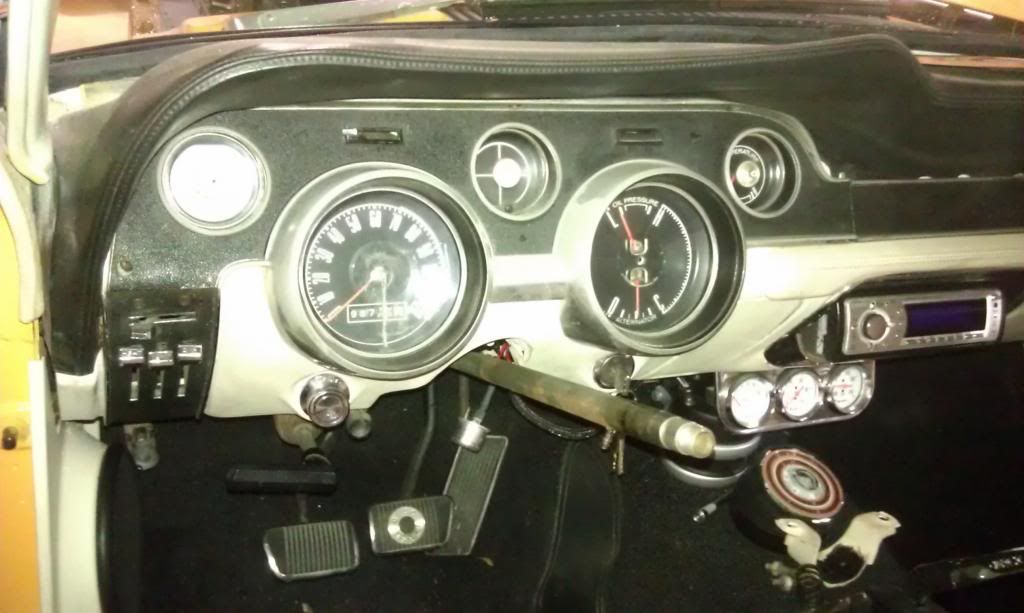
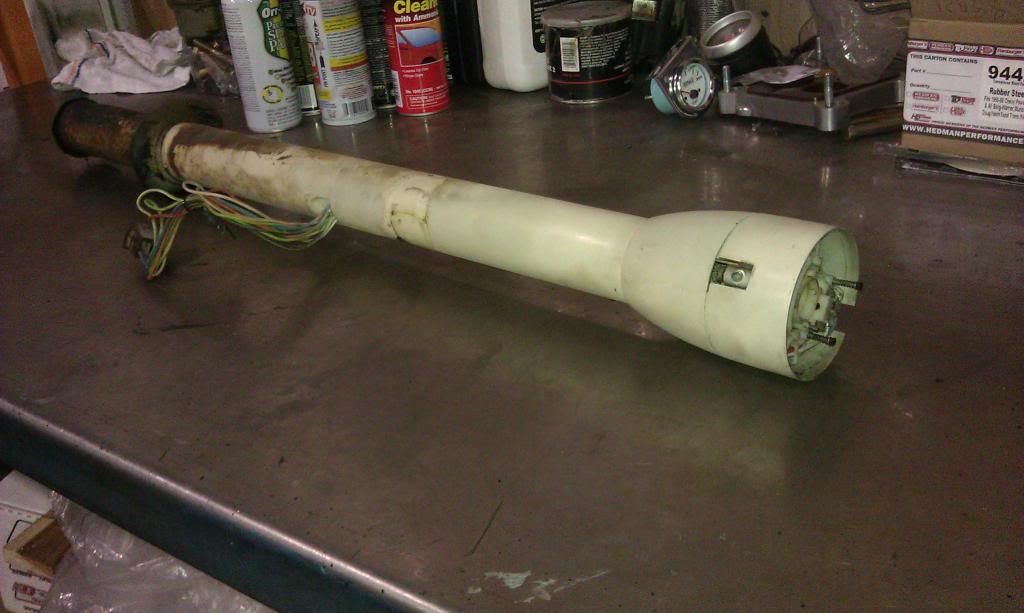
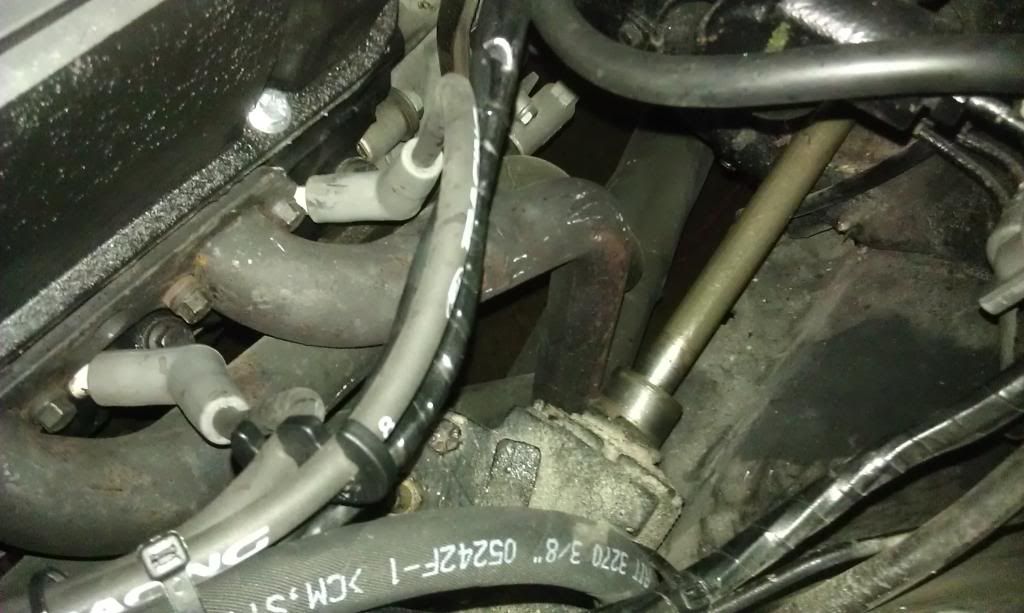
-
-
-
-
Next with the car still on the ground I removed the shock tower caps and took off the strut rod bushing nuts. This allows the suspension to droop all the way down once raised on the lift. I then removed the export brace in preparation for the TCP suspension install later on.
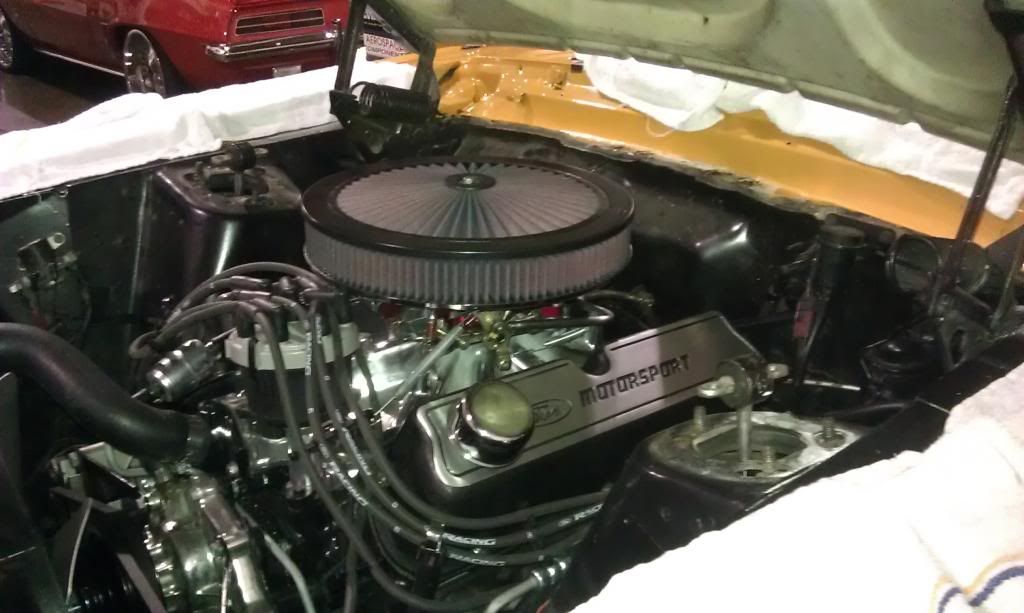
-
-
-
-
Here's the order I chose to do drop the suspension, steering and brakes this time around...
I usually drop all of the suspension, steering and brakes at the same time when I'm in a hurry. If you have access to a lift it can be done that way to save time.
Always keep the end result in mind though and DO NOT OPEN FLUID LINES or hoses unless you plan on finishing the job "the same day" or don't mind making a mess.
In my case I only have a few hours to tackle some things today, and I will be parking another car underneath this one overnight, so I'm being a little conservative.
So, keeping that all in mind I racked and raised the car, removed the wheels, removed outer tie rod ends and front drums from the spindles, and removed the sway bar end link bottom nuts from the lower control arm, sometimes these are on the top which makes for a messy removal(I promptly put them back on once the end-link was pulled from the lower control arm). I'm reusing the sway bar in this case so it's OK to leave it on the car, it shouldn't get in the way too badly.
Now that everything is hanging and no longer under stress I unseated the ball-joints from the spindles. ...Note the use of the side-cutters to remove the cotter-pins and the air hammer and corresponding bit at the very tip of the ball-joint studs, being careful not to damage the threads. This is my personal method of choice to unseat ball-joints and tie rod ends from spindles. ...The use of a pickle fork here would definitely prove death for the ball-joints and tie rod ends, not good if you plan on ever reusing them on another car. I'm not that fond of pickle forks either way though. You can hit the spindle with a large hammer also for a similar result, but I don't want to put big dents in my spindles in this case either.
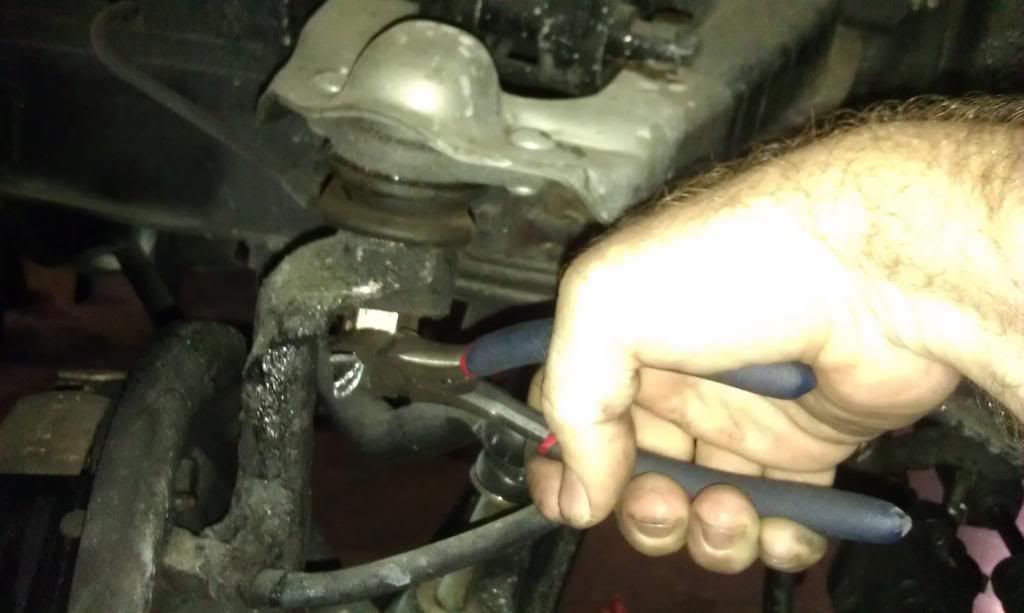
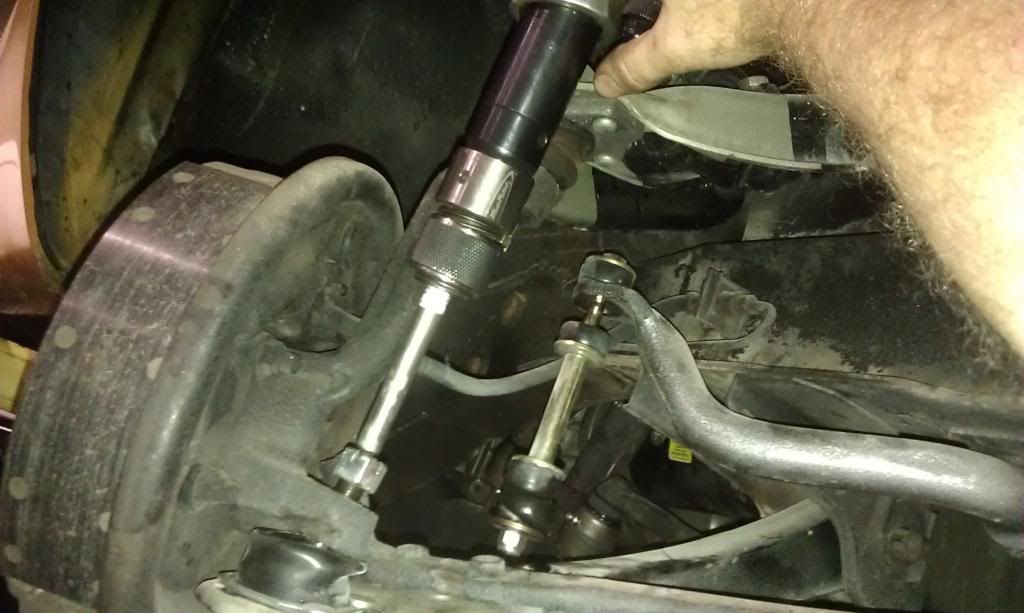
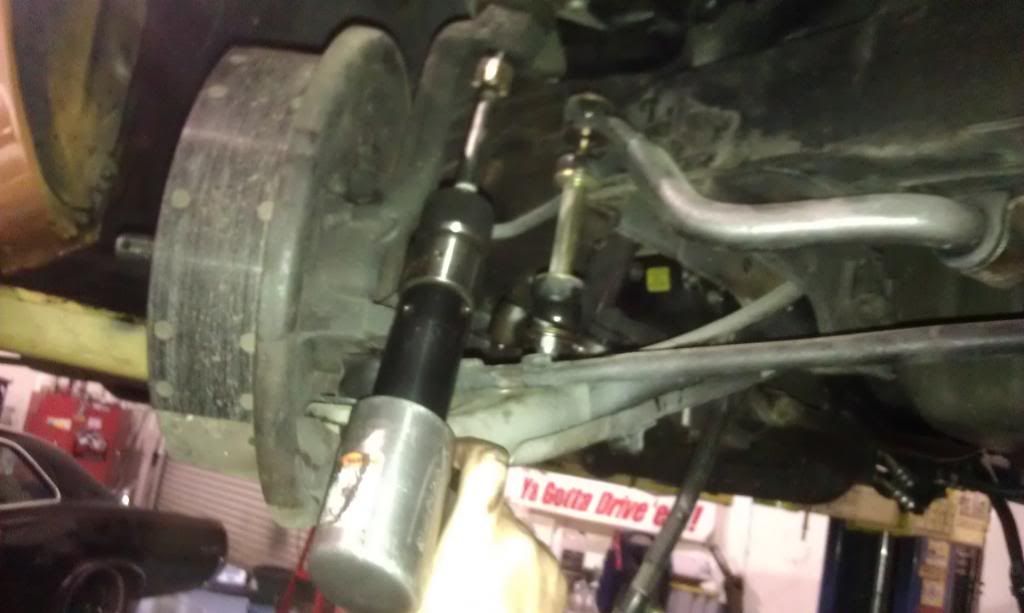
-
-
-
-
Now it's time to remove the center brace for access to the lower control arm bolts/eccentrics. Then I removed the lower control arms and strut rods as a complete unit.


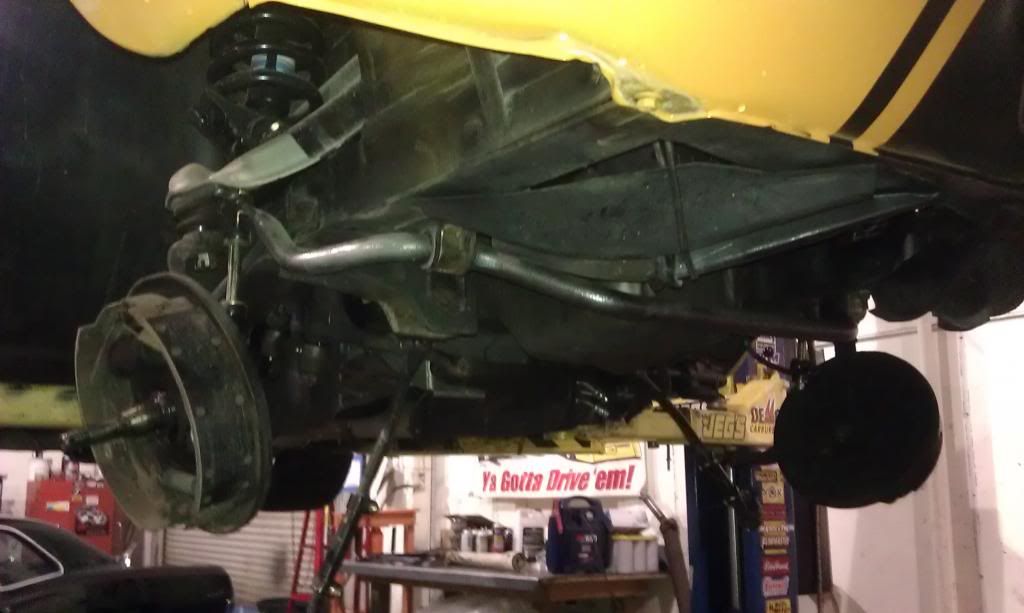
TO BE CONTINUED...
[ December 02, 2012, 12:37 AM: Message edited by: bwkelley76 ]
Posted by BOOSTED92GT (Member # 8650) on
:
nice man, i have the tcp on the front of my 68. Gotta order or mod the cross member now though as im switching powerplants to a 03 cobra instead of a 5.0. Car looks good!
Posted by BLoWN FR500 (Member # 8766) on
:
Posted by bwkelley76 (Member # 8792) on
:
...editing
[ December 05, 2012, 12:57 AM: Message edited by: bwkelley76 ]
Posted by bwkelley76 (Member # 8792) on
:
Removing spindles an throwing them in the parts washer
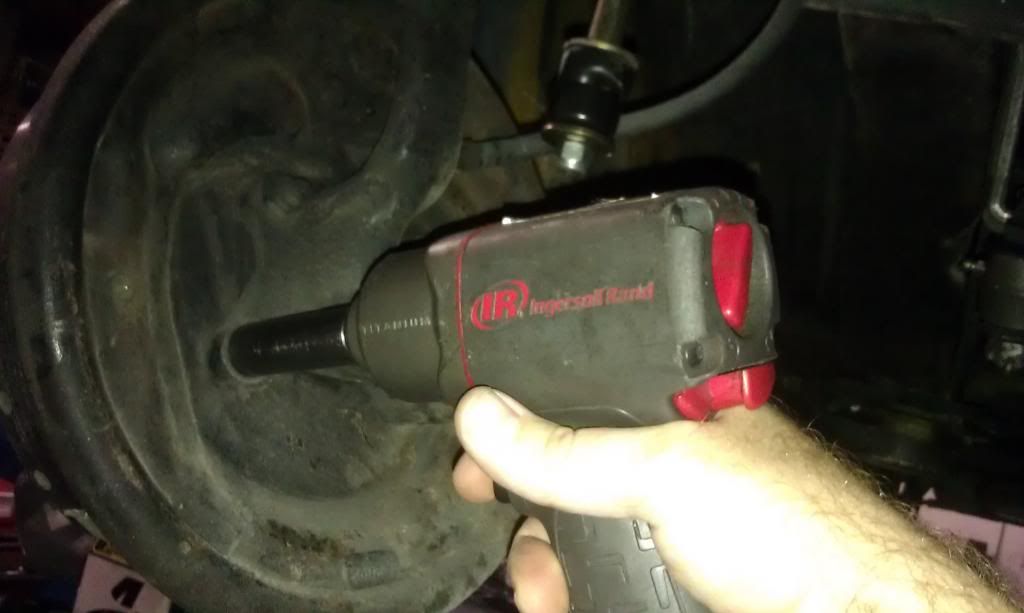
Removed lower half of the steering components plus the pump and bracketry
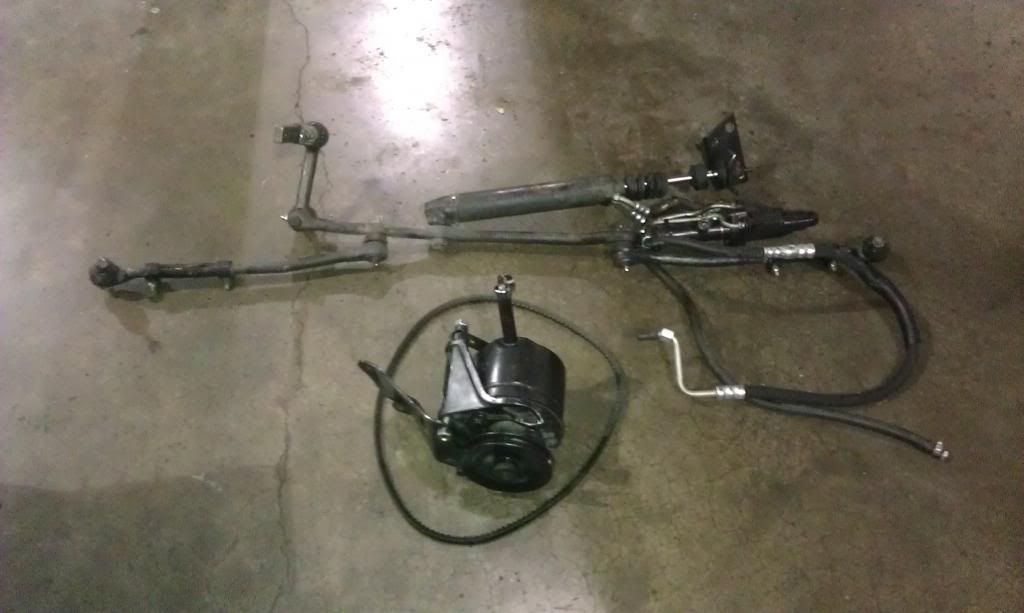
Removing the steering box
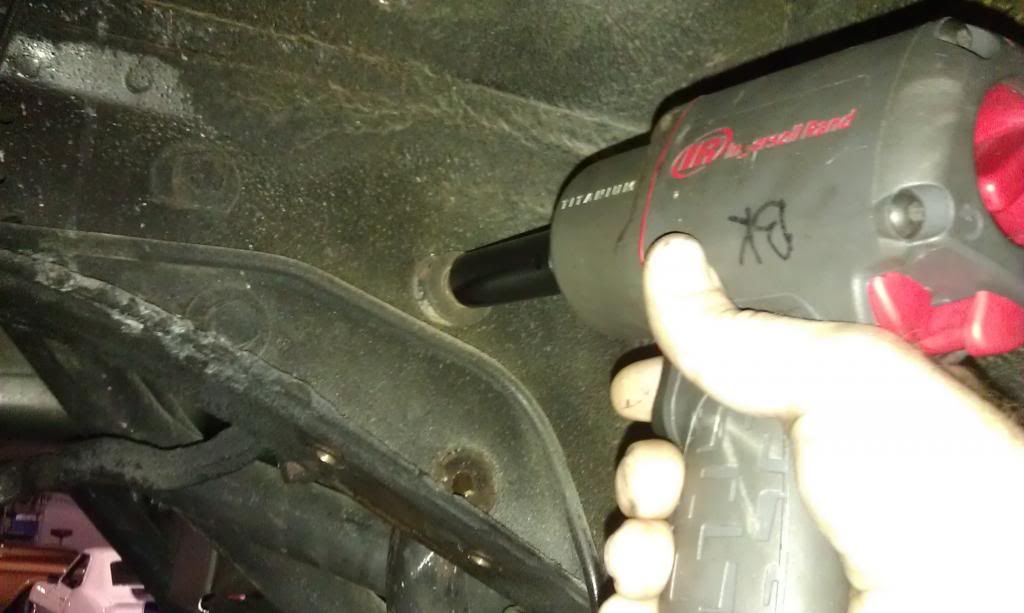
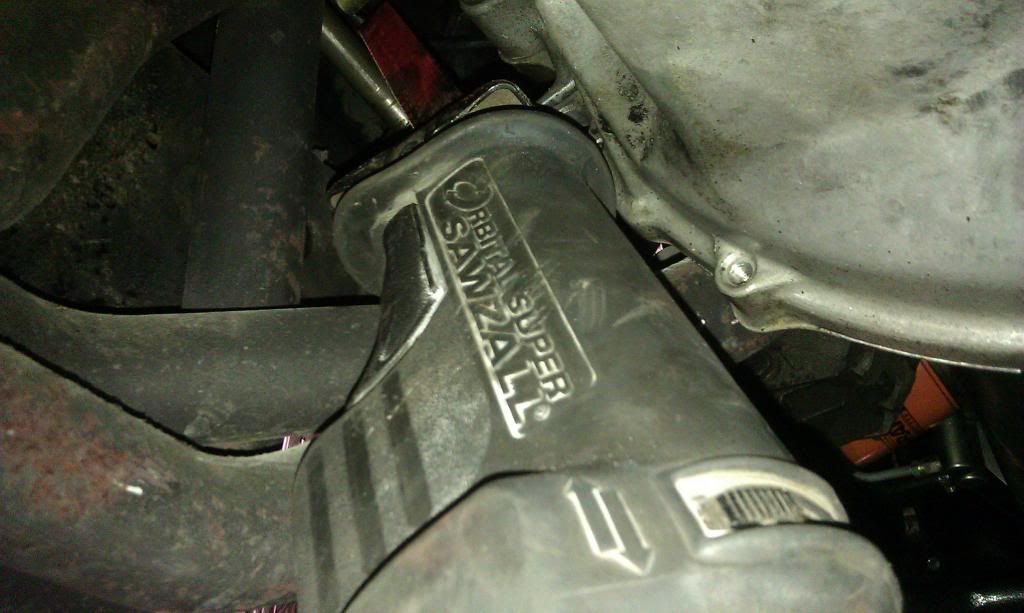
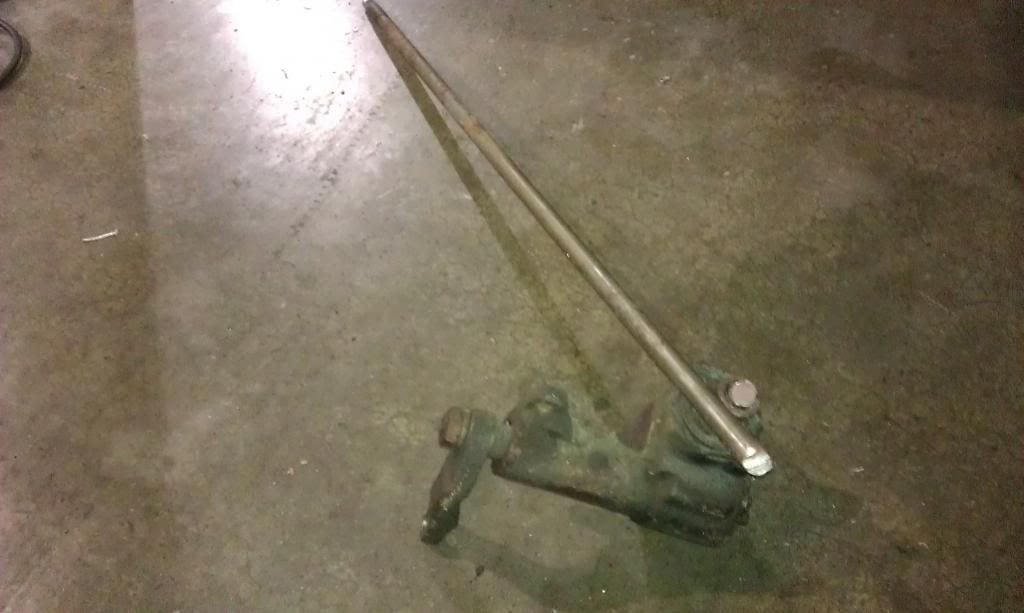
Removed all of the upper suspension as a whole
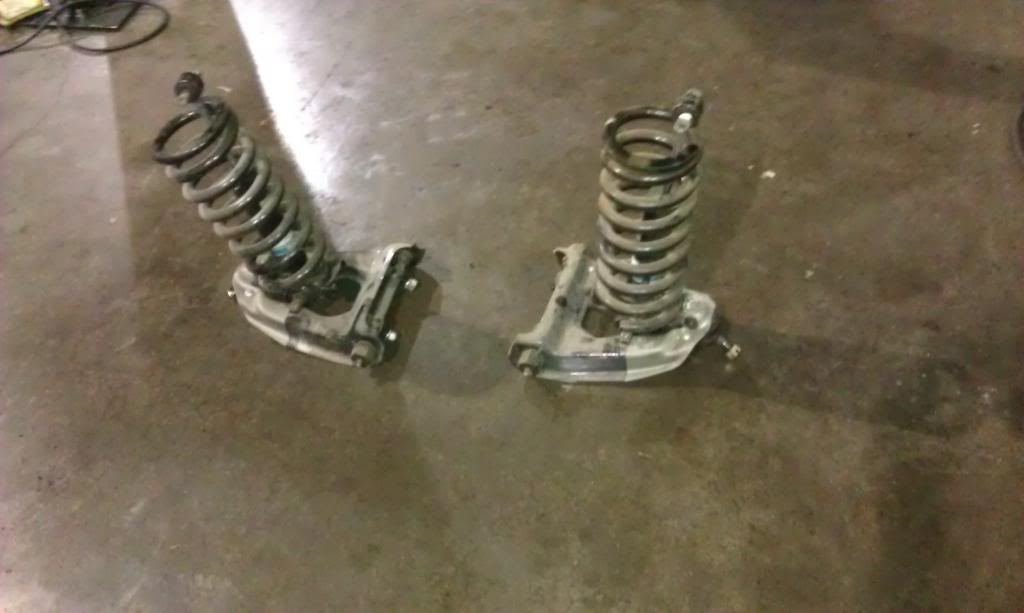
THE HEAP IS GROWING!
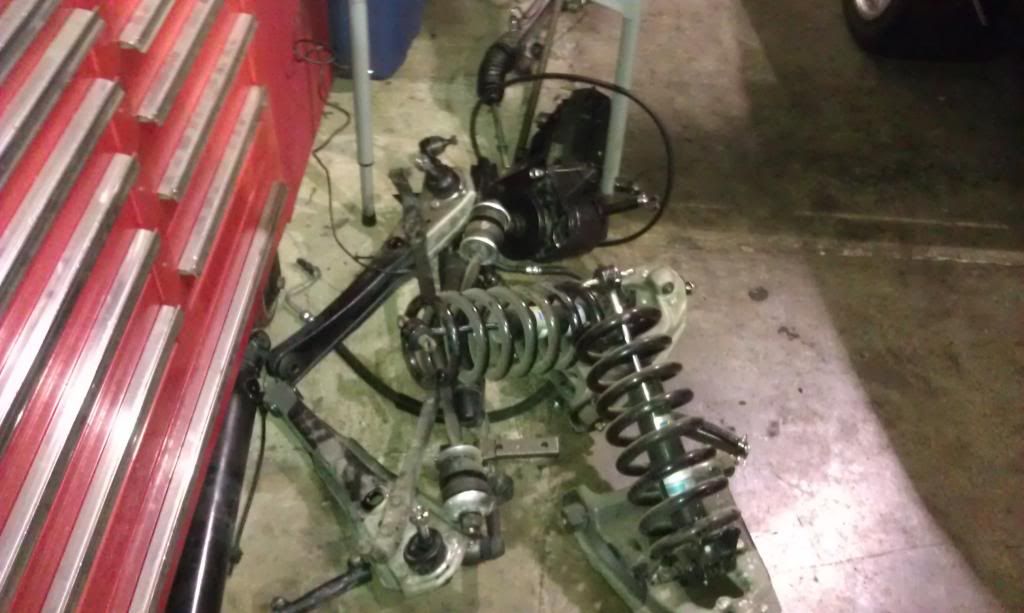
Cleaning time!

Posted by bwkelley76 (Member # 8792) on
:
Much Better!
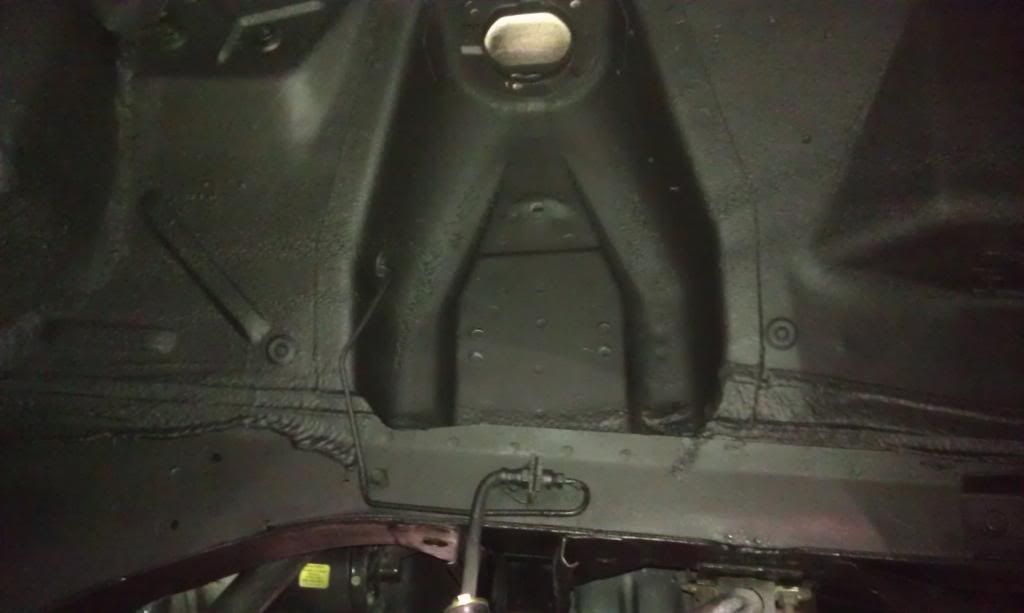
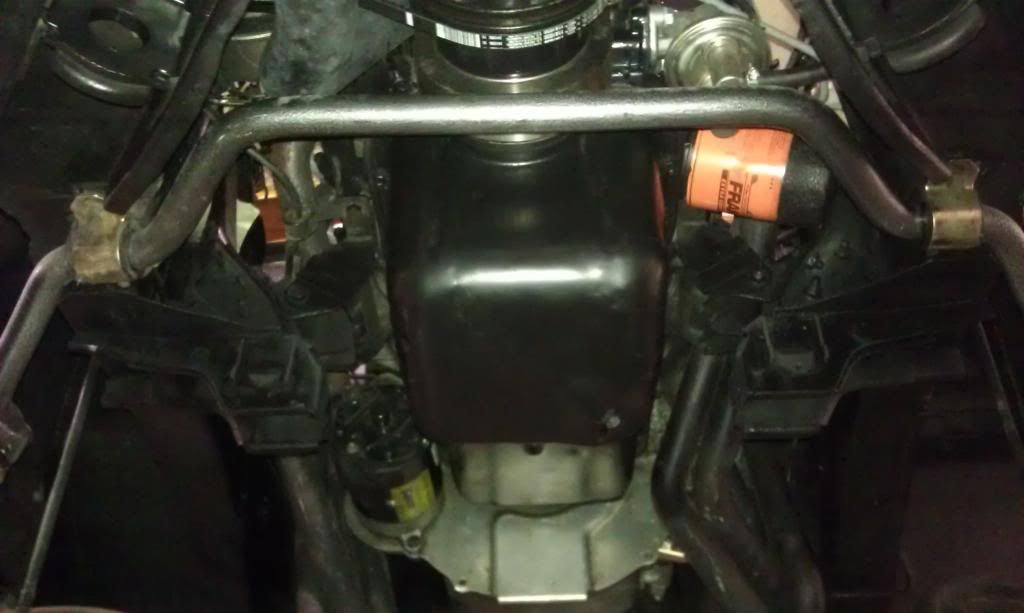
...Really good stuff!
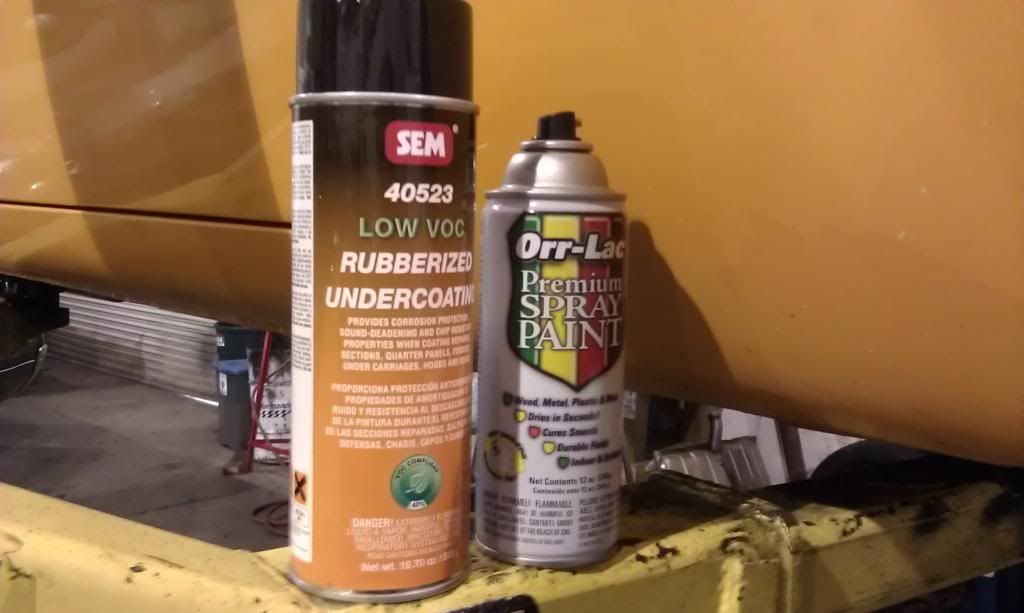
Sand blast time
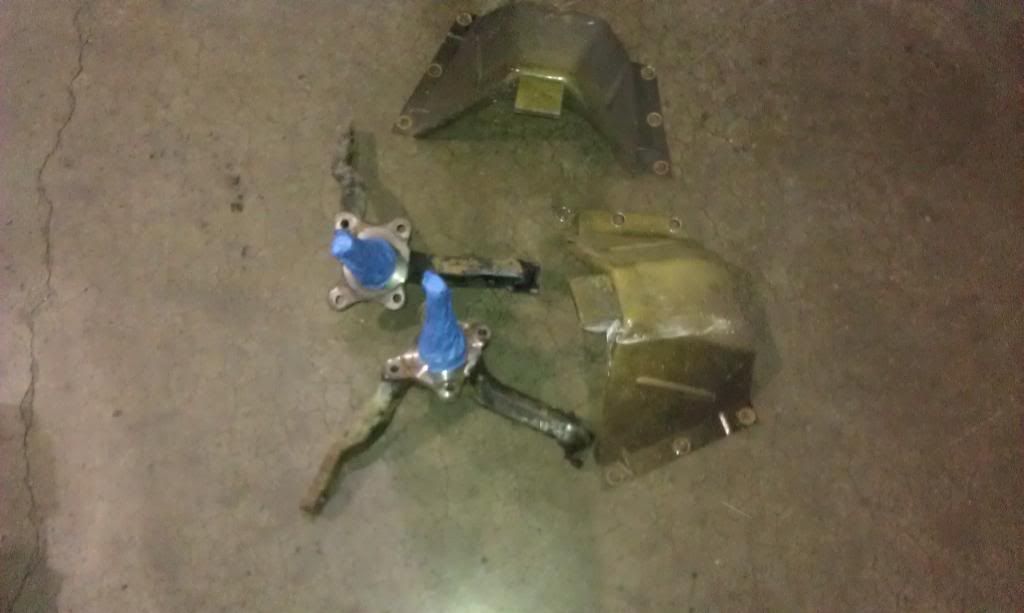
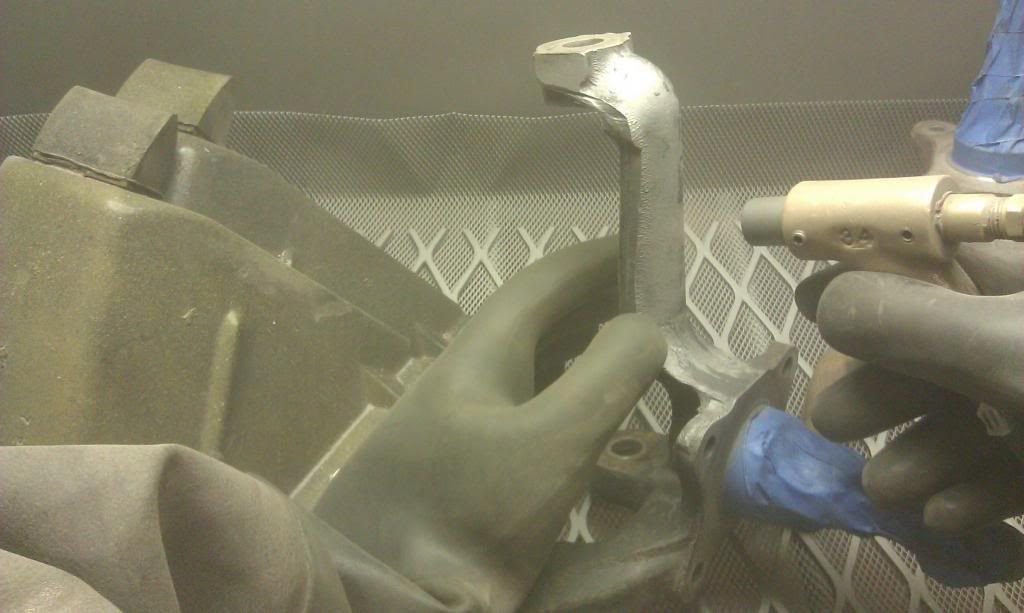
A little blasting and paint goes a long way! (also a little random sneak peak of a few of the new parts that you weren't supposed to see until later)
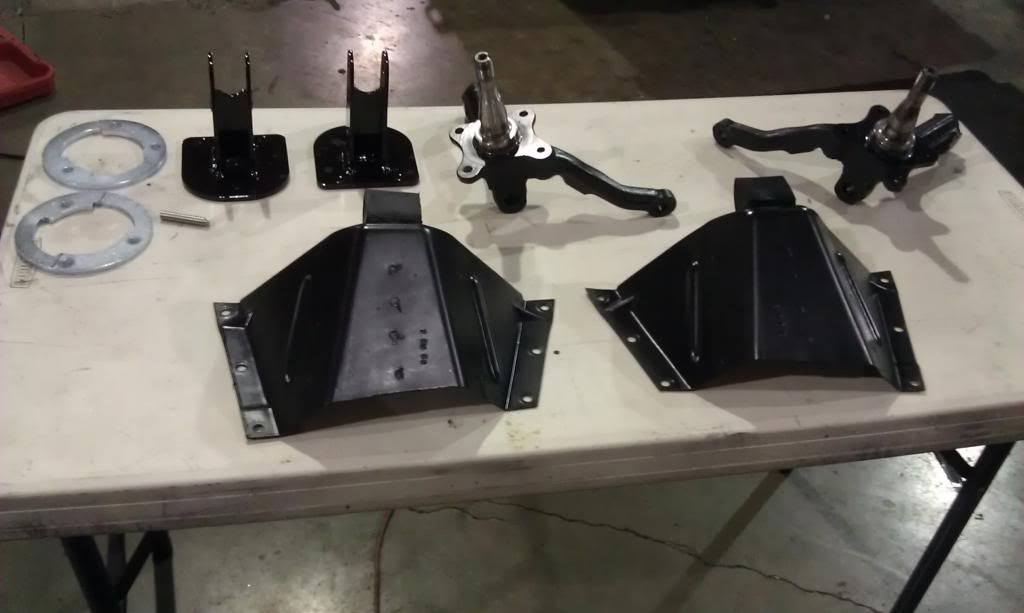
HERE WE GO!!!!!
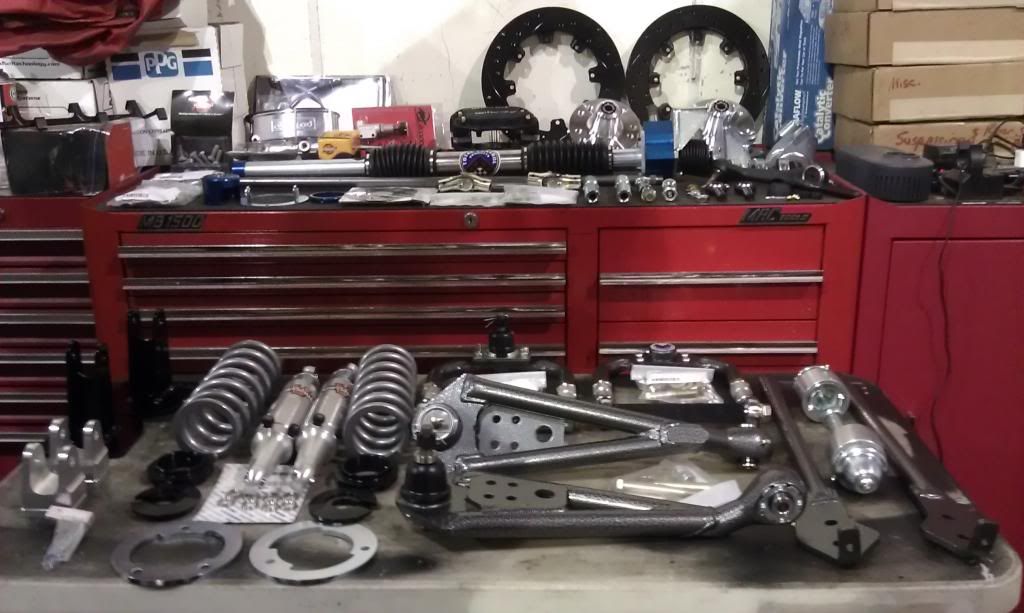
...Wait, don't forget the instructions. Where's my beer?
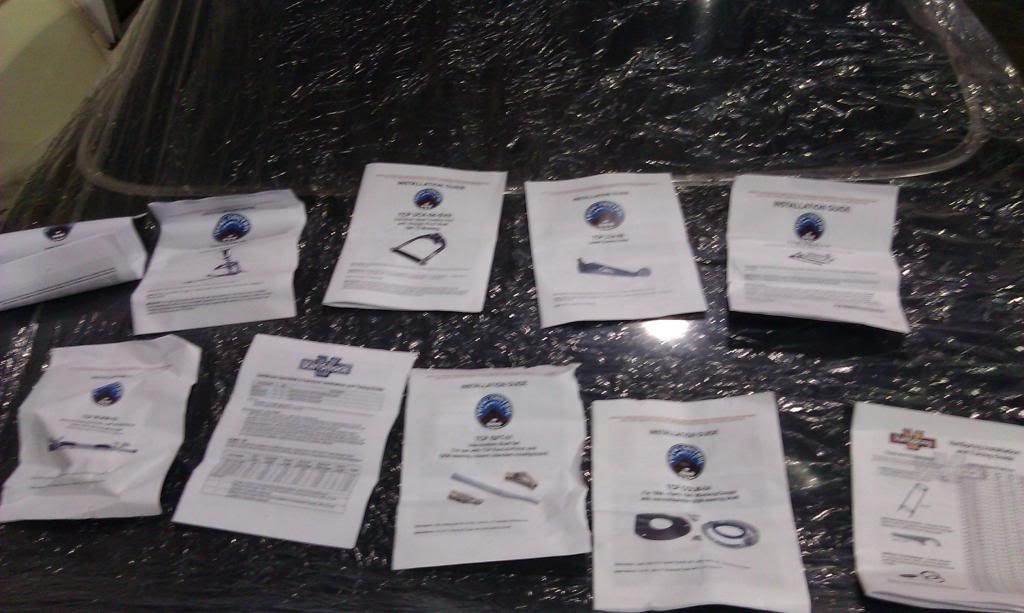
TO BE CONTINUED.....
-
-
-
Posted by kingdavid (Member # 11179) on
:
Posted by bwkelley76 (Member # 8792) on
:
<<<Thanks kingdavid!
OK HERE WE GO...
First step is to remove the factory spring locator plate from inside the shock tower. You can use the spot-weld drill/bit provided with the kit or whatever method works for you. When you are done removing the plates be sure to clean up the area and paint it so it doesn't rust.
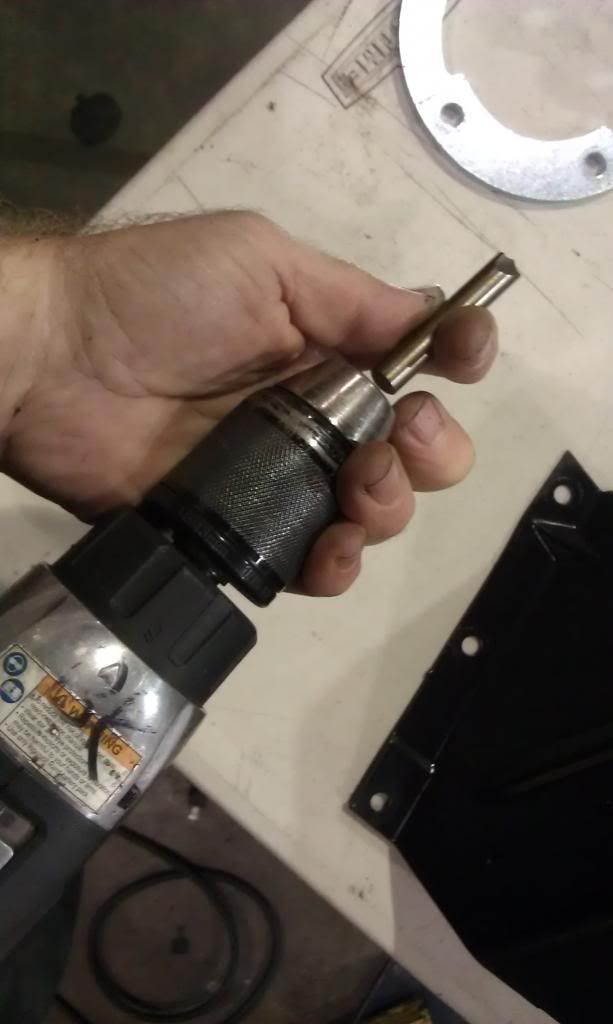
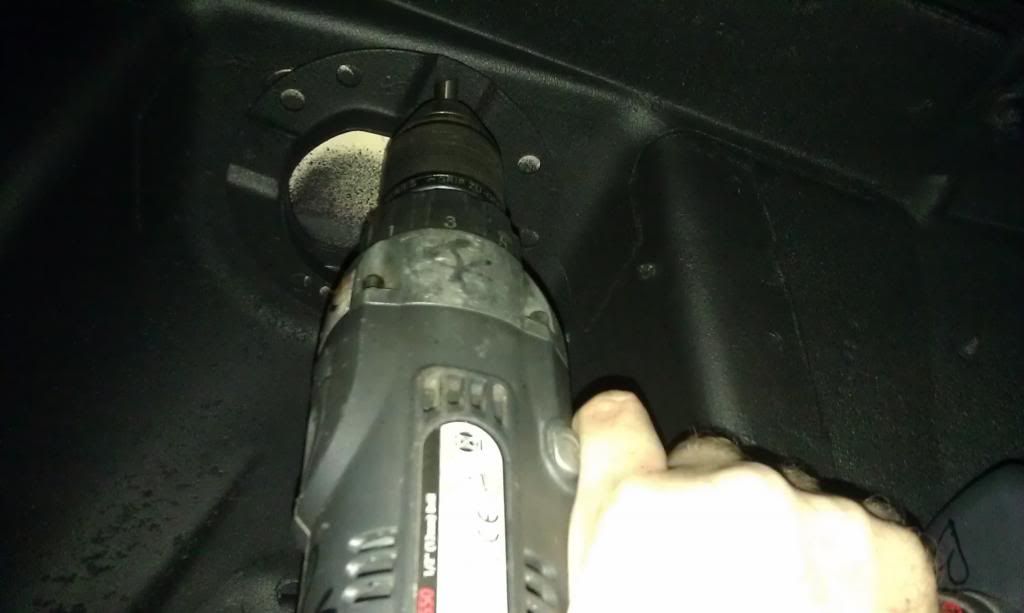
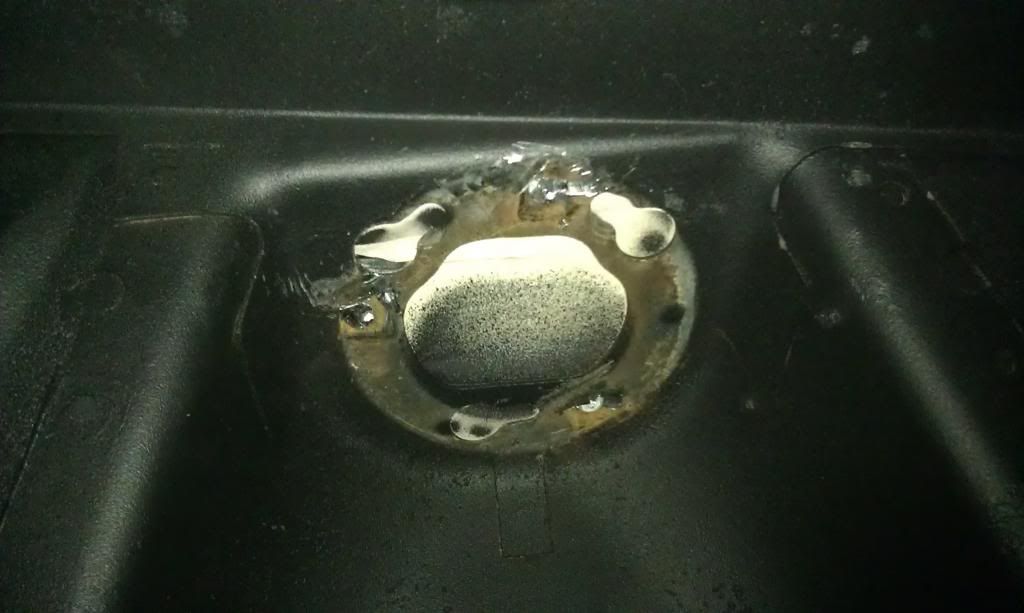
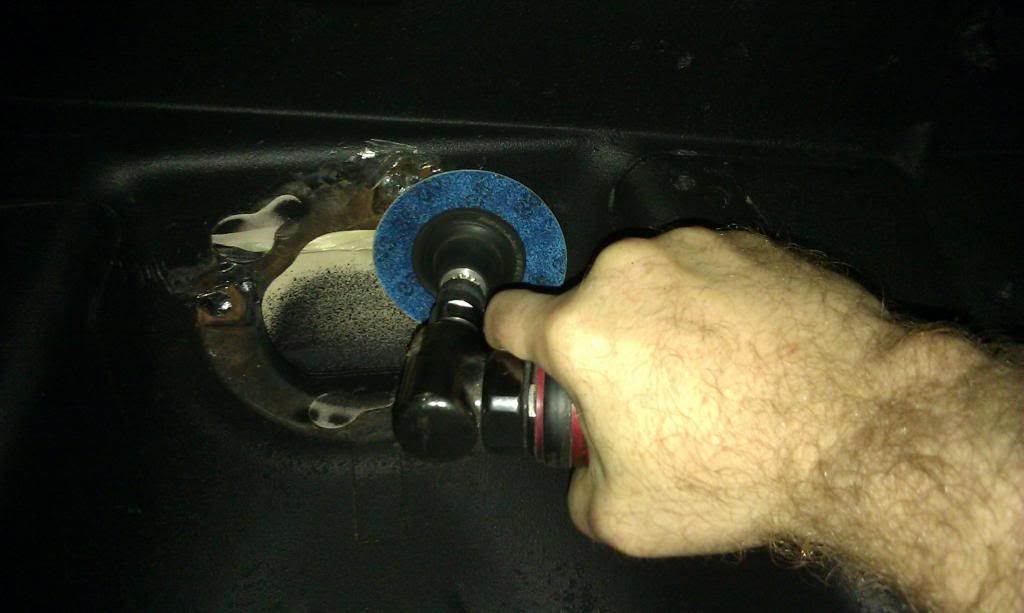

Installing the upper coil-over mounting plates is super easy, just mock them up and hog/drill out any of the car's factory holes that need it. THERE IS A PASSENGER AND DRIVER'S SIDE PLATE and they are marked "D" and "P" The markings are hard to see since they are laser-etched and then powder-coated.
In my case all but one of the holes on each plate lined right up to the shock tower. Do the same with the holes on your factory or aftermarket strut tower brace to make installation easier. Your brace will bolt right on top of the coil-over mounting plate. ...In order from top to bottom you will have a shock tower brace, TCP coil-over mounting plate, factory shock tower, and finally underneath will be the TCP lower retainer plate followed by lock-nuts and washers.
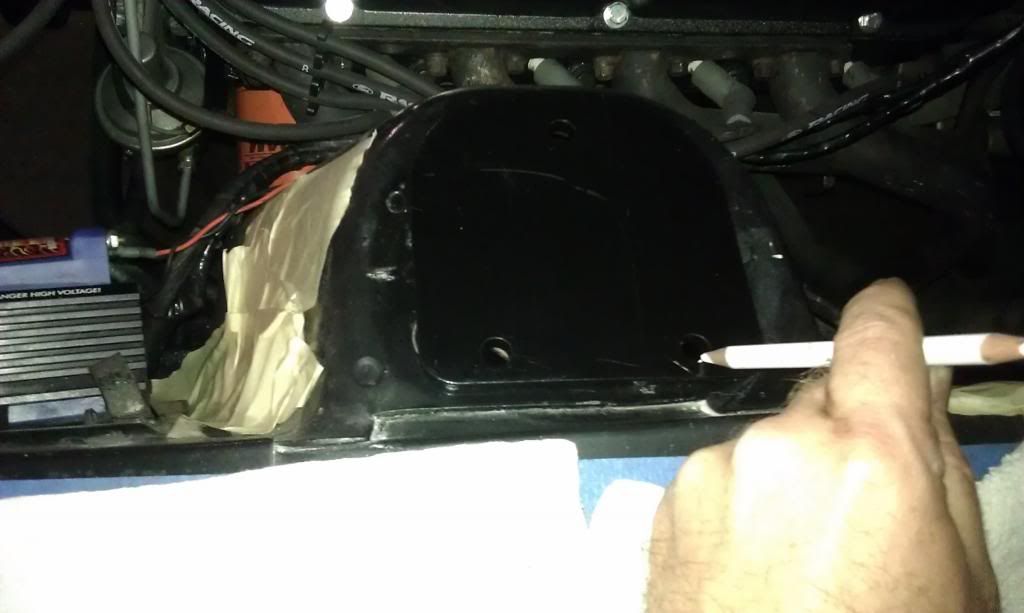

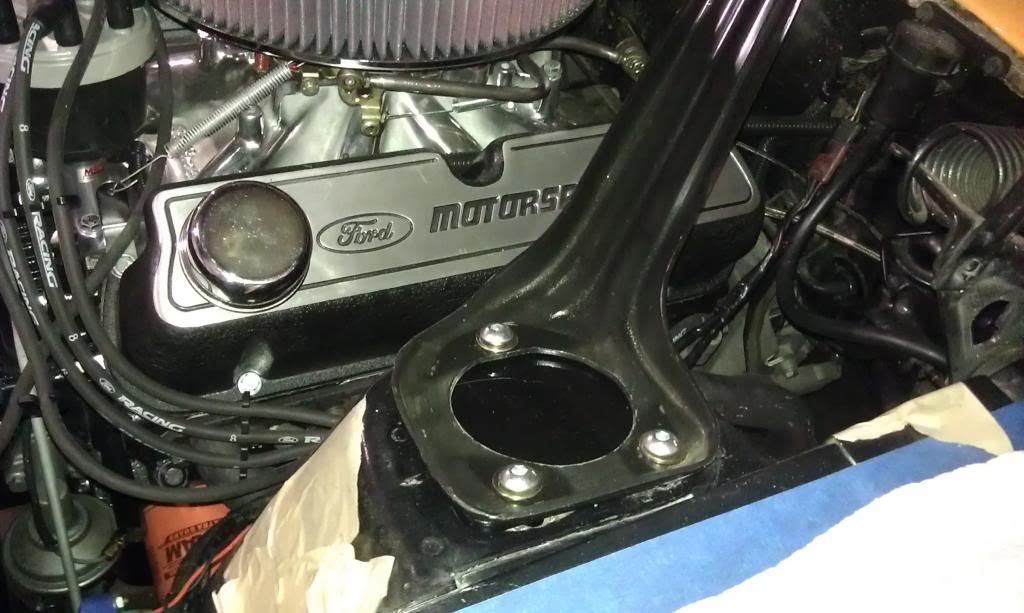
Posted by bwkelley76 (Member # 8792) on
:
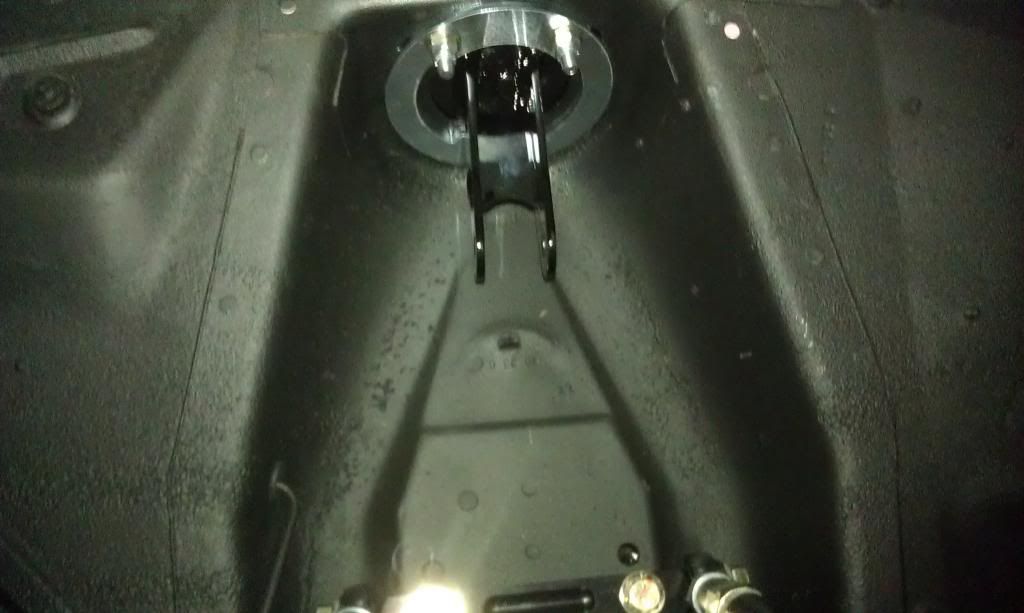
Now on to the lower control arms, eccentric eliminators, and strut rods. Make sure to use anti-seize on strut rod adjusters and also if you're running a TCP rack & pinion make sure the LCA bolts you use are long enough to incorporate mounting of the rack. My kit came with 2 sets, one was included with the rack and one with the LCA's. Both sets ended up being the same length in my case but it's still a great idea to check.
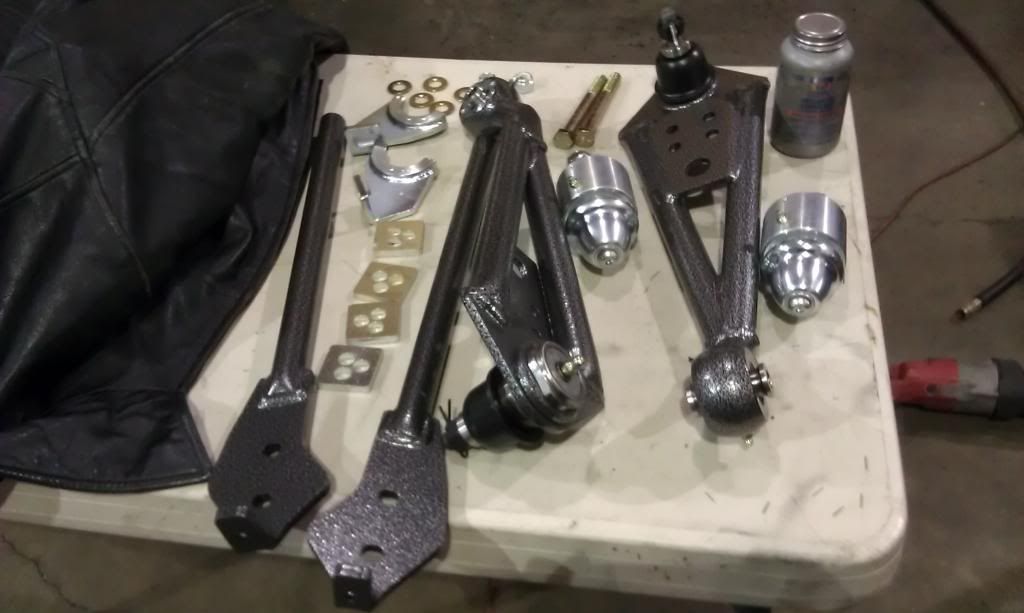
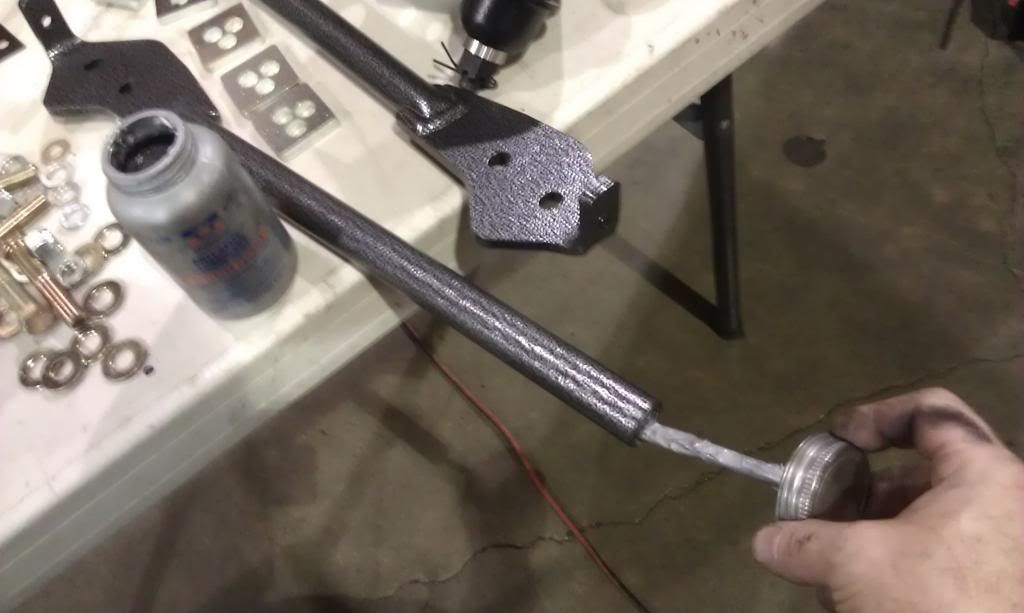
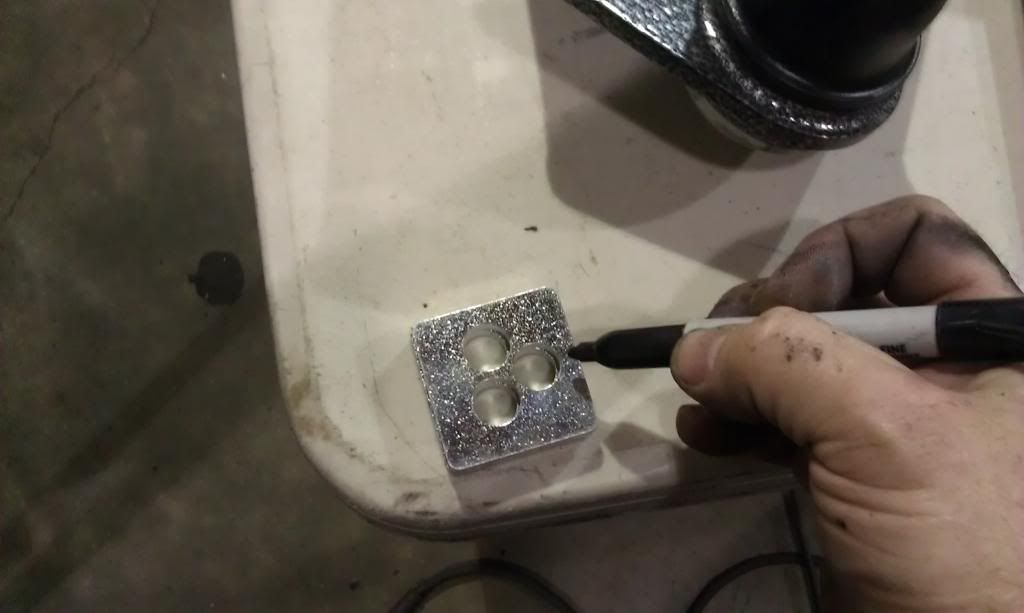
Be careful not to damage the Zerk fitting on the LCA when installing the arm.
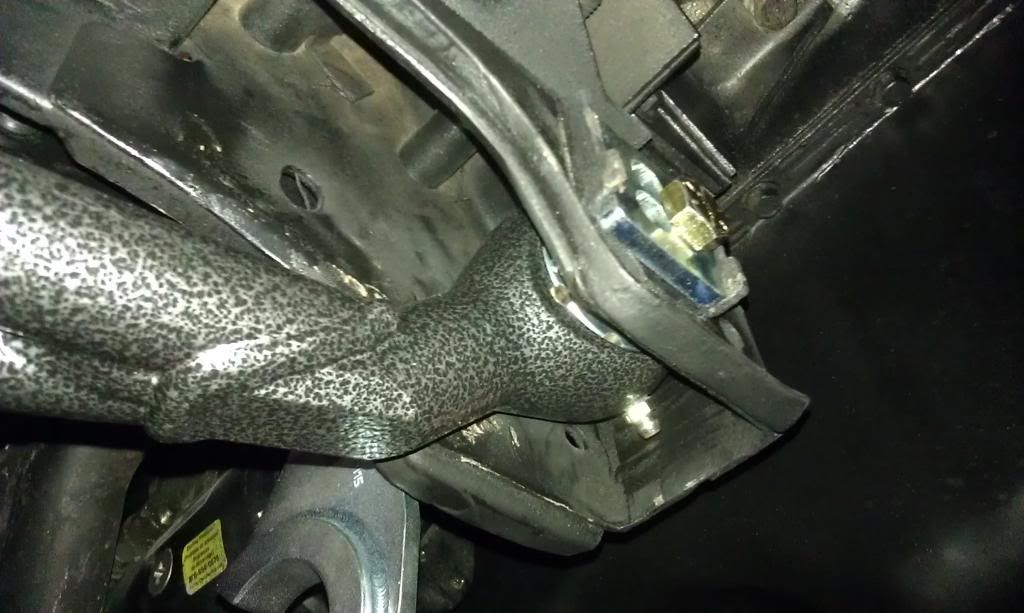
Remove collar/sleeve from factory strut rod mount
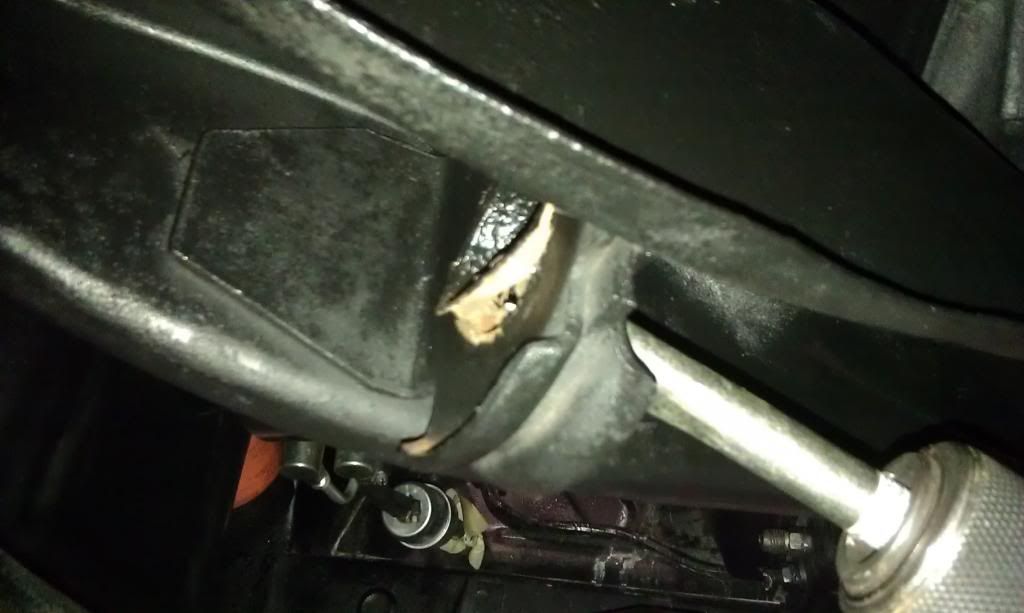
When installing the strut rod bushing to the car you need to read the instructions carefully, you will need anti-seize for the big threads and loc-tite for the small retainer bolt. TORQUE SPECS ARE MANDATORY. ...Very clever engineering was put into this part, I LIKEY.
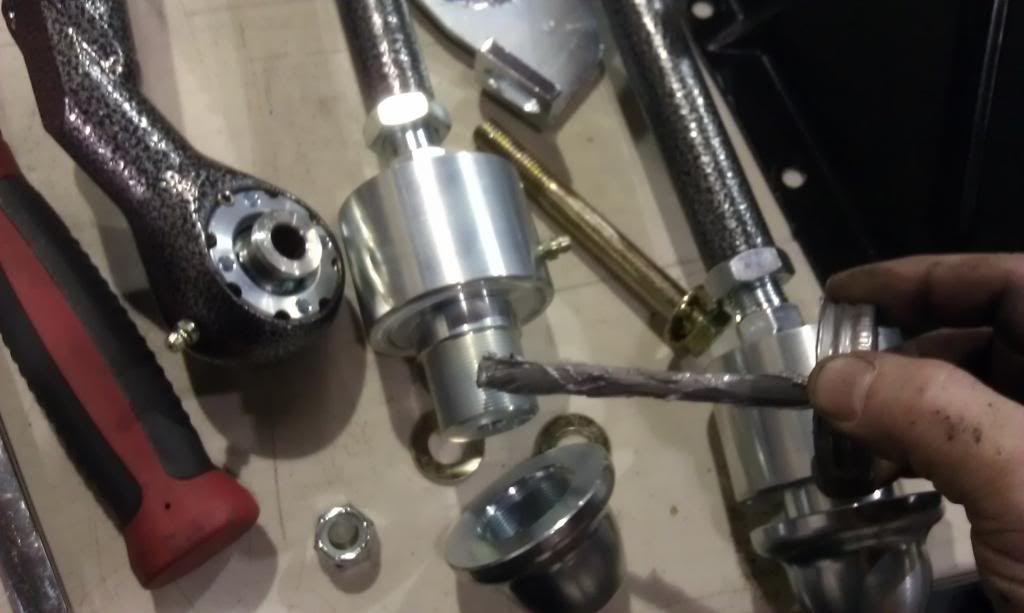
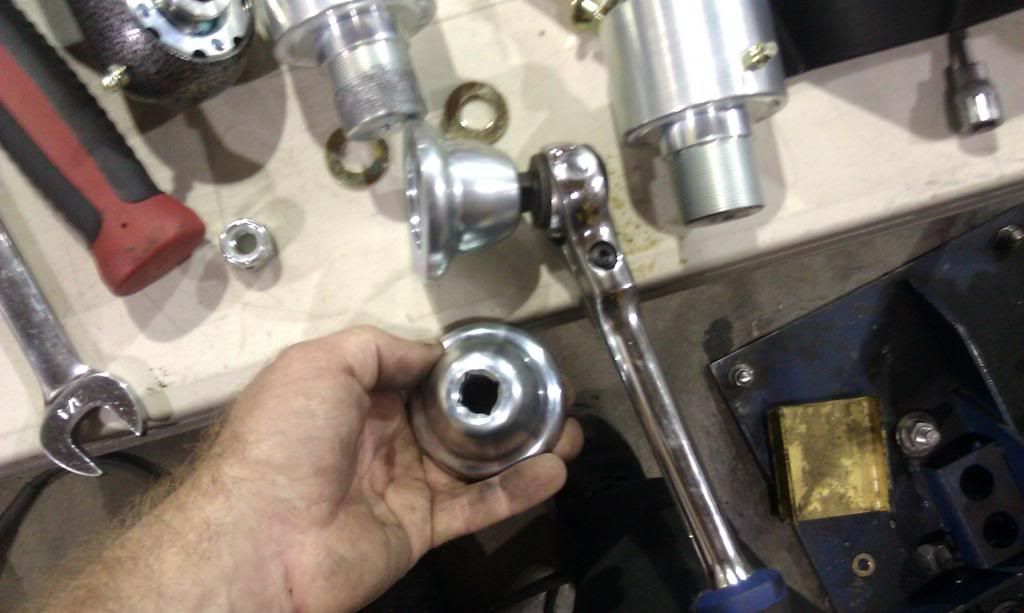
Posted by bwkelley76 (Member # 8792) on
:
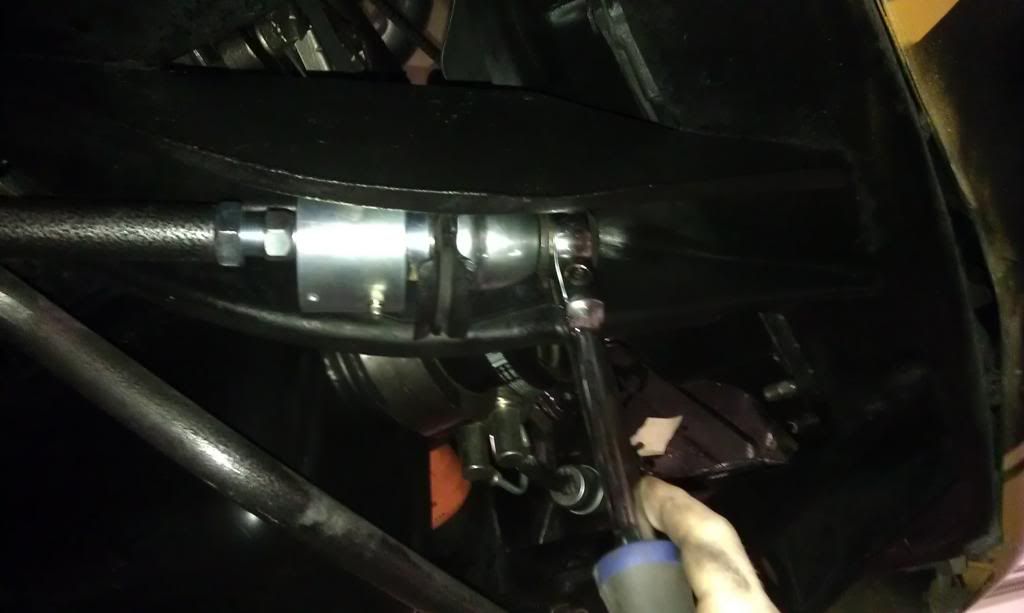
Zerk fitting aligned accordingly for service.
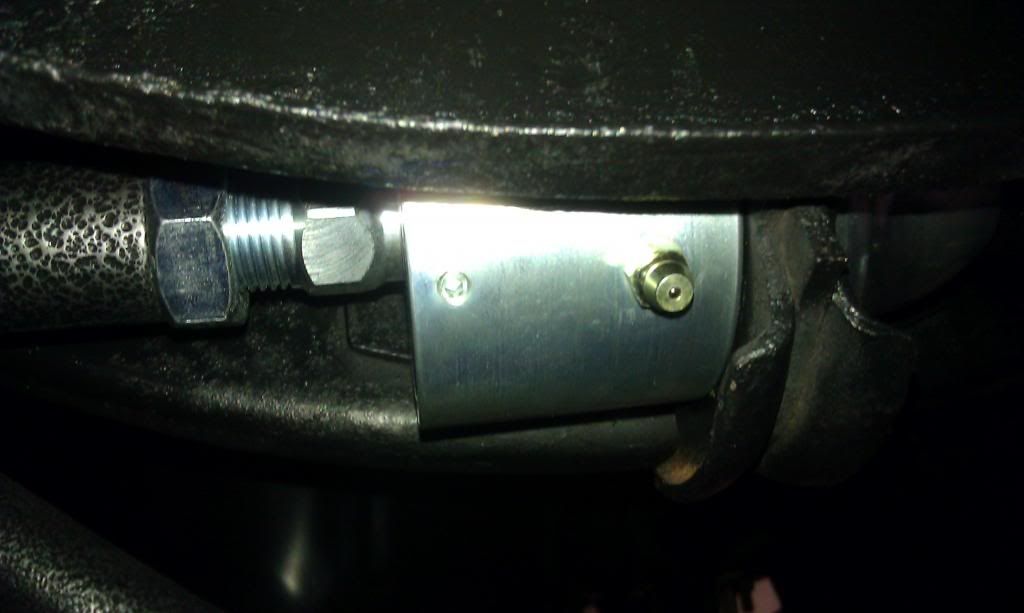
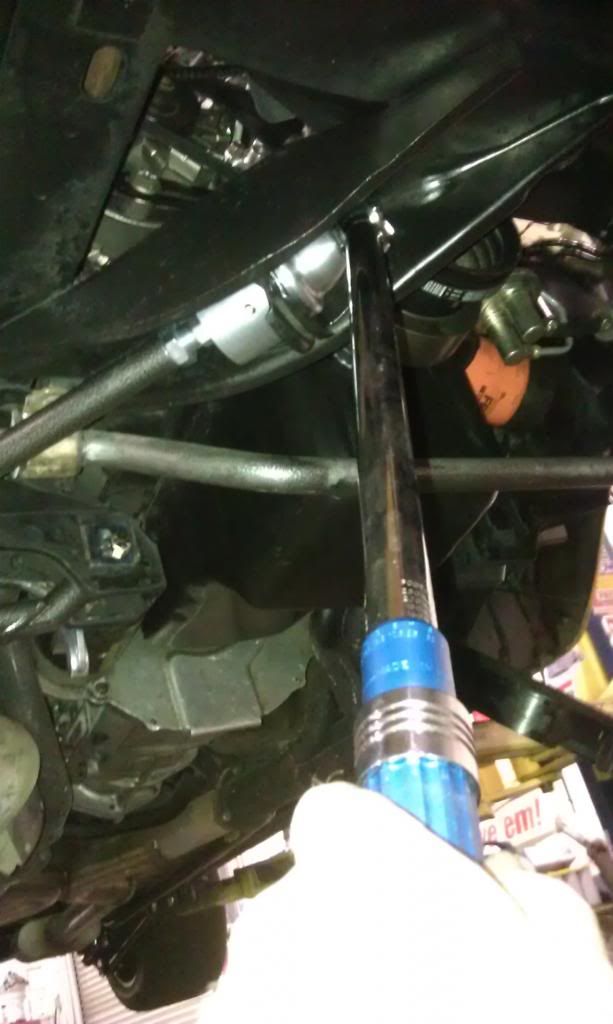
Lower coil-over perch is directional and doubles as the nut to mount the strut rod to the LCA.

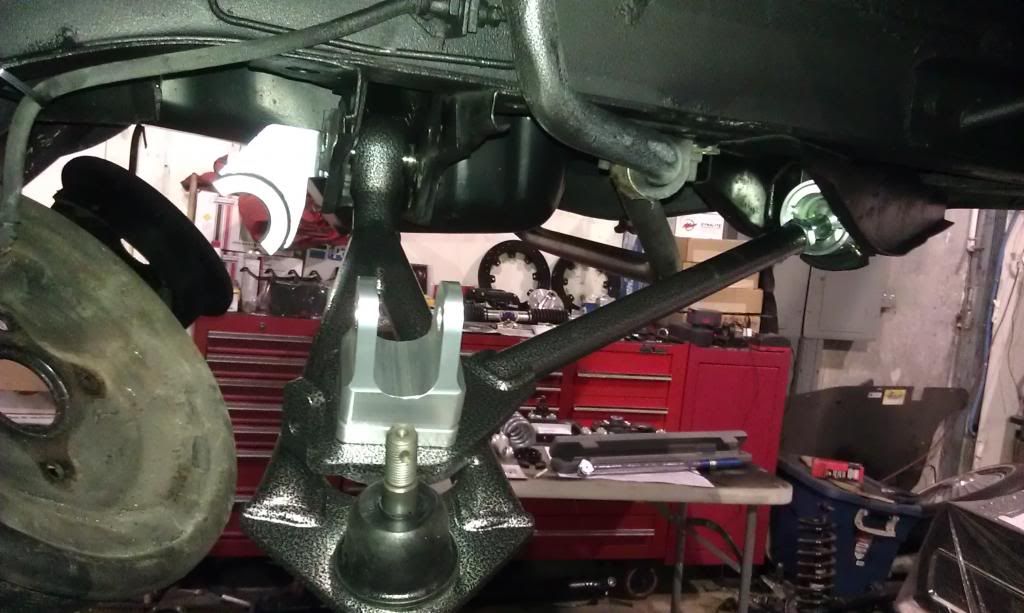
Steering stop will be adjusted later
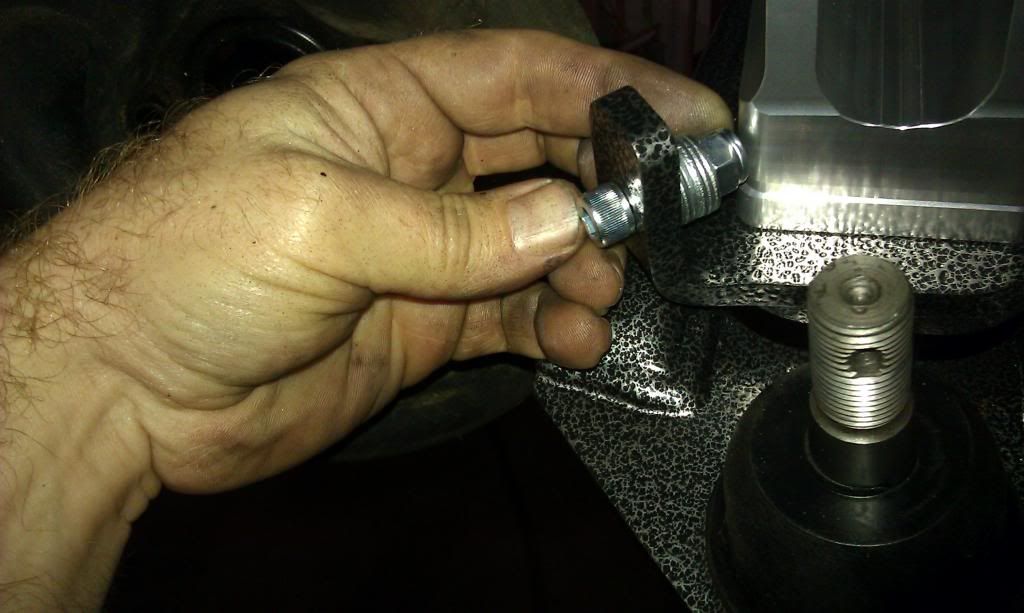
TO BE CONTINUED...
Posted by kingdavid (Member # 11179) on
:
Looking good.
Posted by 68dustin (Member # 5388) on
:
DAMN that is the only update i havent done to my car.. I have all new a-arms, bushings & borgenson steering. Does the coil-over system with tublar a-arms make a huge difference on the road?
Posted by bwkelley76 (Member # 8792) on
:
quote:
Originally posted by 68dustin:
DAMN that is the only update i havent done to my car.. I have all new a-arms, bushings & borgenson steering. Does the coil-over system with tublar a-arms make a huge difference on the road?
The short answer is YES! Not only is it way stronger than your current setup, the adjustability allows for all kinds of different ride and handling characteristics and the ability to change everything without much labor.
[ December 08, 2012, 01:14 AM: Message edited by: bwkelley76 ]
Posted by bwkelley76 (Member # 8792) on
:
quote:
Originally posted by kingdavid:
Looking good.
Thanks!
...Continued
Upper control arms go on super easy. Mine are the straight shaft instead of the drop-down ones since my car already has the 1" UCA (Shelby) drop holes drilled.
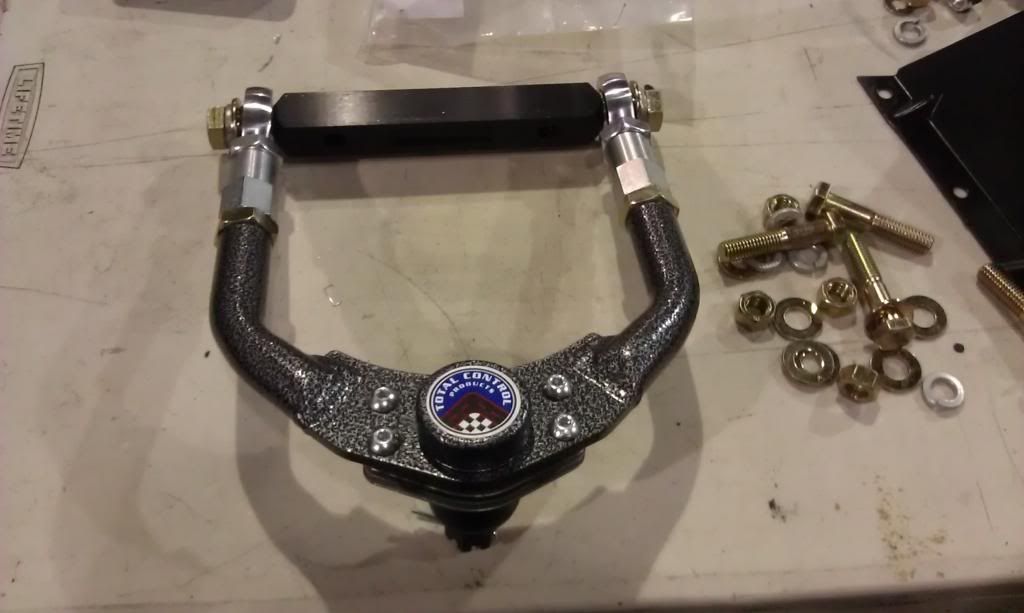
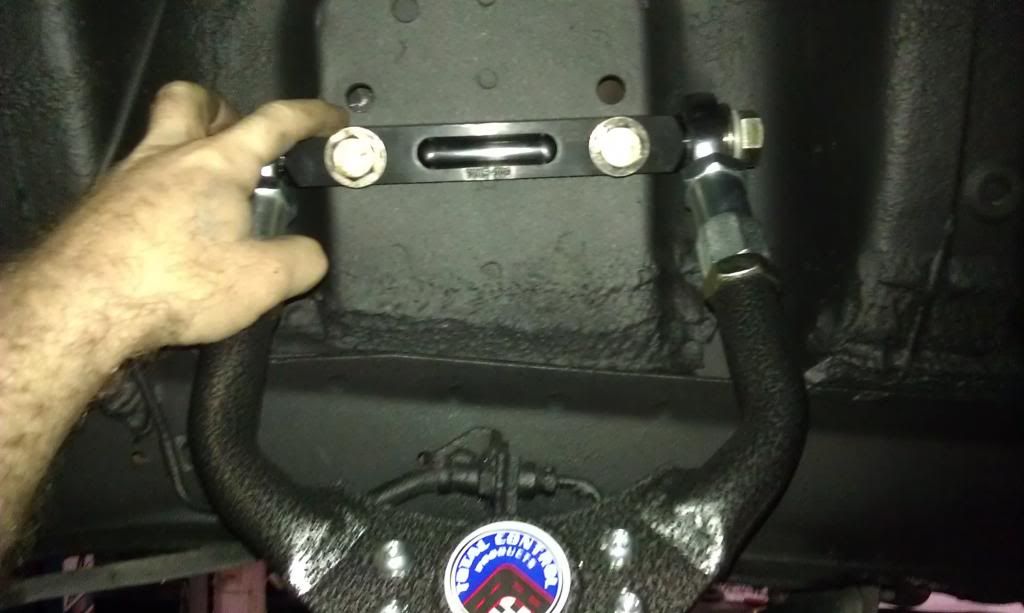
Aligning/clocking the cotter pin holes so they line up with desired position (not pointing right at the spindle which makes it impossible to install and remove them later.

Spindles go on next
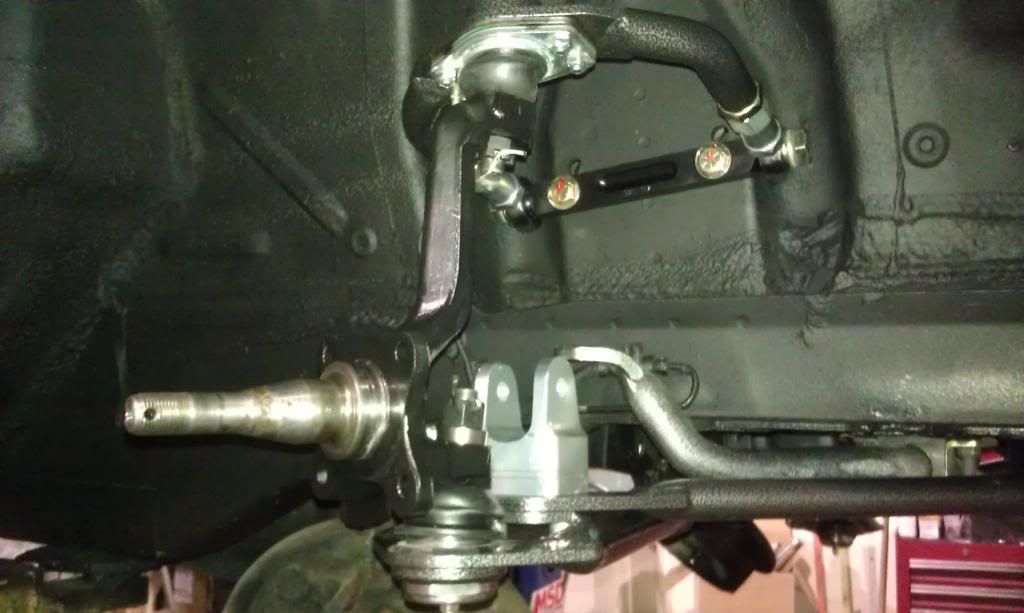
Now it's time for the coil-overs. Setting them on the lowest setting really helps make the job easier. USE LOTS OF ANT-SEIZE ON THE SPANNER THREADS AND DONT FORGET TO LOOSEN ALLEN LOCKS. I also opted for a set of spanner bearings which make the adjusting job easier and protect your spanners from wear.
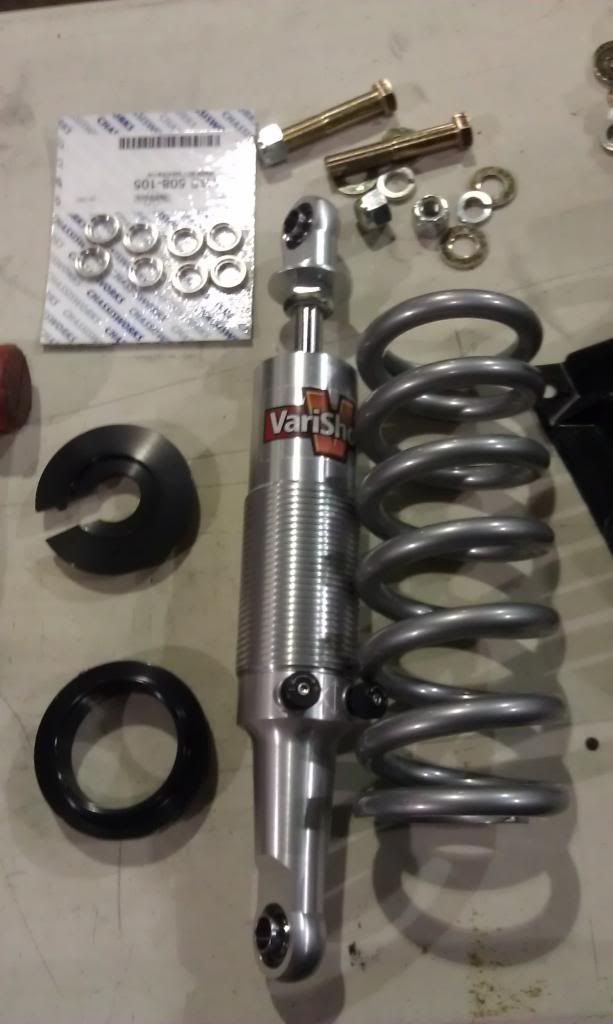
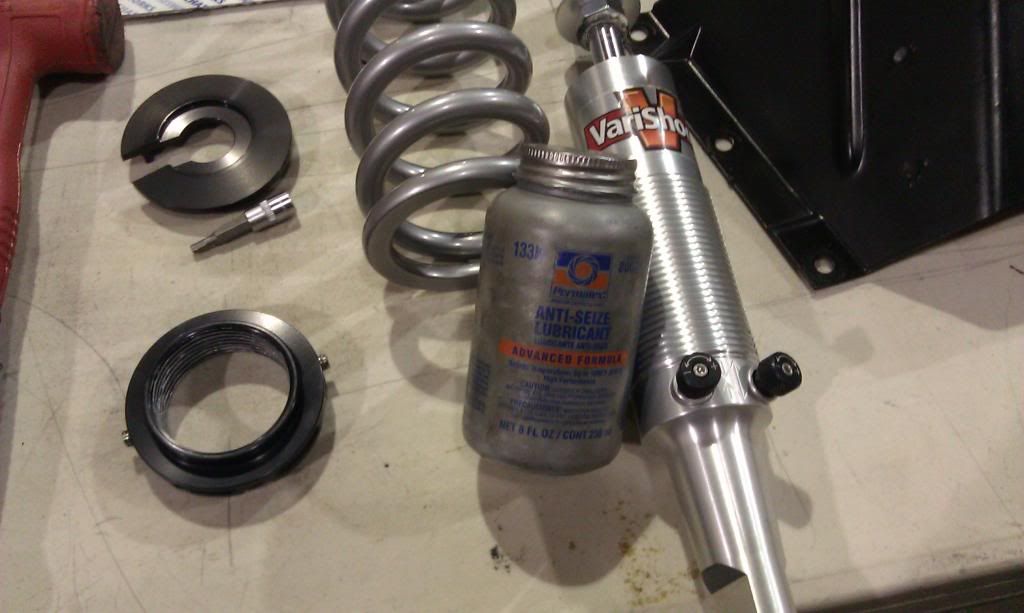
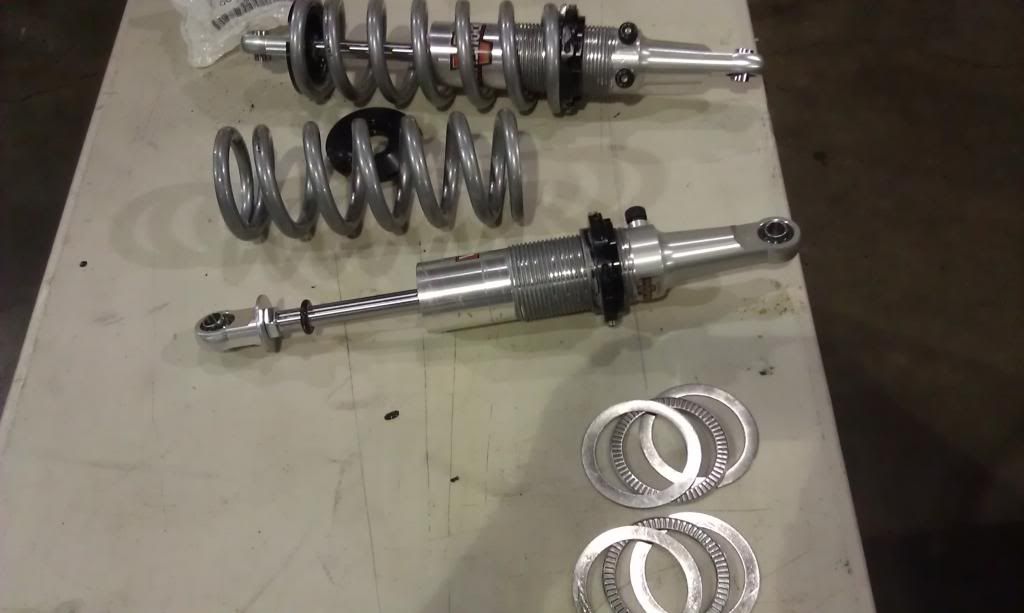
(Note the sneak-peak of the rack & pinion mocked up in this pic)
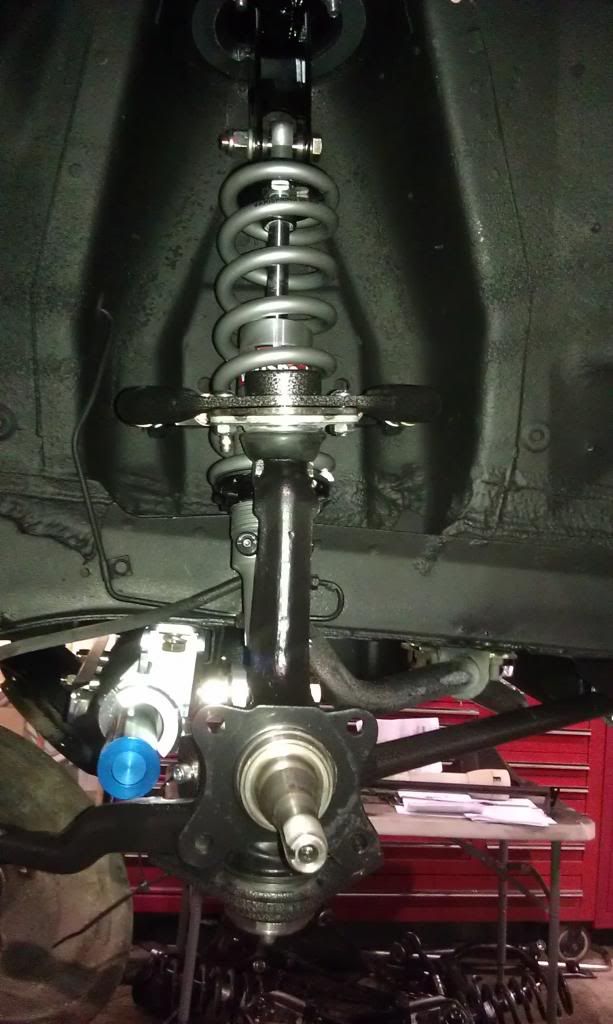
Posted by bwkelley76 (Member # 8792) on
:
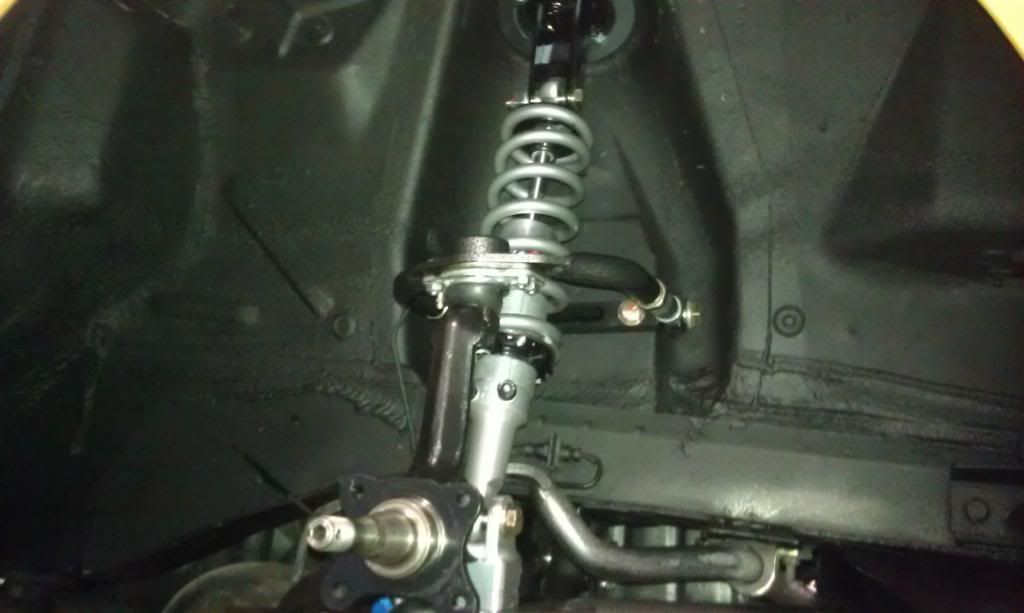
Manual Rack & Pinion Install. Friendly advice; READ INSTRUCTIONS AND DO NOT DEVIATE WHATSOEVER or you could ruin your rack.
Clamps install in a certain order and will require shims to the frame. A drive-on lift is the best option so the chassis isn't in a bind or slightly tweaked. The instructions go over a few troubleshooting scenarios if for some reason you install it wrong and put the rack in a bind with the frame.
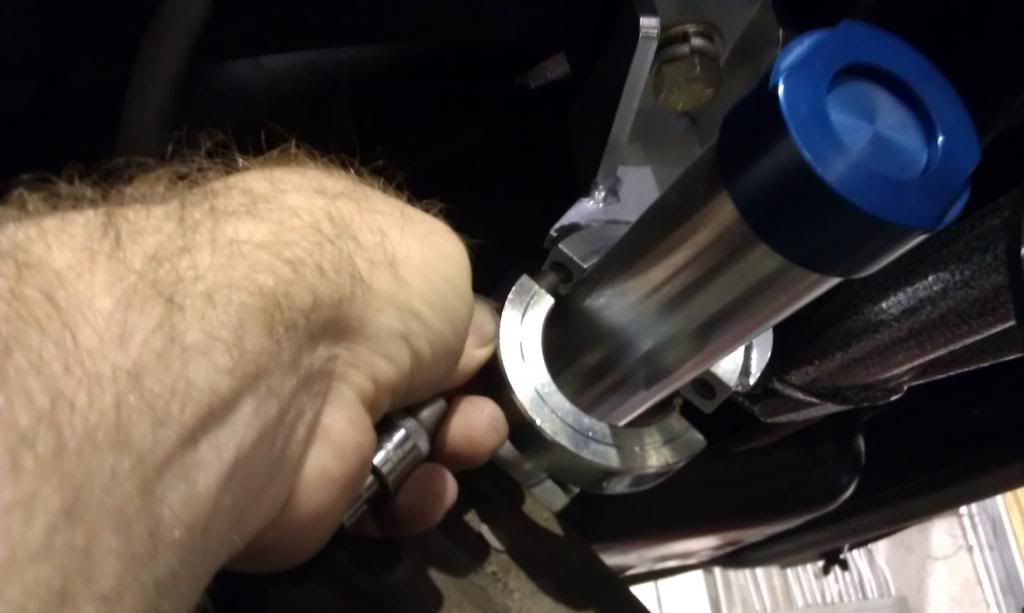
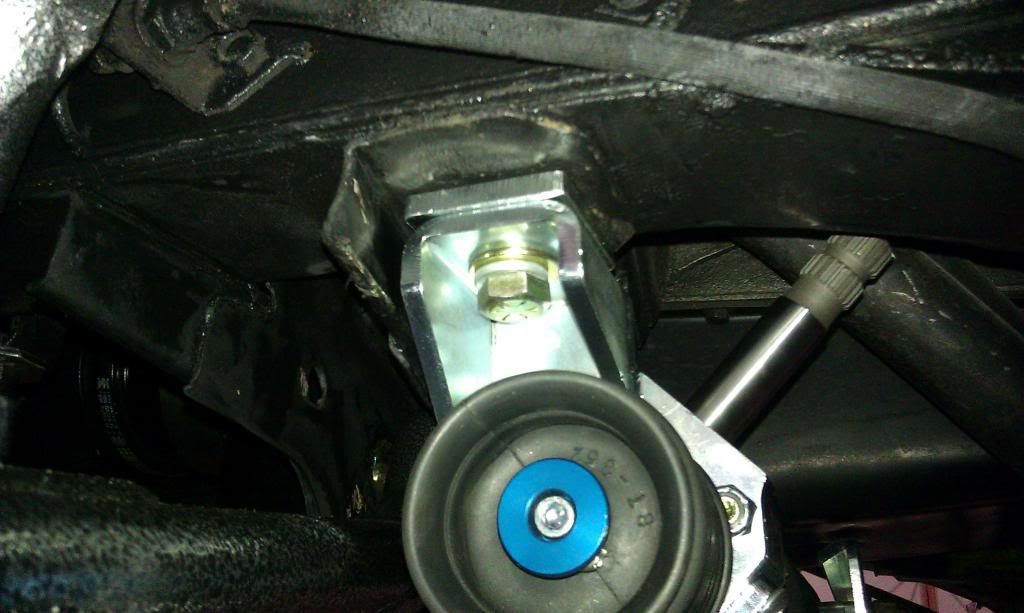
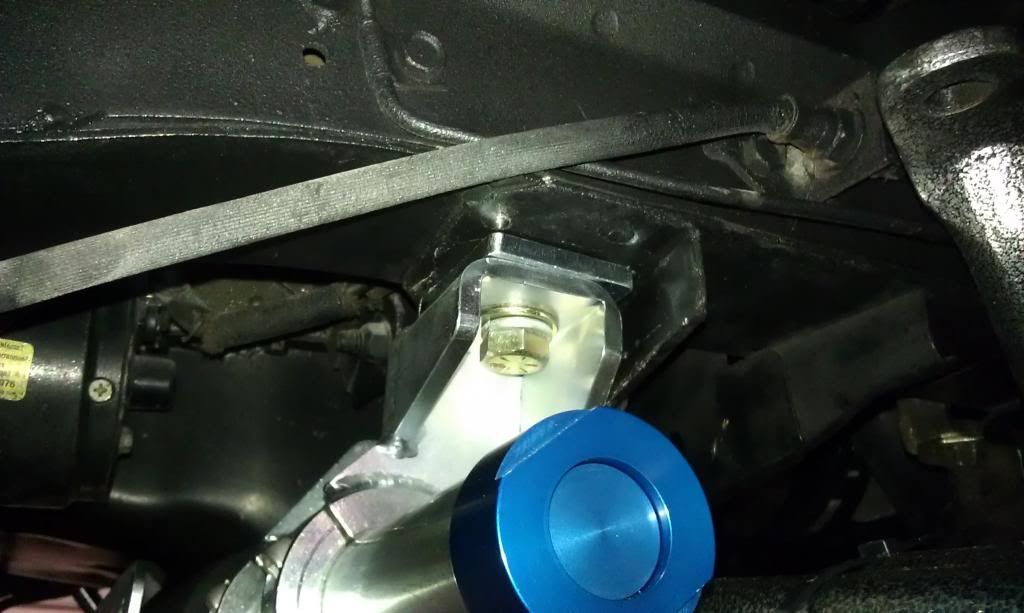
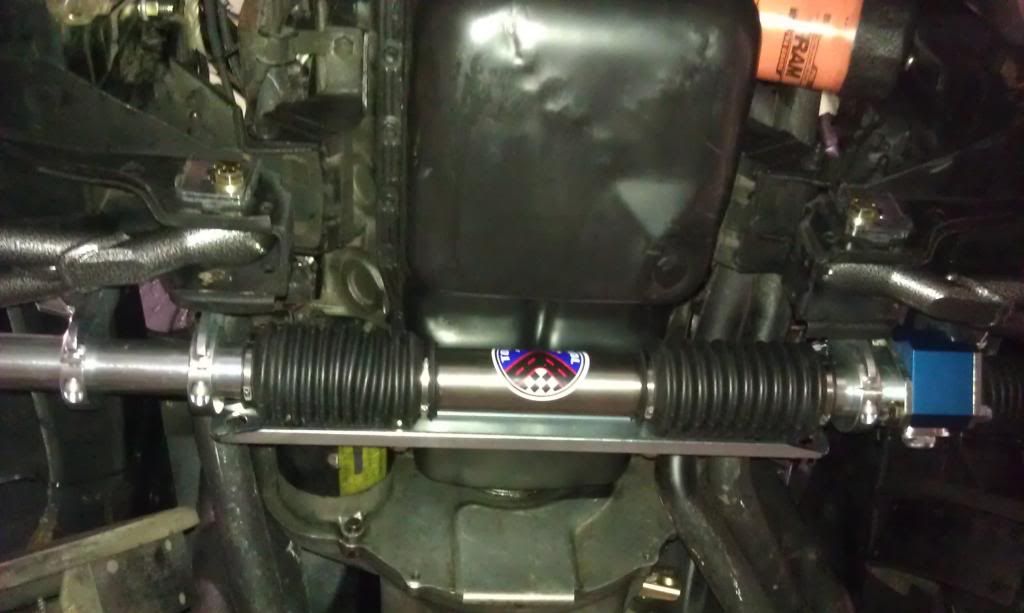
If your column isn't installed yet you can move the rack by hand to see if it is binding or making noise, etc. The instruction manual will help you do the job correctly, hopefully the first time.
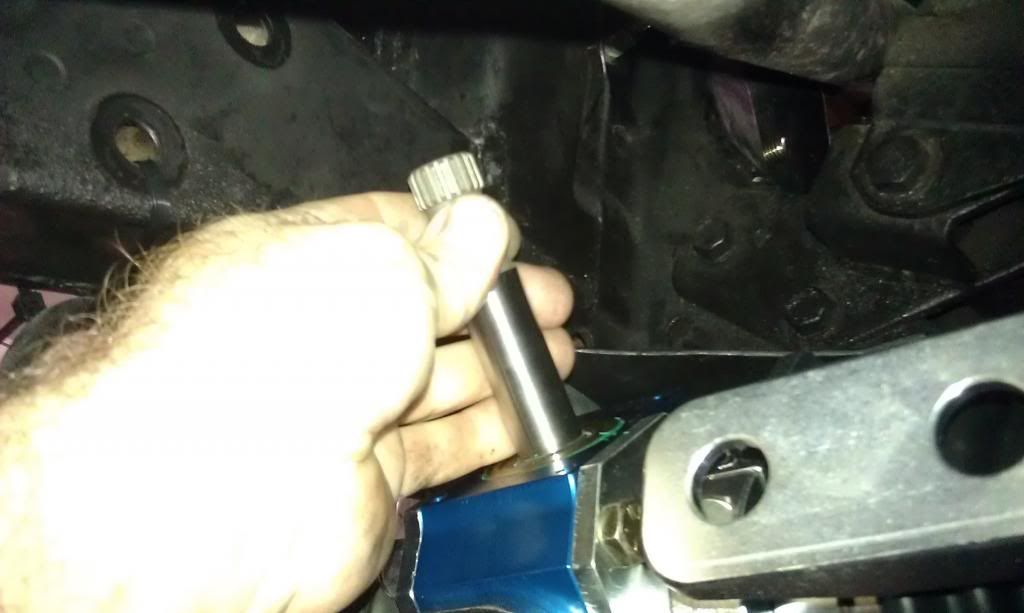
TO BE CONTINUED....
-
-
-
-
-
Posted by v-town coupe (Member # 2771) on
:
looking good!
Posted by bwkelley76 (Member # 8792) on
:
quote:
Originally posted by v-town coupe:
looking good!
Thanks V-Town! ..Hey your PM inbox is full so I can't reply to your PM.
Posted by bwkelley76 (Member # 8792) on
:
Continued...
Time to modify the factory steering column to work with the TCP manual rack. The parts come with the kit so all you are out is your time/labor on this. The other option is to buy their tilt column which is made by "Ididit". To keep cost down I decided to go this route although the Ididit column is really nice.
Once again the instructions are really helpful. There are a few things you will need to know like how to adjust/shim or cut to obtain the right end-play on the shaft.
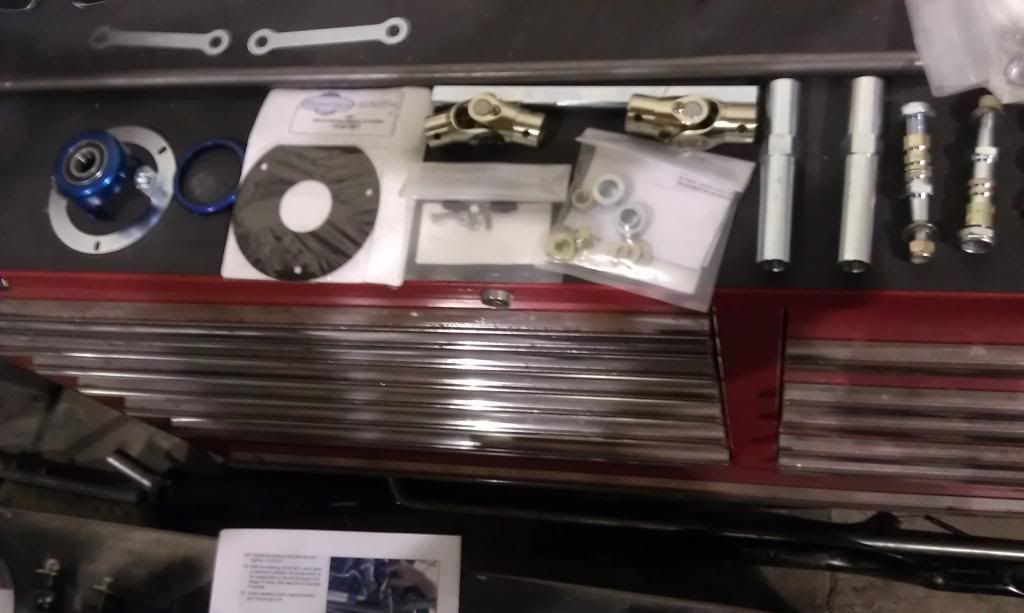
Measure and cut the old column to the length specified in the instructions. I used a hose clamp to make a straight cut. After cleaning up the cut end of the column I used a file to clean it up and then I painted the lower portion to avoid rust. Then I installed the supplied retaining collar onto the column.
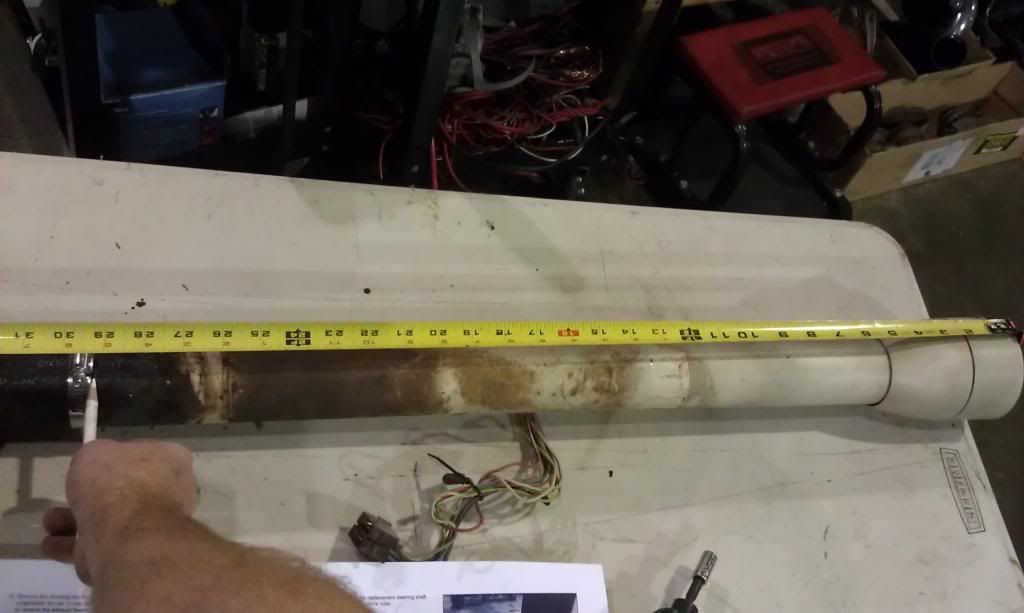

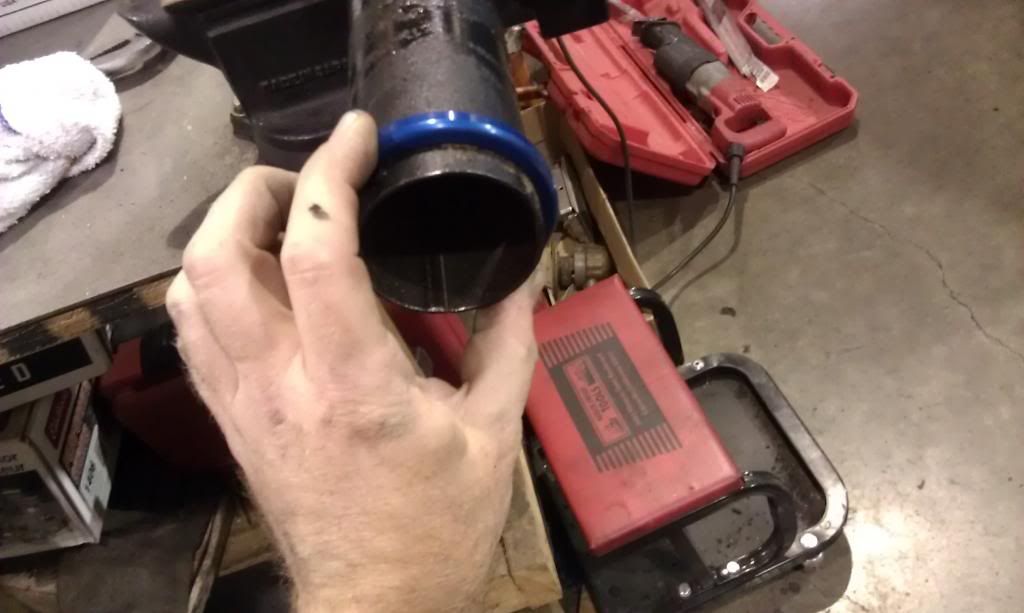
End cap/shaft support bearing assembly slides right onto the end and then it's attached with 3 sheet-metal screws (good idea to mock up shaft and steering wheel before screwing this to the column)
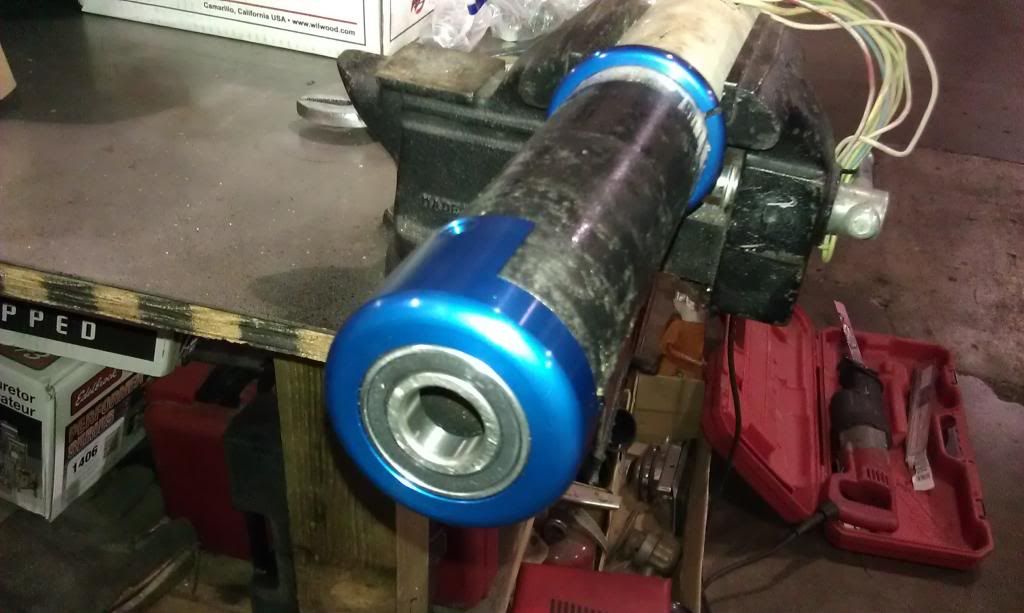
Now insert the supplied steering shaft and attach the steering wheel. The top half of this shaft is identical to factory and will reuse the original nut, spring and collar/bushing. I installed the wheel and set up the turn-signal cancel geometry and column to bell clearance, etc.
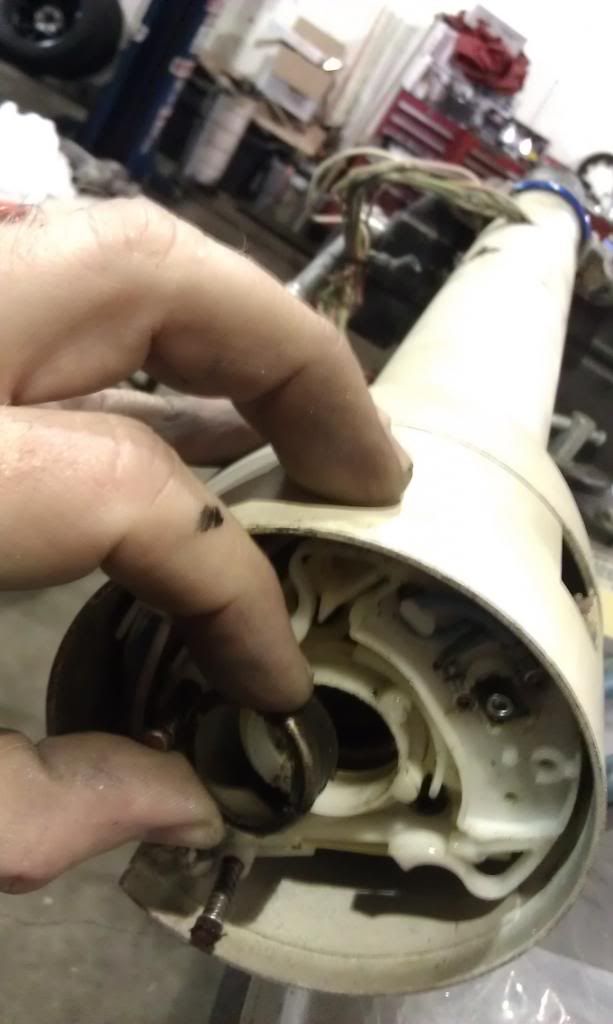
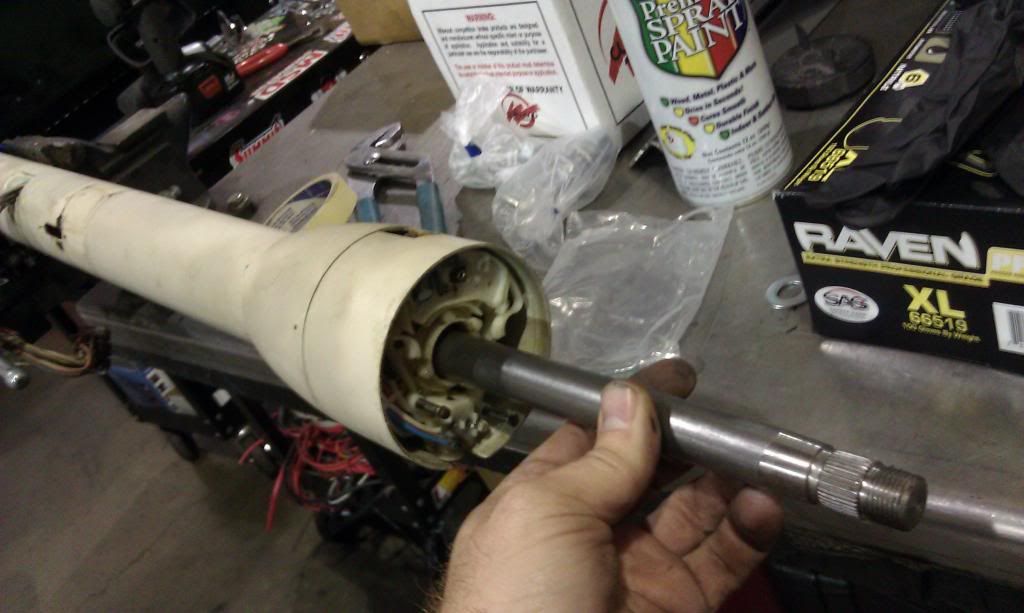
Posted by bwkelley76 (Member # 8792) on
:
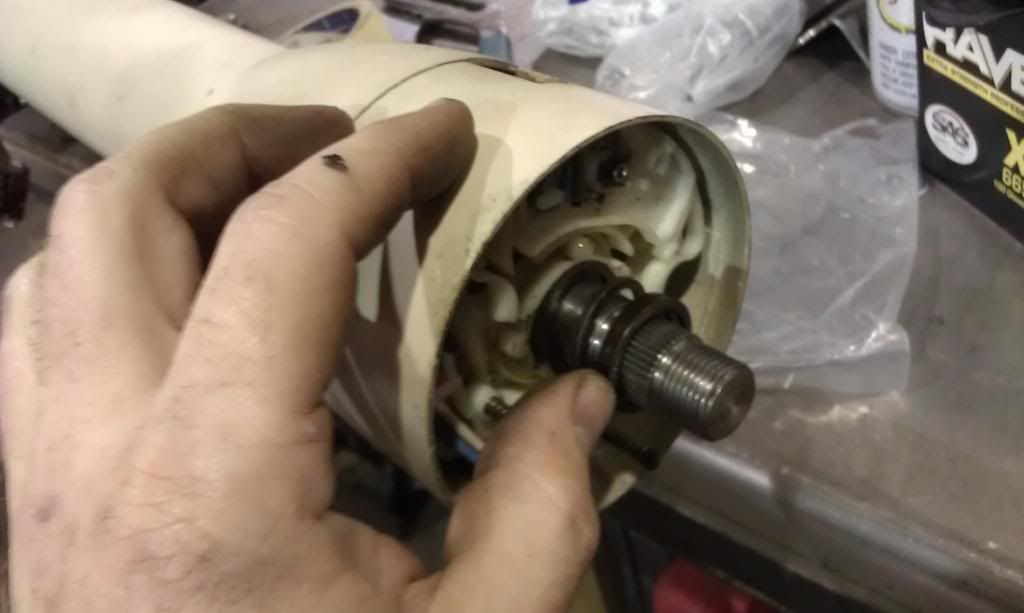
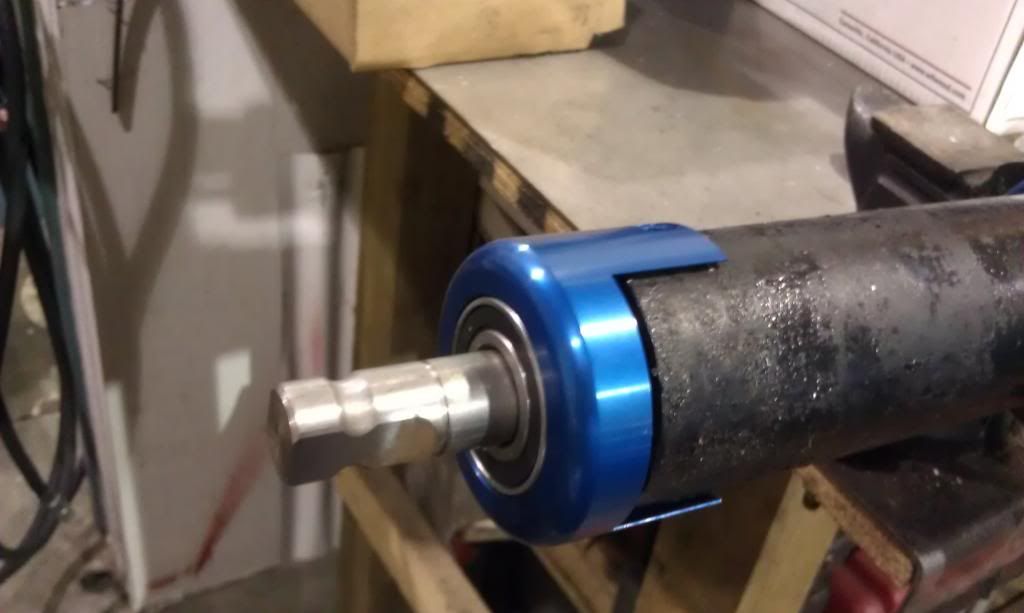
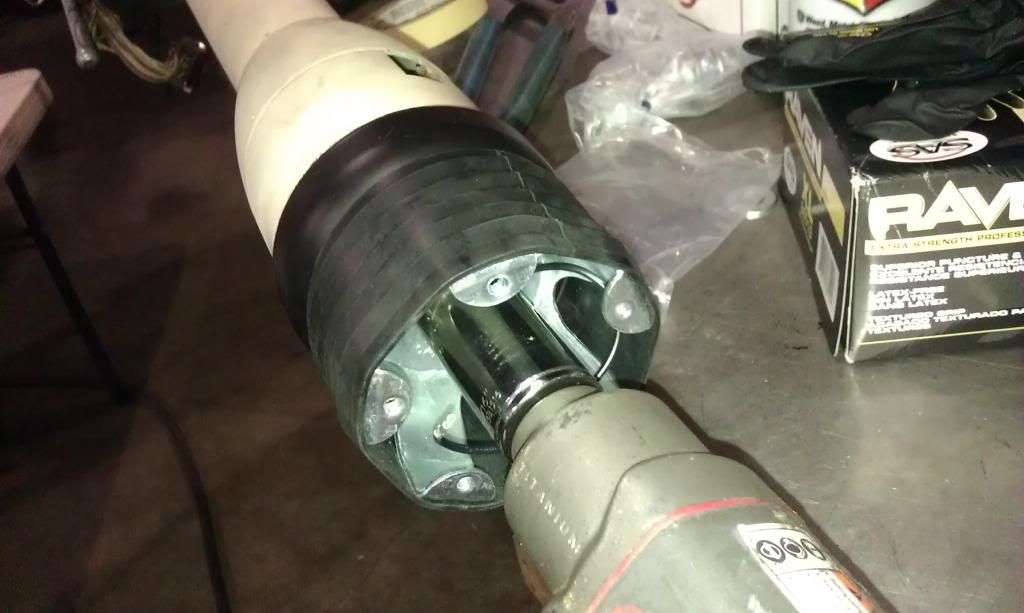

Now it's time to set the end-play (telescopic play) so that your steering wheel and its shaft do not slide up and down (in and out) in the column. I installed the retainer clip at the bottom and then checked my clearance at the steering wheel-to-column bell top. Because there is a spring trying to pull the shaft outward this can be a little tricky. Once the correct position is obtained check the clearance between the shaft support bearing and the clip. Make sure the column cap and support bearing are ALL THE WAY onto the column. Determine if you need to cut more off the column or add shims to make up for play. Once you get the column close to the right length you can screw the bearing support down. In my case I needed almost 1/4" of shim so I found a nut that fit perfectly. ...hey it was free and available. lol
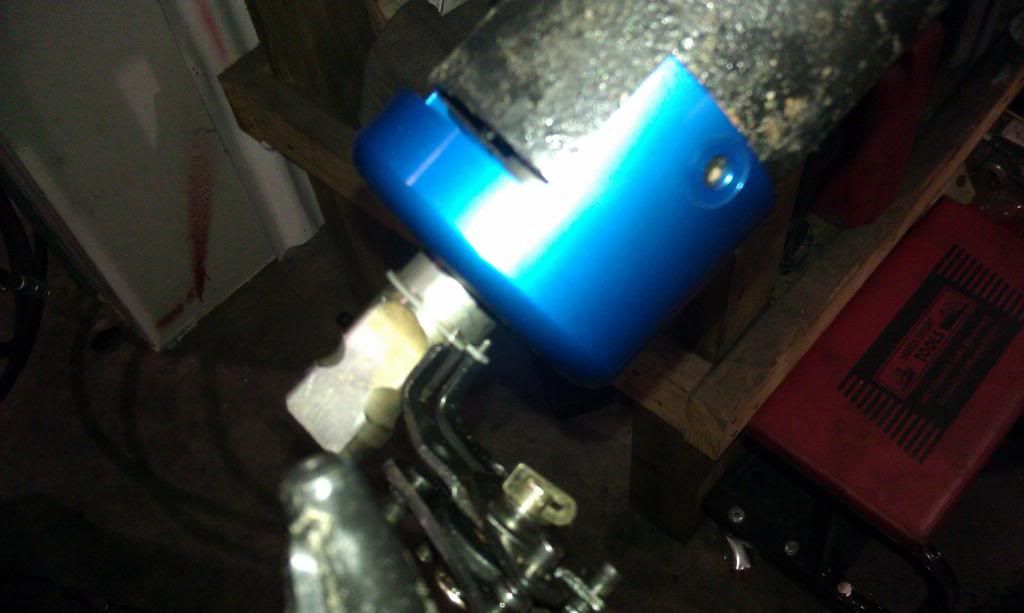
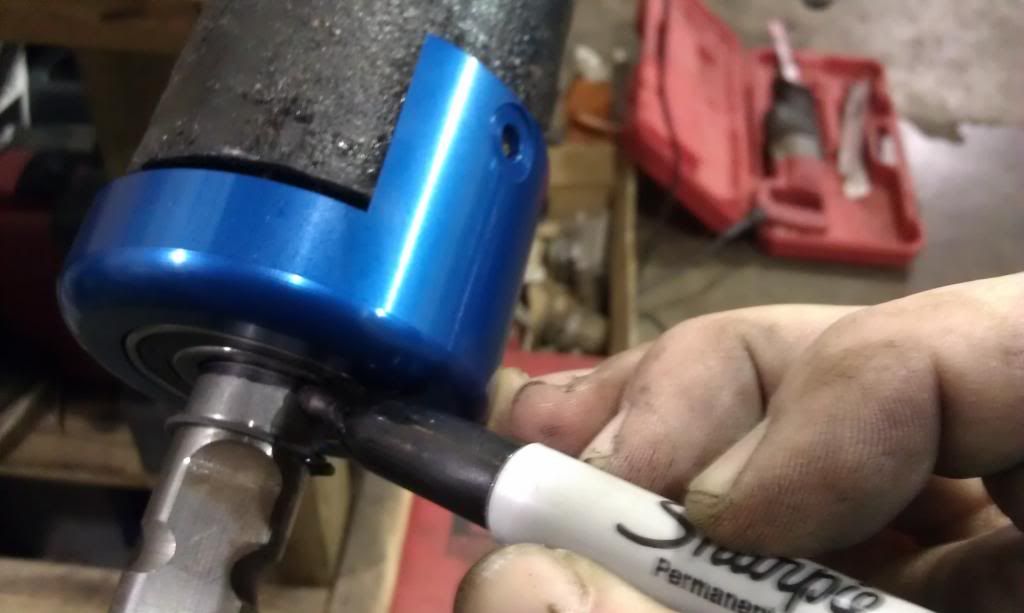
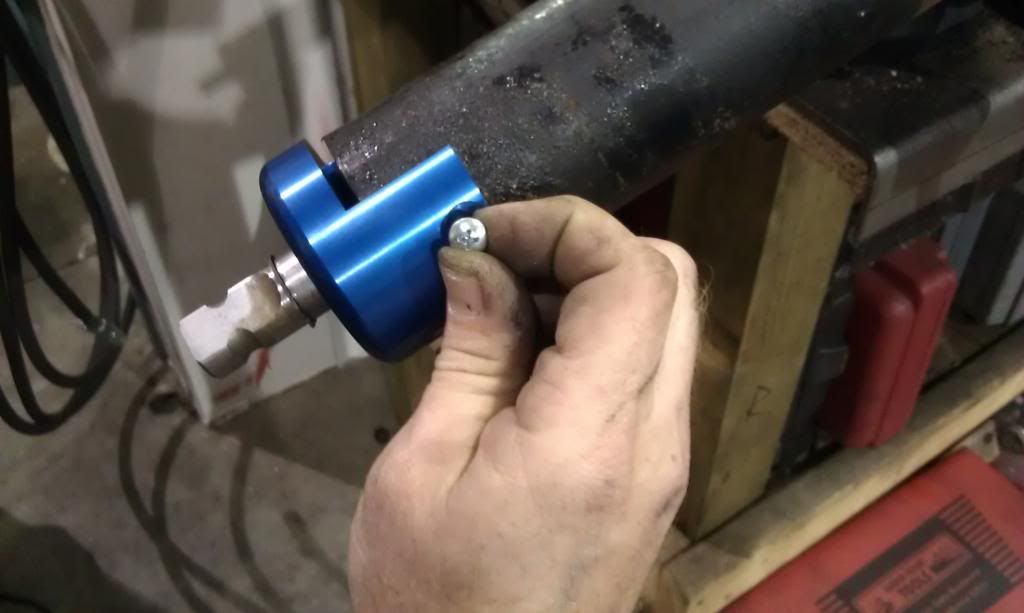
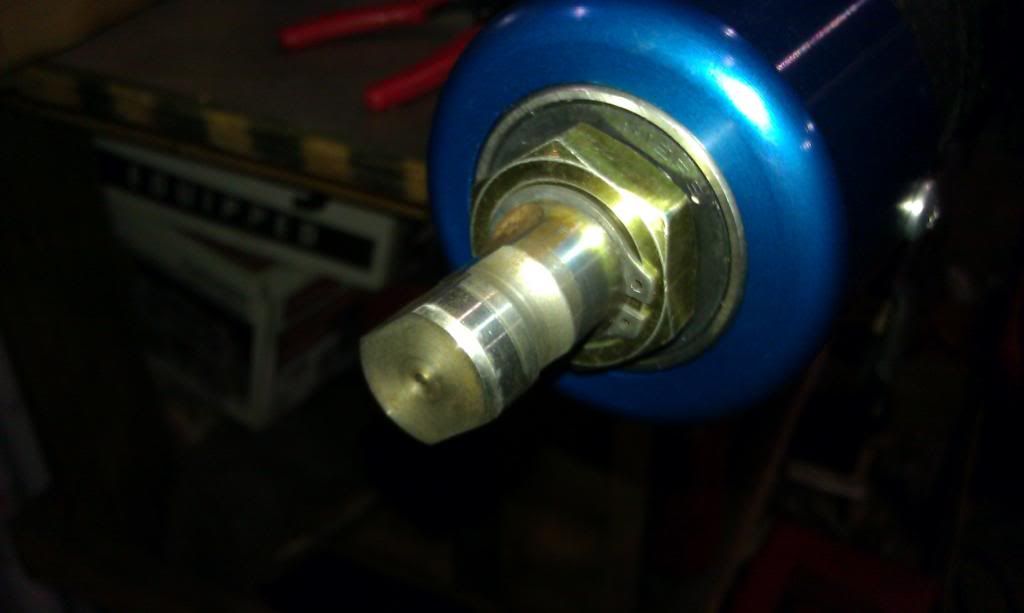
Posted by bwkelley76 (Member # 8792) on
:
Now It's time to install the column and the lower steering shaft and u-joints into the car. I removed the old boot and installed the supplied boot and mount bracket as per the TCP instructions. These parts are universal from 65-69 as far as I know, and some cars may require you to drill new holes. My holes did not line up so I centered the assembly and drilled new holes. The column then slides in and bolts to the dash like normal. The slip-on support collar that was put on the column earlier slides down in-line with the boot and bracket and you screw the set screws into the collar.
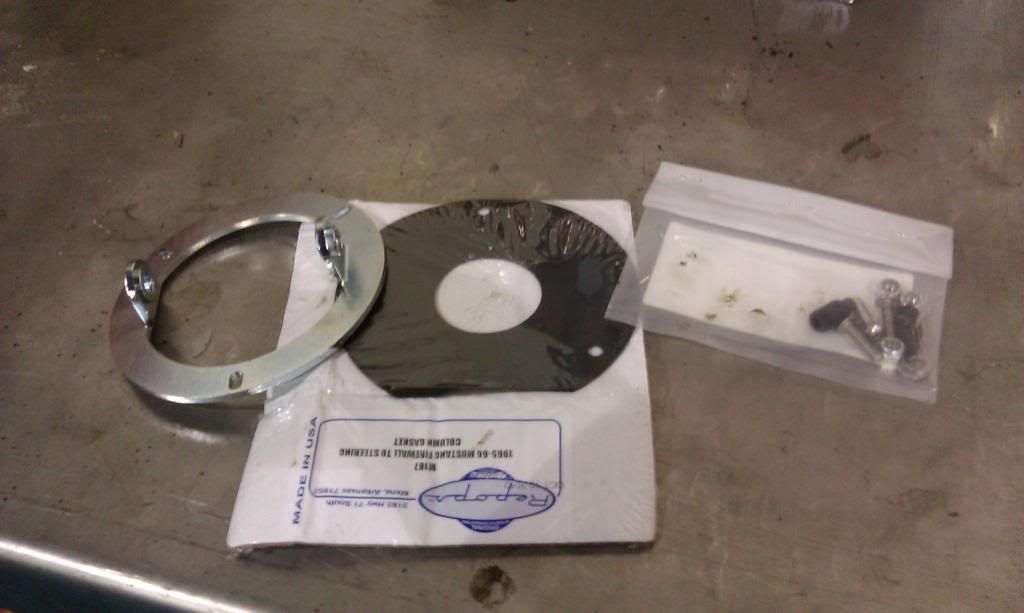
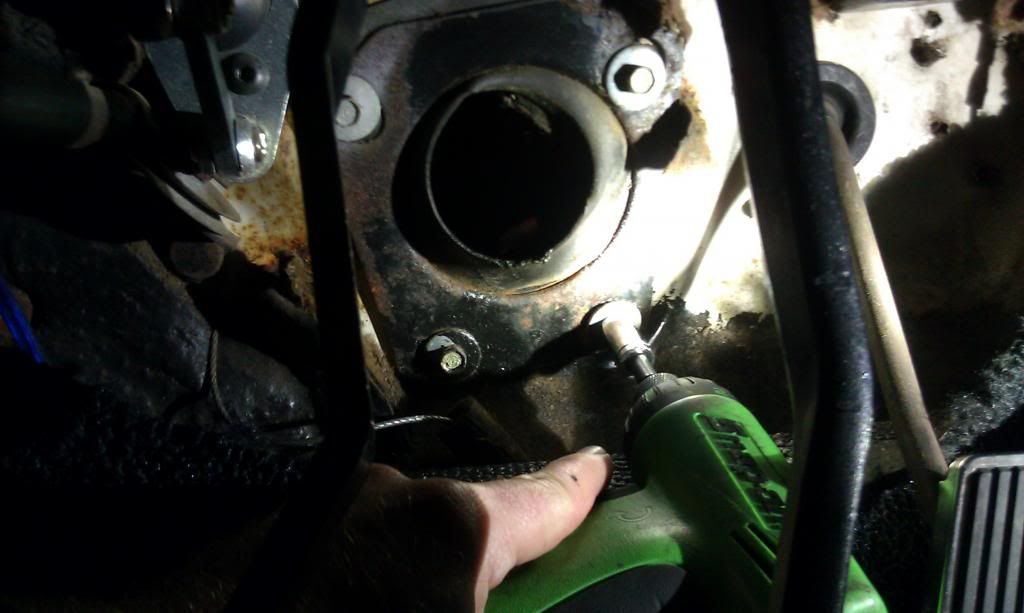
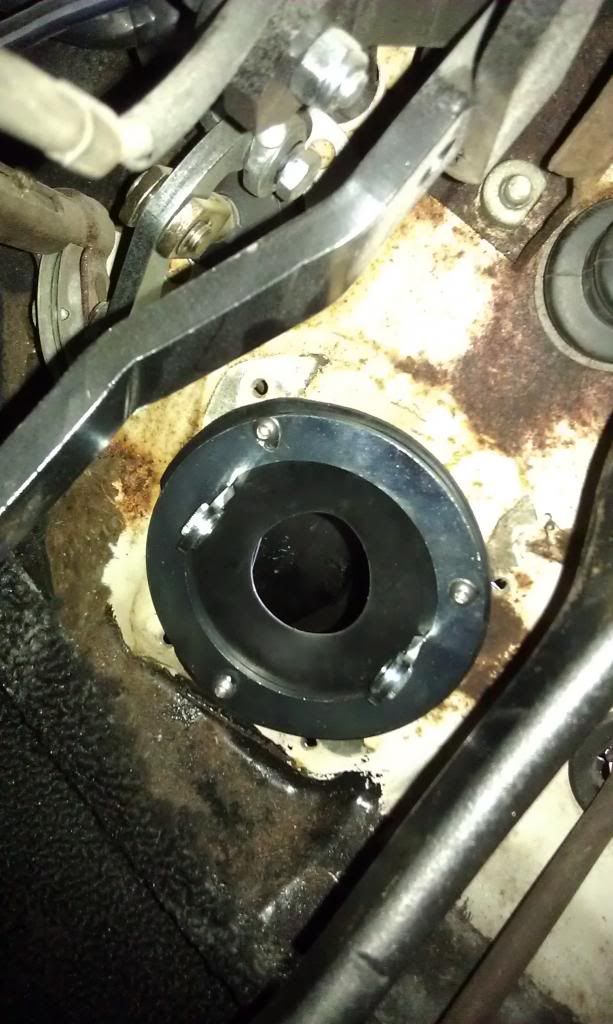
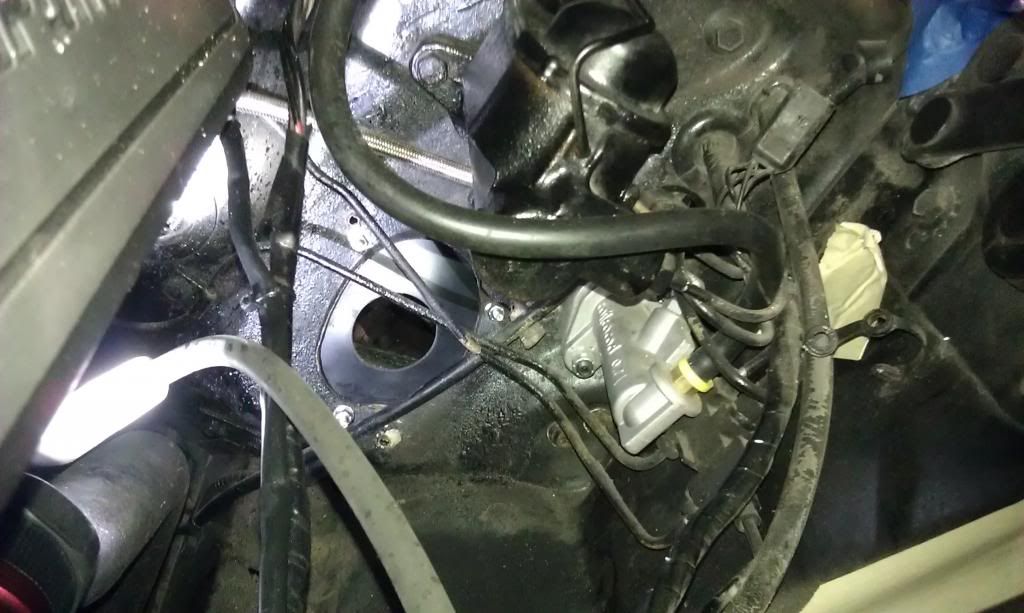
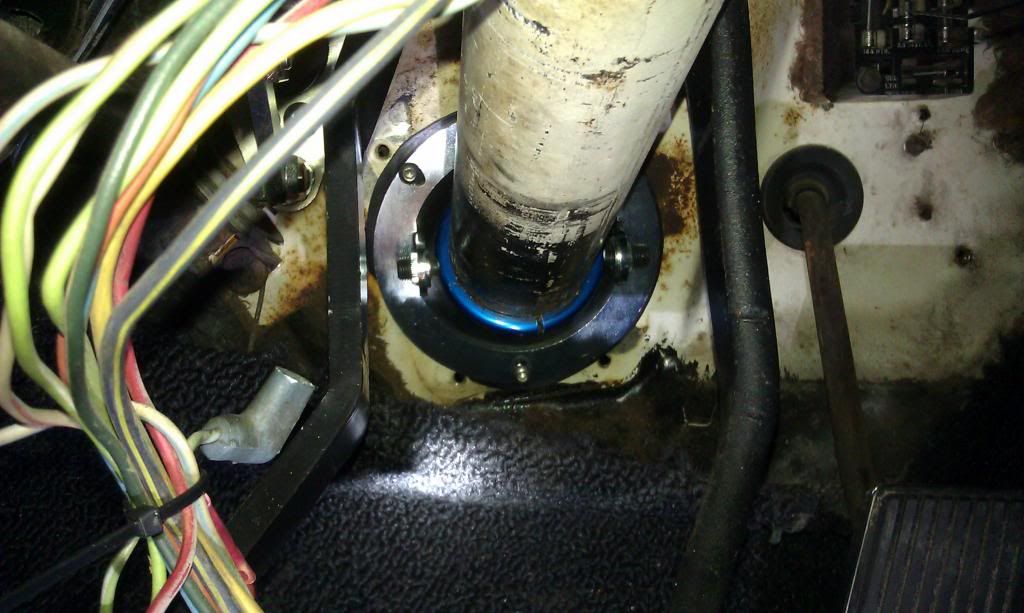
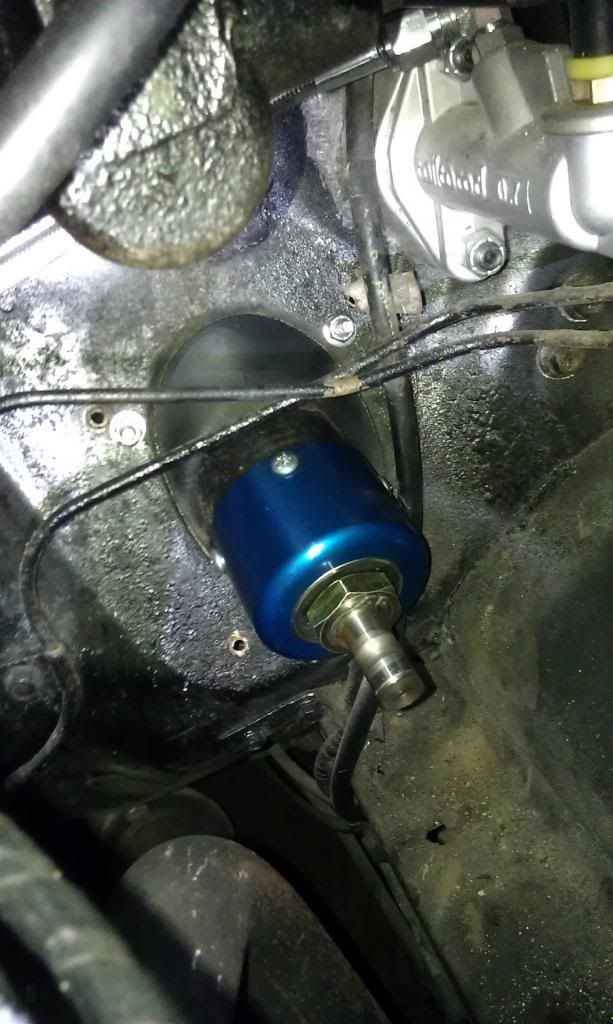
TO BE CONTINUED...
-
-
-
-
Posted by bwkelley76 (Member # 8792) on
:
...Steering lower shaft and u-joints. First I taped the steering wheel to the column in the exact center position (would have been better if I had a nifty centering stand like the alignment shops do). Then I centered the rack & pinion as well. Next I installed the u-joints and cut the provided DD shaft to length. Finally, I used loc-tite on the allen set screws and tightened everything up.
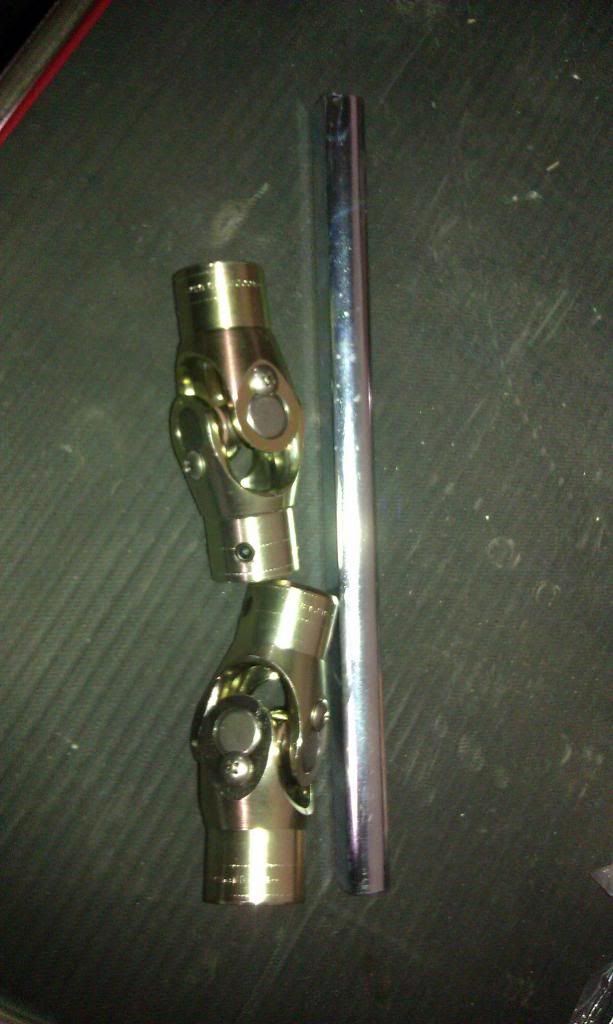

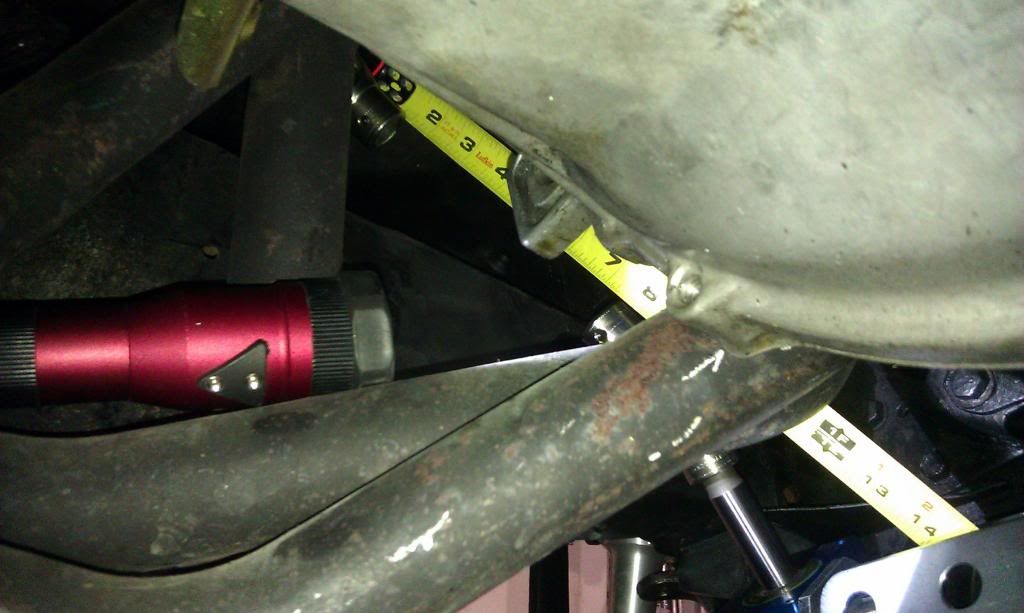
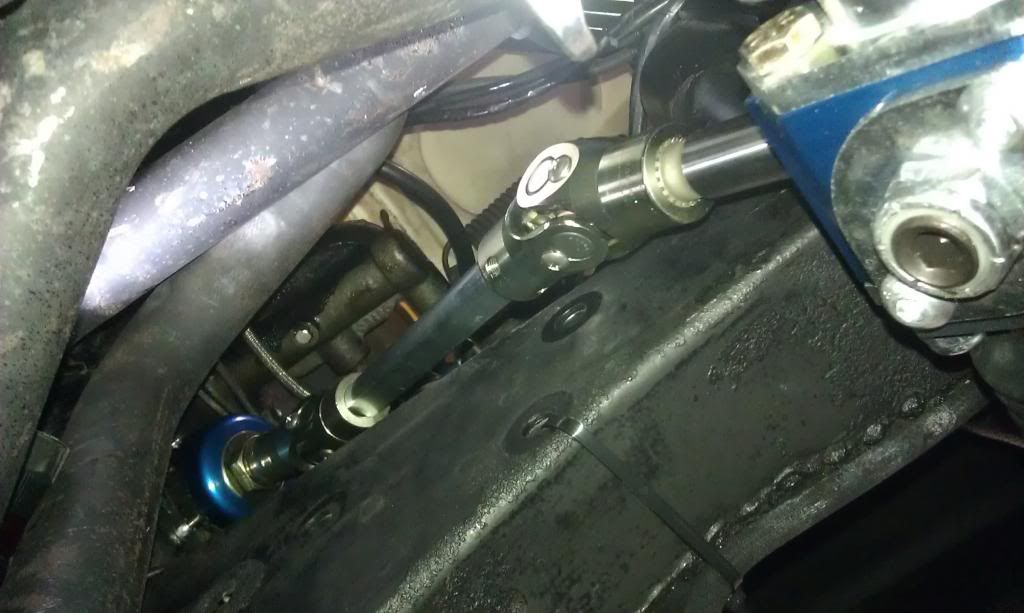
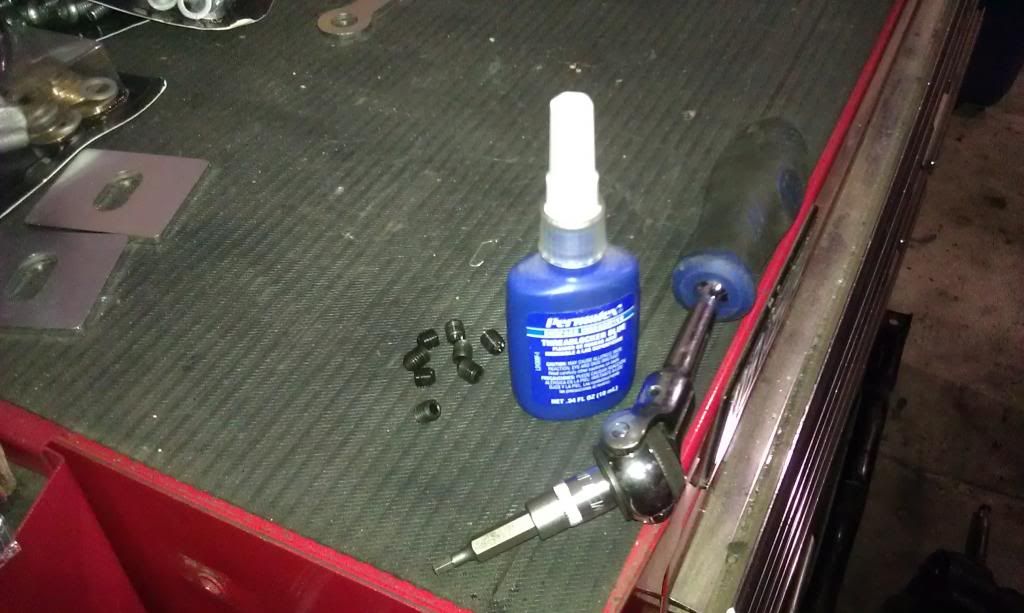
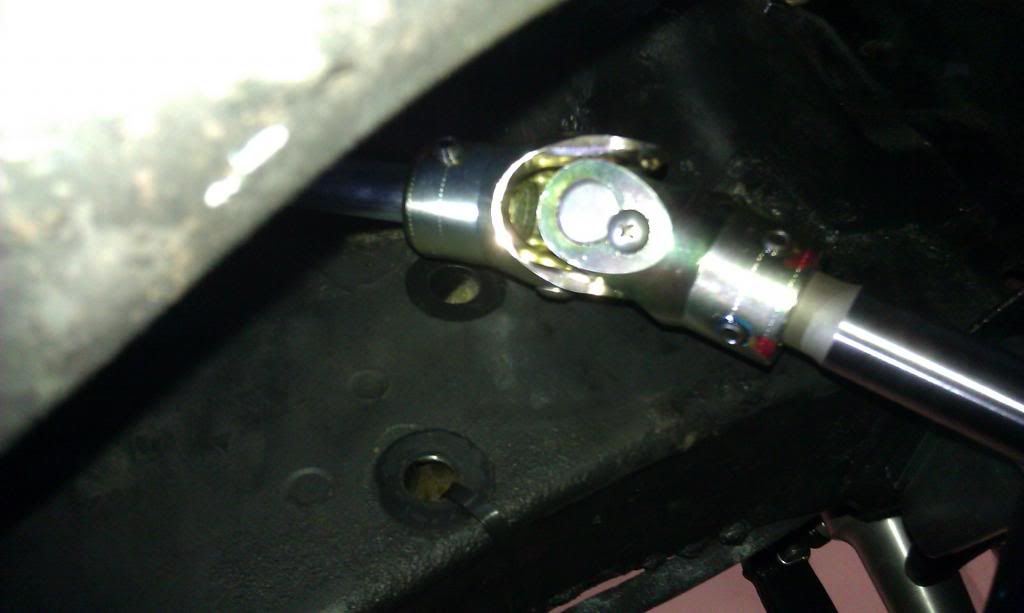
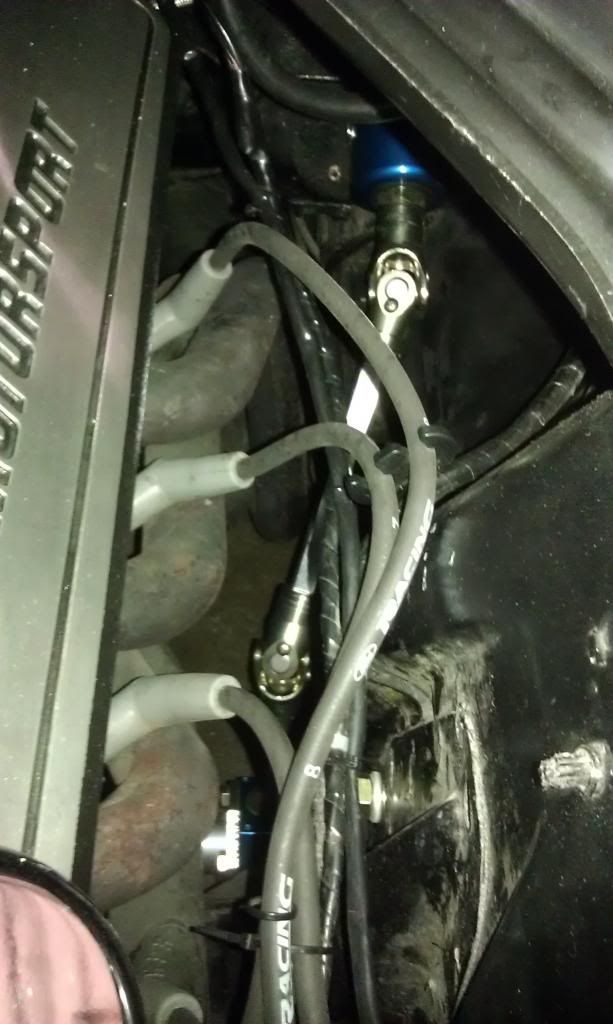
Now it's time to install the bump-steer tie rod kit. First thing I had to determine is which holes I was to use for the inner tie-rods. The rack instructions say one thing and the bump-steer tie rod kit instructions say another. I determined that my car uses the inner ones. As far as the adjuster sleeves anti-seize is your friend so use it generously. At some point you will follow the directions in further detail to measure and eliminate bump-steer by moving around the bushings that make up the custom outer tie rod ends. For the initial setting I put the single largest bushing on the bottom and the combination of smaller ones on top, and made them equal on each side. The inner tie rods are a little tricky since there is nothing to keep them from spinning internally. In my case I peeled back the boots and grabbed the tie-rods from the very back-side. The other thing that is kindof tricky and/or easy to overlook is the cotter pins can rub the rack boots if you don't keep their profile low enough.
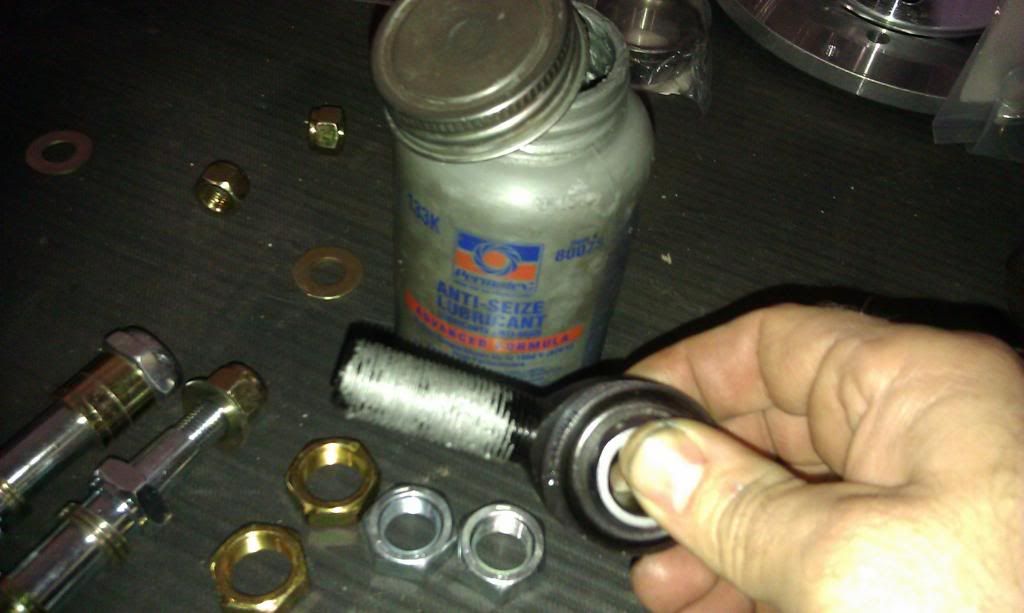
[ December 09, 2012, 05:13 AM: Message edited by: bwkelley76 ]
Posted by bwkelley76 (Member # 8792) on
:
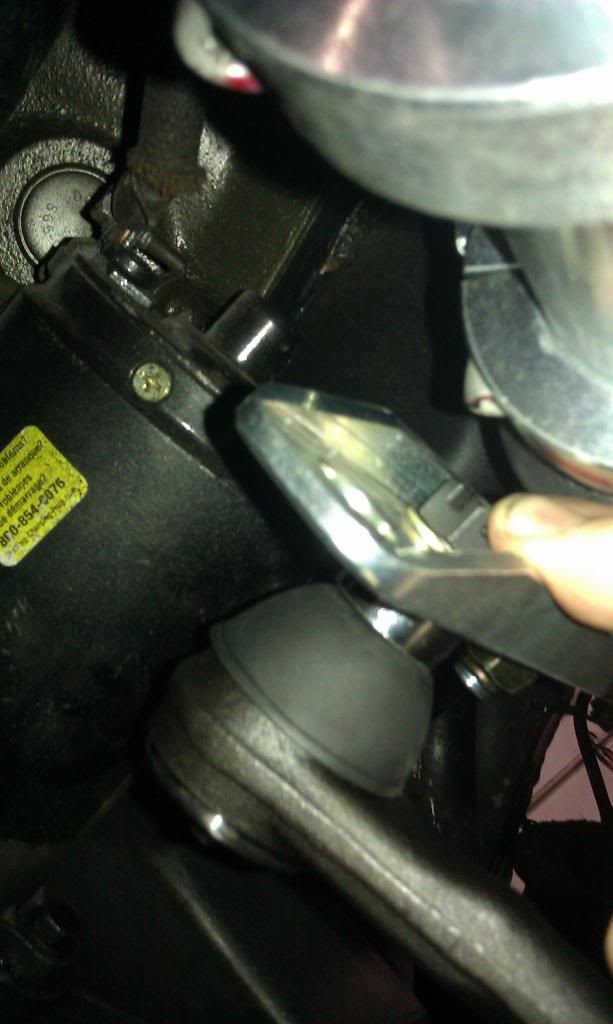
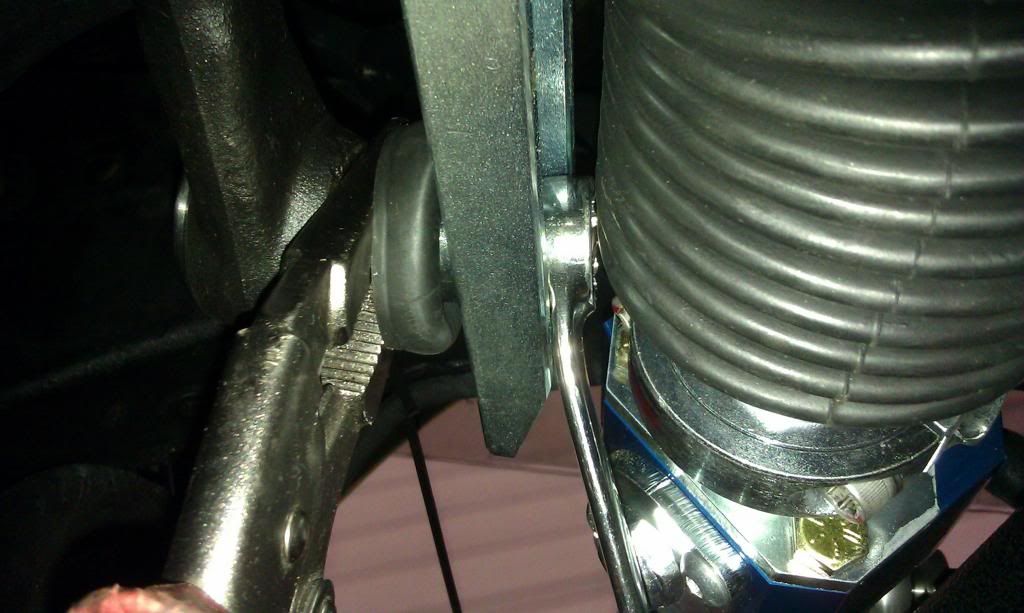
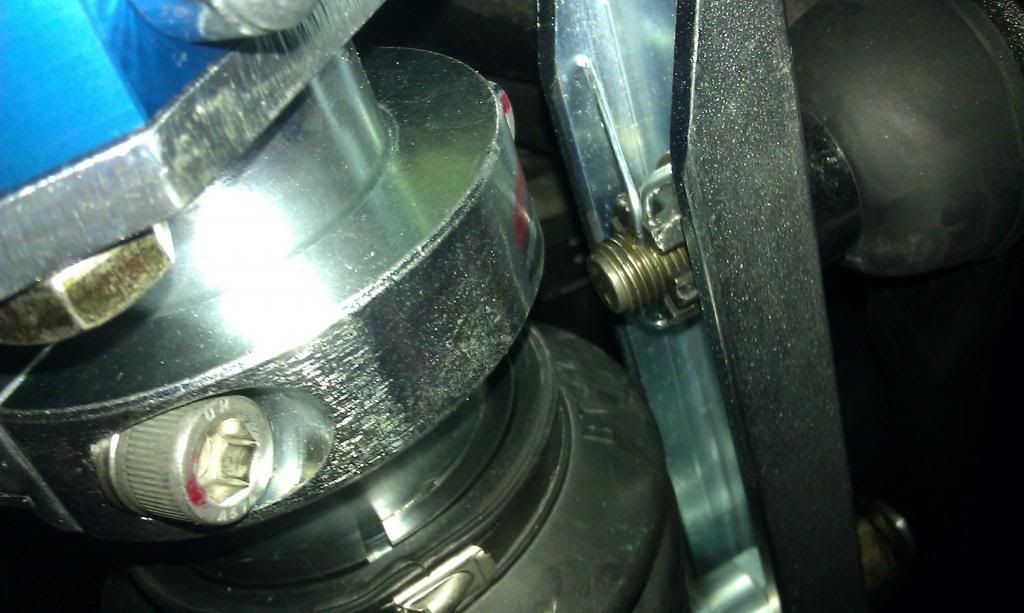
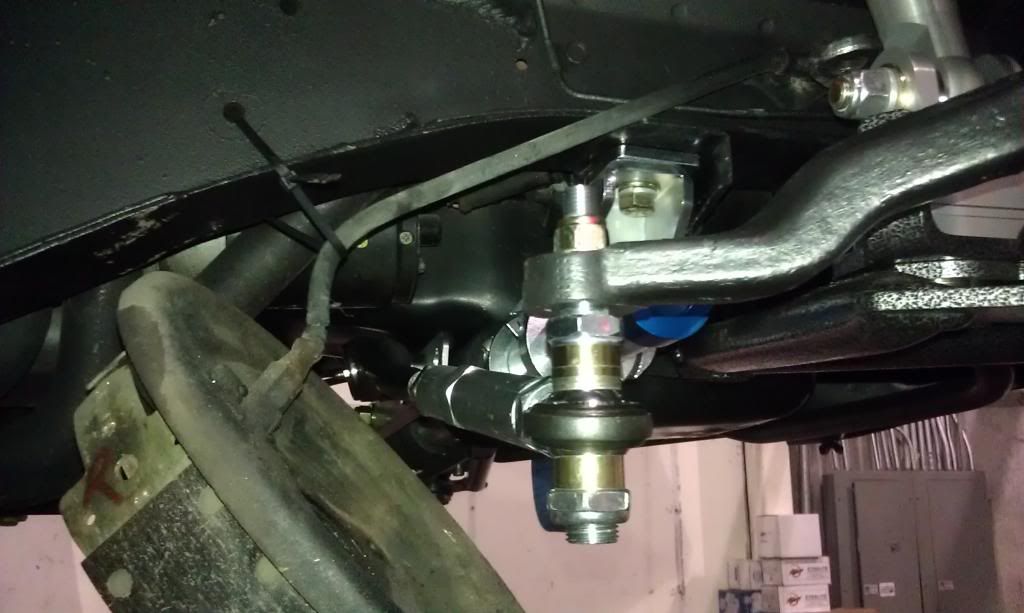
So that pretty much wraps up the suspension and steering. Make sure to lube everything, set the coil-overs to your specs, and get a proper alignment that makes sense for your combo.
Next up is the Wilwood front disc brakes.
TO BE CONTINUED...
[ December 09, 2012, 05:11 AM: Message edited by: bwkelley76 ]
Posted by bwkelley76 (Member # 8792) on
:
Well guys, last but not least here is the Wilwood brake install. SUPER SIMPLE AND EASY TO DO! The only thing that one needs to know is that although the parts "look" the same, the 1968 kits put the caliper on the back side when the 65-67 kit is on the front. I got my kit with a group of about 5 kits for other cars in the shop so my instructions were nowhere to be found. I downloaded a set of instructions online and they were specific for 1968. So funny enough I started out putting mine on wrong...lol. I figured out soon enough that my brackets were on backward. Oops!
Here's the RIGHT WAY to put it all together...
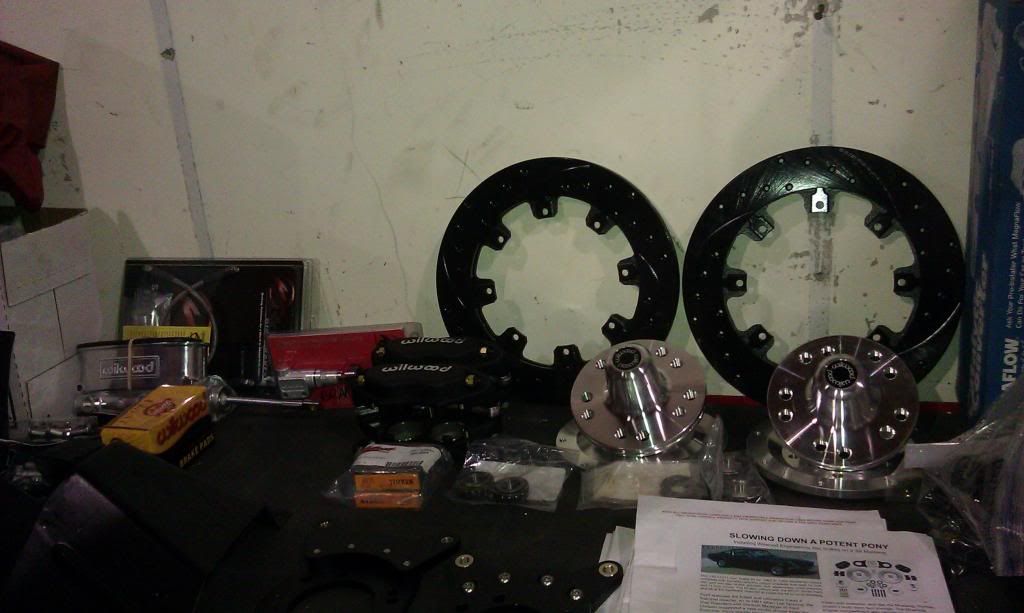
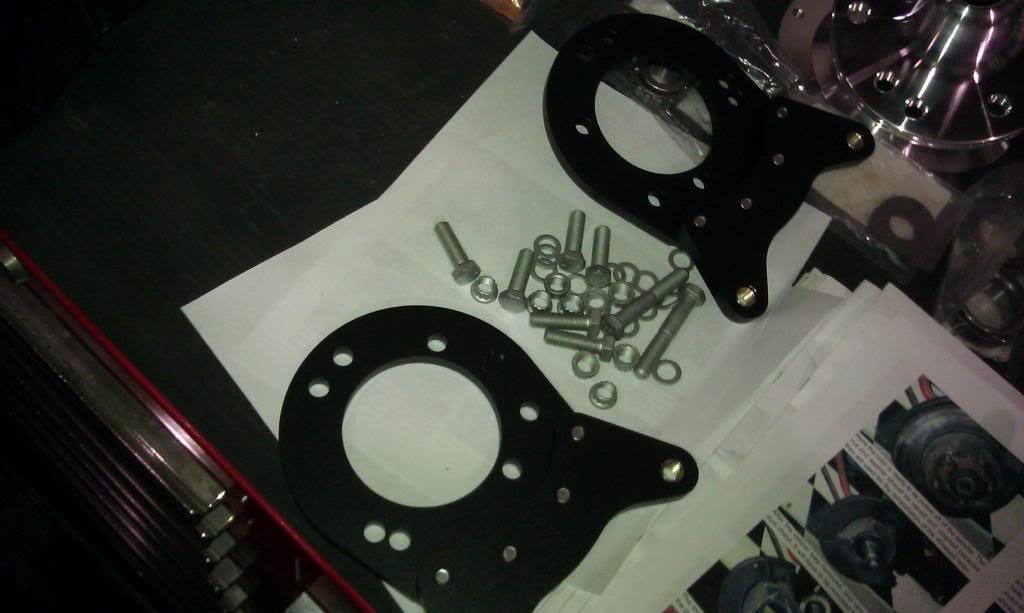
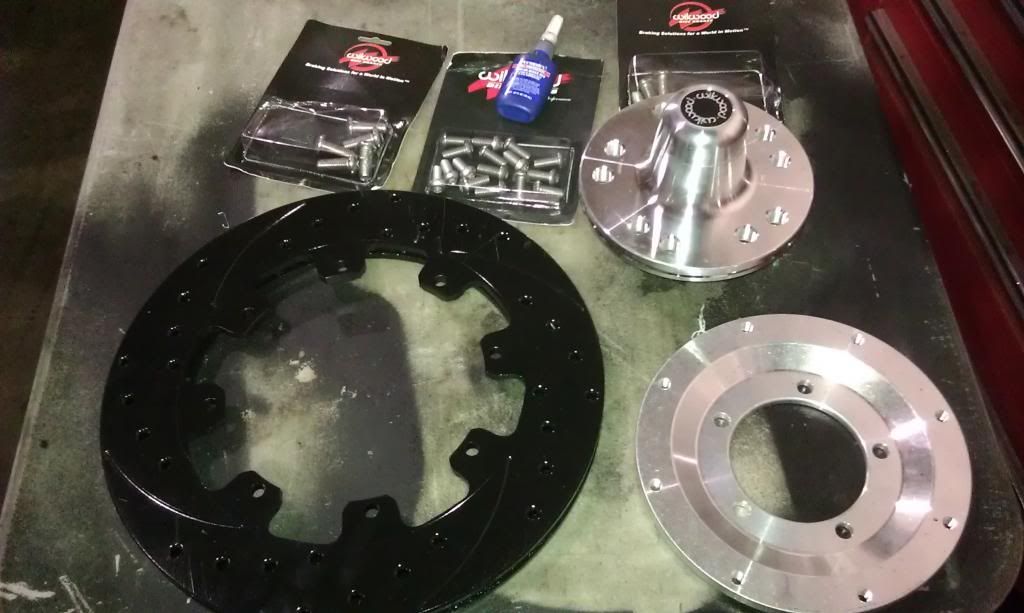
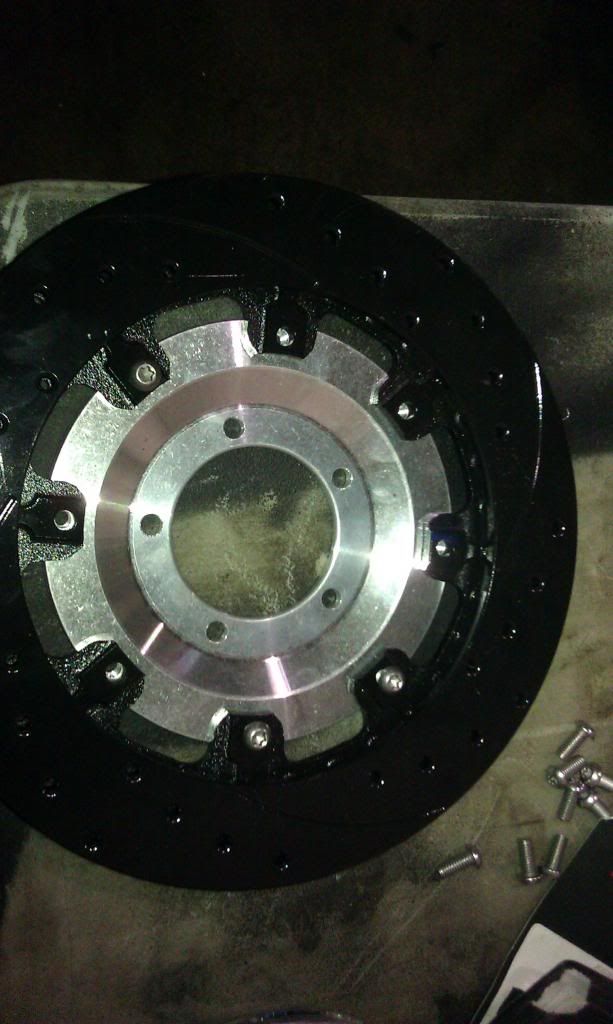
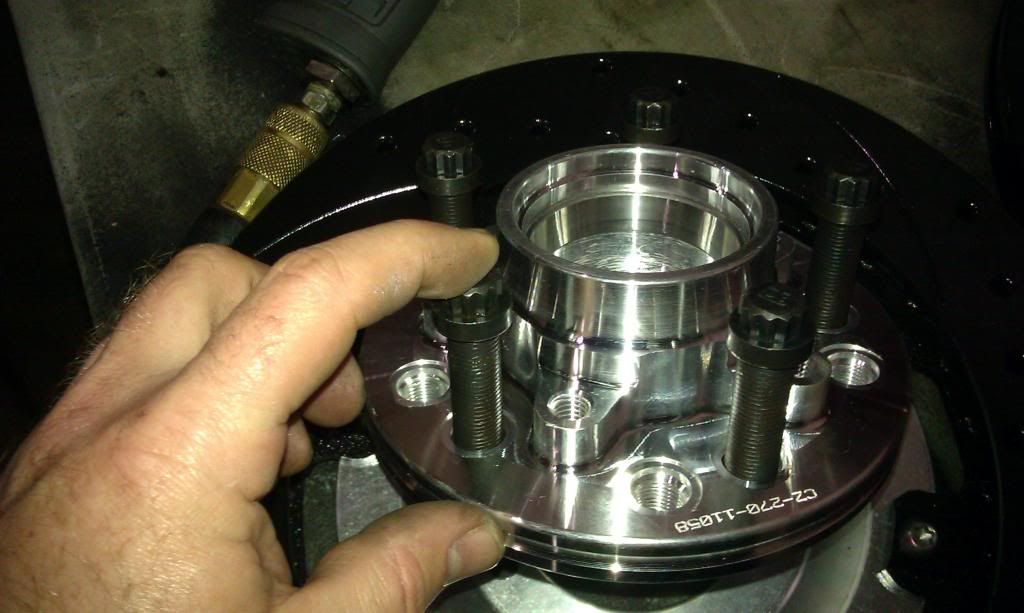
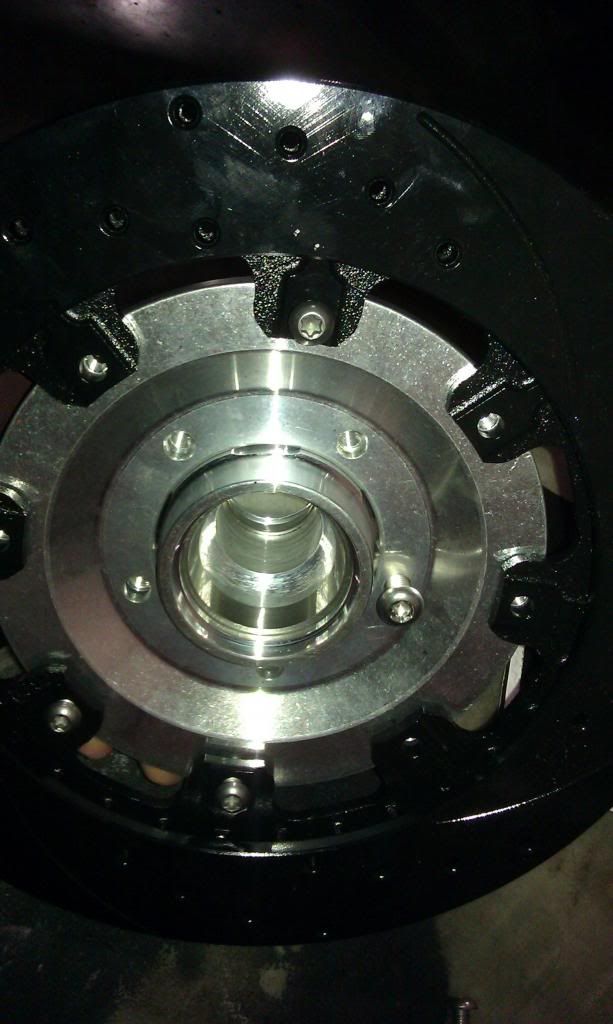
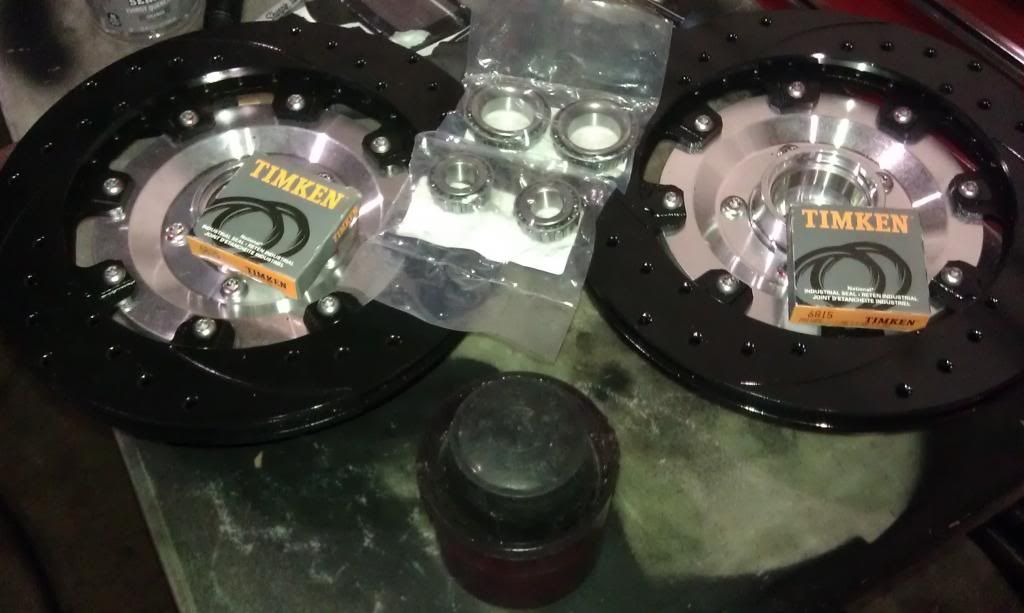
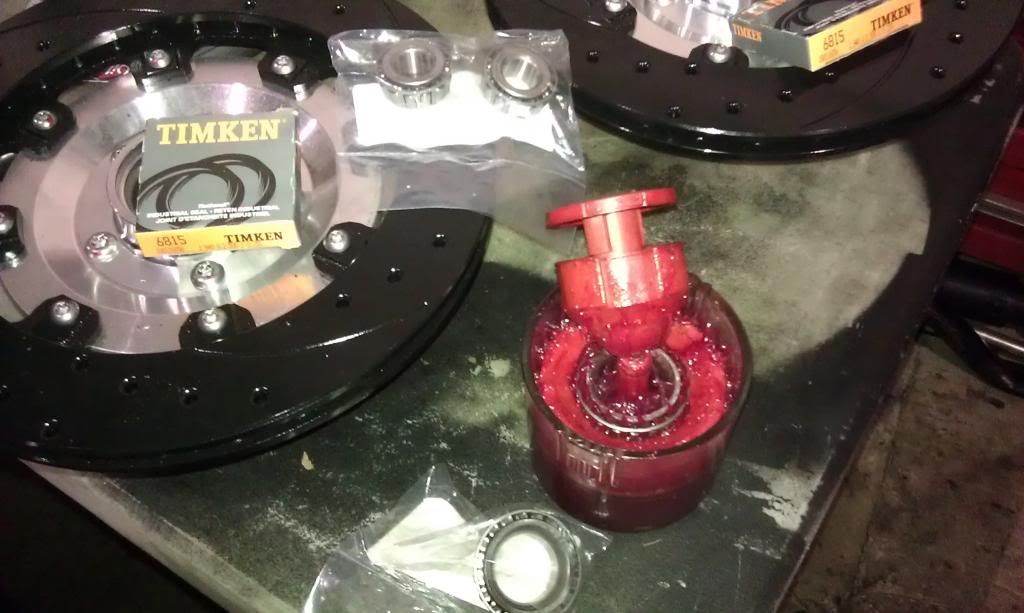
[ December 10, 2012, 12:21 AM: Message edited by: bwkelley76 ]
Posted by bwkelley76 (Member # 8792) on
:
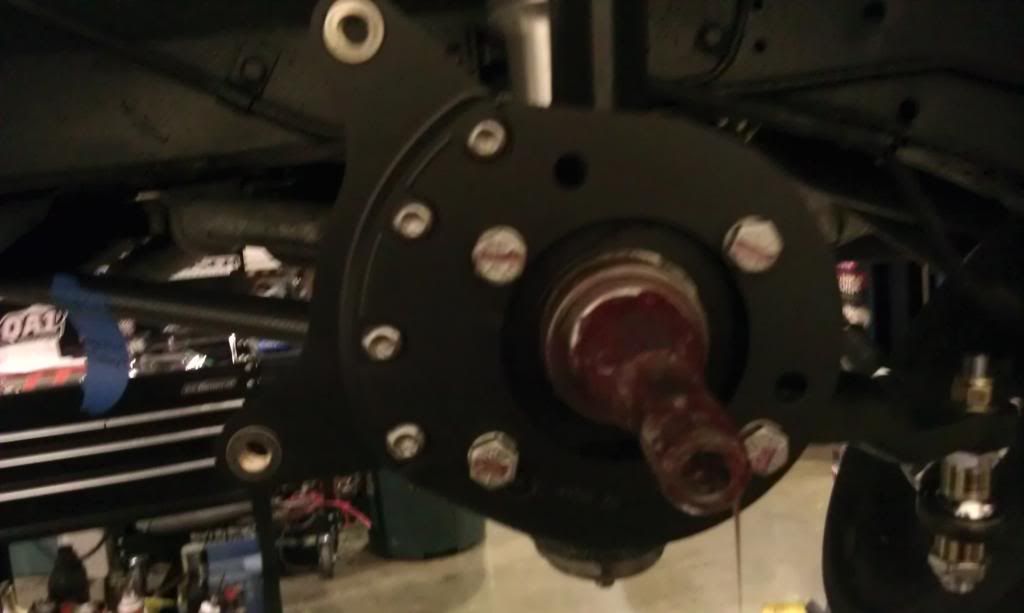
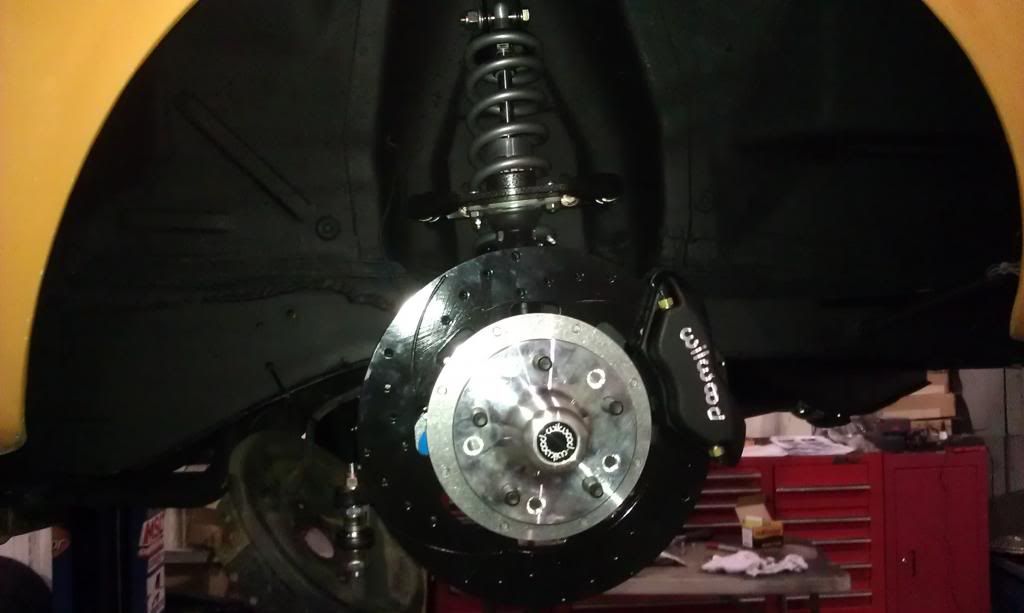
NOTE the black rotors. This is a coating Wilwood puts on that keeps them from rusting and allows for correct seat-in on the brakes. It's some kindof mystery goo that actually works well for both purposes. Some people's first reaction is to take this coating off with abrasives or chemically. I've experimented with leaving it on or taking it off on various vehicles, spent time on the phone with their tech department about this a few times, and have learned the benefits of leaving it on. One or more of the cars that we removed the coating on ended up needing pads prematurely on the front due to noise/sqeaking. ...may or may not be the reason but on this car I left it on the rear and now the front and I followed Wilwoods break-in procedure to the letter. I've had great results just leaving it on. The brakes make some HORRIBLE noises when coming to a stop during the break-in process and if one can suck it up for a few minutes it goes right away and once the brakes cool they are good to go!

The brake lines were easy enough with the right hardware and adapters. The 14" Wilwood line kit I bought was too short but had the right adapters for -3 AN stainless braided brake hoses. I bought a set of 18" ones from the local parts place and they were perfect.
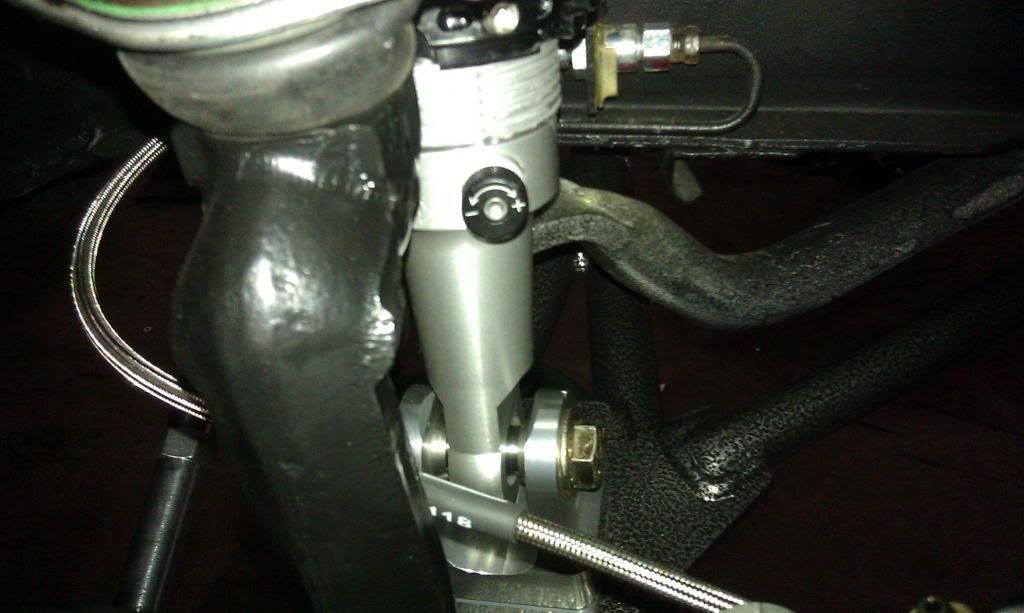
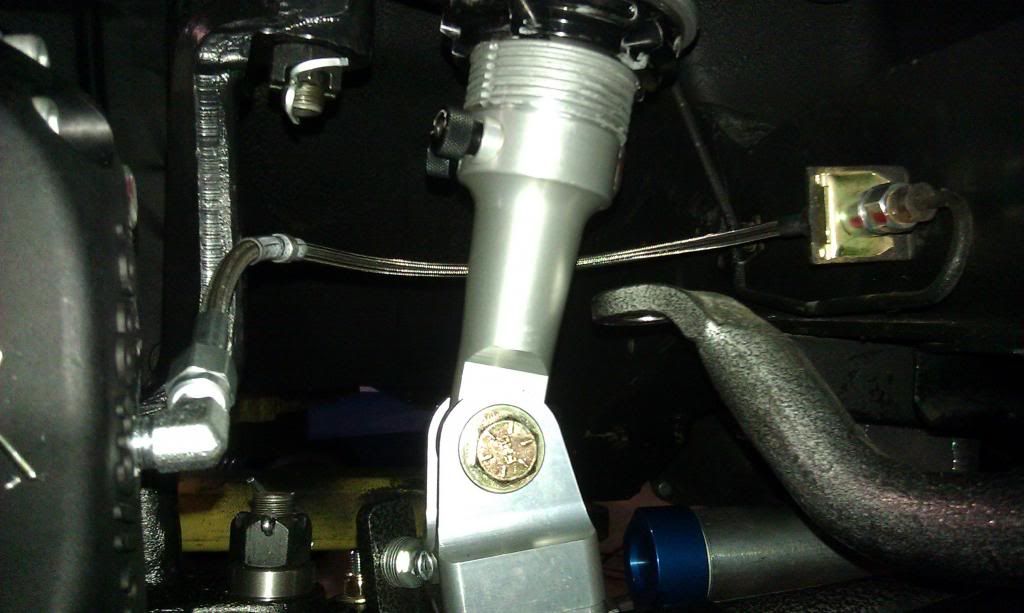
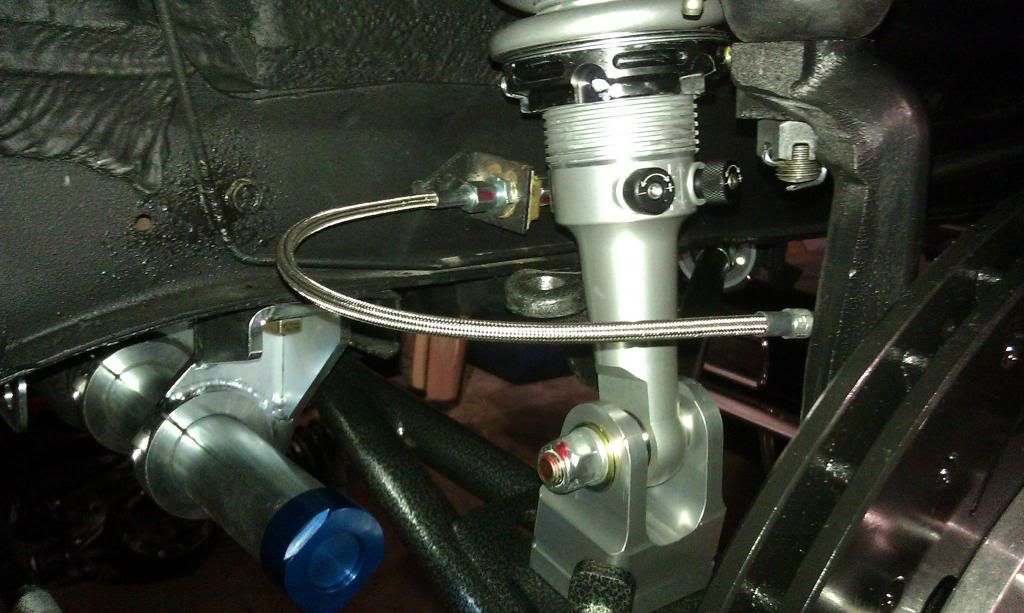
--------------------------------------
FINAL PICTURES!!!!.....
THE INSTALL IS DONE FOLKS! I hope everyone enjoyed this, it was a lot of work doing this solo and taking pics along the way but I figured many people can benefit from my efforts. Thanks for the encouragement and comments along the way! More pics and topics as the car progresses further and then some more fun stuff when I get her on the track. As the car stands now it handles, steers and stops phenomenally. I am still dialing in the car and I can't wait to get her out on the track and really give her a workout ... weather, time, and funds permitting.
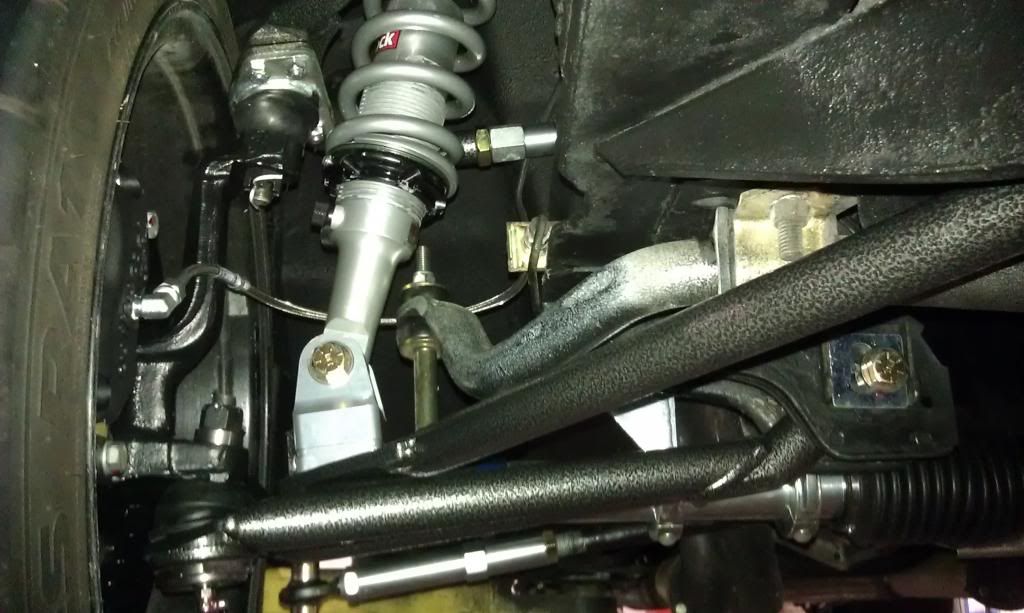

[ December 10, 2012, 12:24 AM: Message edited by: bwkelley76 ]
Posted by bwkelley76 (Member # 8792) on
:
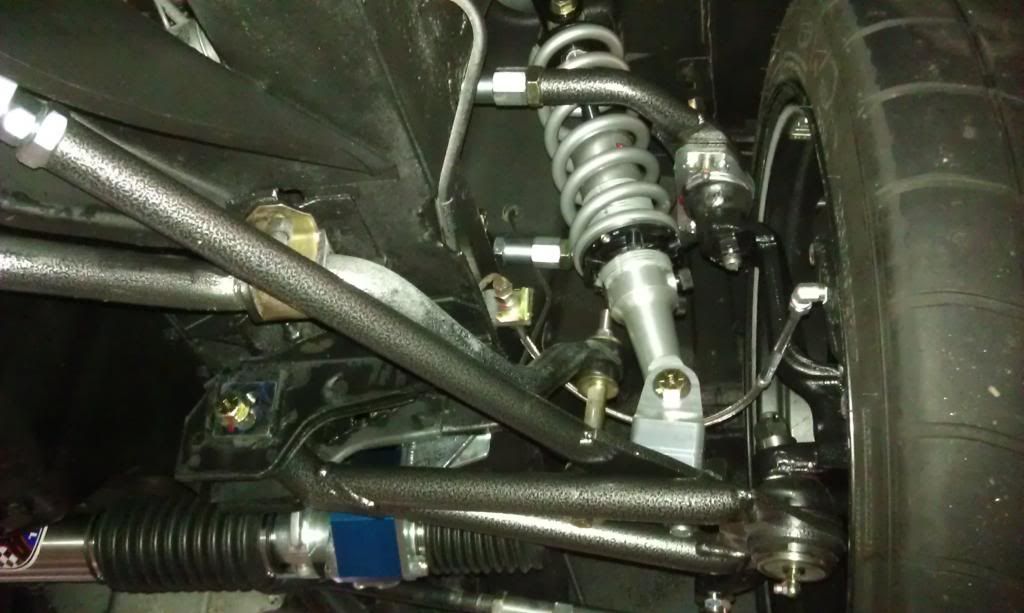
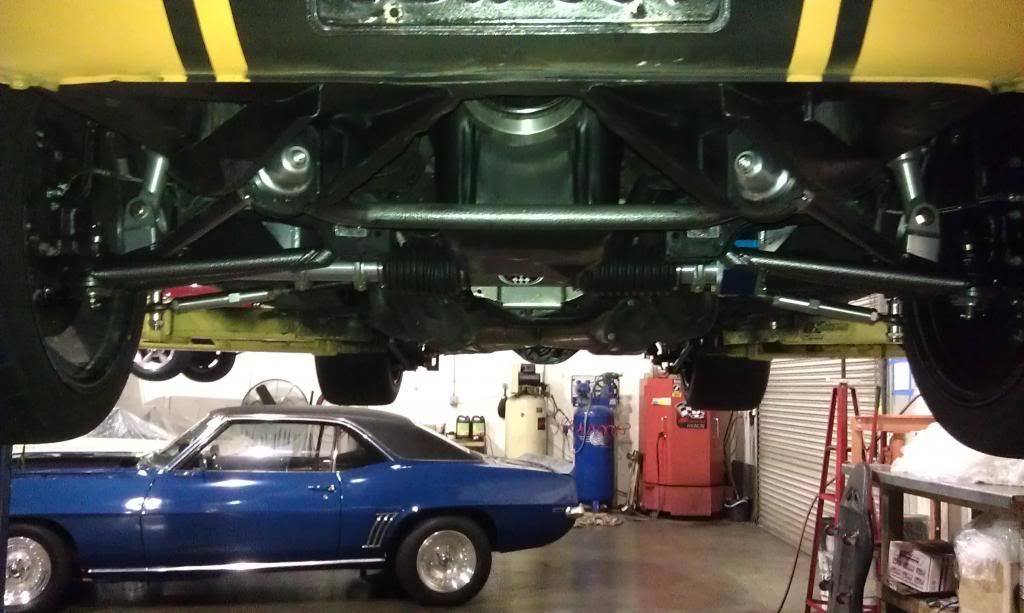
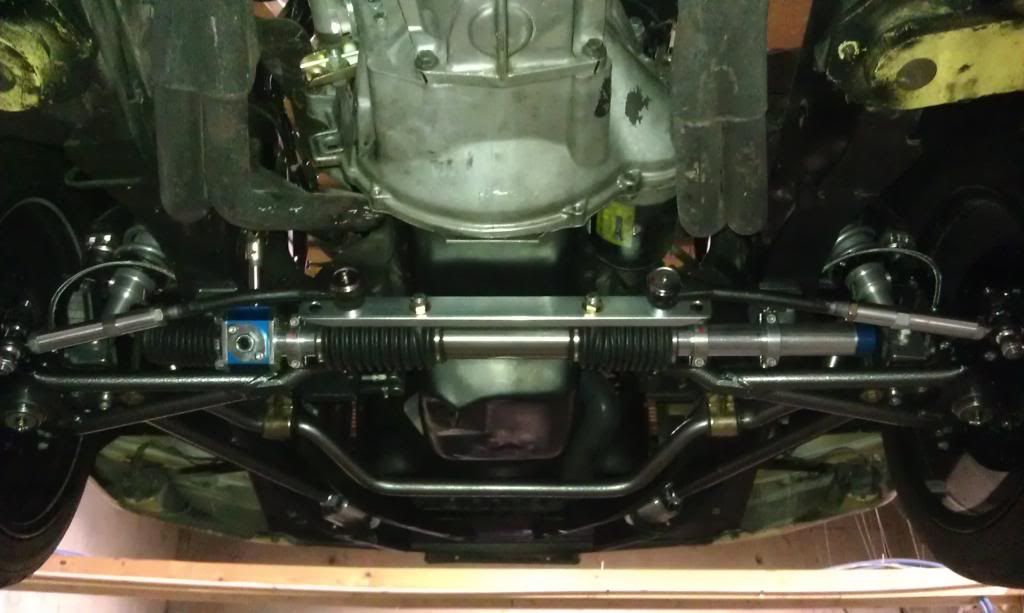
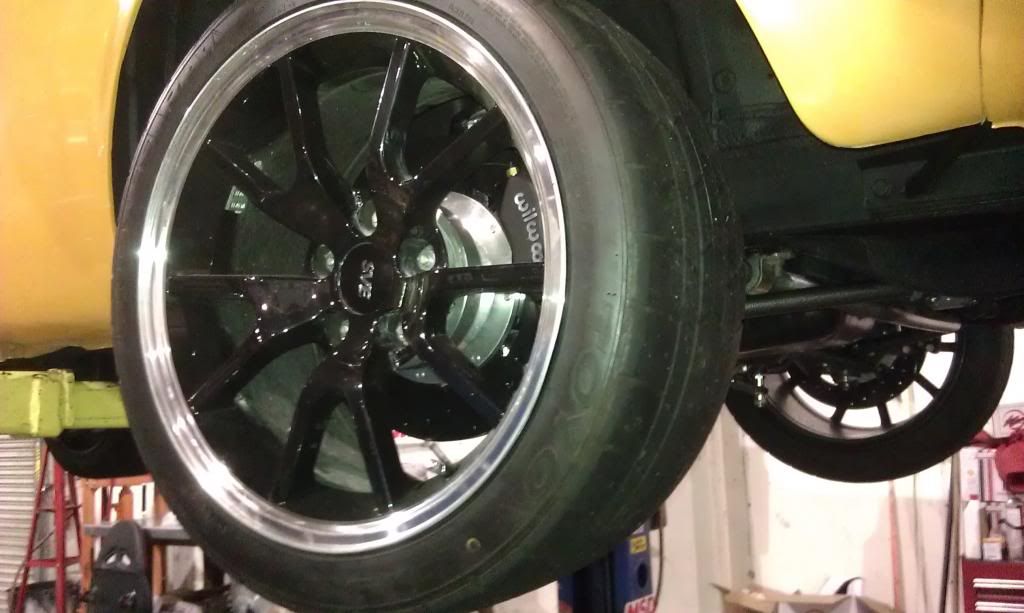
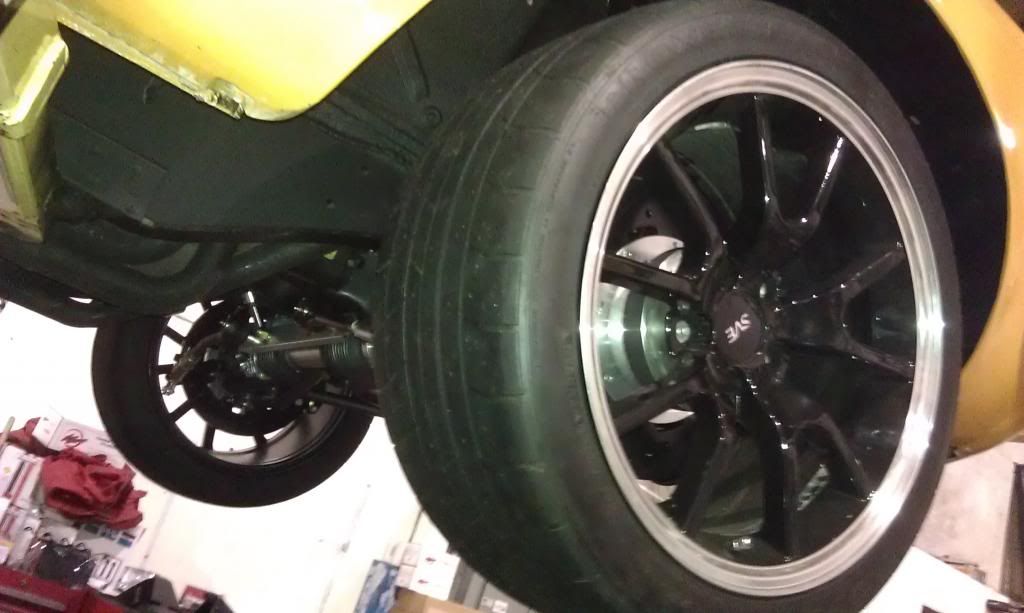
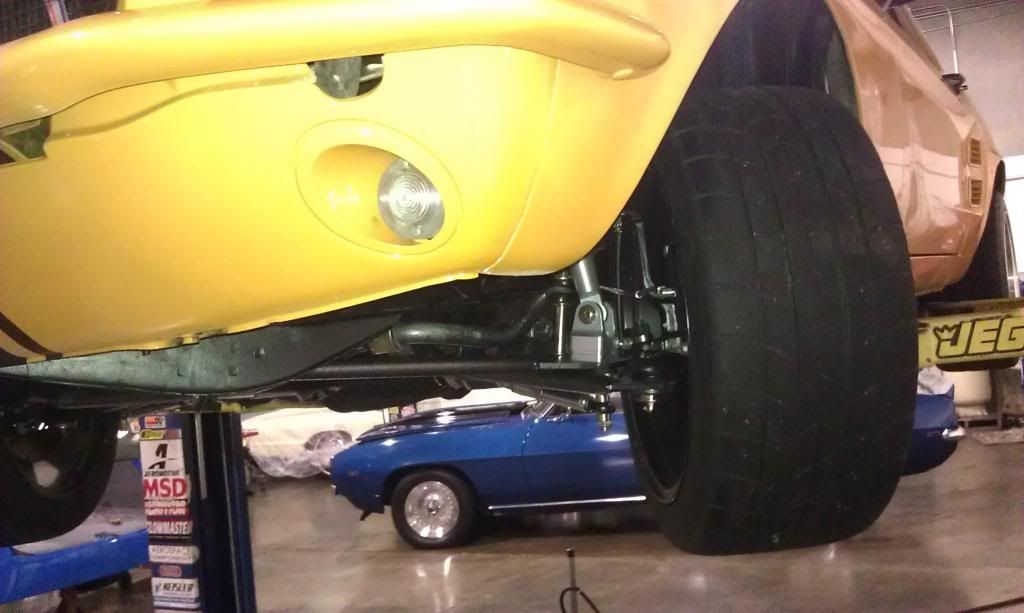
http://s69.beta.photobucket.com/user/bwkelley76/media/286.jpg.html

Posted by COBRA50 (Member # 11614) on
:
Beautiful beast
Posted by bwkelley76 (Member # 8792) on
:
quote:
Originally posted by COBRA50:
Beautiful beast
Thanks!
Posted by Hele On (Member # 4107) on
:
Excellent job and great write up!
Posted by bwkelley76 (Member # 8792) on
:
quote:
Originally posted by Hele On:
Excellent job and great write up!
Thank you!
Posted by bwkelley76 (Member # 8792) on
:
Car handles incredibly well! I'm DEFINITELY investing in a better steering wheel though...lol I love the feel of the rack & pinion but it's definitely a FULL RACE manual rack! ...Bicepts are throbbing as I write this.
Posted by bwkelley76 (Member # 8792) on
:
LOOKIE WHAT SANTA BROUGHT! ...Rears to match the fronts.
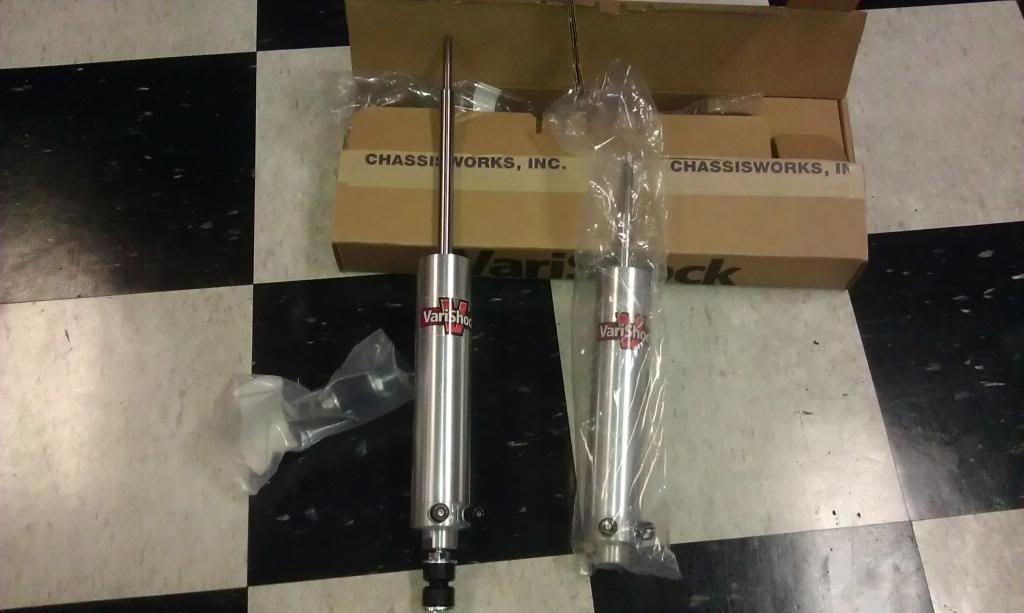
Posted by 66_5.0 (Member # 9974) on
:
Well who's your Santa? I have a lot of Christmases that mine skipped out on lol
Posted by bwkelley76 (Member # 8792) on
:
quote:
Originally posted by 66_5.0:
Well who's your Santa? I have a lot of Christmases that mine skipped out on lol
lol, you know, the crazy fat guy with the red jammies and the flying deer?
Posted by bwkelley76 (Member # 8792) on
:
Finally found the right wheel ...15" leather wrapped Moto-Lita. Found it used and picked it up for a great price!
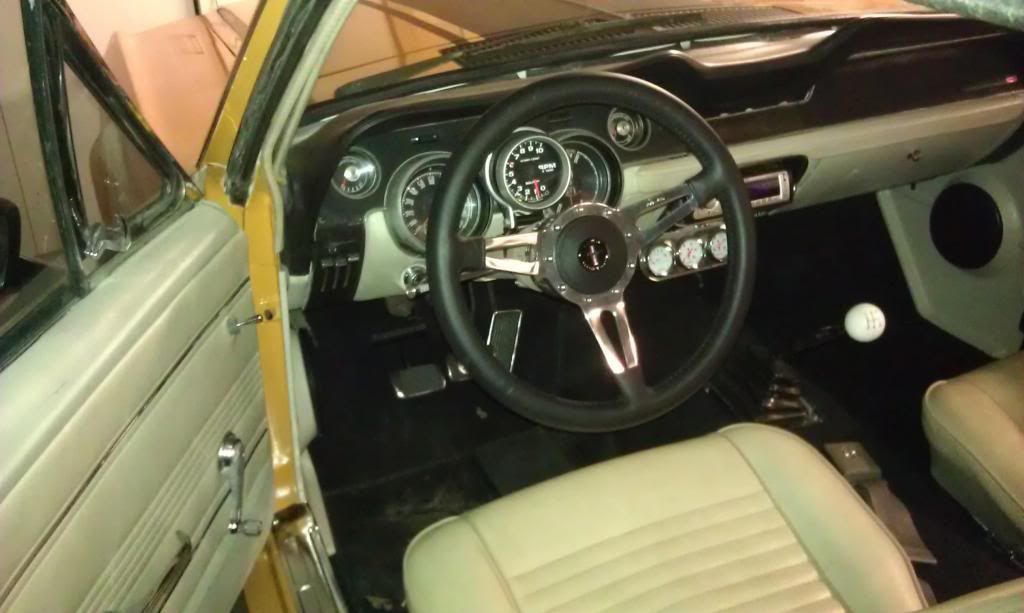
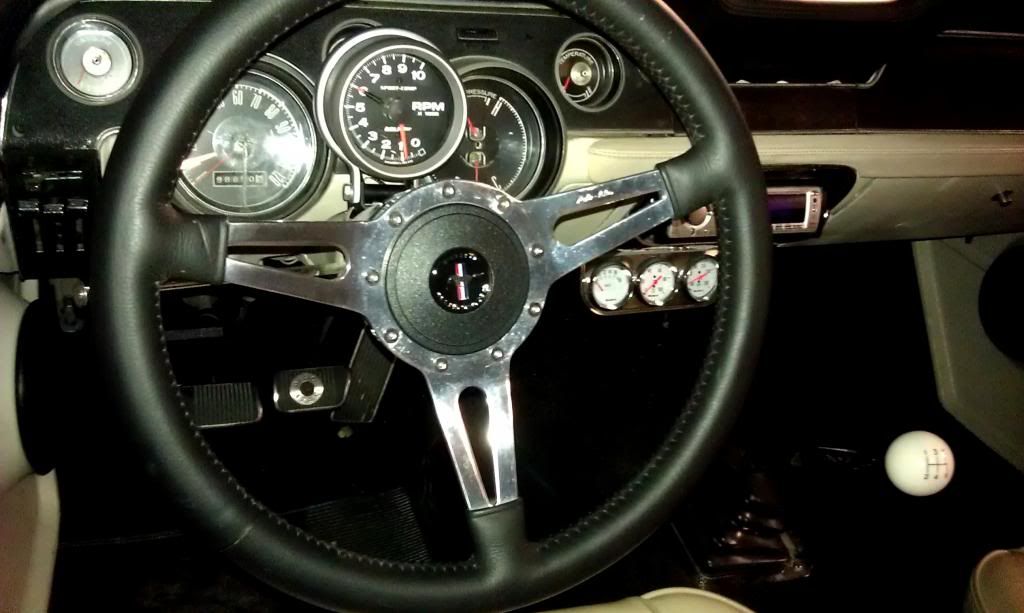
Posted by bwkelley76 (Member # 8792) on
:
Happy Holidays everyone! Here are some updated pics of the undercarriage and trunk, as well as my new rear double-adjustable Varishocks. The shocks are a HUGE difference over the Bilsteins and I LOVE the adjust-ability.
I think once I learn the "recipe" I'll be able to race this thing on the auto-x and the drag strip all in the same day. Can anyone say biathlon? lol
...Props to Varishock for a really cool product.
Anyone ever done this? ...The joys of building THEN PAINTING! (Backward I know) In a perfect world it would now be time for disassembly, paint, then reassembly. Call me lazy, or maybe skilled? lol..
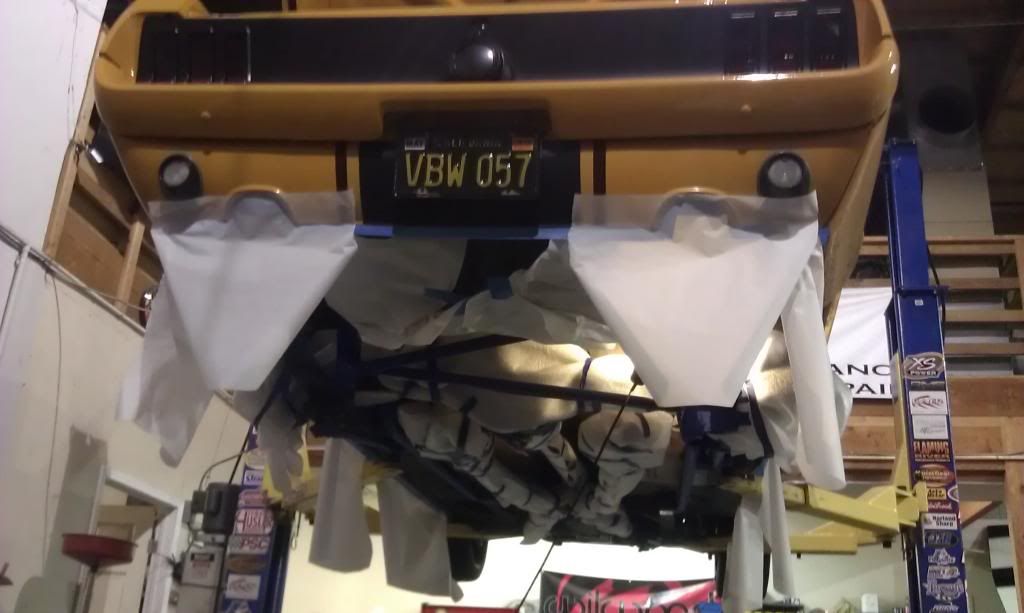
Hah! just in time for the Holidays! ... I just realized this thing looks like the sleigh from "A Nightmare Before Christmas" ".......on Dancer, on Prancer, on Edelbrock, Quick-Fuel, and " ....wait, I think I'll stop there I don't want to break any copy-write infringement laws.
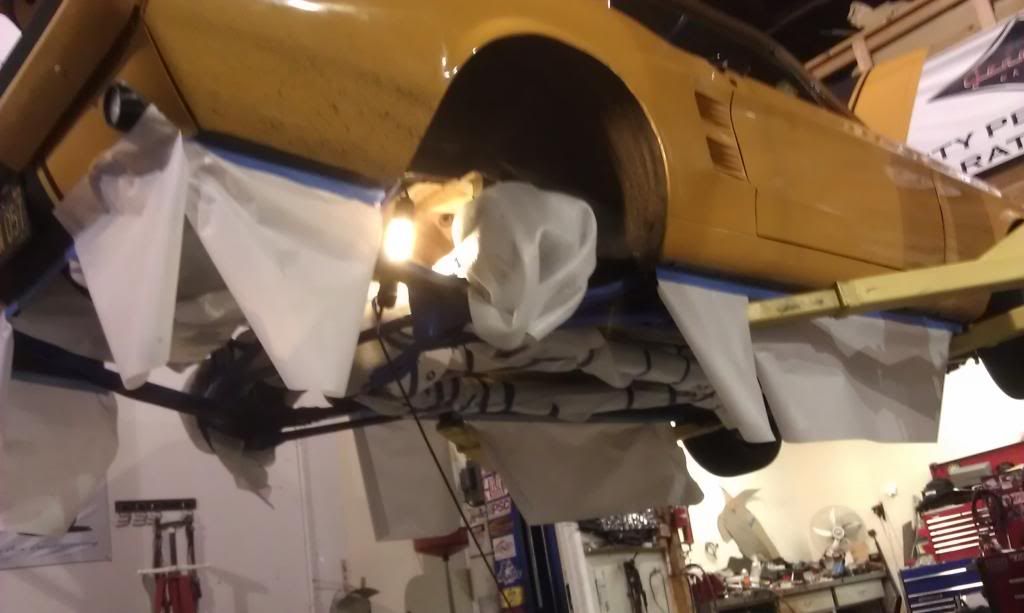
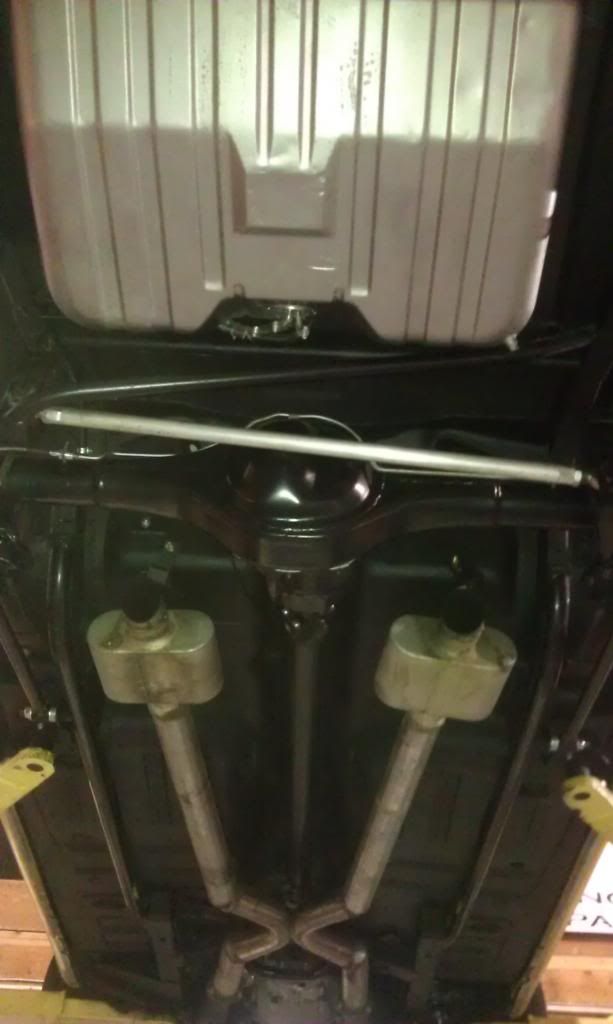
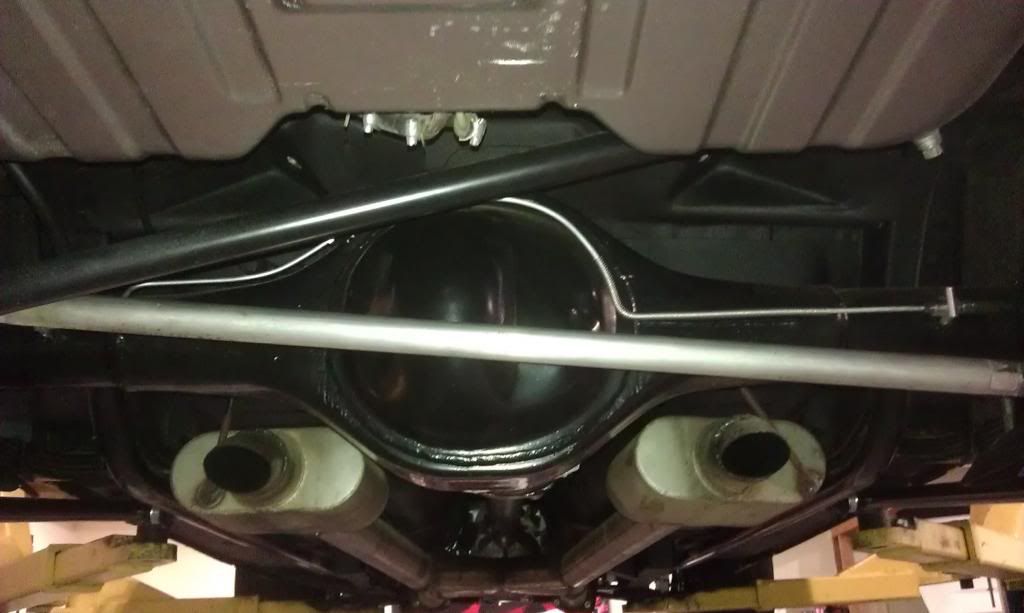
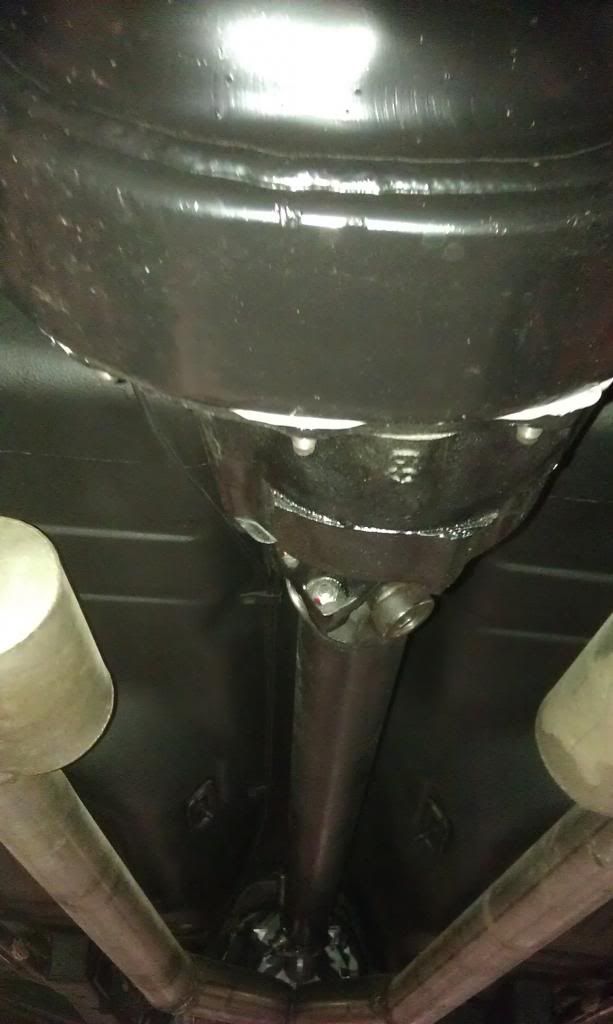
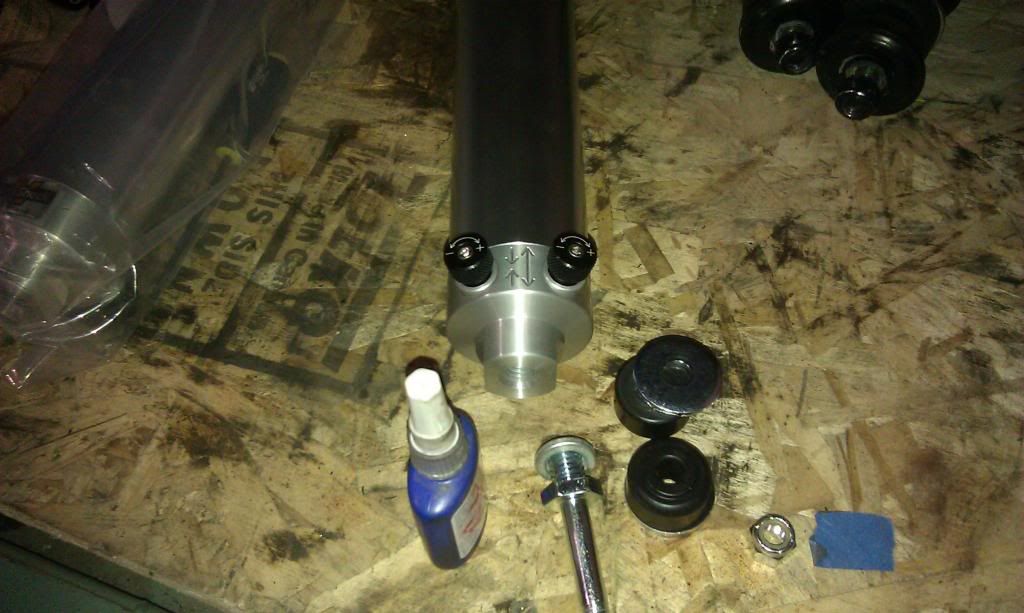
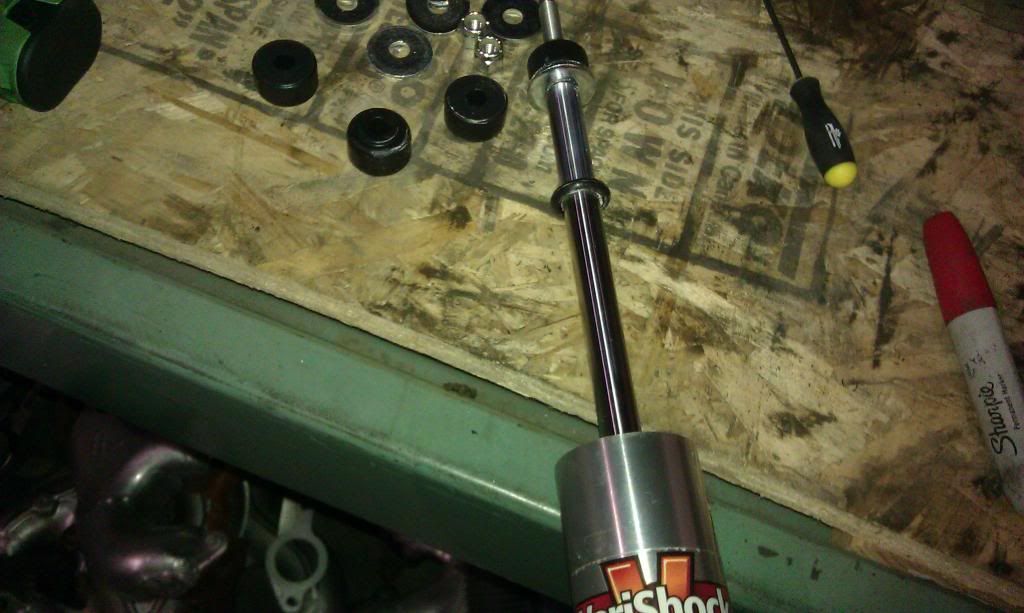
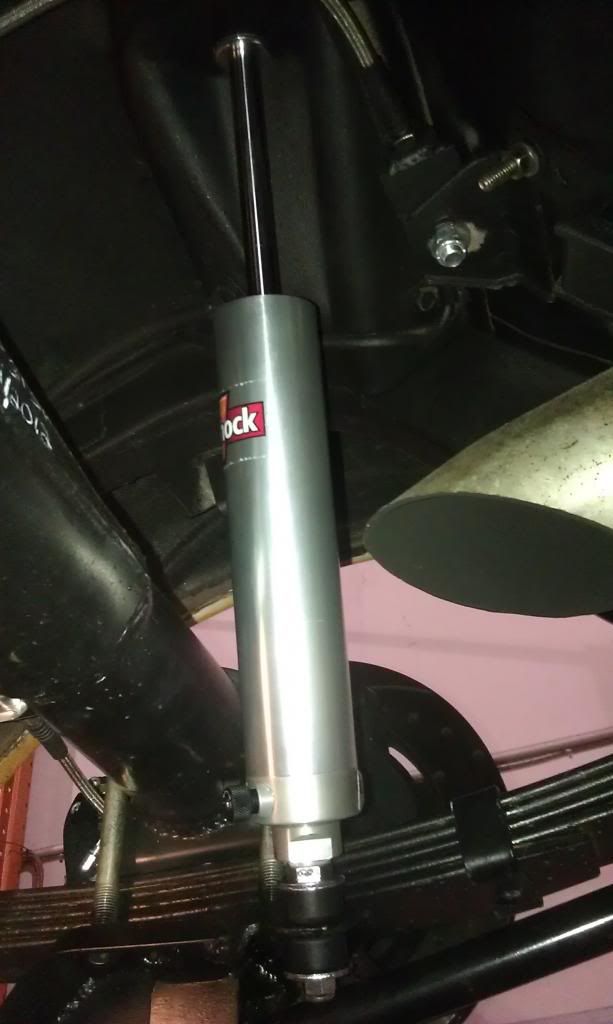
[ December 30, 2012, 01:23 AM: Message edited by: bwkelley76 ]
Posted by bwkelley76 (Member # 8792) on
:
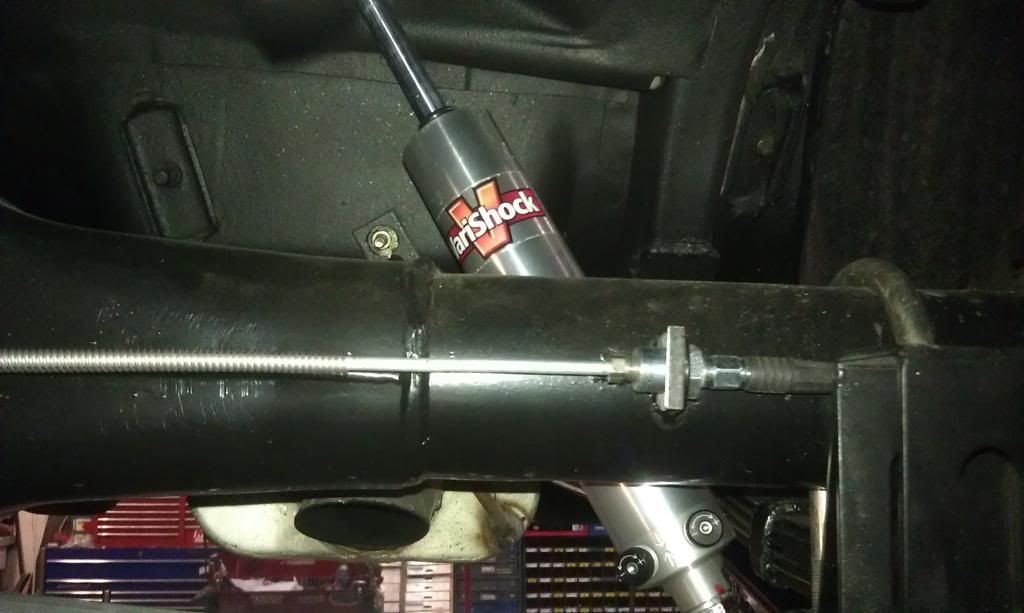
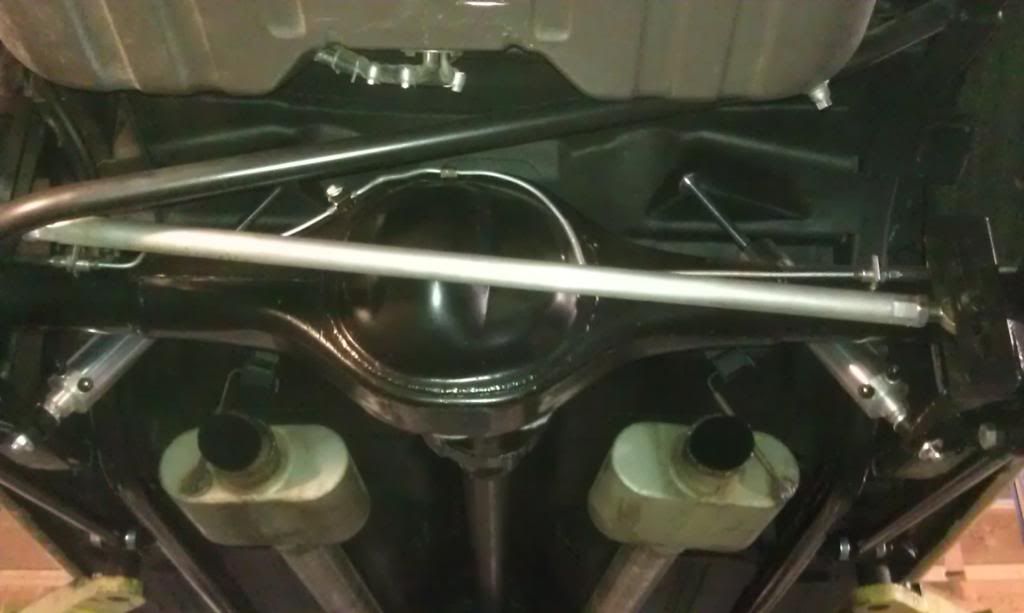
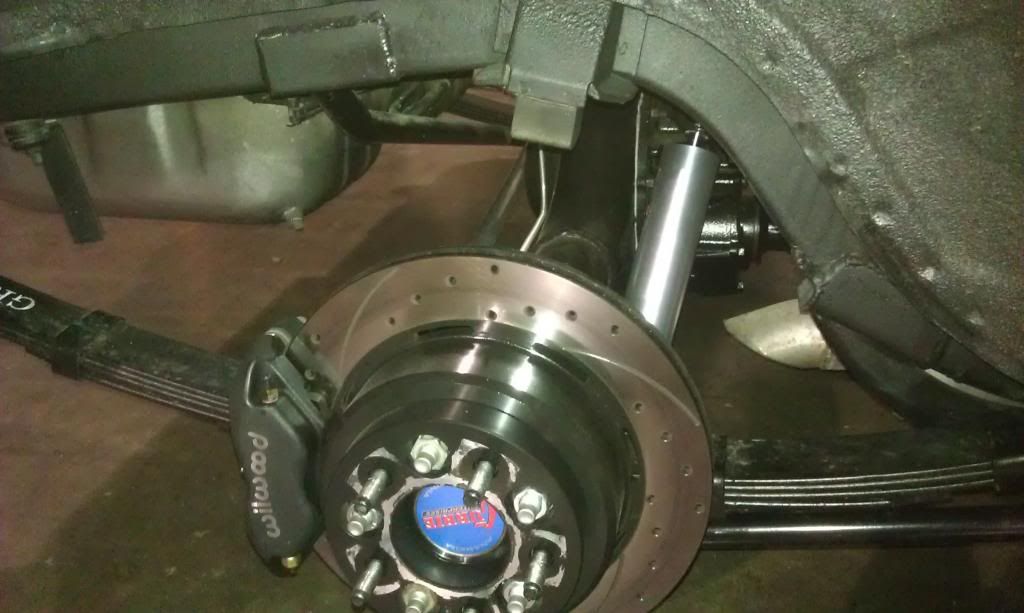
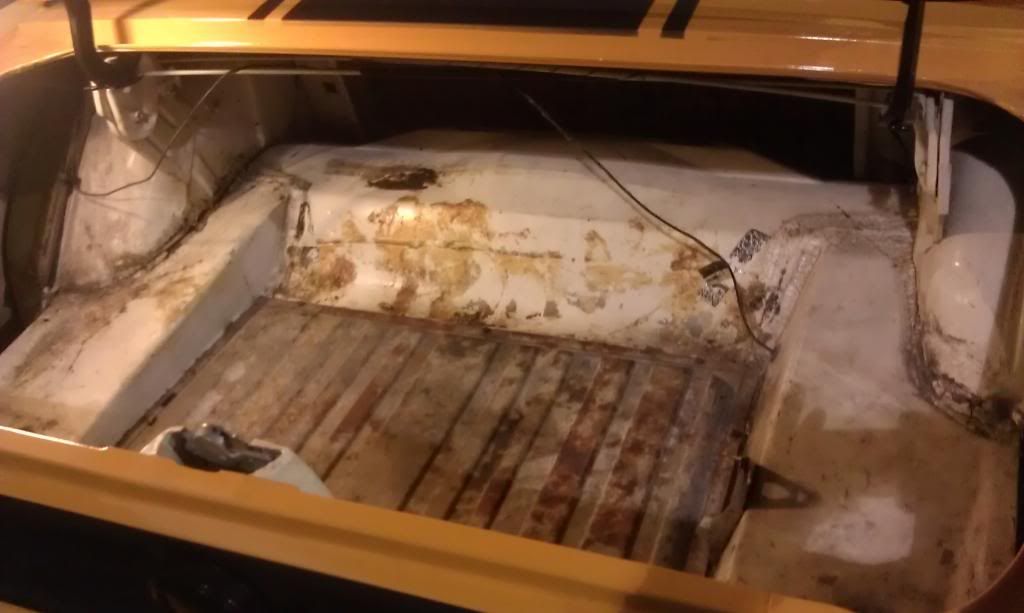
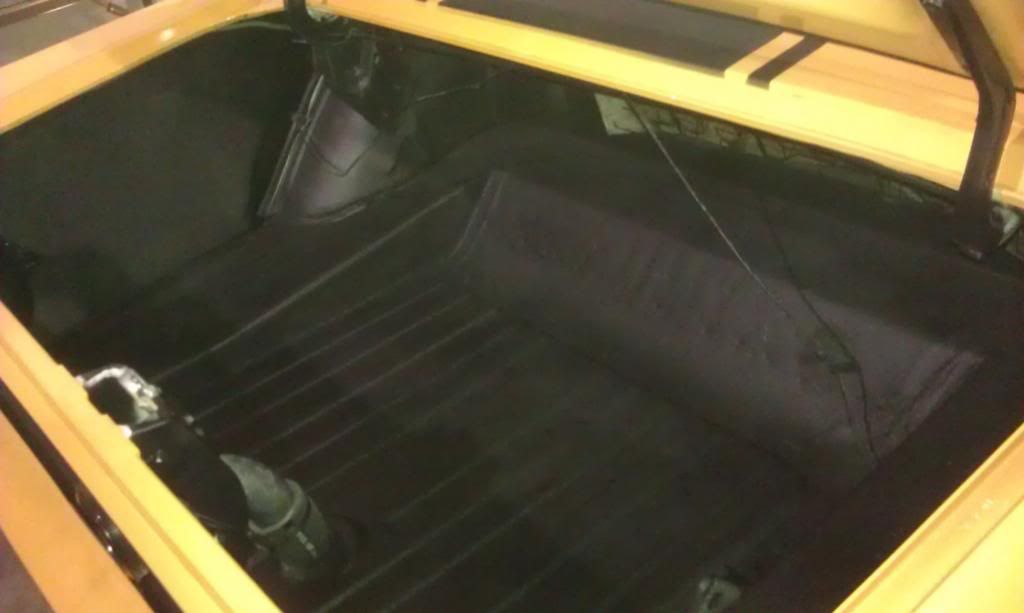
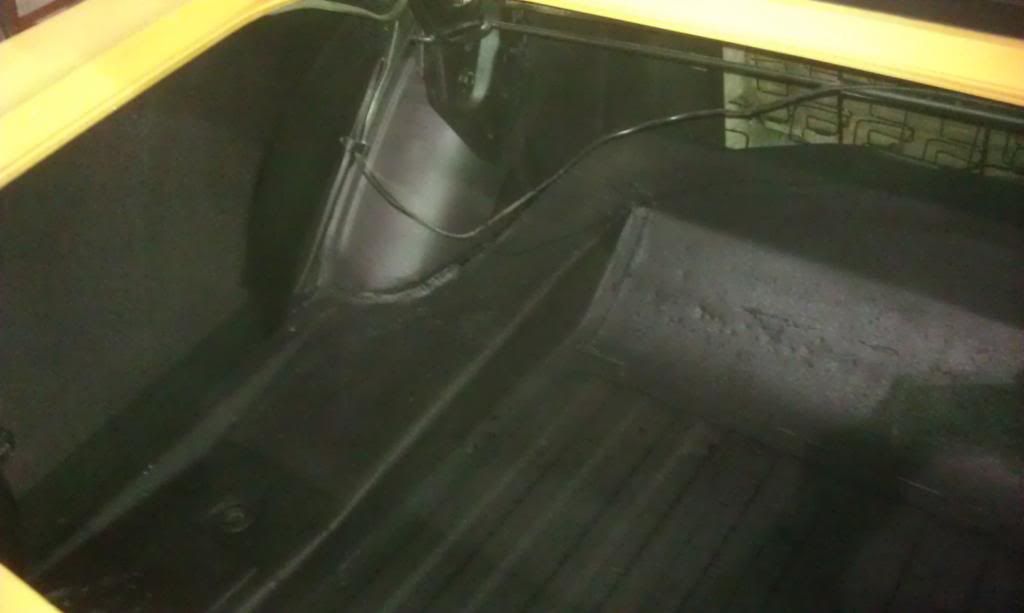
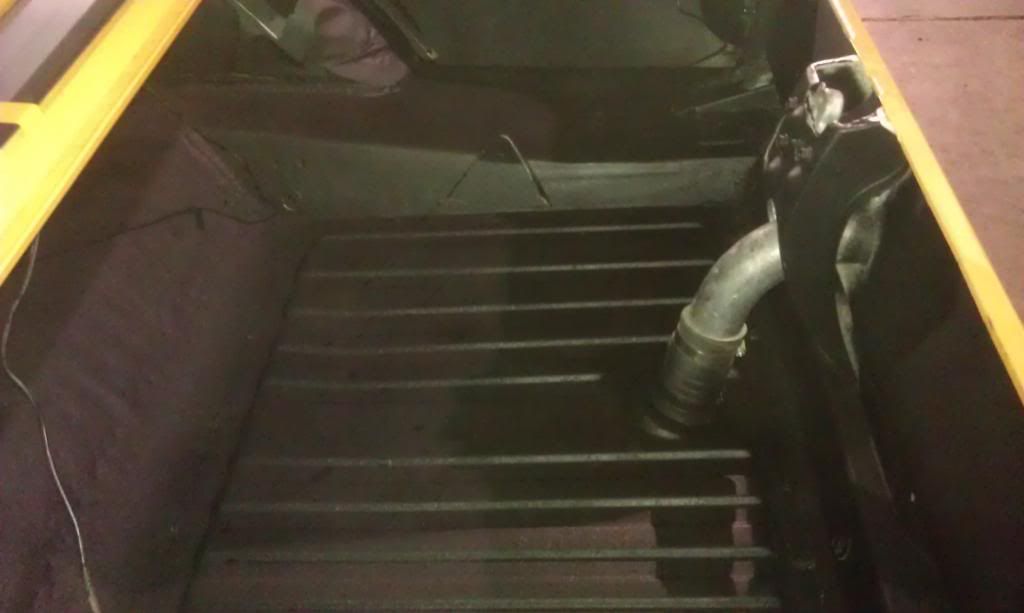
Posted by Greasy (Member # 5258) on
:
Looks great
Posted by bwkelley76 (Member # 8792) on
:
quote:
Originally posted by Secnd2nun64:
Your not doing that rear end justice with the crud on the underside of your car. Time for wire brush cleaning and black paint under there.
<<<Ehem. How do ya like me now?
Posted by bwkelley76 (Member # 8792) on
:
quote:
Originally posted by Greasy:
Looks great
Thanks and Merry Christmas!
Posted by 66_5.0 (Member # 9974) on
:
Looks really good. What did you spray the trunk with? Was it the same as the rest of the car?
Posted by bwkelley76 (Member # 8792) on
:
quote:
Originally posted by 66_5.0:
Looks really good. What did you spray the trunk with? Was it the same as the rest of the car?
Thanks! Yep same stuff. Lucky for me this car was never undercoated so clean-up and prep was a snap.
I used SEM "Low VOC" undercoating and Orr-Lac semi-gloss for the components and/or touch-up. Both are great products for rattle cans. On a high-dollar "rotisserie" build I use Hippo-Liner and a spray gun though, that stuff is TOUGH AS NAILS. The SEM works good for builds like mine and regular street cars, and the rattle can makes it easy to touch-up and get around things.
I like the mild texture, and although it's rubberized it still dries pretty hard and is durable. It comes with your choice of a straw and 2 different nozzles for different textures and easier access to crevices, etc. I spray it right out of the can with the "regular" nozzle instead of the straw in most cases.
Posted by COBRA50 (Member # 11614) on
:
Posted by 66_5.0 (Member # 9974) on
:
Ok and what did you prep it with? My trunk and underneath the car is ugly lol
Posted by 166 Merlot (Member # 1549) on
:
Thats wack, where's the 4-15"s and Zapco amps??
Posted by bwkelley76 (Member # 8792) on
:
<<Thanks Cobra!
Lol Merlot...heck I haven't even put the 6x9's back in it since I pulled them out for paint.
quote:
Originally posted by 66_5.0:
Ok and what did you prep it with? My trunk and underneath the car is ugly lol
Brake-Clean and a Brillo pad in my case. If it's that bad and/or been undercoated before, usually a heat gun and a spatula is needed.
[ December 26, 2012, 04:14 AM: Message edited by: bwkelley76 ]
Posted by 66_5.0 (Member # 9974) on
:
quote:
Originally posted by bwkelley76:
<<Thanks Cobra!
Lol Merlot...heck I haven't even put the 6x9's back in it since I pulled them out for paint.
quote:
Originally posted by 66_5.0:
Ok and what did you prep it with? My trunk and underneath the car is ugly lol
Brake-Clean and a Brillo pad in my case. If it's that bad and/or been undercoated before, usually a heat gun and a spatula is needed.
Im jealous everything on your cars are always very nice! Ill put that on my to do list thanks
Posted by MaK_1967v8 (Member # 12187) on
:
Amazing build for sure. I would've done some things a LITTLE different. ( bumpers would've been flat black as well, not color matched ) but regardless. its beautiful.
Posted by bwkelley76 (Member # 8792) on
:
quote:
Originally posted by 66_5.0:
quote:
Originally posted by bwkelley76:
<<Thanks Cobra!
Lol Merlot...heck I haven't even put the 6x9's back in it since I pulled them out for paint.
quote:
Originally posted by 66_5.0:
Ok and what did you prep it with? My trunk and underneath the car is ugly lol
Brake-Clean and a Brillo pad in my case. If it's that bad and/or been undercoated before, usually a heat gun and a spatula is needed.
Im jealous everything on your cars are always very nice! Ill put that on my to do list thanks
You're welcome, always glad to help, and I hope it goes well for ya!
Posted by bwkelley76 (Member # 8792) on
:
quote:
Originally posted by MaK_1967v8:
Amazing build for sure. I would've done some things a LITTLE different. ( bumpers would've been flat black as well, not color matched ) but regardless. its beautiful.
Thanks! Different strokes for different folks, and this car was really not "planned out", it just kinda happened. LOL
Posted by Secnd2nun64 (Member # 1431) on
:
quote:
Originally posted by bwkelley76:
quote:
Originally posted by Secnd2nun64:
Your not doing that rear end justice with the crud on the underside of your car. Time for wire brush cleaning and black paint under there.
<<<Ehem. How do ya like me now?
lol, very nice! You may want to put some type of barrier inside that trunk behind the rear seat to protect you from the gas tank. I'm curious on those shocks you have. I put some kyb's on mine and they are too soft.
Posted by Luke87GT (Member # 21) on
:
That's some serious dedication to a car.
Posted by bwkelley76 (Member # 8792) on
:
quote:
Originally posted by Secnd2nun64:
quote:
Originally posted by bwkelley76:
quote:
Originally posted by Secnd2nun64:
Your not doing that rear end justice with the crud on the underside of your car. Time for wire brush cleaning and black paint under there.
<<<Ehem. How do ya like me now?
lol, very nice! You may want to put some type of barrier inside that trunk behind the rear seat to protect you from the gas tank. I'm curious on those shocks you have. I put some kyb's on mine and they are too soft.
Thanks! I LOVE the Varishocks. They are Double-Adjustable, meaning you can adjust both compression and extension rates. They give you 16 clicks on each which gives you 32 different settings. They adjust all the way from super soft to super stiff, and everything in-between.
I like your suggestions by the way, don't be afraid to chime in any time!
quote:
Originally posted by Luke87GT:
That's some serious dedication to a car.
I know right? lol
[ December 30, 2012, 01:35 AM: Message edited by: bwkelley76 ]
Posted by 166 Merlo (Member # 1549) on
:
Amazing what a little tender love and care can do ![[Whoo Whooooo!]](graemlins/woowoo.gif)
Posted by bwkelley76 (Member # 8792) on
:
quote:
Originally posted by 166 Merlo:
Amazing what a little tender love and care can do
Thanks! A little TLC does go a long way. So does a whole heck of a lot of work...lol! I NEVER thought I'd go this far on this car but I'm glad I have.
[ December 31, 2012, 04:53 AM: Message edited by: bwkelley76 ]
Posted by bwkelley76 (Member # 8792) on
:
Testing....
[ 2013-04-01, 10:53 PM: Message edited by: bwkelley76 ]
Posted by 50DADDY (Member # 3076) on
:
Did you need spacers or anything special to fit those rims? Whats the width and offset of the wheels and what size tire. Thanks. Ive got a 68 and im looking at wheels right now.
Posted by bwkelley76 (Member # 8792) on
:
quote:
Originally posted by 50DADDY:
Did you need spacers or anything special to fit those rims? Whats the width and offset of the wheels and what size tire. Thanks. Ive got a 68 and im looking at wheels right now.
SN-95 offset, 10's and 9's 275's out back and 235's up front. 1" spacers all around.
Scavenger X-Pipe and center section all finished!
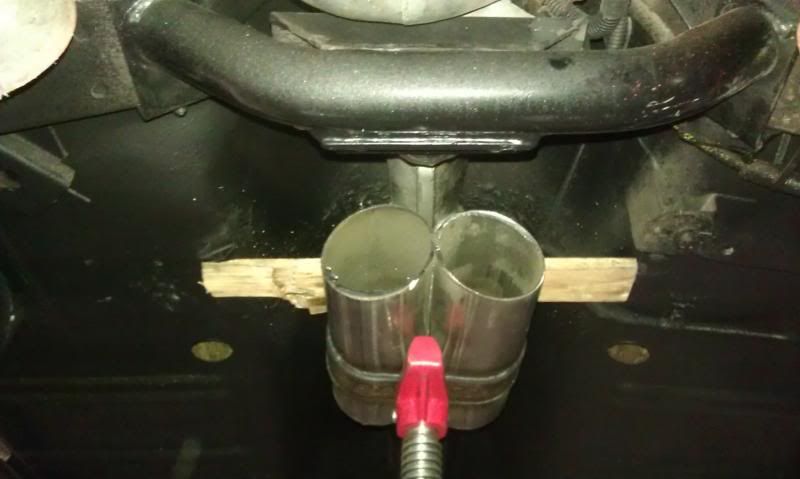
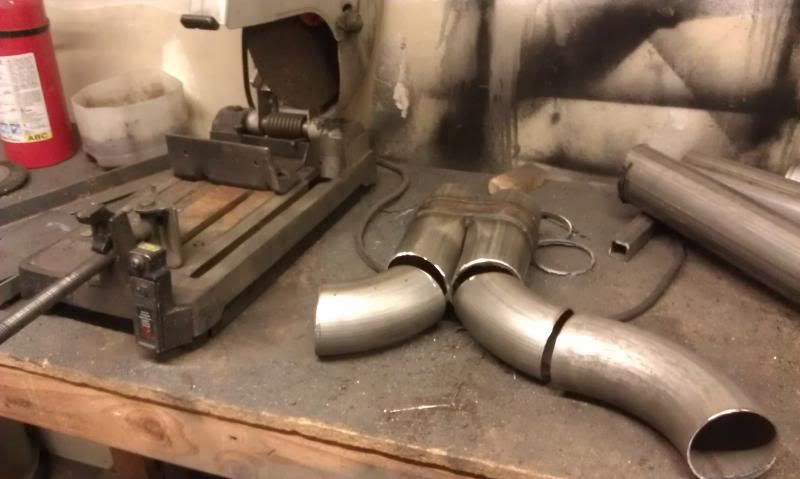
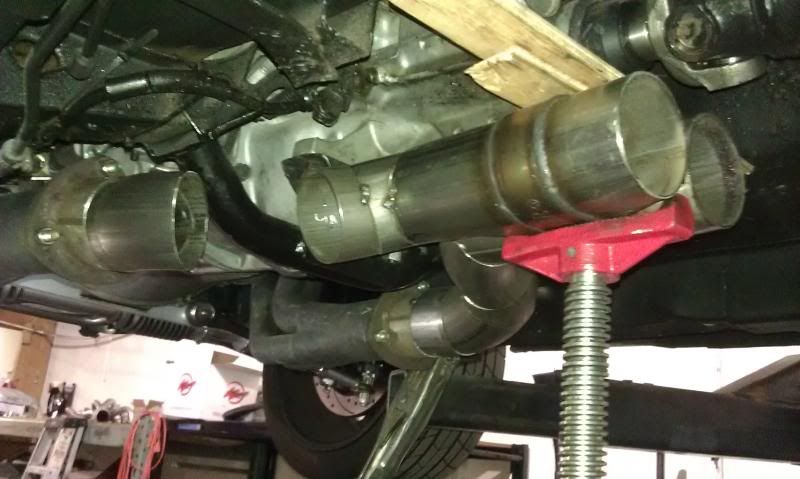
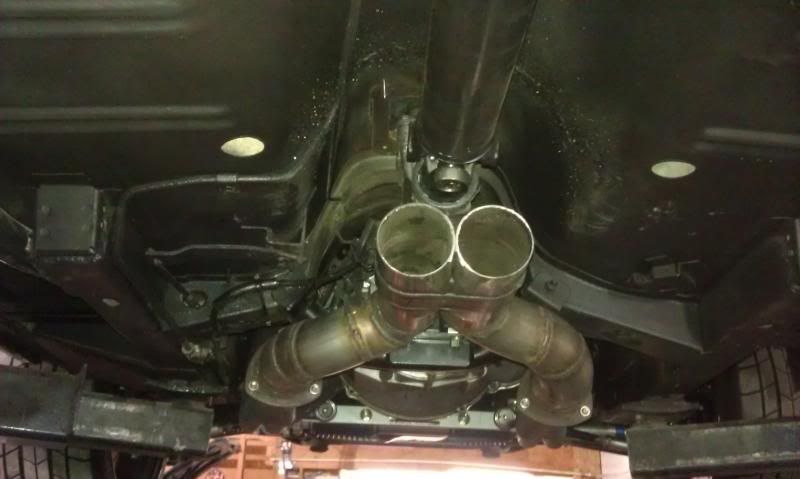
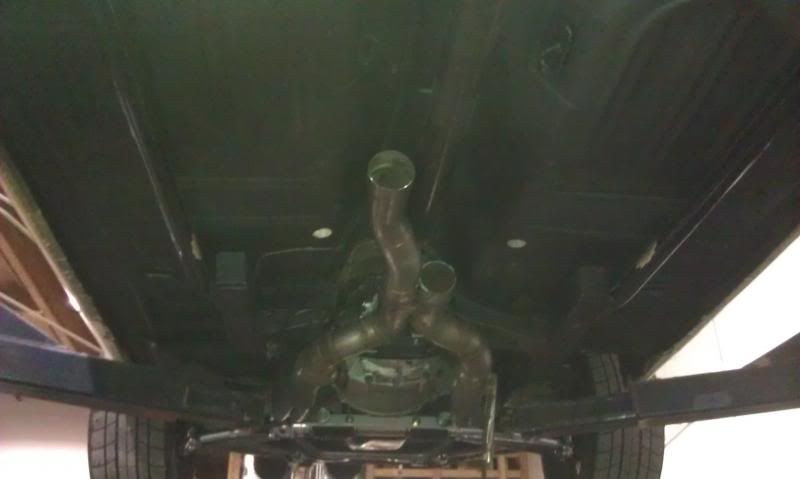
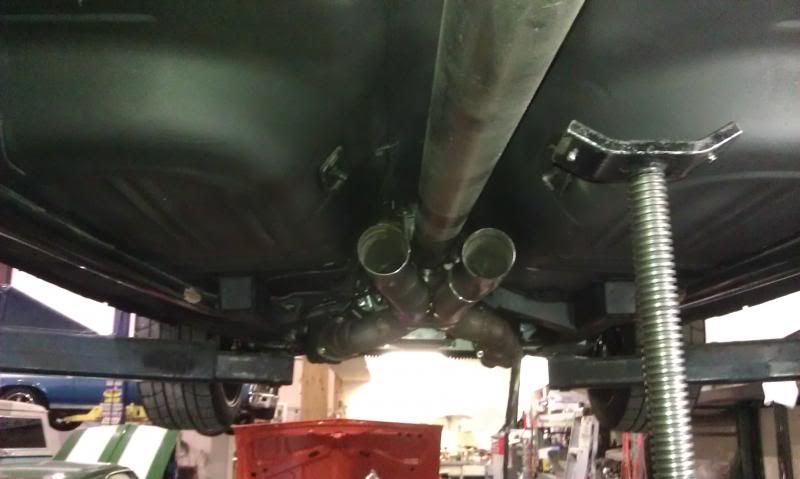
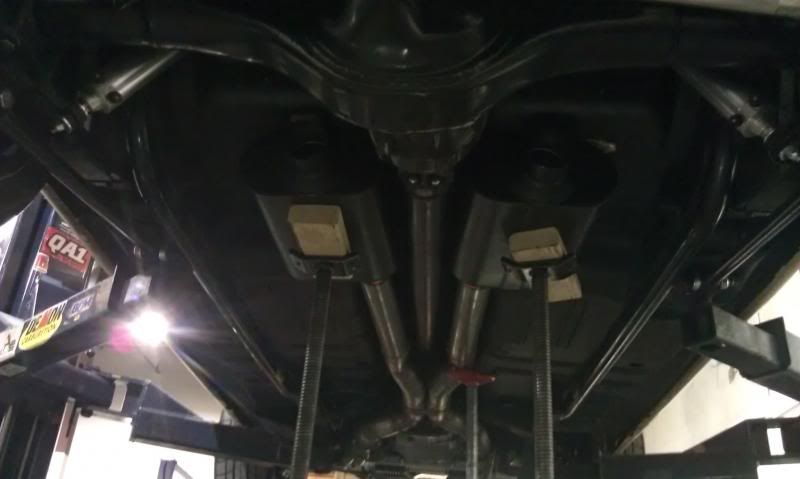
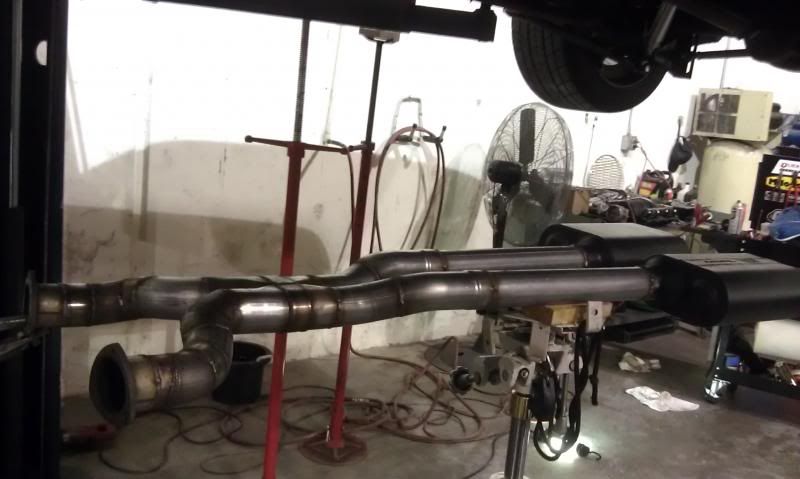
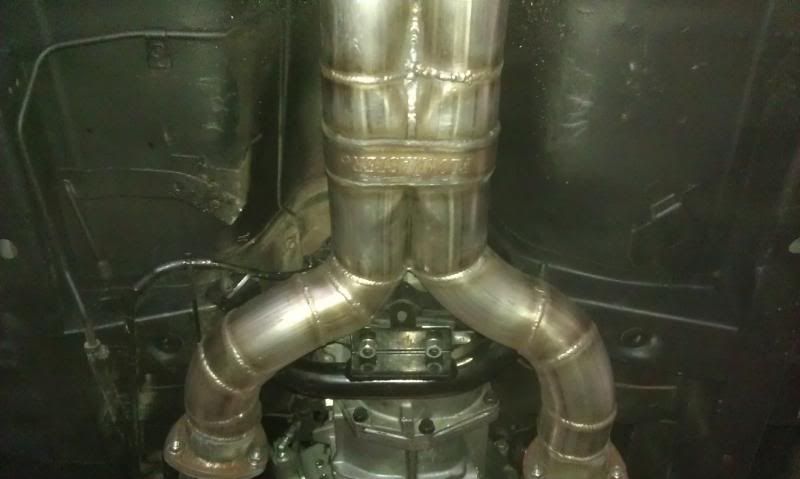
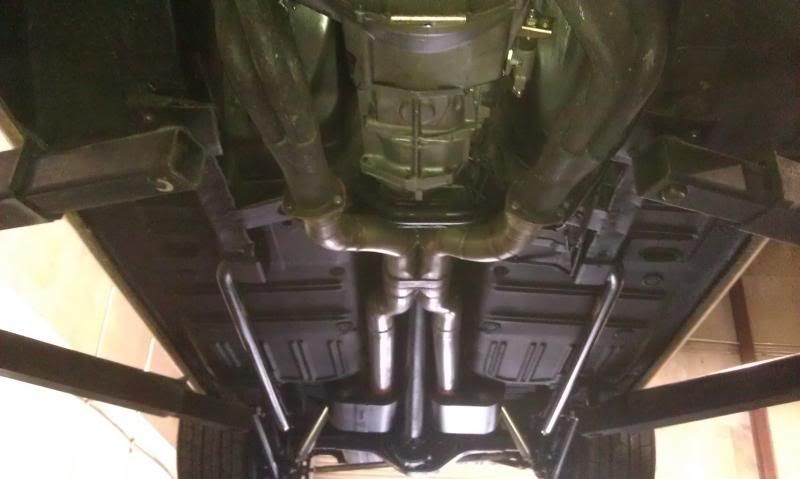
[ 2013-04-03, 08:33 PM: Message edited by: bwkelley76 ]
Posted by bwkelley76 (Member # 8792) on
:
------
Exhaust is all finished! It's like a whole different car. Took it for a drive and beat it up pretty good and zero issues. No more drone, super quiet inside car but you can still here the engine. That X-pipe really works, the power-band is INSANELY different! The car used to have no power until 3k RPM's and now it has a ton of torque all over the place and kicks in hard at 2500 and pulls hard above 6k. ..Note the passenger tail section is raised for the Maier panhard setup.
Here are the final pics and a video
((CLICK ON THE BOTTOM PIC TO PLAY VIDEO))
...The sound on my camera phone doesn't keep up with the revs so I pretty much kept it at an idle with a couple of small blips of the throttle.
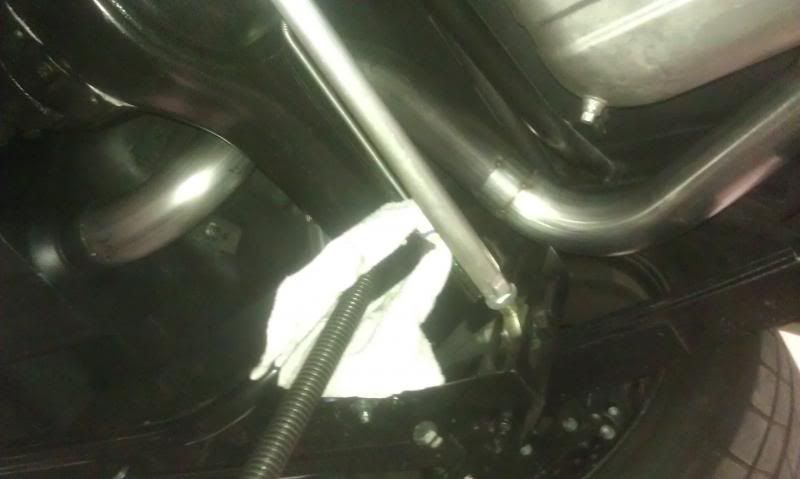
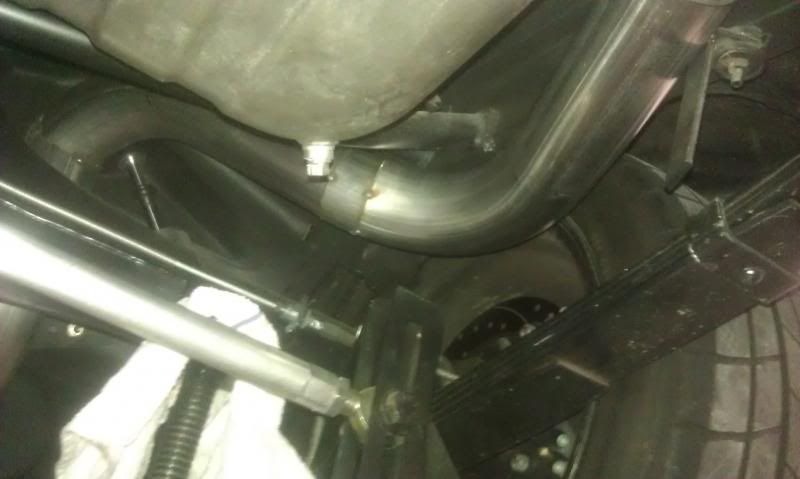
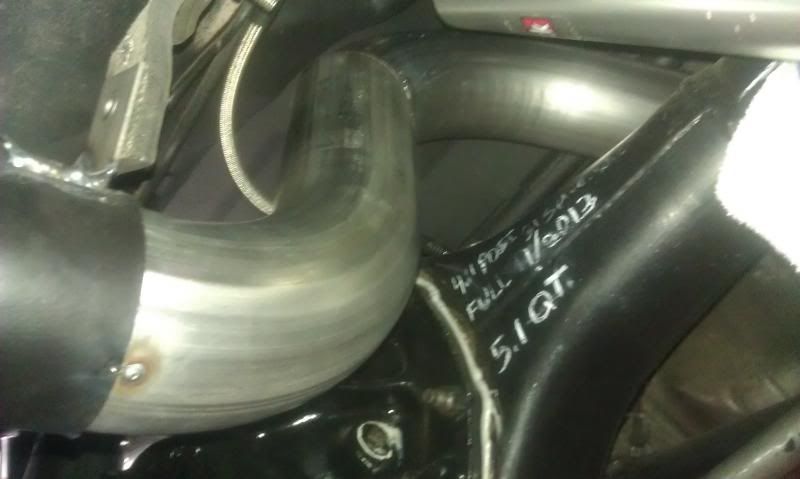
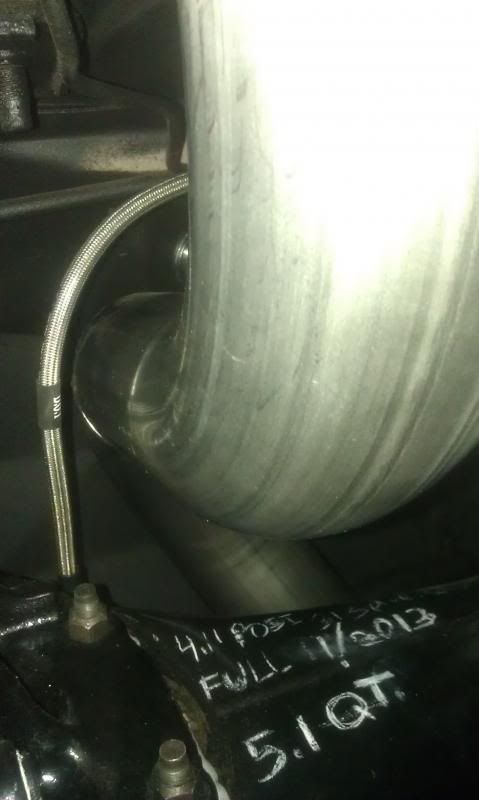
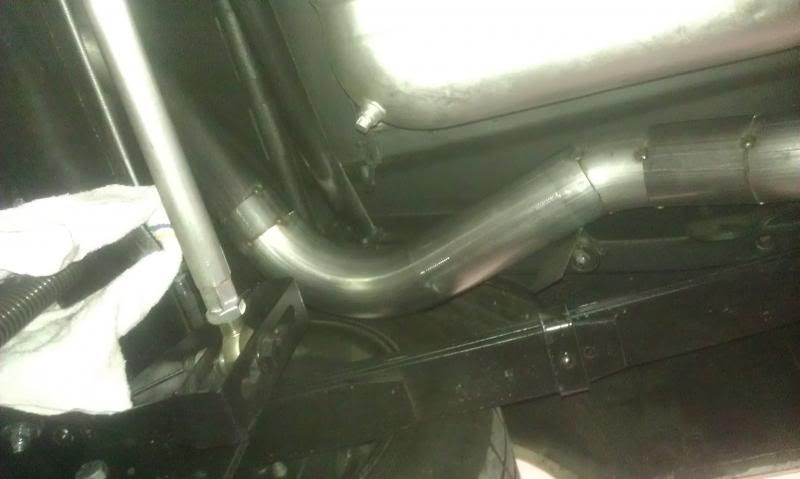
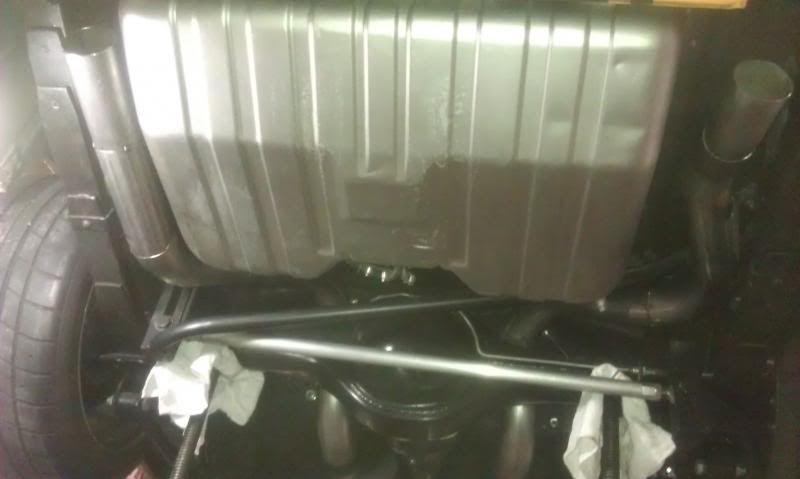
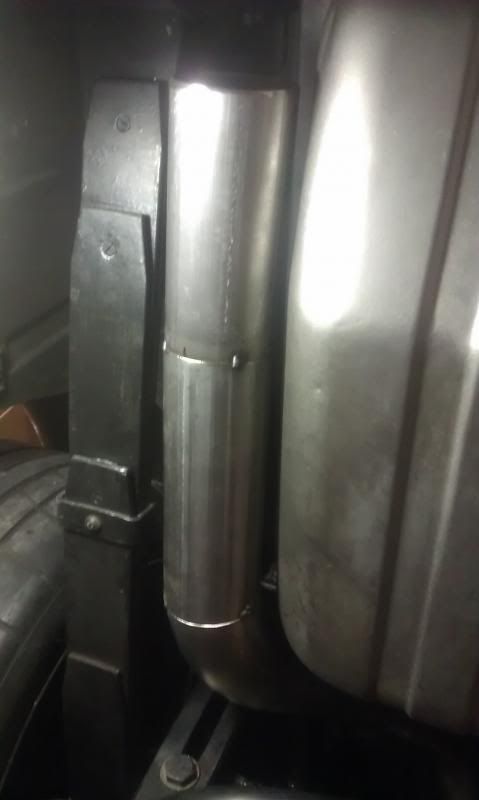
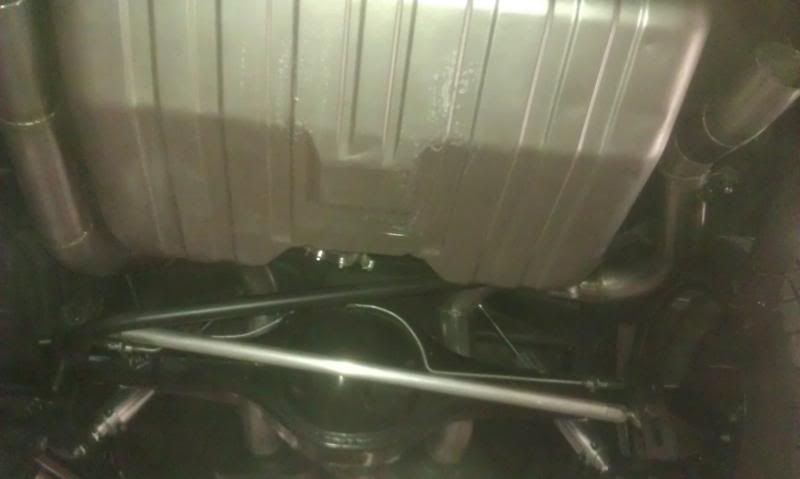

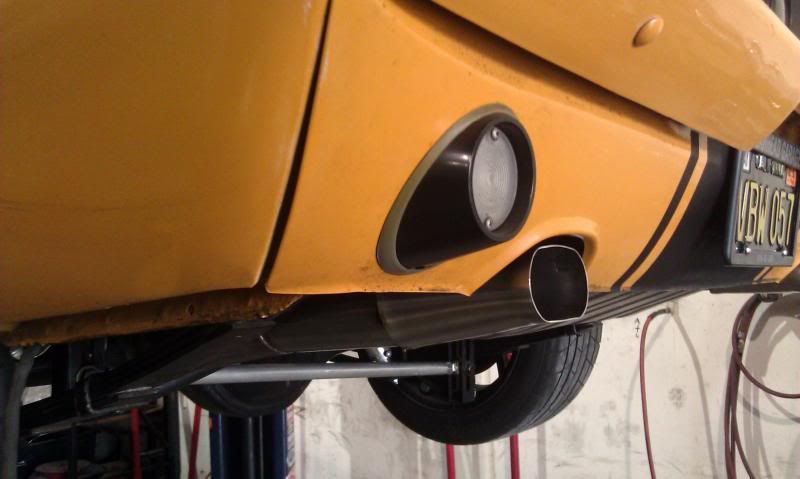

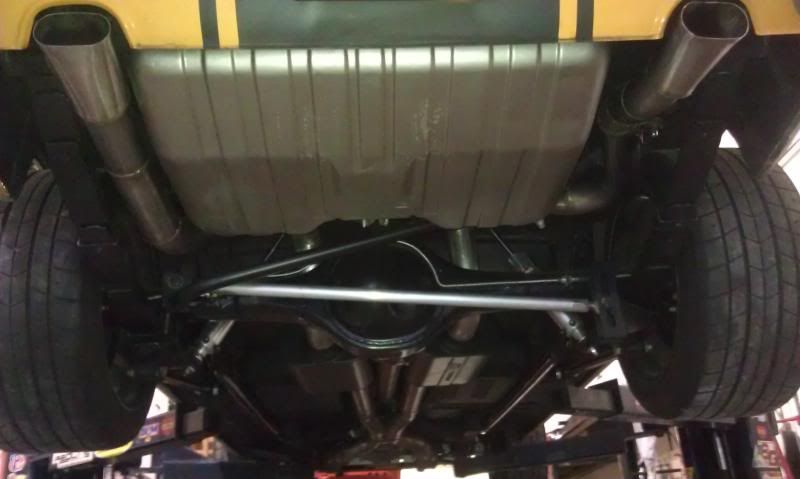
CLICK ON THIS PHOTO FOR EXHAUST VIDEO...
---------
For those of you that missed out due to the server crash here's some footage from the Mustang's debut at the Goodguys Pleasanton AutoX.
Here's a video one of my co-workers took of my first EVER run. *Not too shabby! *
http://www.youtube.com/watch?v=j-wGF...ature=youtu.be
One of my "mediocre" test runs kept it in first gear and raised the rev limiter and just still too much gear. 35.90 seconds.
GOPR0257
Best run in 2nd gear 34.760. Not bad! ...especially for lugging the engine the entire track.
GOPR0258
Learned two very important things.... I NEED POWER STEERING (bent steering wheel and my arms hurt like hell) and I NEED LESS GEAR! ...3.55's or 3.73's would do the trick versus the 4.10's.
Had fun!
[ 2013-04-03, 08:34 PM: Message edited by: bwkelley76 ]
Posted by 66_5.0 (Member # 9974) on
:
That's awesome! I'm jealous!
Posted by bwkelley76 (Member # 8792) on
:
<<Don't be jealous man, it was a lot of work and money! lol
[ 2013-04-04, 11:45 PM: Message edited by: bwkelley76 ]
Posted by Luke87GT (Member # 21) on
:
Fancy exhaust work. How does it do over speed bumps ;-)
Posted by turbo50 (Member # 6700) on
:
Whats the deal with the 63 PLYMOUTH in the background?
Get me some more pics!!!
Posted by bwkelley76 (Member # 8792) on
:
quote:
Originally posted by Luke87GT:
Fancy exhaust work. How does it do over speed bumps ;-)
Very well, it tucks. The BIG bumps at the Costco tire center in Citrus Heights are a good example, no rubbing at all and I can go over them straight.
Posted by bwkelley76 (Member # 8792) on
:
quote:
Originally posted by turbo50:
Whats the deal with the 63 PLYMOUTH in the background?
Get me some more pics!!!
Customer's car. Very nice older resto/survivor, all original down to the push-button drive and 2-V 318 Poly Wide Block engine. Cool car.
Posted by bwkelley76 (Member # 8792) on
:
Just arrived home from Mather Field with the Mustang. This was "our" 1st official SCCA Autocross event. Lino Chestang from Chassisworks rode along on all 4 runs and Carl Ogren, also from Chassisworks was there to pay tribute in the AM. Despite a few starter solenoid issues early in the morning (all fixed now thanks to a joint effort between Carl, Lino, and myself) everything went well. We qualified with a 69.936 run and finished after four runs with a final and best run time of 60.840. (Major improvement) Zero adjustments were made to the car, it ran great as-is. Didn't hit any cones either. Not bad!
VIDEO:
http://s69.photobucket.com/user/bwkelley76/media/GOPR0267_zps8ff42ee6.mp4.html
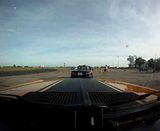
http://s69.photobucket.com/user/bwkelley76/media/GOPR0267_zps8ff42ee6.mp4.html
..all stickered up and ready for the day.. 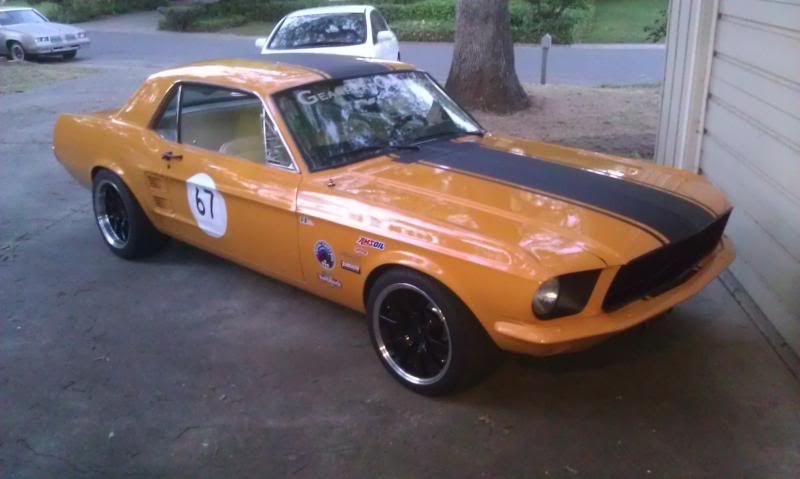
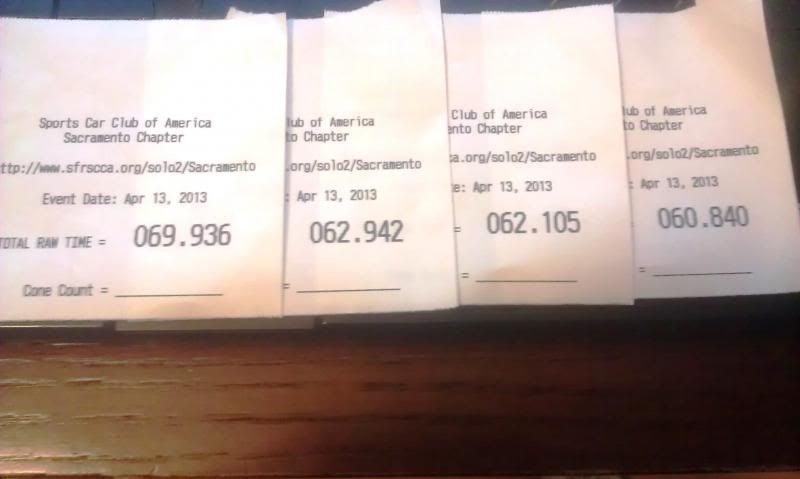
Posted by v-town coupe (Member # 2771) on
:
what was the fastest time of the day out there?
Posted by bwkelley76 (Member # 8792) on
:
quote:
Originally posted by v-town coupe:
what was the fastest time of the day out there?
I believe one of the full-race classes (not sure which class) had a 47.XX? A lot of the Corvettes were running anywhere from 58 to 63 seconds. Times varied from 80 seconds to the best of 47. There might have been a cart or 2 (maybe an open-wheeler)that was faster, not sure. I'm still waiting on them to post the results from Saturday.
Posted by MaK_1967v8 (Member # 12187) on
:
Everytime I see this build its inspiration for my 67, no joke. I love how fast your got everything done, and it was done right.
Posted by bwkelley76 (Member # 8792) on
:
quote:
Originally posted by MaK_1967v8:
Everytime I see this build its inspiration for my 67, no joke. I love how fast your got everything done, and it was done right.
Thanks Mak!
Posted by bwkelley76 (Member # 8792) on
:
..Chillin at a local car show.
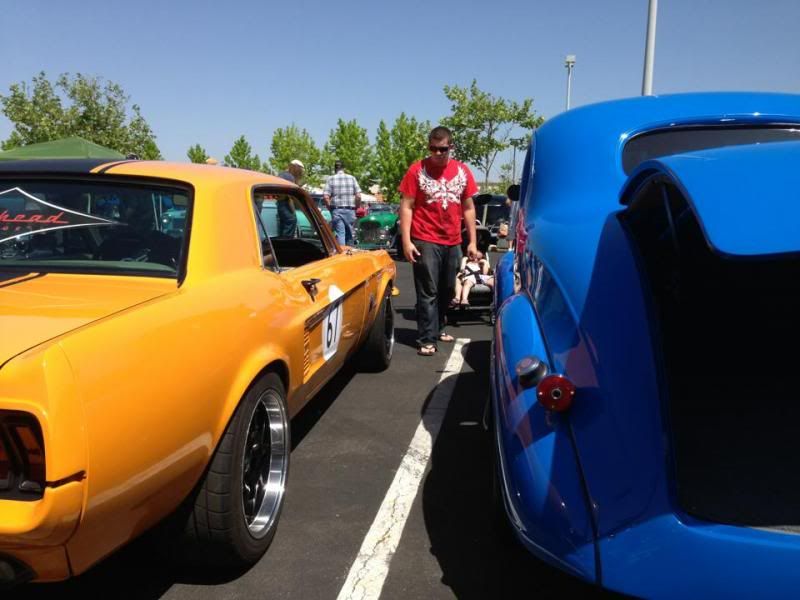
...Did everyone get to see the latest video from Mather Field SCCA?
VIDEO:
http://s69.photobucket.com/user/bwkelley76/media/GOPR0267_zps8ff42ee6.mp4.html
http://s69.photobucket.com/user/bwkelley76/media/GOPR0267_zps8ff42ee6.mp4.html
Posted by bwkelley76 (Member # 8792) on
:
Here are some professional pics of the Stang taken over the weekend.
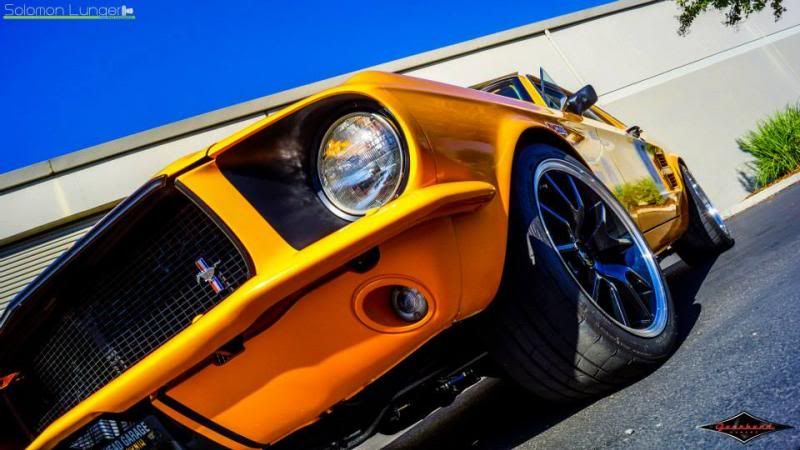
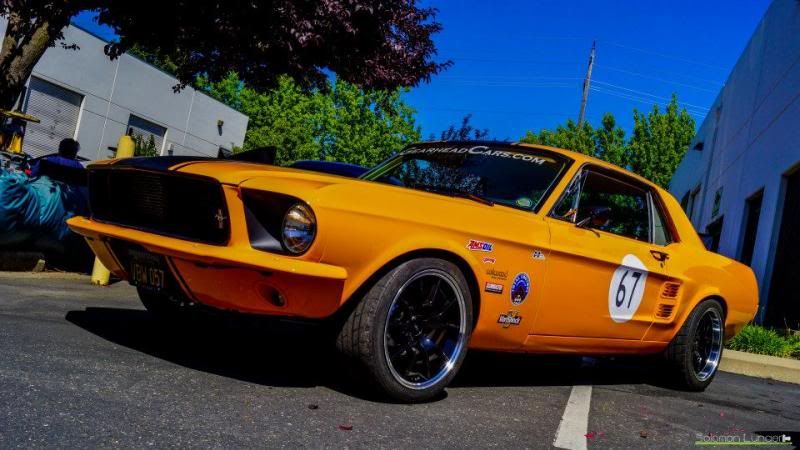
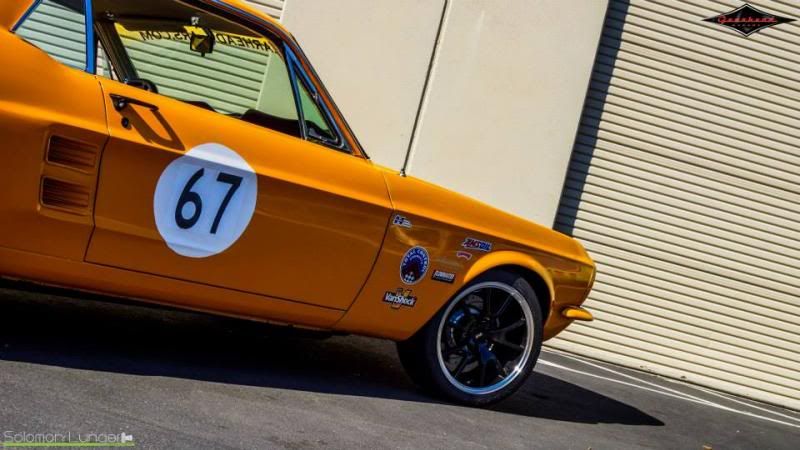
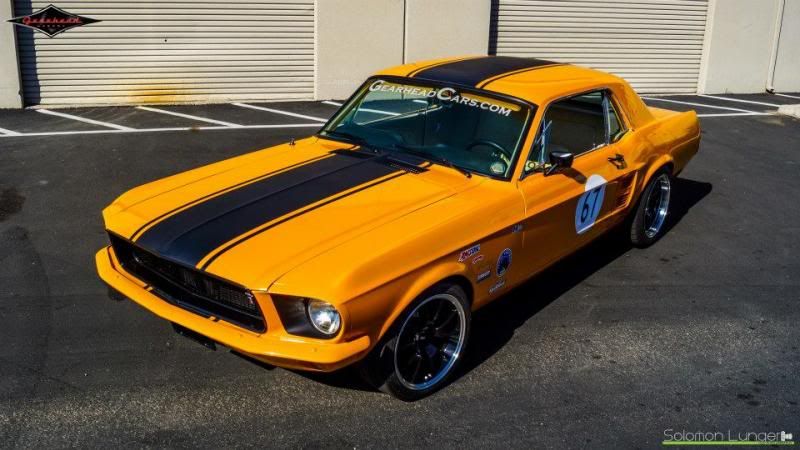
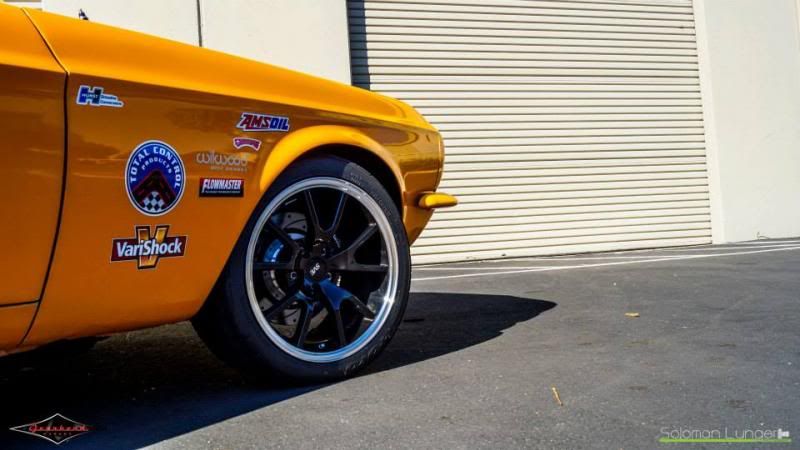

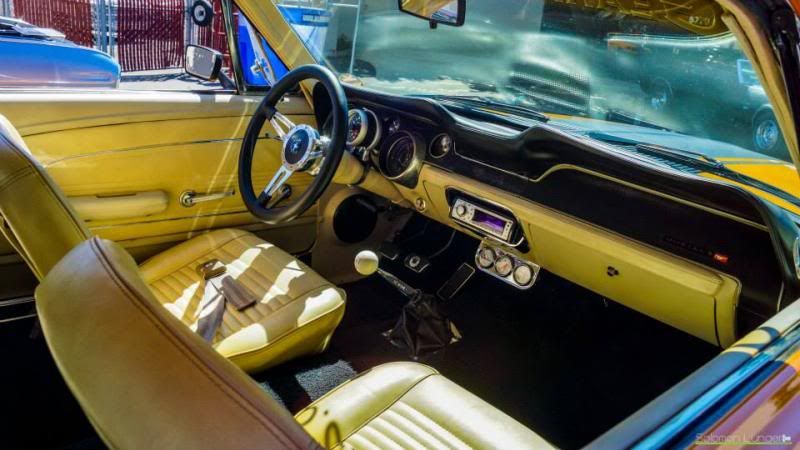
Posted by bwkelley76 (Member # 8792) on
:
...testing. Have not been able to post lately.
Posted by bwkelley76 (Member # 8792) on
:
Results are in!
Here are the "Best Run" results for the 4/13/2013 Mather Field SCCA Sacramento Cup event. (Round 1)
The car and I did very well for the first time out (ZERO COMPLAINTS) especially for NOT pushing myself or the car hard at all.
Best time was 60.840 seconds with only 4 runs, each run was MUCH faster than the prior. With a little more suspension tuning and a few more practice runs (More camber and caster) and a heavier foot I'm sure I could have achieved times in the mid 50's or who knows, maybe even the low 50's (we shall see what the future holds).
We finished #105 out of 172, running quite a bit faster than a number of Porsches, Z06 Corvettes, C4 and C5 Corvettes, WRX's, RX7's, a Mistubishi Evo, an '06 GTO, a number of Miatas, a Honda S2000, and many other cool and fast cars.
**NOT BAD FOR A 46 YEAR-OLD CAR WITH A FEW BOLT-ONS!
Most of all I had a blast and didnt' break myself or the car.
Overall Order of Finish: Actual times
(Driver) (Car) (Class) (Best Run) (Indexed) (Secs/min Behind)
1 Mike Wood Van Diemen RF/88 cm 48.342 43.991 0
2 Tom Smiley 1965 Chevrolet Corvette bp 48.997 43.019 0.813
3 Maurice Velandia Arrow f1 49.676 47.441 1.656
4 Bob Weisickle 1956 Austin Healey em 49.808 46.222 1.82
5 Rick Brown 1990 Chevrolet Corvette bp 49.978 43.881 2.031
6 Doug Hargrove 1987 Red Devil fm 50.063 45.908 2.136
7 Rory Marin 1964 Chevrolet Corvette bp 50.180 44.058 2.281
8 Bob Giovannoni 1967 Chevrolet Camaro cp 50.748 43.745 2.986
9 Gale Smiley 1965 Chevrolet Corvette bpl 51.358 45.092 3.743
10 Mike Ansell 1969 Chevrolet Camaro cp 51.457 44.356 3.866
11 Harold Olsen 1996 Chevrolet Corvette bsp 51.494 44.182 3.912
12 Ken Yeo 1989 Chevrolet Corvette bsp 51.525 44.208 3.951
13 Speedy Knudsen 1969 Chevrolet Camaro cp 51.533 44.421 3.961
14 Al Patterson 2006 Dodge Viper ssp 51.760 45.083 4.242
15 Steve Slinkard 2002 CTS Kart f1 52.311 49.957 4.926
16 Milt Burleson 1967 Chevrolet Camaro cp 52.801 45.514 5.534
17 Brad Fleig 2002 Chevrolet Corvette Z06 ss 53.043 45.564 5.835
18 Ray Miller 1989 Chevrolet Corvette bsp 53.222 45.664 6.057
19 Ruby Villarreal 2001 Chevrolet ZO6 ssp 53.424 46.532 6.308
20 Vince Russell 1990 Mazda Miata csp 53.605 46.154 6.532
21 Brett Egen 1998 Baby Grand Monte Carlo am 53.617 53.617 6.547
22 Lanny Bowden 1989 Chevrolet Corvette C4 bsp 53.725 46.096 6.681
23 Brian Jacobson 1998 Chevrolet Camero SS esp 53.860 45.727 6.849
24 Susan Fontaine 2007 Porsche 997S ssl 54.238 46.590 7.318
25 Jeff Glorioso 2003 Chevrolet Corvette sti 54.657 46.950 7.838
26 Roger Fellows 2004 Chevrolet Corvette Z06 ss 54.663 46.956 7.845
27 Jan Knudsen 1969 Chevrolet Camaro cpl 54.820 47.255 8.04
28 Ken Falconitin 2001 Honda S2000 sm 54.859 47.563 8.089
29 E.J. Fontaine 2007 Porsche 997 ss 54.914 47.171 8.157
30 Doug Hubbard 1989 Chevrolet Corvette bs 54.980 46.458 8.239
31 Corey Englehardt 2013 Subaru STI sti 55.118 46.630 8.41
32 Bill Brooks 2013 Brooks Special Open Roadster bm 55.166 53.070 8.47
33 Josh Garcia 1973 Datsun S10 ep 55.201 48.301 8.513
34 Penny Hubbard 1989 Chevrolet Corvette bsl 55.355 46.775 8.704
35 Tom Kubo 1990 Mazda Miata csp 55.390 47.691 8.748
36 Sean Velandia ja 55.510 48.793 8.897
37 Gus Migchels 1998 Chevrolet Corvette as 55.617 47.108 9.029
38 Des Toups Scion FRS sti 55.728 46.477 9.167
39 Tom Nivison 1990 Chevrolet Corvette bs 55.732 47.094 9.172
40 Nathan Gabriel 1993 Mazda Miata csp 55.732 47.985 9.172
41 Tony Manzer 1993 Chevrolet cp 55.818 48.115 9.279
42 Ken McCulloch 2012 Ford Mustang GT sti 55.893 46.391 9.372
43 Ken Pickett 1991 Chevrolet Corevette bs 55.990 47.312 9.492
44 Shauna Glorioso 2003 Chevrolet Corvette stil 56.014 48.116 9.522
45 Bill Clarkson 1994 Chevrolet Lumina cp 56.114 48.370 9.646
46 Jeff Andrade 2003 Nissan 35OZ cs 56.233 46.898 9.794
47 Davey Drouin 1992 Mazda Miata es 56.240 46.567 9.803
48 Mark Heinrichs 1995 Chevrolet Z28 fs 56.339 46.761 9.926
49 Ben Hardt 2000 Audi TT sm 56.352 48.857 9.942
50 Marie Lindberg 2004 Chevrolet Corvette Z06 ssl 56.394 48.442 9.994
51 Jack Parker 2007 Mazda MX-5 str 56.460 47.370 10.076
52 Eric Ramirez 2003 Nissan 350Z cs 56.517 47.135 10.146
53 Carl Graf 2004 Nissan 350Z cs 56.533 47.149 10.166
54 Nick Haleen 2001 Mazda MX-5 cs 56.709 47.295 10.385
55 Gary Ratliff 1969 Buggy Manx dm 56.732 52.080 10.413
56 Bob Reagh 1998 Chevrolet Corvette as 56.864 48.164 10.577
57 Eric Egen 1998 Baby Grand Monte Carlo am 56.998 56.998 10.743
58 Steve Mill 1971 Datsun 240 Z fp 57.023 50.009 10.774
59 Tony Monoogan 2008 Corvette sti 57.204 49.138 10.999
60 Ron Garcia 1973 Datsun S10 ep 57.220 50.068 11.019
61 Nick Brand 2008 Ford Mustang GT sti 57.258 48.612 11.066
62 Eric Williams 1987 Toyota FX16 dsp 57.353 49.037 11.184
63 Thanat Phavindhu 2003 Honda S2000 str 57.447 48.198 11.301
64 Ryan Grow 1986 Honda S2000 str 57.513 48.253 11.383
65 Chris Estrada Sr 2000 Toyota Celica GTS gs 57.535 46.949 11.41
66 Russ Bowlus 1994 Mazda Miata es 57.670 47.751 11.578
67 Charles Meyer 2002 Honda S2000 str 57.672 48.387 11.58
68 Kevin Grivich 2010 Infiniti G37 Sedan stx 57.799 47.800 11.738
69 George White 2004 Corvette Z06 sti 57.813 49.661 11.755
70 Michael Drouin 1994 Mazda Miata es 57.893 47.935 11.854
71 Ingrid Ansell 1969 Chevrolet Camaro cpl 58.113 50.093 12.127
72 Jeff Thompson 2005 Ford Mustang GT sti 58.212 48.316 12.25
73 Mike Moore Chevrolet Z06 sti 58.223 50.014 12.264
74 Joe Van Sickle 1994 Mazda Miata dp 58.224 50.888 12.265
75 Jason Trantham 2006 Chevolet Corvette sm 58.241 50.495 12.286
76 Roman Volchansky 2001 Acura Type R fm 58.259 53.424 12.309
77 Cameron Bowen 2012 Nissan 370Z sti 58.278 48.604 12.332
78 Dave Green 2013 Home Built Apex am 58.290 58.290 12.347
79 Bob Imrisek 2003 Chevrolet Z06 sti 58.363 50.134 12.438
80 Kris Haleen 2001 Mazda MX-5 cs 58.390 48.697 12.471
81 Darrel Huckabay 2008 Porsche Boxster sti 58.594 49.512 12.724
82 Bill Nandor 2007 Chevrolet Corvette Z06 ss 58.735 50.453 12.899
83 Dan Morlan 2002 Subaru 2.5RS stx 58.803 48.630 12.984
84 Justin Bowen 2012 Nissan 370Z sti 58.817 49.053 13.001
85 Ken Haleen 2001 Mazda Miata cs 58.891 49.115 13.093
86 Lloyd Feaver 1997 BMW M3 sti 58.925 49.143 13.135
87 Renee Russell 1990 Mazda Miata cspl 58.970 50.773 13.191
88 Eric Martin 2011 BMW 335i sti 59.032 48.760 13.268
89 Rufus Crow III 1993 Ford Mustang sm 59.216 51.340 13.496
90 Donora Wichmann 1987 Toyota FX16 dspl 59.232 50.643 13.516
91 Jason Belden 2012 BMW 135 stu 59.429 50.277 13.761
92 Jim Cigler 2008 Ford Mustang GT sti 59.483 49.371 13.828
93 Jim Hearn 1974 Triumph TRG fp 59.664 52.325 14.052
94 Marcus Thomas 1992 Honda Civic sti 59.783 48.066 14.2
95 Ken Evans 2003 Chevrolet Corvette ss 59.852 51.413 14.286
96 Debbie Owen f1l 59.909 57.213 14.356
97 Steve Clark 1990 Ford Mustang sti 59.915 50.868 14.364
98 Blake Pronty 2012 Mazda Speed 3 stx 60.074 49.681 14.561
99 Shawn Reilly 2003 Mercedes SL 55 sti 60.107 51.632 14.602
100 Ryan Rosene Nissan 350Z cs 60.236 50.237 14.762
101 Chris Gibson 1975 Volkswagen Rabbit fsp 60.304 50.535 14.847
102 Jim Sladek 2010 Porsche Cayman S ss 60.569 52.029 15.176
103 Rod Gonzalez 1999 Mazda Miata sti 60.641 50.575 15.265
104 Josh Craig 1997 Mazda Miata es 60.672 50.236 15.30
**105 Brandon Kelley 1967 Ford Mustang cp 60.840 52.444 15.512
106 Chance Lommey 2012 Honda Civic SF stx 60.948 50.404 15.646
107 Eric Smiley 2006 Subaru Impreza WRX ds 60.973 50.364 15.677
108 Butch Mortenson 1989 Chevrolet Corvette bs 61.025 51.566 15.742
109 Barb Pickett 1991 Chevrolet Corevette bsl 61.060 51.596 15.785
110 Arwinder Tamber Mitsubishi Evolution str 61.162 51.315 15.912
111 Laszlo G. Rekasi 1974 BMW 2002 fsp 61.192 51.279 15.949
112 Ryan Saville 2002 Mazda MX-5 str 61.319 51.447 16.106
113 George Akiyama 1996 Mazda sts 61.342 50.853 16.135
114 Derek Hui 2003 Toyota Celica gs 61.367 50.075 16.166
115 Bud Van Cott 2012 Porsche 911 GTS sti 61.382 52.727 16.185
116 Curtis Yamanaka 1991 Honda CRX hs 61.450 49.406 16.269
117 Kevin McHugh 2007 Chevrolet Corvette Z06 ss 61.501 52.829 16.332
118 Patrick Garrett 2002 Subaru WRT sti 61.670 52.173 16.542
119 Brain Hou 2010 Subaru WRX sm 61.885 53.654 16.809
120 Phillip Wickman 1998 Chevrolet S10 fsp 62.098 52.038 17.073
121 Seth Nagau 1985 Mazda RX-7 str 62.116 52.115 17.096
122 Sam Miller 1989 BMW 325iS stx 62.121 51.374 17.102
123 Steve Parmeley 1973 Datsun 240Z fp 62.163 54.517 17.154
124 Gary Mendenhall 1966 Austin-Healey Sprite gp 62.168 52.843 17.16
125 Dustin Dinh 2009 Nissan 370 Z str 62.221 52.203 17.226
126 Jamison Hines 1989 Volkswagen Scirocco fsp 62.223 52.143 17.228
127 Tyler Ziegler 2003 Mitsubishi Evo sm 62.490 54.179 17.56
128 Robert O'Rourke 1999 Chevrolet Corvette as 62.582 53.007 17.674
129 Romy Haideury 2010 Mitsubishi Lancer asp 62.668 54.270 17.781
130 John Gibson 1980 Chevrolet Corvette bs 63.174 53.382 18.409
131 Jim Jakim 1998 BMW Z3 cs 63.343 52.828 18.619
132 Rick Oates 1970 Dodge Dart esp 63.543 53.948 18.867
133 Kevin Craig 1997 Mazda Miata es 63.710 52.752 19.074
134 Josh Hawkins 1999 Porsche Carrera 4 as 63.941 54.158 19.361
135 Lino Chestang 2005 Scion XA stf 64.050 50.920 19.496
136 Max Moon 1998 Corvette C5 sti 64.147 55.102 19.616
137 Chris Mimilis 2010 Mazda Speed3 ds 64.226 53.051 19.715
138 Brian Castaneda 2011 Honda CRZ hs 64.226 51.638 19.715
139 Sy Tran MR2 sti 64.322 53.645 19.834
140 Ronnie Fortes 1994 Mazda Miata sts 64.357 53.352 19.877
141 Tobin Gallawa 2004 Mazda Miata sti 64.481 53.777 20.031
142 Nitin Sain 2008 BMW M6 sti 64.683 54.916 20.282
143 Larry Jacobs 2007 Corvette sti 64.764 55.632 20.382
144 Steven Creaner 2002 Ford Mustang sti 64.831 53.810 20.465
145 Raymond Feliciana 2001 BMW 330ci ds 65.007 53.696 20.684
146 Dan Pickle 2000 Chevrolet Corvette as 65.103 55.142 20.803
147 John Nishida 1991 Honda CRX hs 65.115 52.352 20.818
148 Anton Chu 1992 Honda Civic smf 65.287 55.625 21.031
149 Greg Hubbard 2002 BMW 330ci sti 65.302 53.939 21.05
150 Tomas Lechuga 1992 Honda Accord fsp 65.352 54.765 21.112
151 Derek Shimozaki 1992 Nissan 240sx gs 65.764 53.663 21.623
152 Steve Howe 2006 Pontiac GTO fs 65.856 54.660 21.738
153 Steve Bouche 1990 Mazda Miata str 66.119 55.474 22.064
154 Ernie Drake 2010 Corvette sti 66.307 56.958 22.297
155 Sean Chaffin 1990 Mazda Miata sts 66.309 54.970 22.3
156 Ted Nagau 1990 Mazda Miata str 66.445 55.747 22.469
157 Jeremy Leider 2012 Ford Fiesta hs 66.898 53.786 23.031
158 Nicole Stagner 2008 Subaru Impreza stxl 67.267 55.630 23.489
159 James Cavanaugh 2000 Mazda Miata csp 68.857 59.286 25.462
160 Matthew Klein 1969 Pontiac Firebird cp 69.068 59.537 25.724
161 Joshua Espiritu 2002 Honda Civic stf 69.169 54.989 25.85
162 Claudia Orozco 2000 Honda S2000 strl 69.877 58.627 26.728
163 Will Matthews 1992 Mazda Miata csp 70.022 60.289 26.908
164 Justin McAfee ja 70.370 61.855 27.34
165 Daniel Lacer Emmick KT100 ja 71.635 62.967 28.91
166 Marcus McAfee ja 72.788 63.981 30.341
167 Ron Olsen 2009 Volvo C30 gs 73.713 60.150 31.489
168 Oliver Linayao 2012 Honda Civic Si gs 74.112 60.475 31.985
169 Jordan Eklund 2002 Lexus IS 300 ds 75.025 61.971 33.118
170 Hazel Gillego 2009 VW GLI/Jetta sti 77.882 63.552 36.664
171 Jillian Hubbard Kart jb 81.320 68.471 40.931
172 Tim Patenaude 1967 Lotus Europa dm 99.999 91.799 64.114
Here is the video of our best run for those that haven't seen it.
VIDEO:
http://s69.photobucket.com/user/bwkelley76/media/GOPR0267_zps8ff42ee6.mp4.html
http://s69.photobucket.com/user/bwkelley76/media/GOPR0267_zps8ff42ee6.mp4.html
[ 2013-06-21, 07:52 PM: Message edited by: bwkelley76 ]
Posted by bwkelley76 (Member # 8792) on
:
Took the Mustang to Sac Raceway for a little 1/4 mile Drag Racing test and tune this evening. Ran a best ET of 12.931. That run resulted in a 102.279 MPH with a 2.042 60-Foot and .135 reaction time.
Best overall numbers for the night were 107.4 MPH, 2.042 60-Foot, and my best reaction time was .041. If I could have combined all of those numbers into one clean run (Practice makes perfect!) I believe I could have nailed a 12.50 to a 12.70.
VERY HAPPY WITH THIS! Not often do you see a purpose-built road/autoX car run 12's in the quarter mile with just a quick adjustment of the shocks. (literally done in 5 minutes) ...I still had the sticky/wide tires on the front also.
...Just a few turns of the adjusters on the 2-way adjustable Varishock shocks allowed for great weight transfer to the rear tires. The thing launched awesome and pulled hard the entire way.
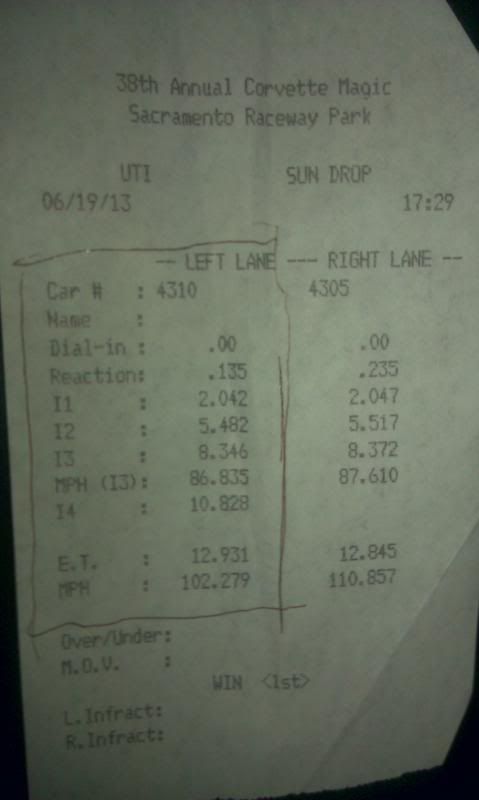
Posted by bwkelley76 (Member # 8792) on
:
Here's a little "teaser" video, still waiting on a few people to send me better pics and videos.
http://s69.photobucket.com/user/bwkelley76/media/20130619_210422_zps95cb033c.mp4.html
Posted by bwkelley76 (Member # 8792) on
:
...Here's how my day went. The original radiator sprung a leak so I found a cheap aluminum alternative. Took all day to do it all right, NOT a direct bolt-in by any means. I had to hand-make brackets for everything, shroud included.
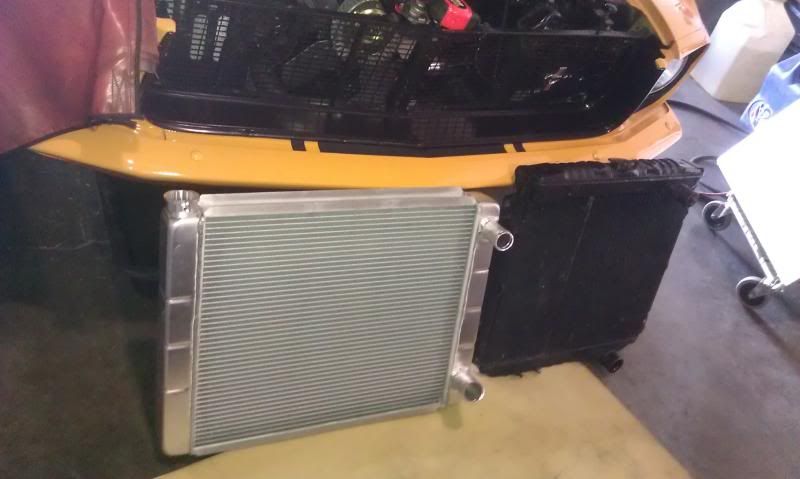
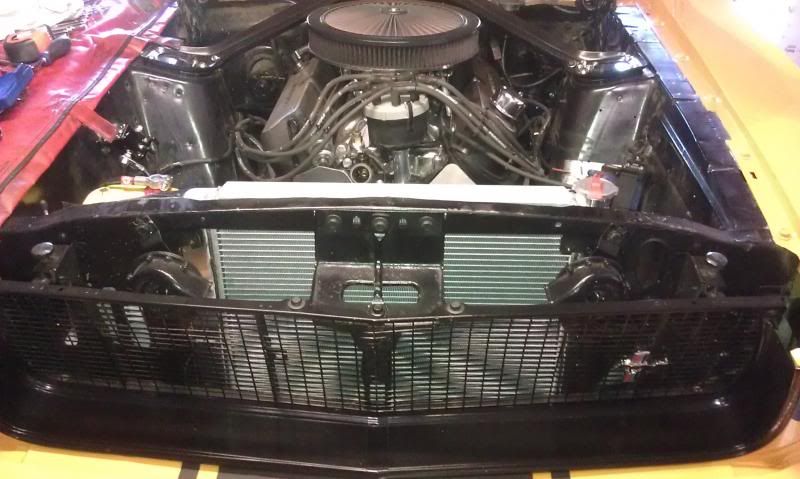
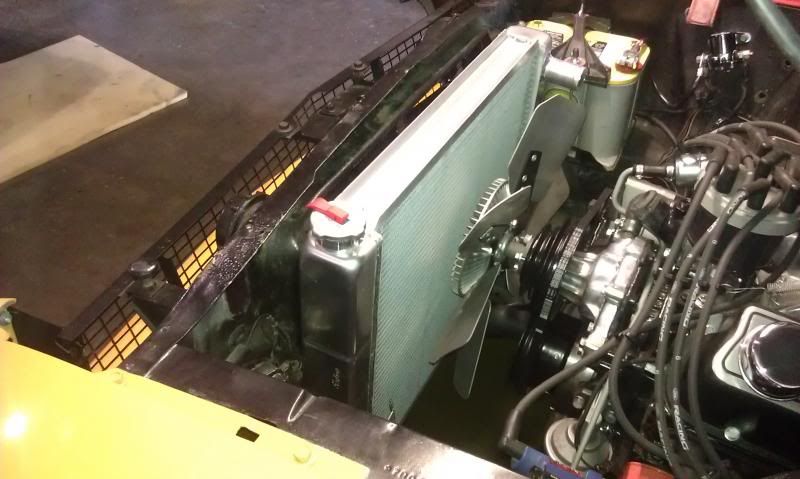
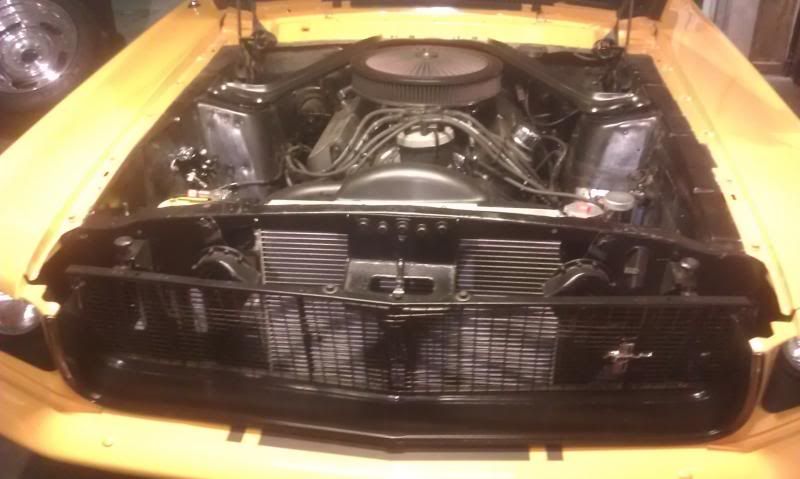
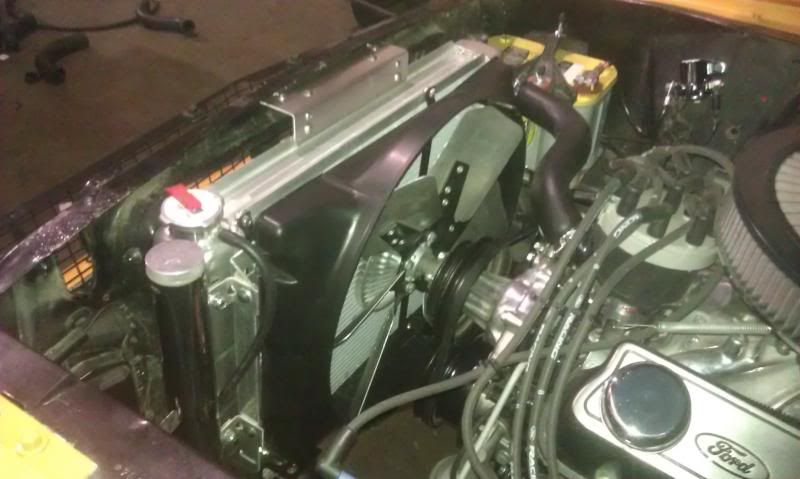
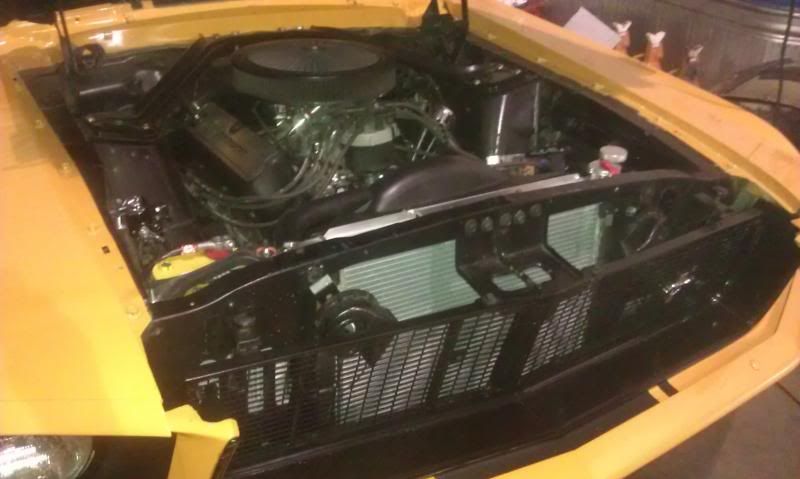
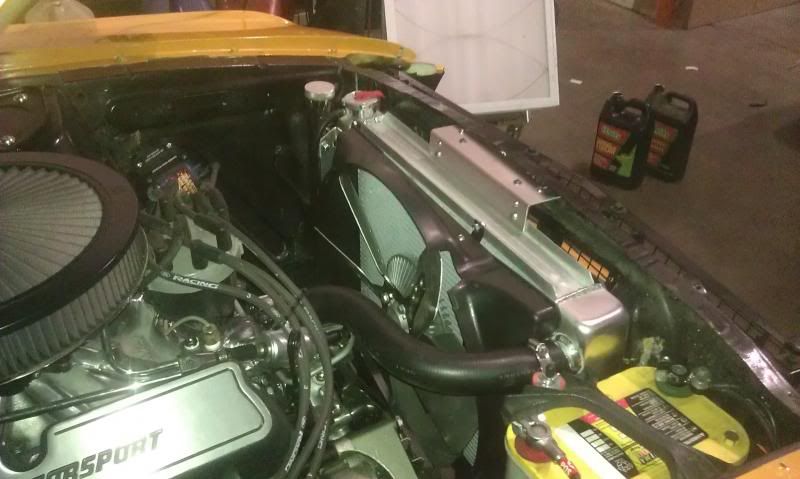
Posted by 89TRUNK (Member # 2506) on
:
I've got a similar set-up on my comet. I used the 500 springs up front with DA's. i havent set up the rear yet but it will probably wont be coilovers. How do you like your rear set up? Would you do anything different? Torque arm and varishock rear shocks, correct. What are you coilover settings at up front? Thanks
Posted by bwkelley76 (Member # 8792) on
:
quote:
Originally posted by 89TRUNK:
I've got a similar set-up on my comet. I used the 500 springs up front with DA's. i havent set up the rear yet but it will probably wont be coilovers. How do you like your rear set up? Would you do anything different? Torque arm and varishock rear shocks, correct. What are you coilover settings at up front? Thanks
Reverse eye Grab-a-Trak rear leafs with Maier adjustable panhard bar and 2-way adjustable varishocks on all 4 corners. I wouldn't change a thing unless I were rich, then I would go torque-arm in the rear. As far a shock settings there are a GAZILLION possibilities and recipes with these shocks. These shocks are by far the best investment so far on this suspension. So far on super short Auto X tracks like the Goodguys Pleasanton track I set them pretty stiff (10 clicks up and down on the front and 8 up and down on rear) and longer Auto X like Mather Field I run 8 front 6 rear up and down. For drag I ran 12 down and 0 up on front and 12 up and 0 down in the rear (90/10 + 10/90 effect). Around town I usually set them to 00000 all-around unless I have a full tank of gas, then I run the rears a few clicks on the down adjustment. If I'm doing any mountain fun runs I set everything to the Mather Field adjustment but on a long trip it proves to be jarring.
Posted by bwkelley76 (Member # 8792) on
:
Still waiting on a few more videos from friends... This is the second half of one of my 13.0XX passes.
http://www.youtube.com/watch?v=EVqve1dUves
Posted by bwkelley76 (Member # 8792) on
:
Swapped out my 4.11 gears today for 3.70's that have been fitted into a nodular case. I also welded in drain and fill bungs to my 9" housing.
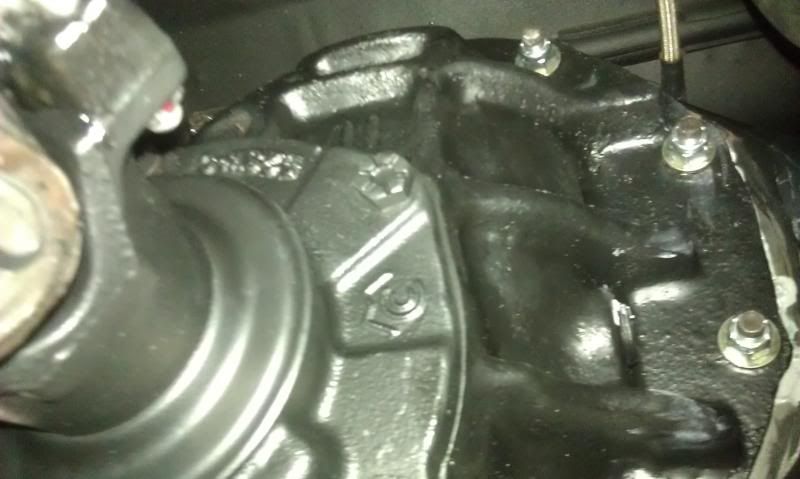

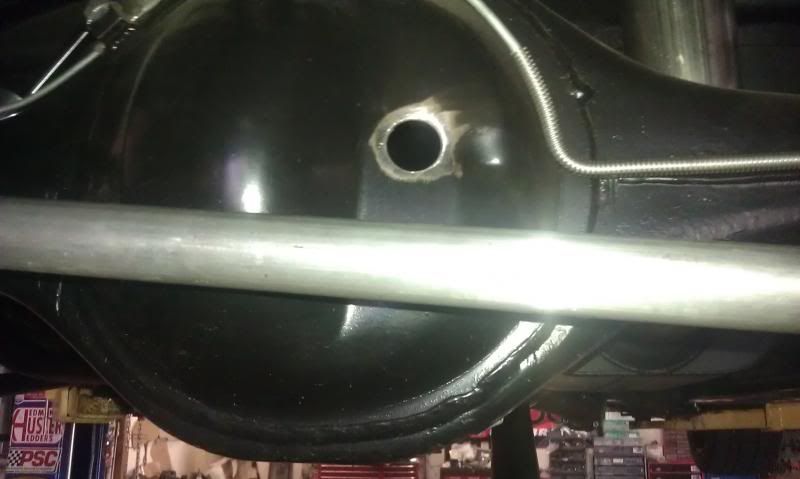
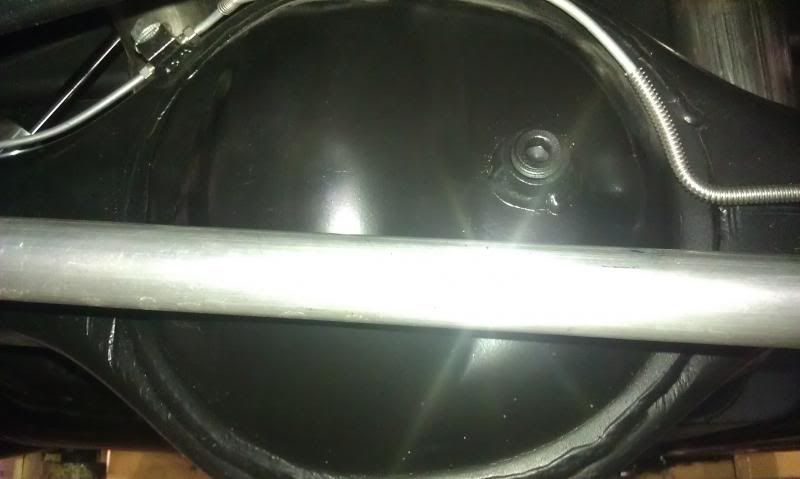
...Going to countersink the drain plug for a little extra ground clearance.
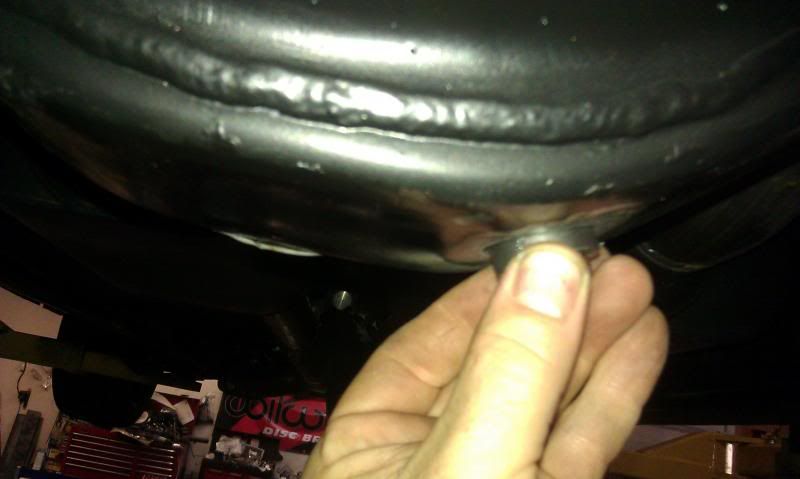
...Decided to cut a drain passage into the recessed/countersunk area of the plug for better draining.
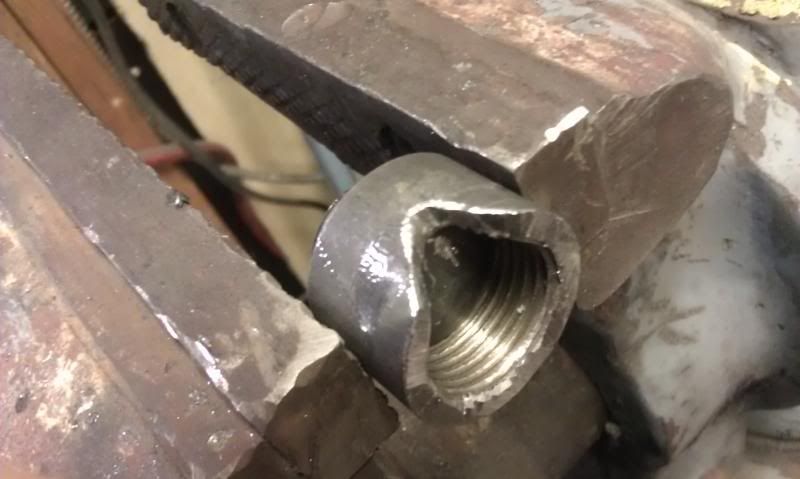
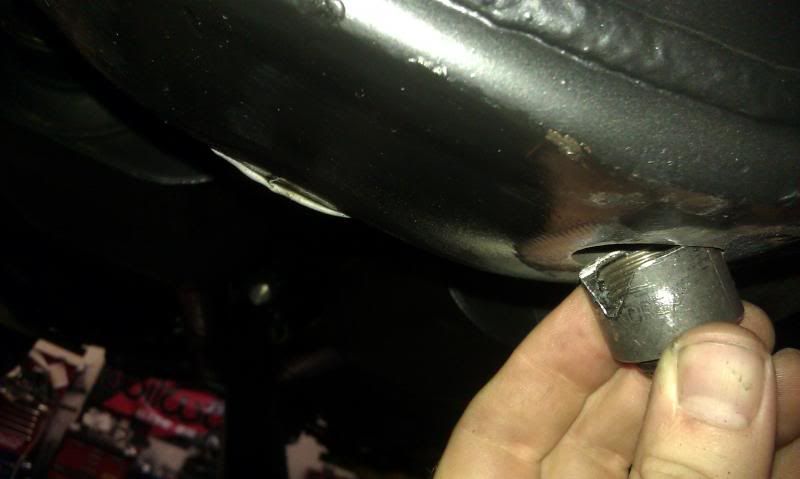
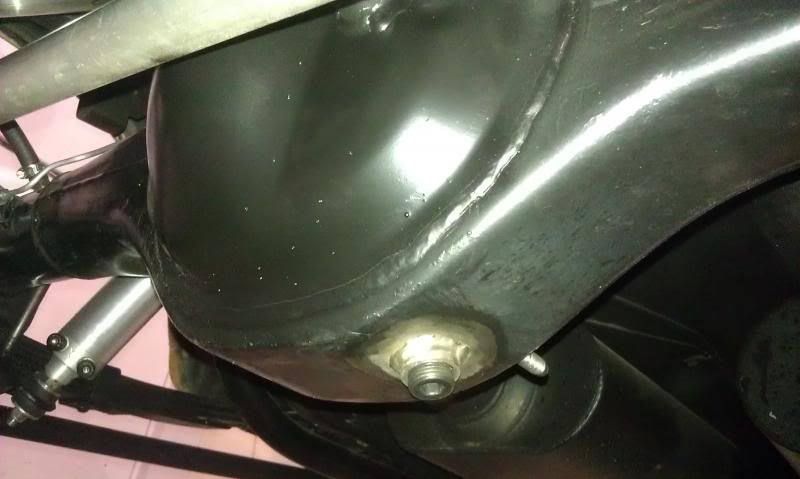
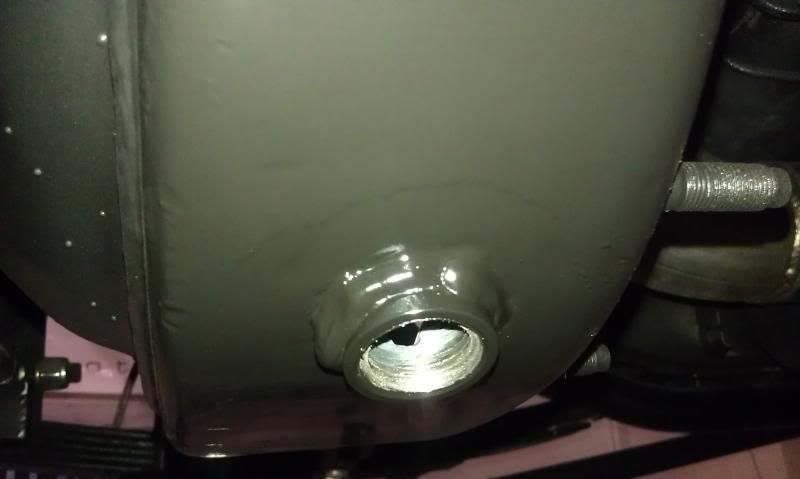
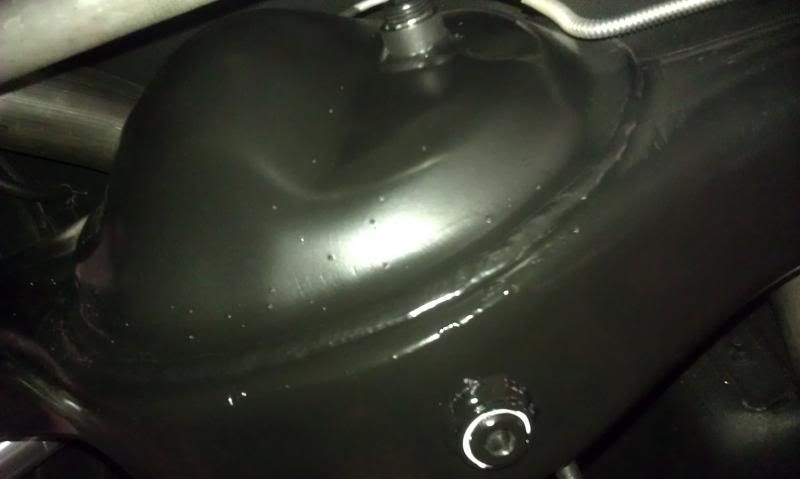
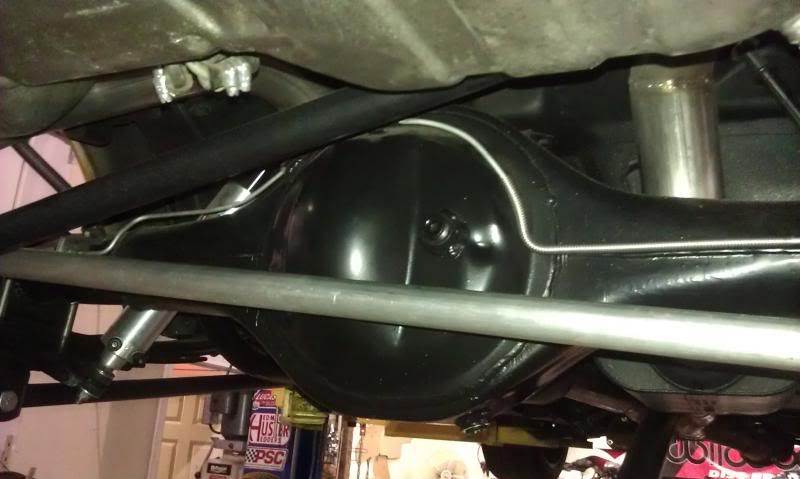
Posted by Luke87GT (Member # 21) on
:
Well Done!
Posted by bwkelley76 (Member # 8792) on
:
quote:
Originally posted by Luke87GT:
Well Done!
Thanks Luke
Posted by bwkelley76 (Member # 8792) on
:
Restored the dash this weekend. ..new pad, bezel, trim panels, and trio gauge set.
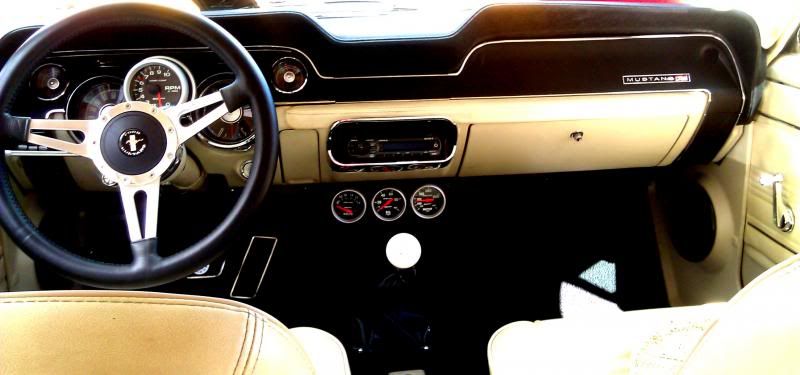
Posted by bwkelley76 (Member # 8792) on
:
Here's another video of the Stang at Sac Raceway. Spun a little out of the hole and tapped the rev-limiter a little at the top of 1st but made it up mid-track, watch her go after I hit 2nd! (...Right lane was slippery, almost consistently a tenth of a second slower in that lane compared to the left)
http://www.youtube.com/watch?v=uqWBb5px914&feature=youtu.be
Posted by SacStangDriver (Member # 8304) on
:
you know i really ahte when people put up quarter mile videos and dont show the time.
Posted by Pure Stang (Member # 7251) on
:
So what was the time?
Posted by bwkelley76 (Member # 8792) on
:
quote:
Originally posted by SacStangDriver:
you know i really ahte when people put up quarter mile videos and dont show the time.
...Sorry, that run was 12.99 I believe, the best run of the day (in the left lane) was 12.93.
Posted by bwkelley76 (Member # 8792) on
:
A few recent pics at SLT HAN and Wilwood's booth at Pleasanton GG Nationals...
Posted by bwkelley76 (Member # 8792) on
:
All good things come to an end. Time to sell out and put a down payment on a house.
Please email me via the ad for best results. I'm not on here that often these days.
http://sacramento.craigslist.org/cto/4232664999.html
[ 2013-12-11, 08:05 PM: Message edited by: bwkelley76 ]
Posted by bwkelley76 (Member # 8792) on
:
SOLD!!!! Merry Christmas everyone!
Posted by bwkelley76 (Member # 8792) on
:
Since I Kept the Mustang "In the family" I thought I would show this year's upgrades/changes as per the new owner..... On the growing list is a color change, new hood, front spoiler, smoothed and painted engine bay, welded shock towers, hydroboost braking, custom interior and audio, power steering, new wheels and tires, more horsepower; (Probably a Windsor stroker, EFI and boost/power adder).
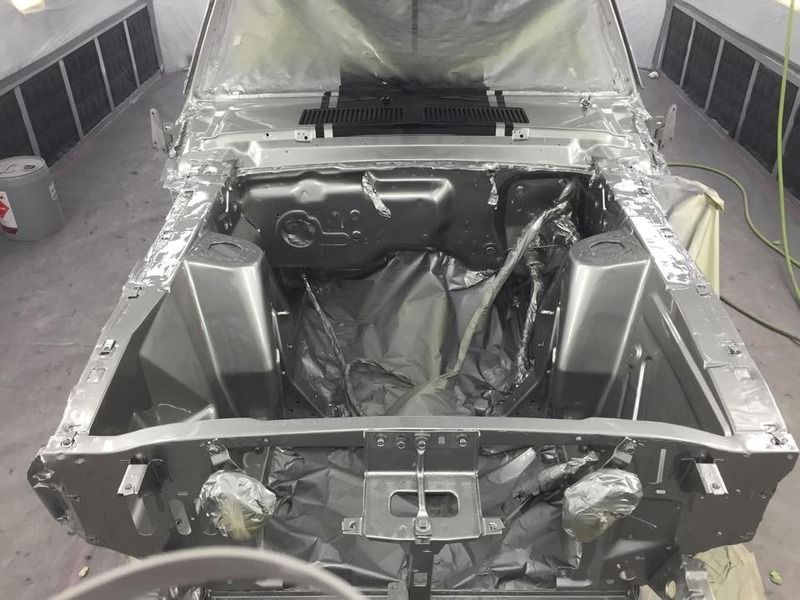
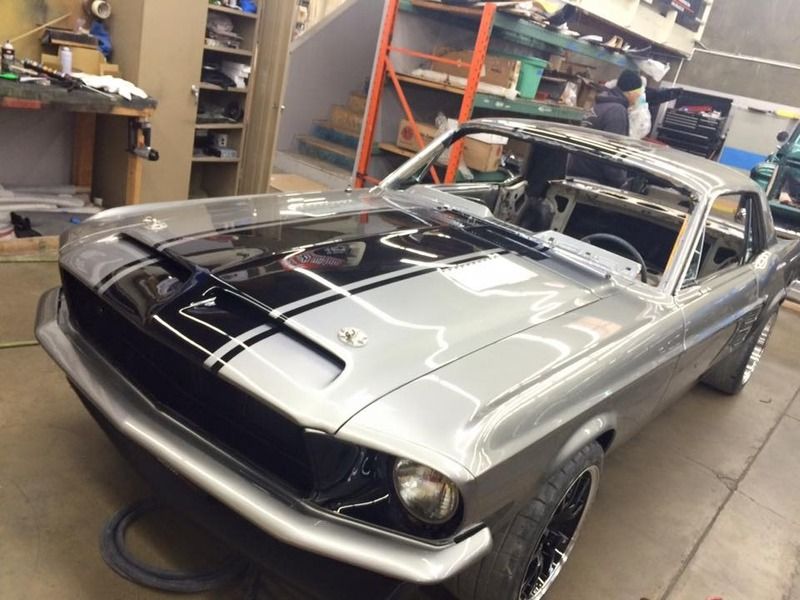
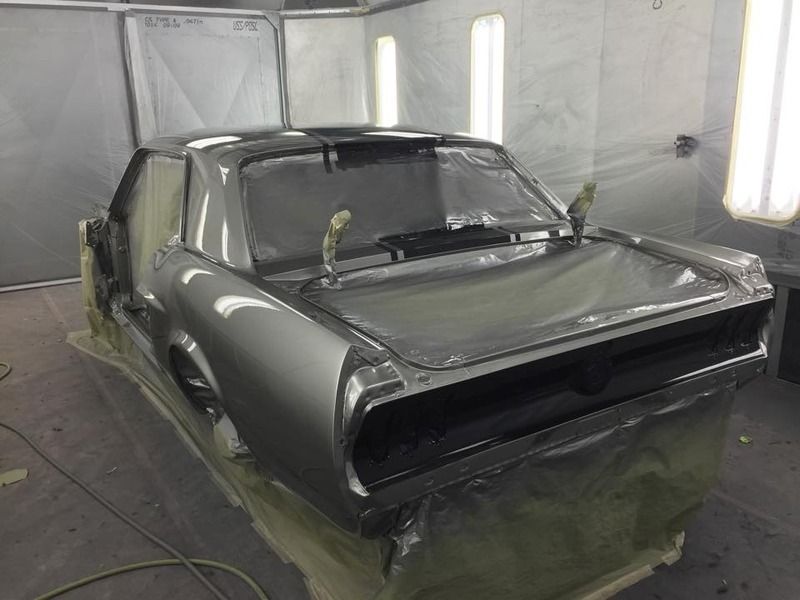
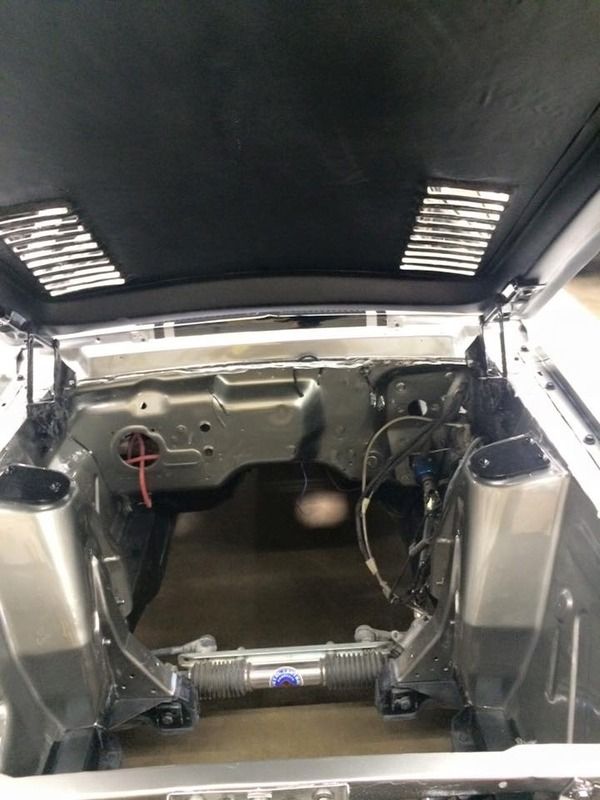
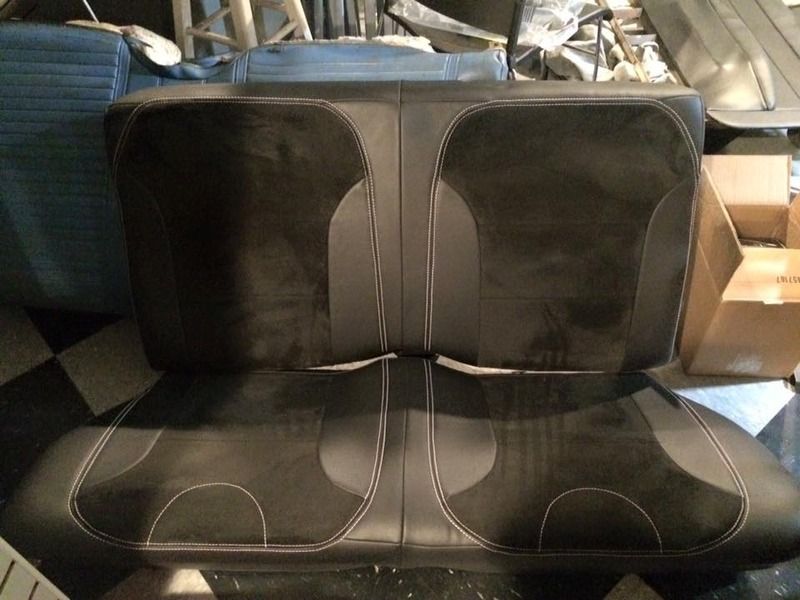

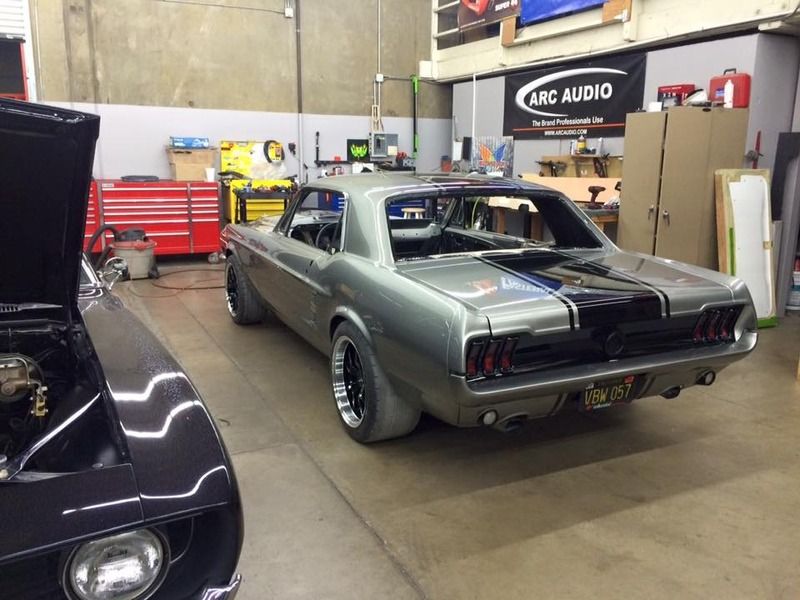
Posted by bwkelley76 (Member # 8792) on
:
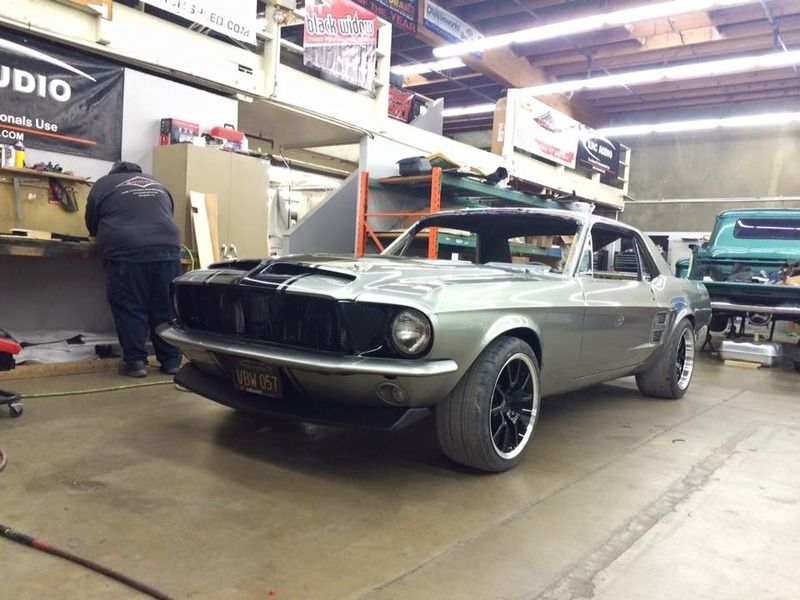
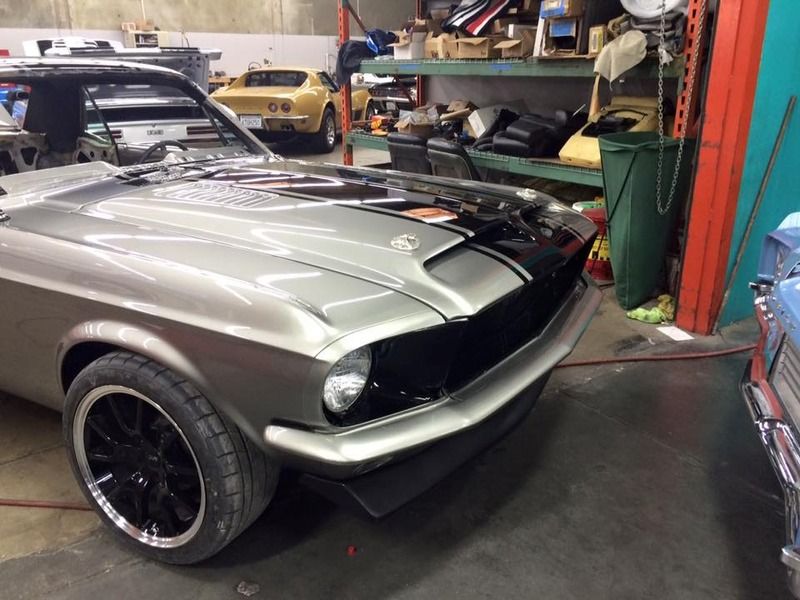
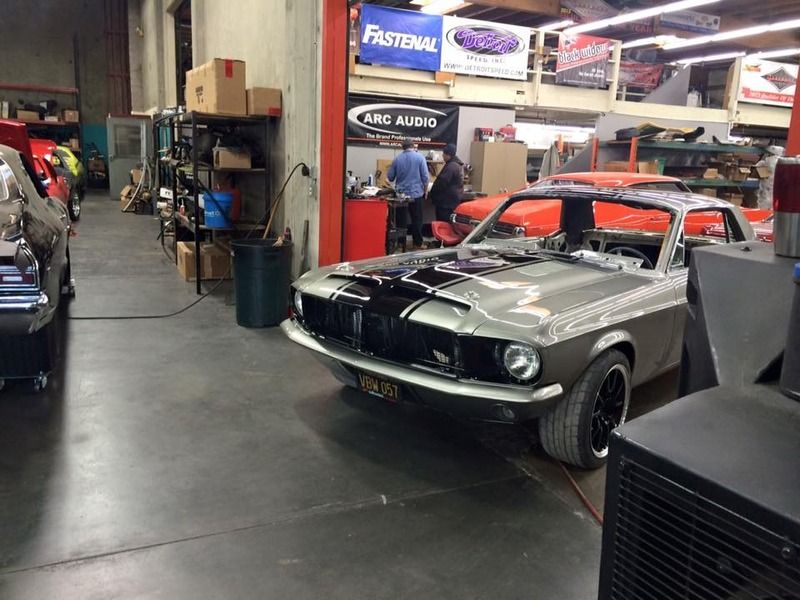
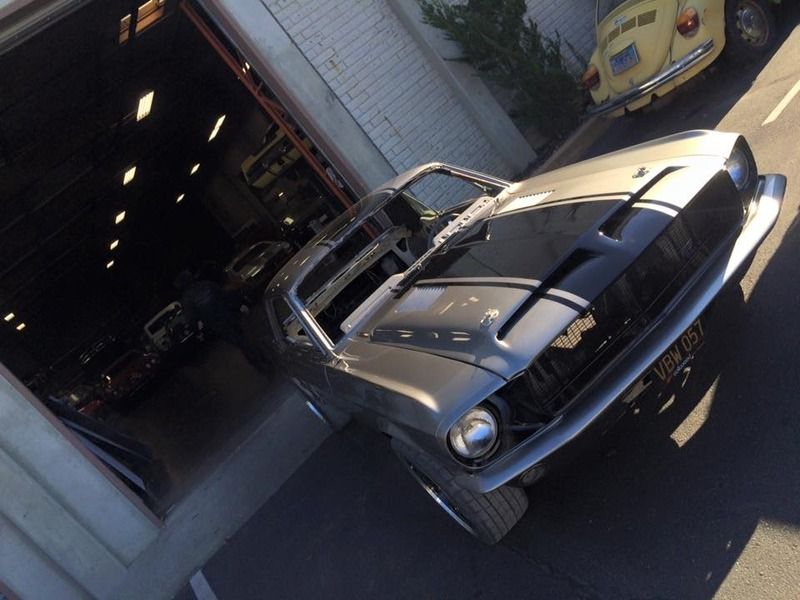
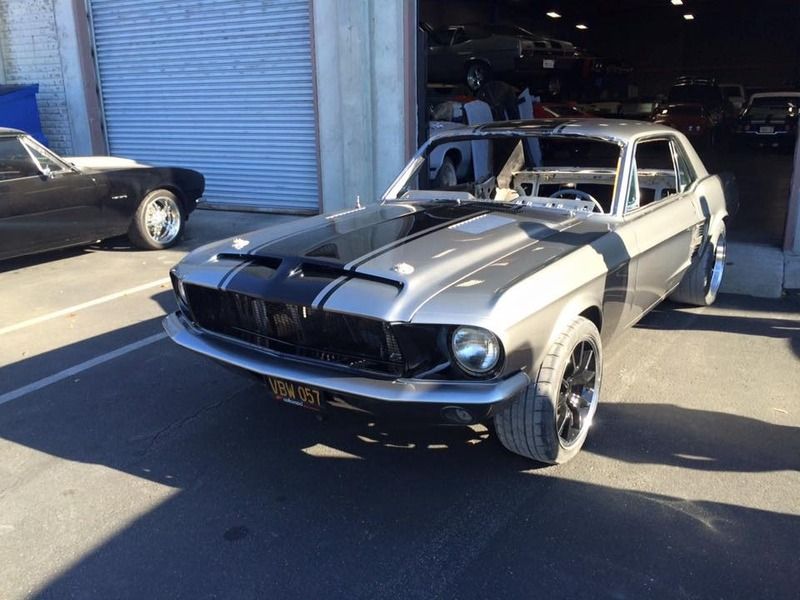
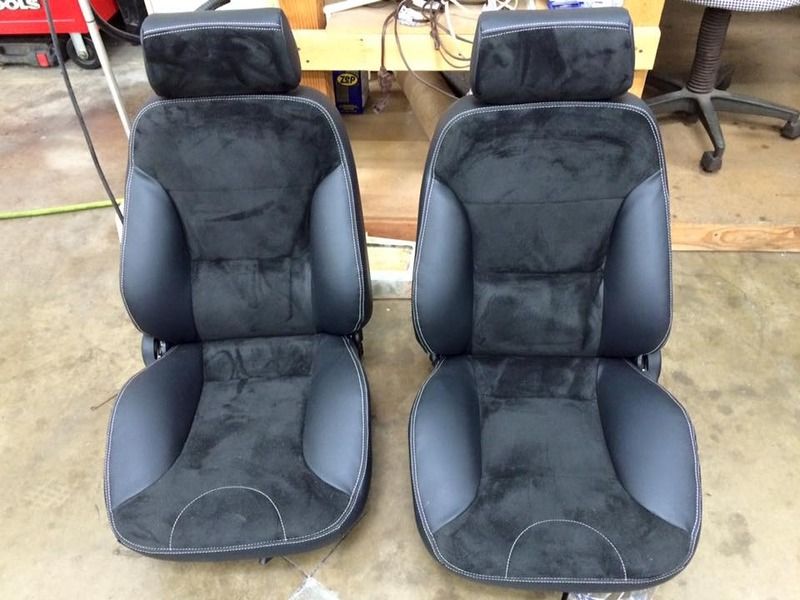
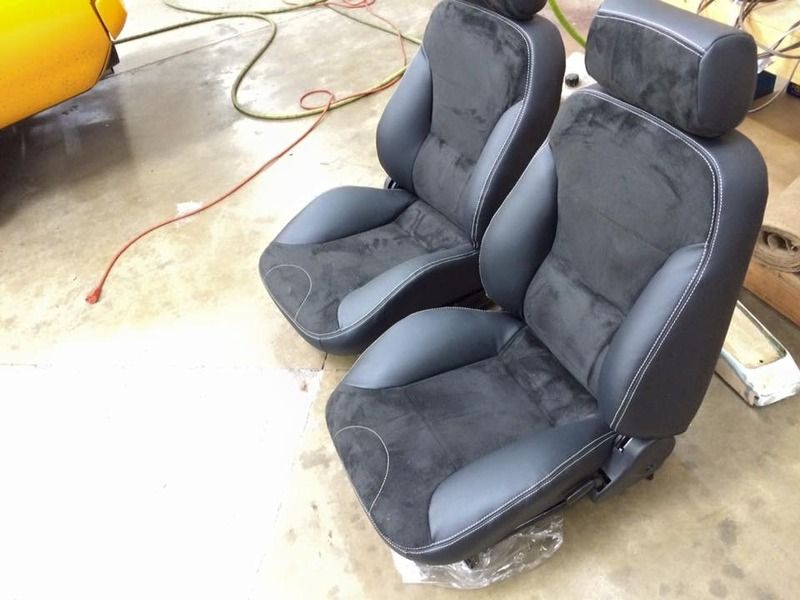
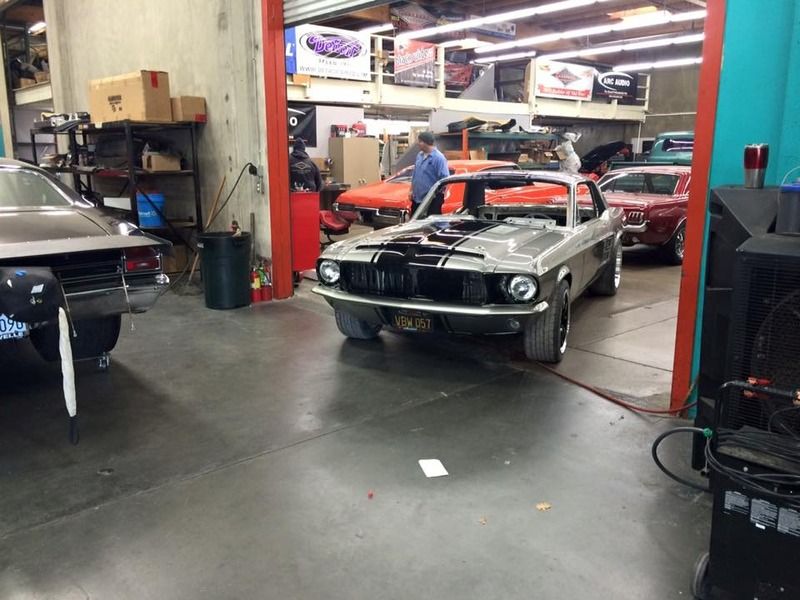
Posted by bwkelley76 (Member # 8792) on
:
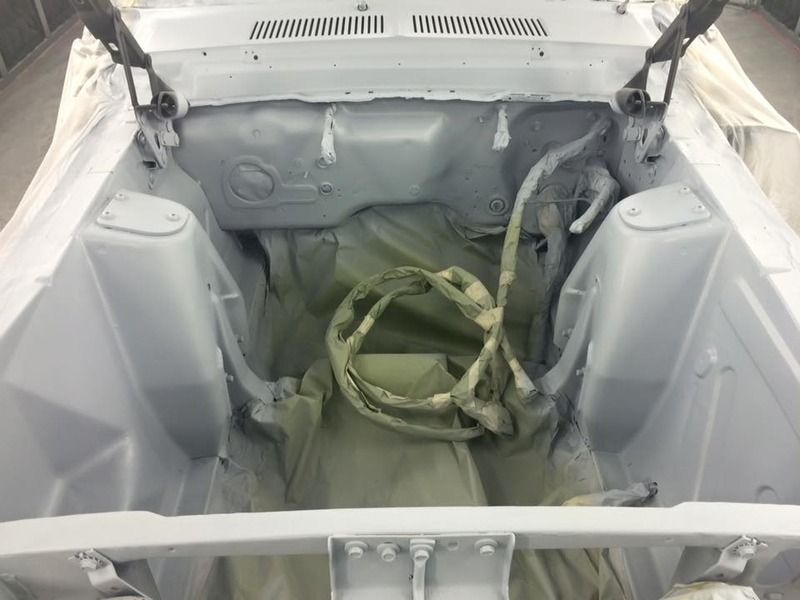
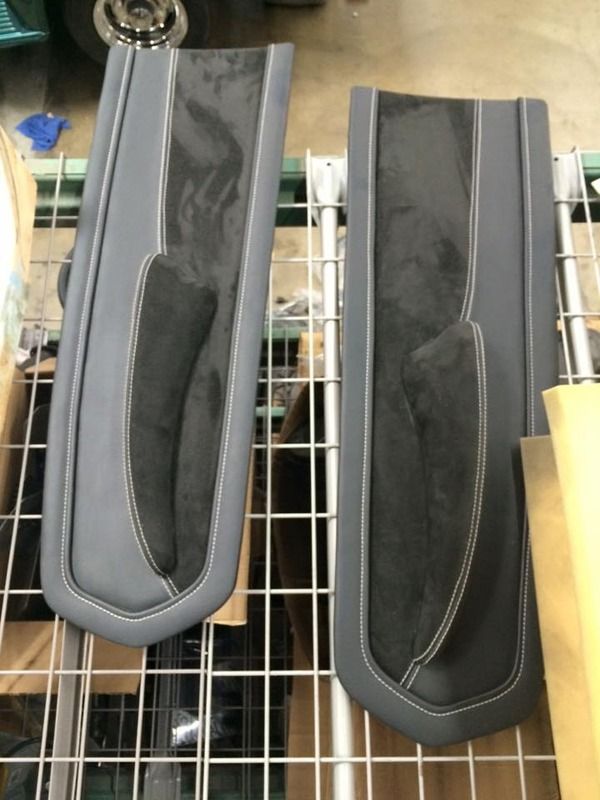
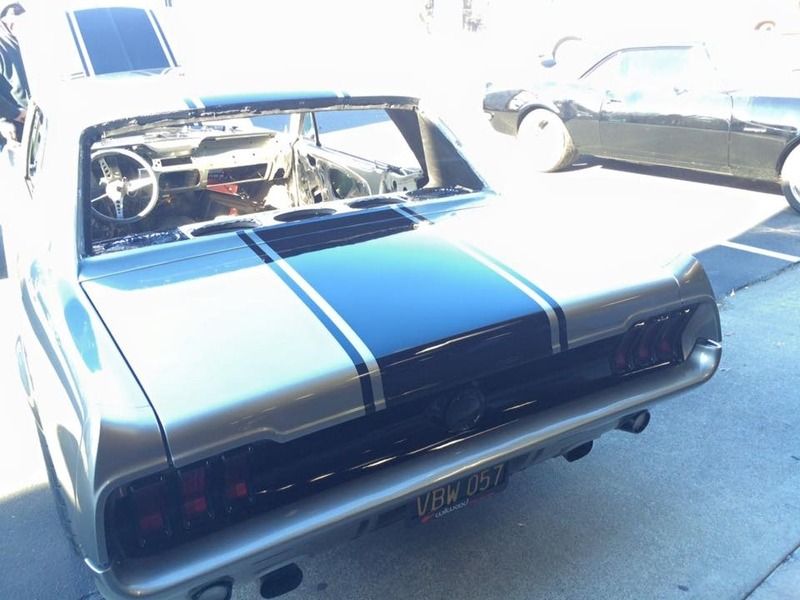
Posted by SVTGabe (Member # 12656) on
:
just read the whole thread, very cool build.
Posted by 70stang351w (Member # 9948) on
:
Very nice work, what do you mean by welded shock towers? Did you get the brace kit or seam welded them up.
Posted by 135.0 (Member # 4992) on
:
Dreamy
Posted by TommyK (Member # 14208) on
:
Awesome!!!
Posted by bwkelley76 (Member # 8792) on
:
quote:
Originally posted by 70stang351w:
Very nice work, what do you mean by welded shock towers? Did you get the brace kit or seam welded them up.
Seams/structural. I never pulled the engine when I owned it, all engine work was done while in the bay. With the motor out, we took the opportunity.
Fueled by Ford Mustang Owners
on CaliforniaFords.com


